macOS makes it easy to tweak the wallpaper, interface colors, icons, sounds, etc. To make your Mac feel like your own, personalize your profile image, change the Dock settings, pick the right notification sound, and make other changes that determine how the system behaves.
You can even set custom Finder window backgrounds, change how apps look in Dark Mode, or make deeper modifications with third-party tools. Below, we'll teach you various ways to customize your Mac.
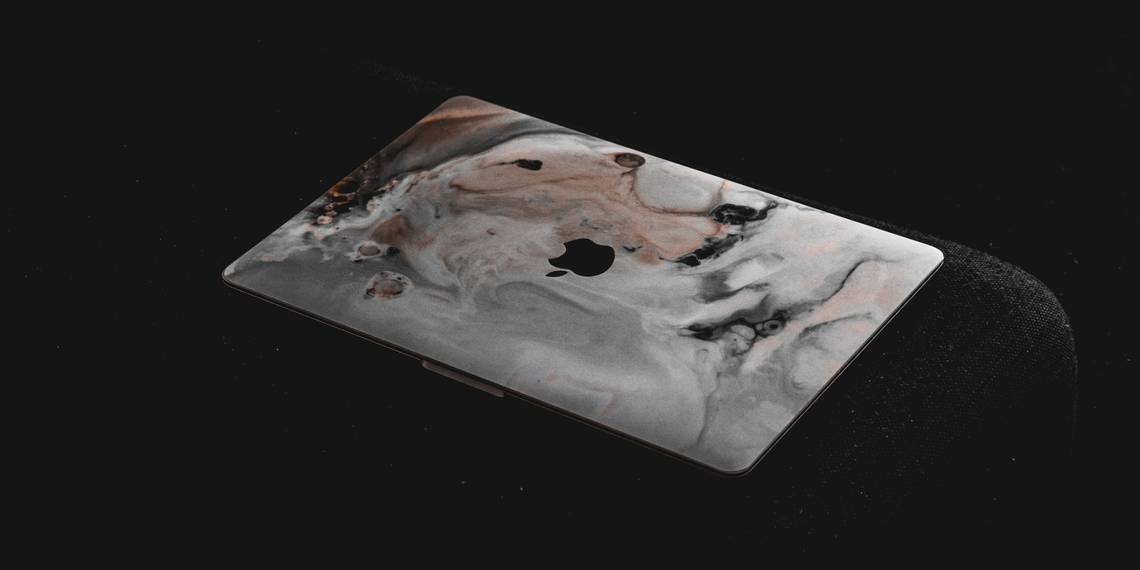
1. Set a Brand New Wallpaper for Your Mac

Simply swapping the default wallpaper for a background you like can make your Mac feel new again. Click System Settings from the Apple menu and select Wallpaper in the sidebar.
On the right side, pick a static image under Pictures, Light & Dark Wallpapers, or Dynamic Wallpapers, or go with a nice solid background color under Colors. Dynamic wallpapers change automatically to match the time of the day.
You can even download or create your own Mac dynamic wallpapers.
You can also set the wallpaper to a memorable photograph from the Photos app or use a folder on your Mac as a source. To do so, click Add Photo Album or Add Folder, select an album or folder to add, and choose an image to set as a new desktop wallpaper.
If you want to see different wallpapers from an album, click Auto-Rotate and pick a duration like Every 5 minutes or Randomly to use random cycling instead. To use an image from a webpage, Control-click it in Safari and choose Use Image as Desktop Picture.
2. Create a Custom Color Scheme

macOS lets you mix and match various color presets for system accents and highlights to create a fresh color scheme. To do this, visit System Settings > Appearance and pick new colors under Accent color and Highlight color. The updated color scheme is reflected across buttons, boxes, menus, selections, and other system elements.
Dark Mode is another tweak to consider. It gives a sleek dark appearance to elements like the Dock, menu bar, app windows, and sidebars, helping make your content shine. Click Light, Dark, or Auto in the Appearance section to set your desired look. Based on your Night Shift schedule, the Auto setting automatically switches between Light and Dark Modes.
3. Add Icons and Backgrounds With Personality

To scale Finder icons up or down, choose Show View Options in the View menu and use the controls next to Icon Size to make changes. macOS even lets you set custom icons for apps. PNG or JPG images can work as icon sources, but it's best to use Mac-compatible ICNS files. Check for the .icns extension when browsing online repositories to ensure compatibility.
To change the icon for a folder or file, copy the new icon by selecting the file and pressing Cmd + C. Next, select the folder whose icon you'd like to replace and click File > Get Info. In the Info panel, select the icon at the top and click Edit > Paste or press Cmd + V. Your custom icon should now be in place, but if you don't like it, select the icon again and hit the Delete key to switch back to the default one.
You can swap out the default app icons in the Applications folder for custom ones, but only for third-party apps. Icons of preinstalled apps cannot be tweaked. On the other hand, you can use icons of system apps as sources for third-party apps. For example, you can easily replace the icon for Chrome with Safari's icon if you like.
Apple even makes it a cinch to add a custom background to any Finder window as long as it's set to Icon view. First, select a folder. And then, press Cmd + J and pick between the Color and Picture options under the Background section in your view options.
4. Revamp the macOS Login Screen
To personalize the login screen, switch to a new user picture for your macOS user account. In System Settings > Users & Groups, click the existing profile picture on the right to swap it out for one from Apple's default set or your Photos library. You can even replace it with a Memoji or Animoji! Click Save to get the selected picture in place.
Next, you can come up with an entertaining message for your Mac's Lock Screen. To do that, head to System Settings > Lock Screen and turn on Show message when locked. Now, click the Set button, type in what you want the lock screen to say, and hit OK.
When you restart your Mac or choose the Lock Screen option from the Apple menu, your custom message will show up at the bottom of the screen, right above the power options.
5. Get a Better-Looking Dock

To personalize the Dock, you should, at the very least, declutter it. Drag an icon from the Dock until Remove appears above it, then let go. With rarely used apps removed from the Dock, drag your favorite apps into the Dock from the Applications folder for quick access.
You can also reposition the Dock, resize its icons, and set them to magnify while hovering with the cursor. To access these tweaks, head to System Settings > Desktop & Dock. Alternatively, you can use hidden Terminal commands to customize the Dock.
6. Give Individual Apps a Makeover

Play around with the built-in settings for installed apps to add more personal touches to your Mac. For example, you can change Discord's theme pretty easily.
Dark mode enthusiasts should check out UI themes in apps like Ulysses, Bear, Things, Tweetbot, Spark, etc. Many third-party apps will automatically adjust their appearance to match system settings, but some provide additional controls for changing their appearance.
Some of Apple's apps also let you change how they look and feel in Dark Mode.
To change how your emails are rendered in Apple's Mail app, tweak fonts and colors in Mail > Settings > Fonts & Colors. To highlight individual emails, select them and pick a new color via Format > Show Colors. You can also set the compose window to a light background in Dark Mode. To do so, uncheck Use dark backgrounds for messages under the Viewing tab.
To do the same for TextEdit, click the View menu and deselect Use Dark Background for Windows. To use a light background in Notes, choose Notes > Settings and untick Use dark backgrounds for note content. To force Apple Maps to use a light background when Dark Mode is on, choose Maps > Settings and tick the Always use light map appearance box.
It's worth noting that these options in Mail, TextEdit, Notes, and Maps are only visible in Dark Mode.

You can also get a new skin for the Terminal app via Settings > Profiles when it's open. Select one of the themes from the sidebar and hit the Default button at the bottom to set your choice as the default. Then, restart Terminal for the new color profile to show up.
7. Add Custom Sounds to Your Mac

Your personalization efforts should extend to system sounds. Start by picking a different computer voice in System Settings > Accessibility > Spoken Content > System Voice. You can customize the macOS alert sound in System Settings > Sound > Sound Effects.
To make your Mac announce the time at specified intervals, go to System Settings > Control Center, scroll down, and hit the Clock Options button in the Menu Bar Only section.
8. Use Third-Party Customization Apps
You can install third-party apps to customize your Mac even further:
- Bartender: Tidy up the menu bar and manage those icons
- Keyboard Maestro: Automation via custom keystrokes
- iStatMenus: Detailed system monitoring in the menu bar
- BetterTouchTool: Rich customization of input devices
- uBar: A Windows-style Start menu in the Dock
- TinkerTool: Adjust hidden or unavailable settings
Likewise, you can find many more premium apps if you have a Setapp subscription.
9. Tweak the Control Center and Menu Bar

To choose what's shown in the menu bar and Control Center, open System Settings > Control Center and click items to add or remove, such as Bluetooth, Battery, Wi-Fi, etc.
Features listed under Other Modules can be added to both the menu bar and Control Center. Scroll to the bottom to see services you can only add to the menu bar, like Time Machine and Siri.
10. Adjust the Mouse, Trackpad, and Keyboard

Go to Apple menu > System Settings and choose Keyboard, Trackpad, or Mouse from the sidebar to adjust their behaviors. Feel free to change trackpad settings like Silent clicking, Tap to click, and Tracking speed. You can also adjust haptic feedback under Click or turn it off entirely by toggling Force Click and haptic feedback.
Keyboard settings worth adjusting include Key Repeat and Delay Until Repeat, which affect keyboard responsiveness. You should also create some text replacements to speed up typing and choose whether pressing the Fn key displays the emoji picker, Dictation, or noting.
11. Add Some Widgets to the Notification Center

Click the date in the menu bar or swipe left with two fingers from the right edge of the trackpad to access the Notification Center. Click Edit Widgets at the bottom to add glanceable information from Stocks, Weather, and Clock apps.
macOS doesn't allow users to add widgets to their desktops, but third-party apps like WidgetWall let you get widgets on your Mac's desktop easily.
You can also manage your Notification Center's behavior, including how alerts are displayed, in System Settings > Notifications.
Have You Customized Your Mac Yet?
As you can see, you can make your Mac truly yours with a bit of thought, time, and effort. Once you do that, it'll be even more of a pleasure to look at and work with.
If you miss your Windows laptop even after making all these visual tweaks, know that there are apps that can make macOS feel somewhat like Windows.