If you ever wanted to save time, then creating a Microsoft OneNote calendar template has many benefits. It gives pages a consistent look and lets you structure different types of notes. You can create a monthly calendar to track projects and attach files along with it. Or, make a planner for weekly activities.
Unfortunately, the tool for making a calendar a missing in OneNote. But with the help of built-in features and add-ons, we’ll show you five different ways to create a OneNote calendar template.
1. How to Make a Calendar Template in OneNote
Paper notebooks, such as three-ring binders, use dividers to create sections and have pockets you can fill with loose sheets of paper. OneNote uses a similar organizational setup. Each notebook consists of sections and can hold lots of pages.
While creating a calendar in OneNote is almost as easy as editing a Word document, you must decide on the right layout to ensure smooth working with your calendar.
- Existing or new notebook: In most cases, you’ll find it easy to manage your calendar in an existing notebook.
- Potential use: Do you want to create a calendar to track personal projects or collaborate with your team? You should create a separate notebook for teamwork.
- Cell spacing: If you wish to write notes or attach files in a cell, it’s better to keep adequate spacing while creating a calendar.
Insert a Table
At first, we’ll create a new page. In OneNote 2021, click the + Add page button or press Ctrl + N on the keyboard.
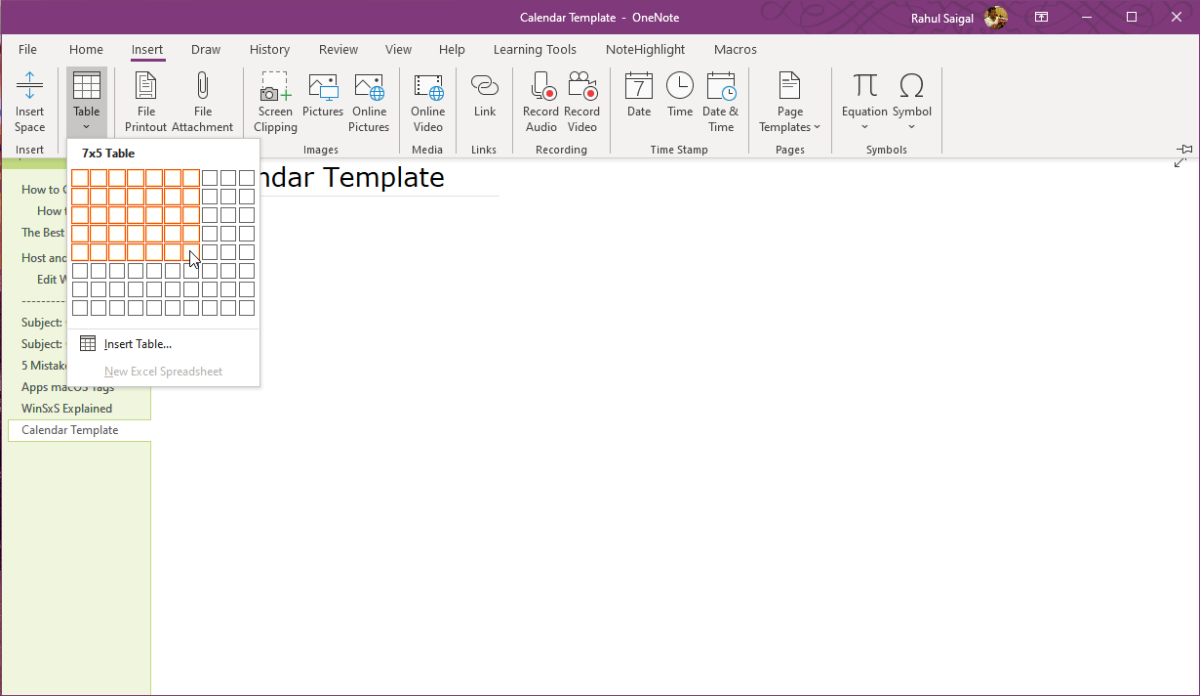
To create a table, click the Insert tab. Click the Table dropdown arrow and drag your mouse over the boxes to select rows and columns you want in the table.
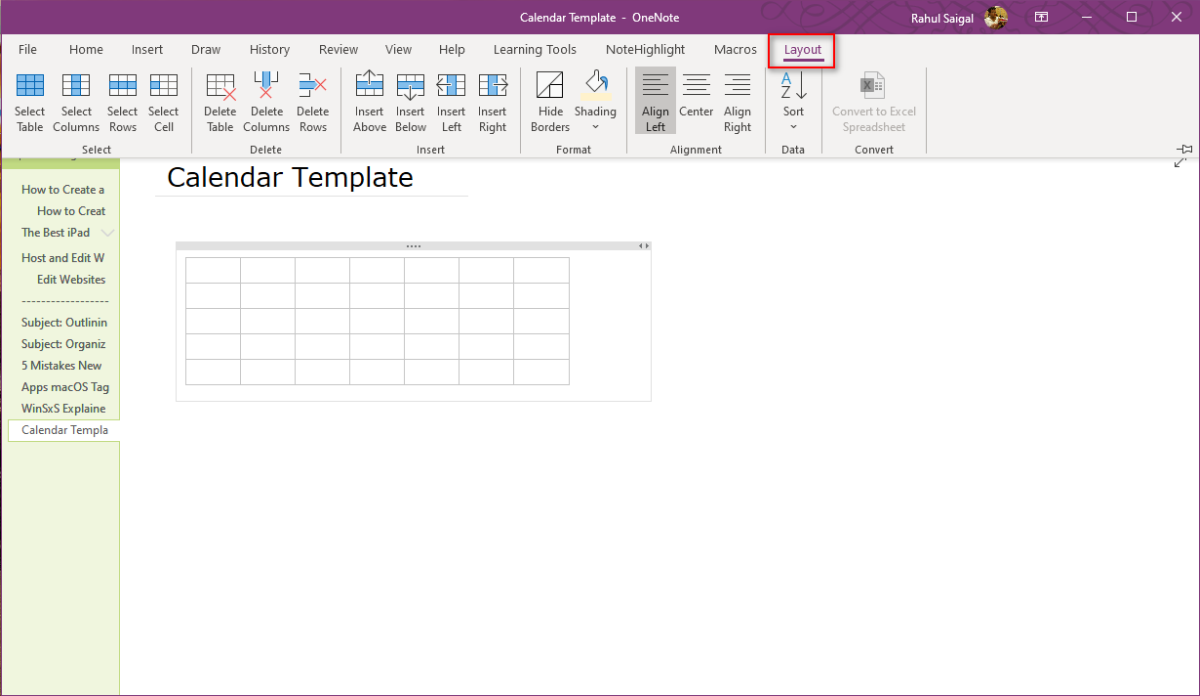
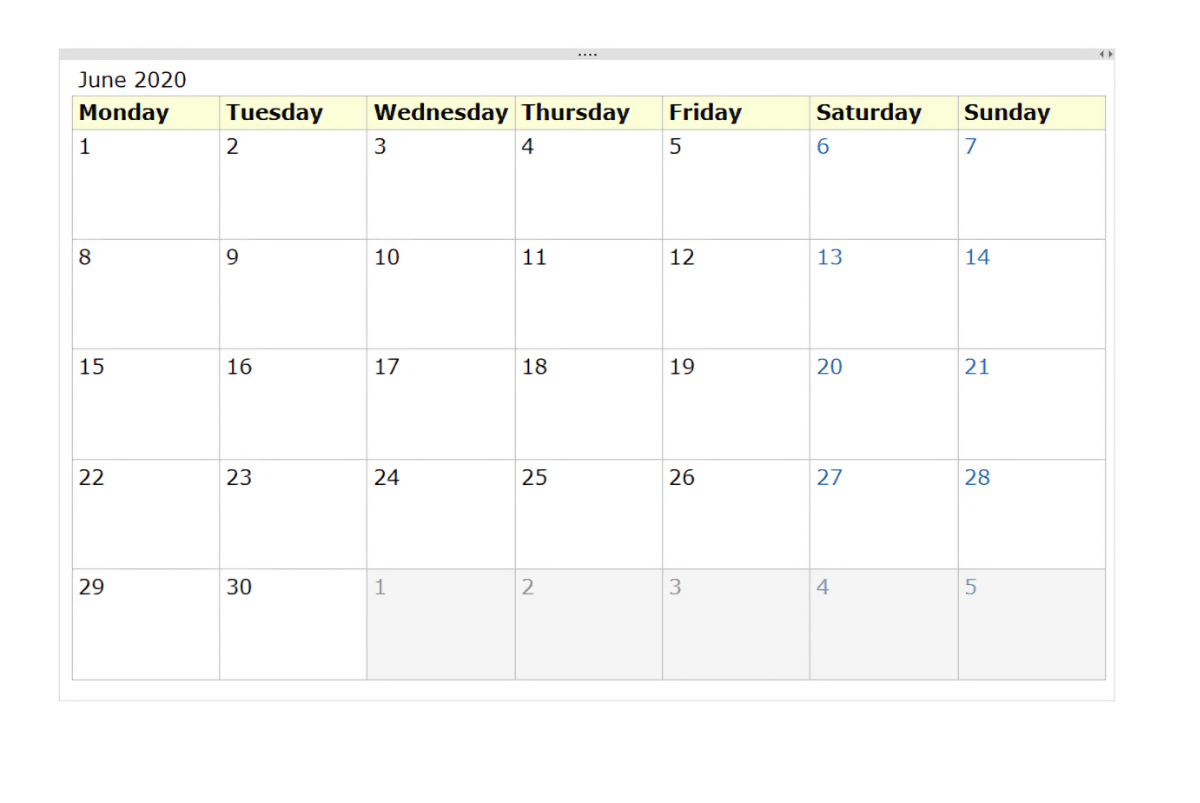
Make a table with five rows and seven columns. Four of the rows are for the weeks in a month. There’s an extra row for the titles. And if you notice carefully, whenever you click on the table, OneNote reveals a hidden Table menu with all the table-related tools.
Fill the Table
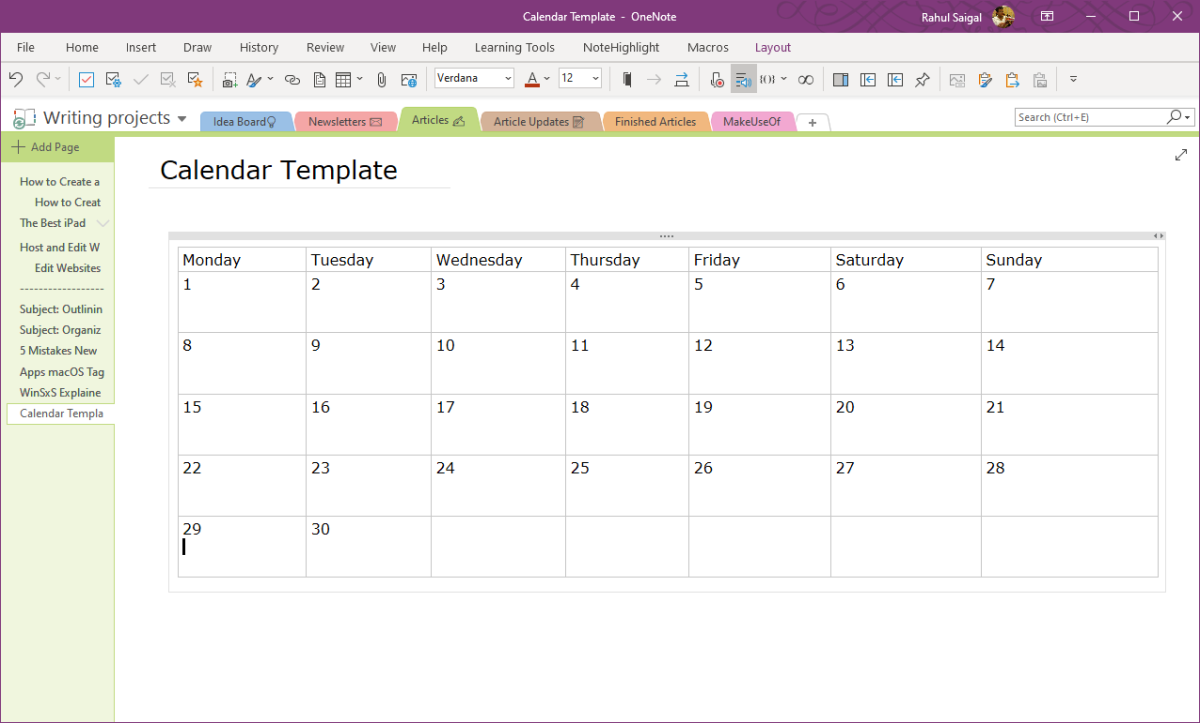
Put your cursor in the first box on the uppermost row and type Monday. Press the Tab key to move to the next cell and continue adding the rest of the weekdays. Then, type in the dates for that month.
To adjust the column width, hover your pointer over the border until you see the double-headed arrow and drag the edge. Although you cannot resize the rows, it’ll automatically adjust according to the size of the text within them.
Format the Table
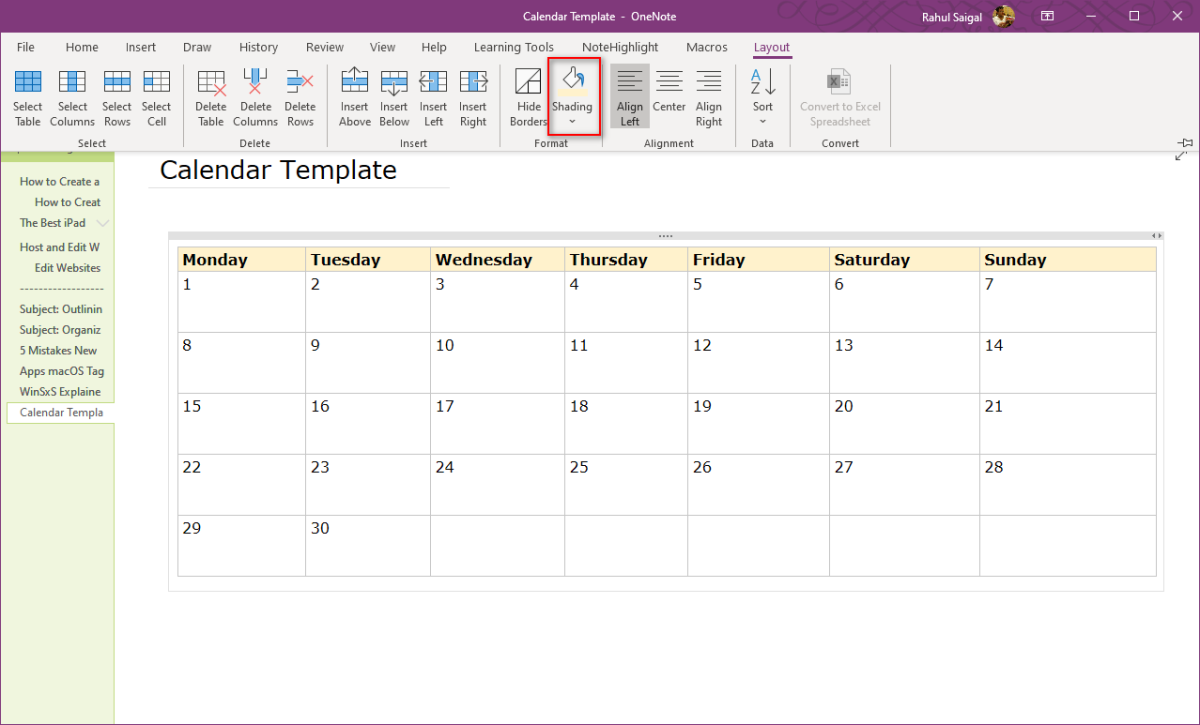
You can change the appearance of your table’s text and apply the formatting as per your needs. Click the first cell of your table, then drag your pointer till the end of your table. Then, press Ctrl + B to bold the text of the entire row.
Let’s apply some cell shading to make it attractive. Select the cell or cells you want to format. Click the Table tab. Then, from the Shading dropdown menu, choose a color you want to apply. Cell shading only affects the background behind the cell’s contents.
Save Your Calendar as a Custom OneNote Template
Ever since 2013, you won’t find quality templates within OneNote. But you can improvise and create your own by making a template from the basic calendar you just created.
From the Insert tab, click Page Templates and choose the Page Templates option.
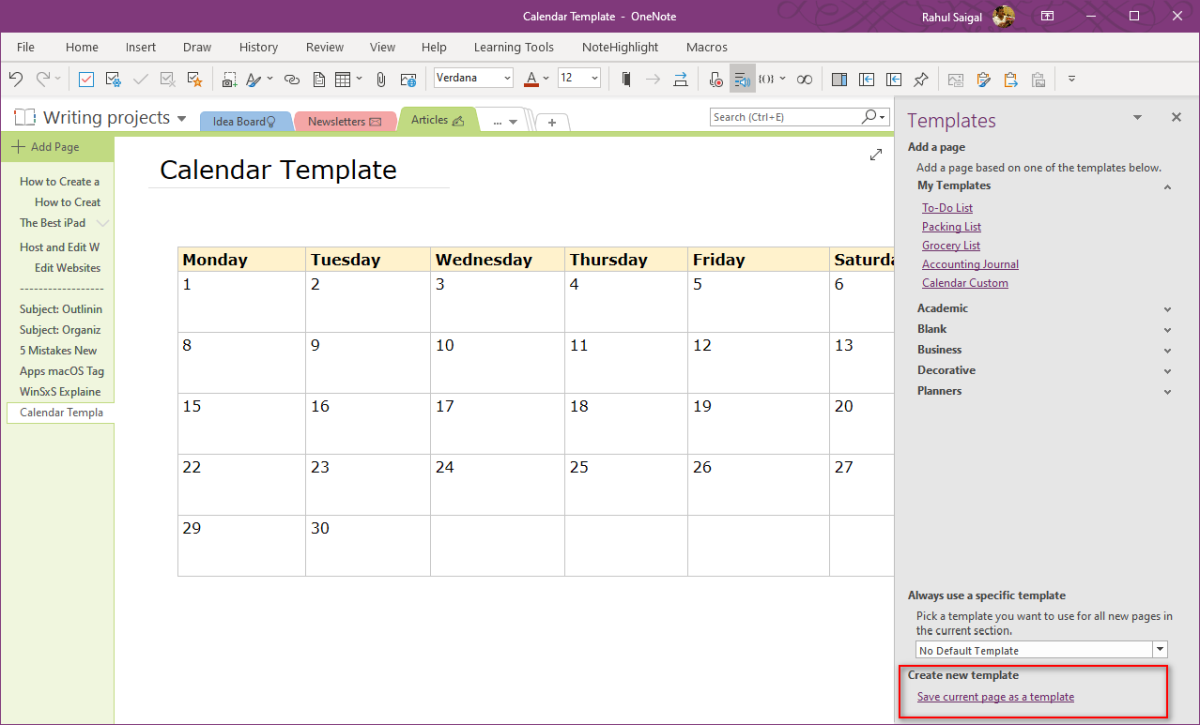
Click Save Current Page as a Template. Type in the name, and optionally, you can set this as a default template for new pages in the current section. Doing this will save you time if you create a new OneNote calendar every month.
2. Editing an Existing Template
If you want to make changes or edit any template you download from the web, then OneNote lets you easily edit those templates.
Go to the Insert tab and click Page Templates. From the dropdown menu, click the Page Templates option to bring up the Templates task pane.
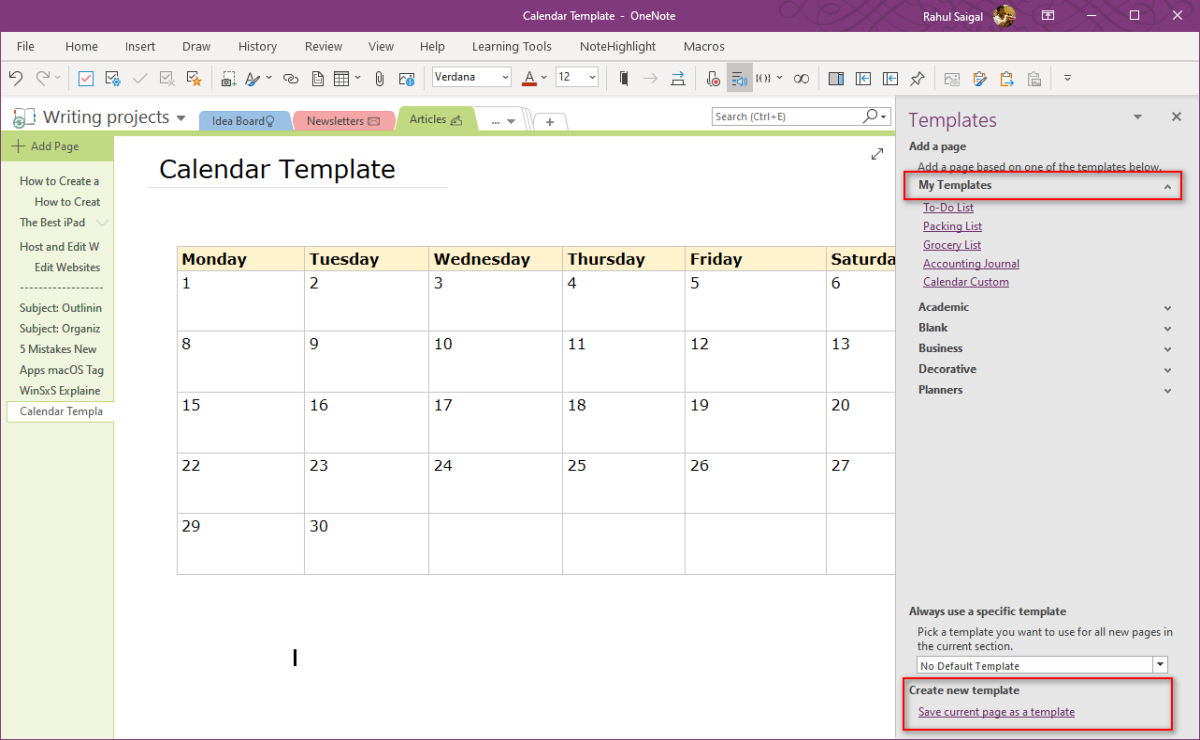
Click the tiny dropdown arrow next to My Templates and select the template you just saved. This action opens a new blank page and applies your chosen template. From here, type in the name of this version of the template and save it.
3. Import a Calendar Image
You’ll find many free calendar templates for Microsoft Office with different designs and types (e.g., business, school, parenting, and more). Since OneNote lets you easily import the images, it reduces the amount of time required to make a template.
To insert an image, click the Insert tab and then Pictures. From the dialog box that appears, navigate to the folder and select your image. Alternatively, place your pointer along the edges and take the screenshot of the image.
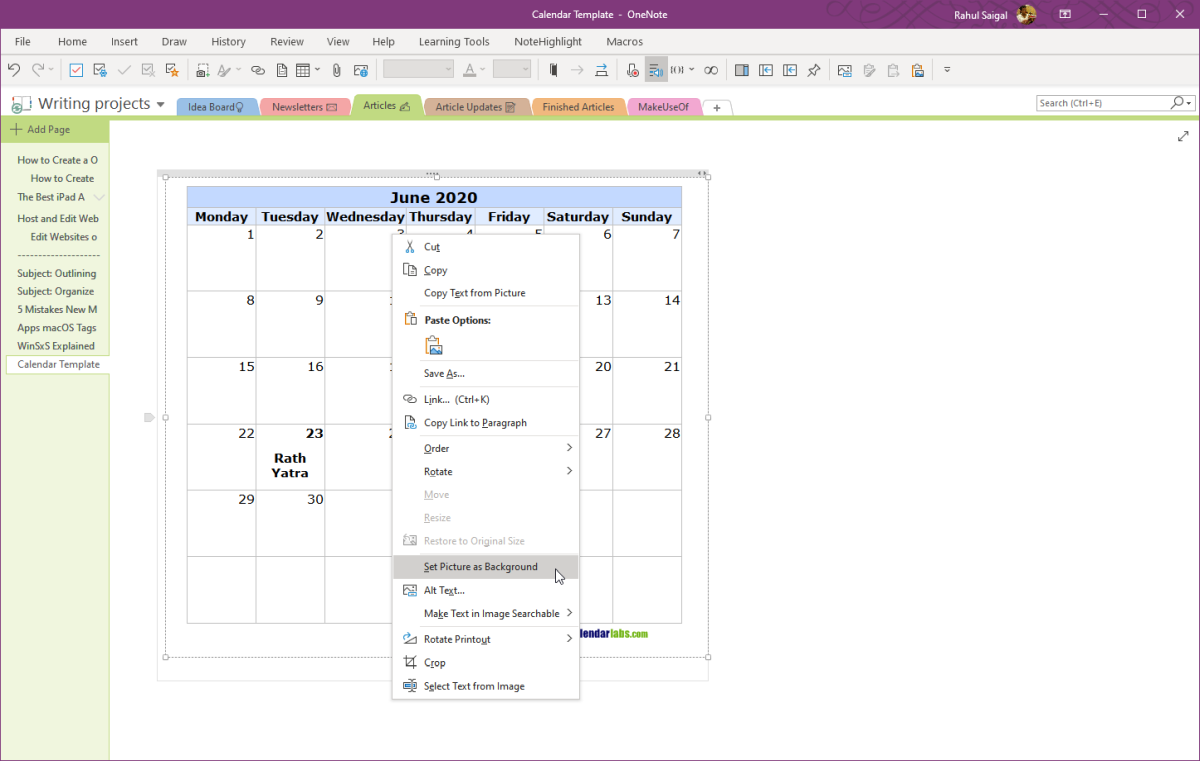
When OneNote inserts the clipping onto the page, you can’t start adding tasks or events right away. Right-click the image and choose Set Picture as Background. Click anywhere within the table cell and type some text.
The only downside of this method is that you cannot resize columns, so you’ll have to keep notes short.
4. Insert Calendar With Onetastic Macros
Onetastic is a useful add-in that increases the capabilities of OneNote to perform complicated tasks. For example, you can view and manage a notebook page with OneCalendar, or crop an image with custom dimensions.
You can take advantage of page management features, such as adding important pages to your favorites list, and define custom styles to quickly format your page text. Onetastic comes in both 32-bit and 64-bit, so download the add-in for the version of OneNote you’re using.
Do note that the OneNote Windows 10 App does not support third party add-ins like Onetastic.
Using Macros to Insert Calendar
Onetastic’s excellent features are possible because of macros, which are little bits of executable code that perform repetitive tasks. You can search and download macros for OneNote.
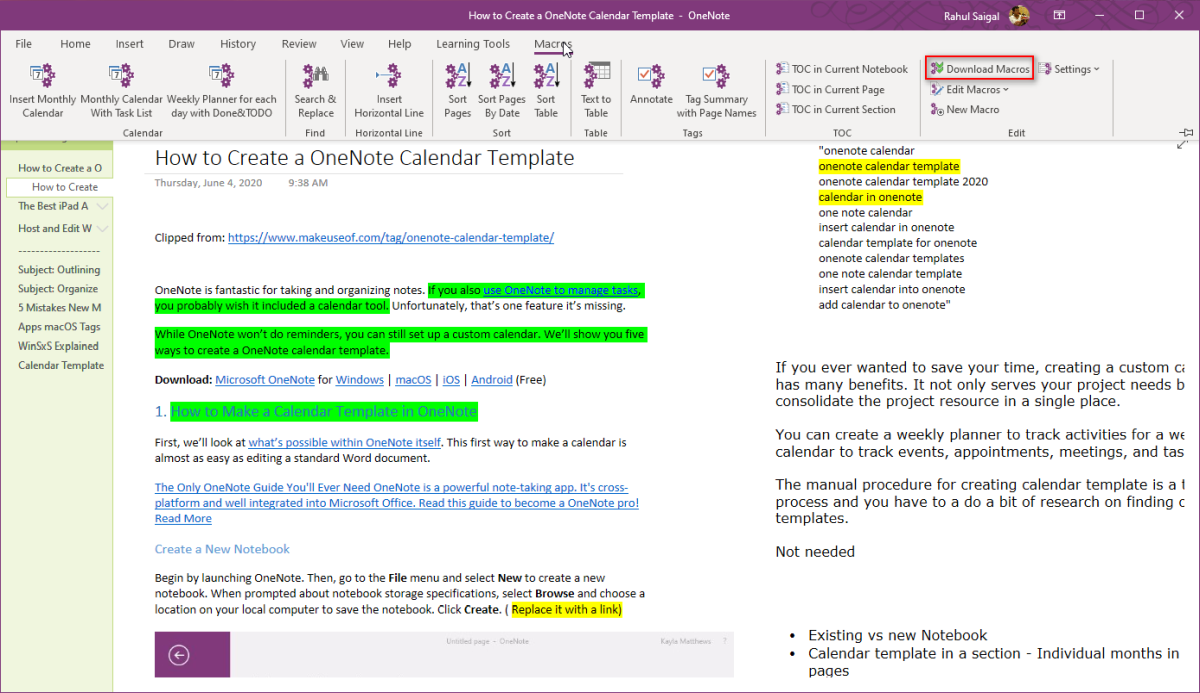
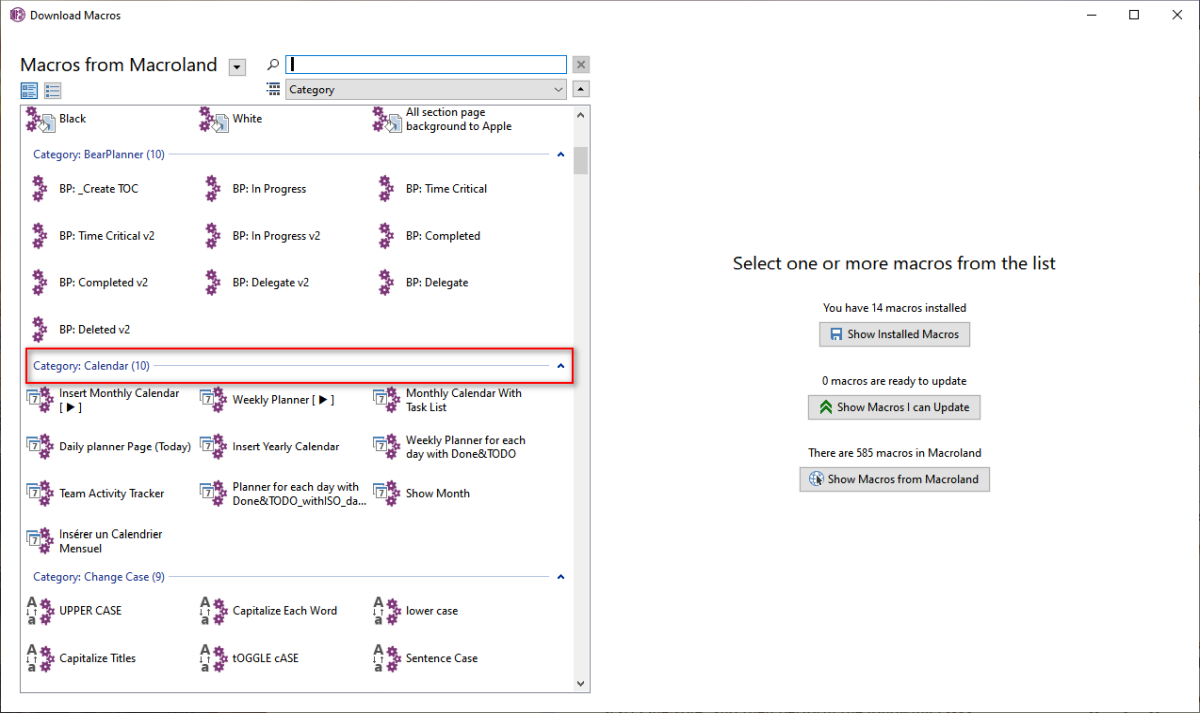
Click the Macros tab (if you don’t see this tab, go to Settings > Show in a Separate Tab) and then Download Macros.
You can find macros to create a monthly or yearly calendar with a task list, and a weekly planner.
Insert Monthly Calendar: Insert a calendar of selected month and year. Choose the first day of your week and the color of the header.
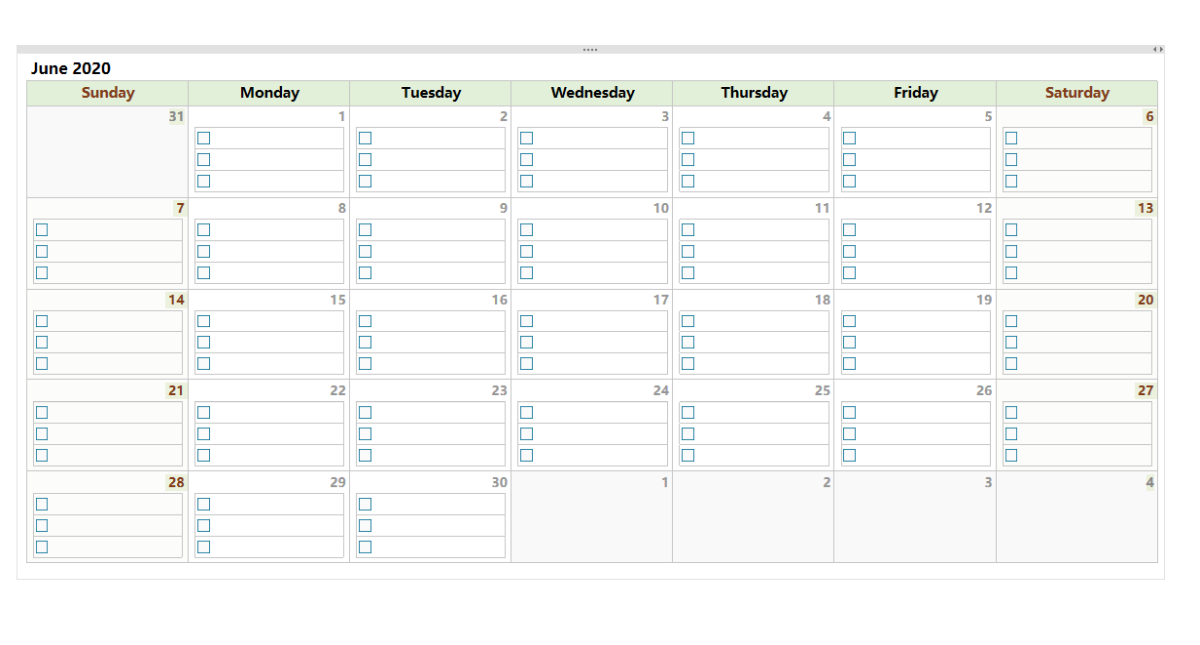
Monthly Calendar with Task List: Insert a calendar along with the task list. Select the header and weekend color and width of the columns.
Manage notebooks With OneCalendar
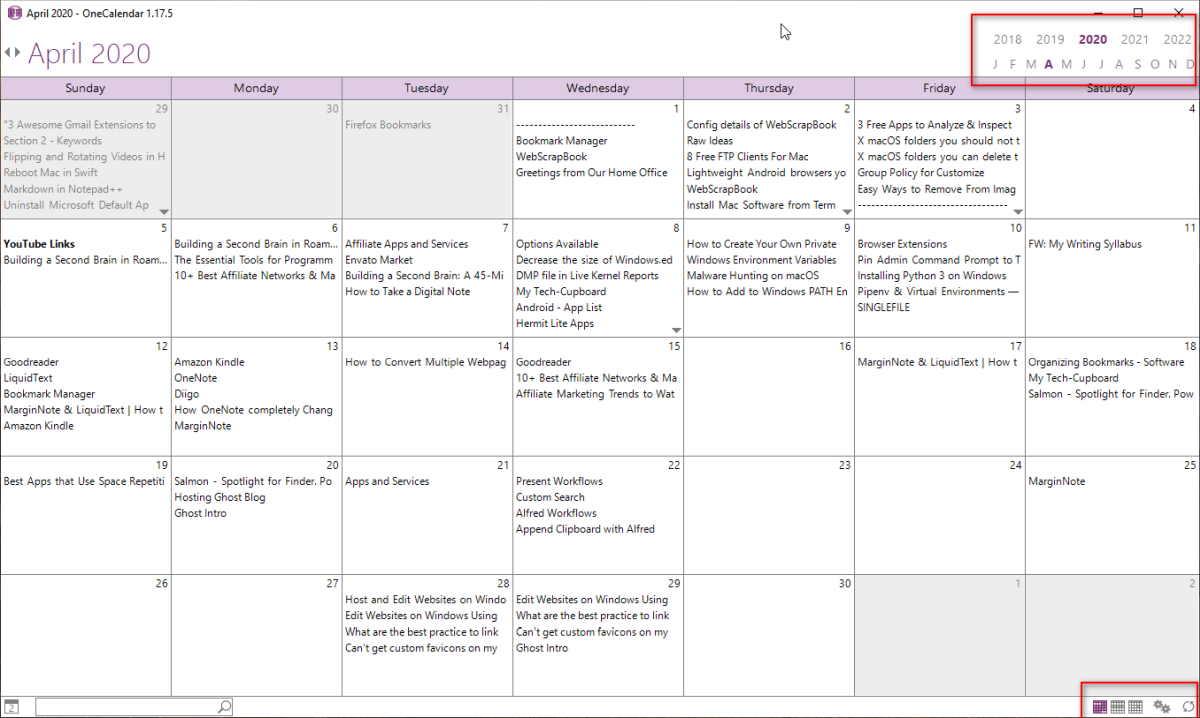
As your OneNote notebook grows, so will the number of pages. It becomes increasingly difficult to track them by the creation or last-modified date. With OneCalendar (a part of the Onetastic add-in), you can navigate the calendar in sequence, from days to weeks or months.
To launch it, click the Home tab and then Launch OneCalendar. If you’re using the utility for the first time, it’ll ask you to set the default language. From the lower-right corner, change the time-period to month, week, or days. And in the upper-right corner, select the year and corresponding month.
Then, click the hyperlink representing the page you want to view. The add-in is entirely customizable. Click the Settings button to change font size, display pages based on the date created or modified, notebooks to include in the display, and ability to see the page previews on hover.
Integrate OneNote With Trello for Better Productivity
You probably use a calendar to plan your daily activities, track events, or manage schedules. With OneNote, you can do all these without leaving the app. If you are busy, then tracking every task along with your calendar is an uphill battle.
What you need is a system to help you manage the glut of information so that you don’t lose focus and clients. Let’s look at some unique ways to use OneNote and Trello together without any effort.


