During the time I've started using Google Maps, I've found as many ways to incorporate it into my life as possible. It's integrated into my Motorola Android car GPS software, Google Latitude lets me share my Maps location to my kids while I'm traveling, and I always use it to search for parks and historic landmarks around us when we're on a family trip.
Other MakeUseOf authors have also shared awesome features offered by Google Maps, such as Tina's list of the 5 best things about Google Maps, and Eyal's article on creating collaborative Google Maps. If you haven't guessed it yet, we're big fans.
Today, I'd like to show you a cool Google API-based application called MapTheWay that lets you incorporate your own customized Google Maps right into your own blog or website, using longitude and latitude way points that you can overlay on the map through an XML file.
This is a useful method of mapping out multiple locations for your visitors because you can either manually plot out a trip or you can create interactive software that sets the way points automatically by editing the XML file via a script. Imagine being able to write a blog post with actually embedded maps - not just screenshots. Your visitors can see the maps that you've laid out and you can title each way point however you like.
Installing MapTheWay for Mapping Multiple Locations On Your Website
As we go through this tutorial, you'll see why having this feature embedded on your website is so convenient. No need to store or share maps from Google Maps - all you have to do is create a new XML file of your waypoints and voila - you can immediately share a new map in minutes.
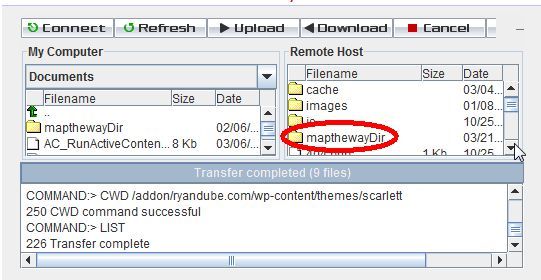
Let's get started and you'll see why this is a very cool tool to install for your blog or your website. First, download the free basic version files to your PC, and then FTP the "mapthewayDir" folder (and all contents) to the http root folder of your website.
In the case of a Wordpress blog, you'll want to upload the folder and contents (along with the base files) to the same level directory in your themes folder where your index.php file is stored. You're already halfway to mapping multiple locations on your blog!
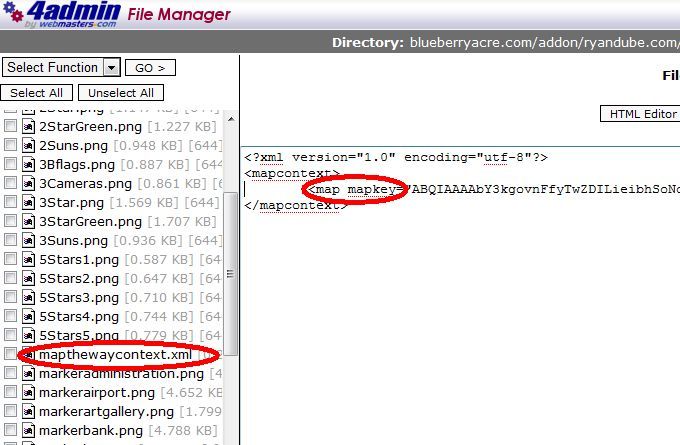
Now, if you don't already have an API map key for your website, then go on over to Google and sign up for a Google Maps API using the domain where you uploaded the MapTheWay directory. Once you receive your key, go into your mapthewayDir directory on your web server and edit the file mapthewaycontext.xml with your own Google API key.
By the way, if you wish, you can change the map language to either French (fr) or Portuguese (po) rather than English. It appears those are the only languages currently available. Now MapTheWay is installed on your site, and you're ready to start embedding your maps!
How To Set Way Points & Display Your Map
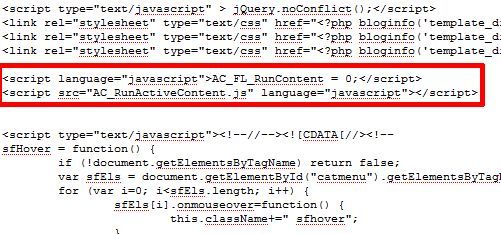
There are a few files that are part of the download package that you'll want to check out. Two of those files are HtmlHead.txt and HtmlBody.txt. Whenever you want to embed a map on one of your pages, you just have to make sure the header script and the body script is included on the page. The header script doesn't change. And guess what, if you're using a Wordpress theme, the odds are pretty good that you have a header.php - you can simply insert the script once and you're all set.
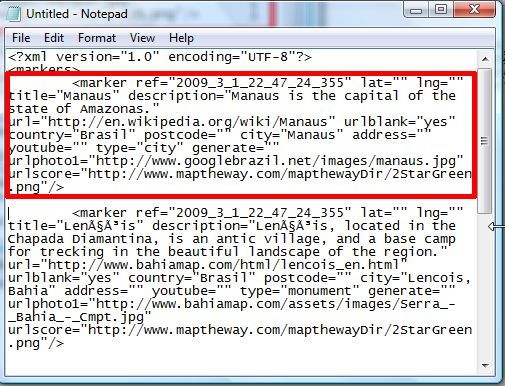
Now, you need to set up your XML file filled with your Way Points. The template to use is MyWebPage.xml included in the mapthewayDir folder. The format of that file is as shown below.
Many of the variables used in the example file aren't available in the free version. For your free setup, you need to focus on setting the lat, lng, title, description, country, postcode, city and address (all optional except lng and lat). The "type" is the name of the marker image file, so type "city" refers to file "marker[city].png. So, you could customize your own marker icons if you use that naming convention.
Your first question here is probably - isn't this a bit complicated? How are you supposed to know the lat and long of your locations? Don't worry my friends, I've got you covered - because when you downloaded this cool free app, you also downloaded a convenient utility to identify those location points. Just go to your browser, go to your domain and open up the file. If it doesn't work at your domain, just use the utility offered for free at MapTheWay.
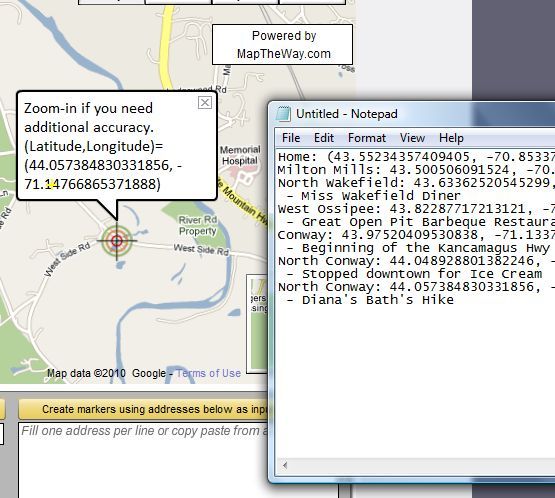
Simple drag the target along your route and it'll give you the longitude and latitude of each point. Keep a note of each waypoint as you trace your trip. Once you're finished, just modify the template MyWebPage.xml with your new way points and descriptions, and save it as a new XML file in the mapthewayDir folder.
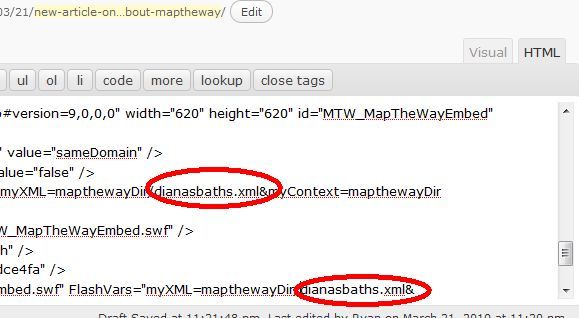
When you're done, all you have to do is embed the map into your webpage using the code found in the HtmlBody.txt file. You should find the name of the xml file in the code 3 times, so you'll need to edit those three entries with your new XML file name.
Save the page, and your new map is now embedded on your website!
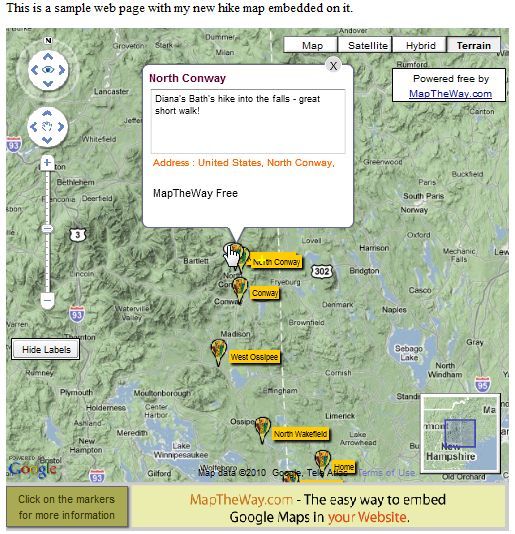
The map embedded perfectly on my webpage. All of the titles show up when the user clicks "Show Labels," and if the user clicks on an icon for a way point, your description text is displayed. The map looks professional and initially attempts to center on all of your way points when it first starts up.
The one thing I noticed about this setup is it didn't really like the Wordpress file structure (the app likes to exist on the root of your domain), so I was able to get it working by installing it on a new domain that I recently purchased and creating an index.html file with the code shown in this tutorial. So, if you've created your own website - embedding this app will be a breeze. If you want to use it on your blog, it's going to take a bit of tweaking before it'll work right - but that's beyond the scope of this article.
So give MapTheWay a shot on your website and let us know what you think. Do you know of any other cool ways to embed maps directly onto your website? Share your resources in the comments section below.


