When it comes to food photography and product shots, sometimes all you need is a flawless white background to take some pretty impressive photos. Rather than buy a lightbox, or go trough the trouble of making one yourself, you can actually get really good results using nothing more than a white canvas sheet and natural light.
There are a couple of extra steps you can take to make your photos look even better - a bit of basic post-processing using free apps, or creating a home-made reflector using just a piece of aluminum foil and styrofoam (or a piece of cardboard), and you can get great photos.
So why bother? When it comes to product shots, if you have an online store - whether on eBay, Etsy, or on your own online store, by just putting a little bit of effort into your photos, you could potentially see an increase in sales. Beautiful photos can make the world of a difference when it comes to sales figures.
If you run a cooking blog, or like to share photos of your culinary creations on photo sharing apps like Instagram, just that little bit of extra effort, can earn you a lot more followers and likes. Best of all - this entire process won't cost you more than $10, at the very most.
Canvas Paper
The easiest way to do this is with nothing more than a sheet of canvas paper. Prop the canvas sheet against the wall closest to your window. It's best to make sure that part of the canvas is against the window so that some of the natural light is coming in through the the paper.

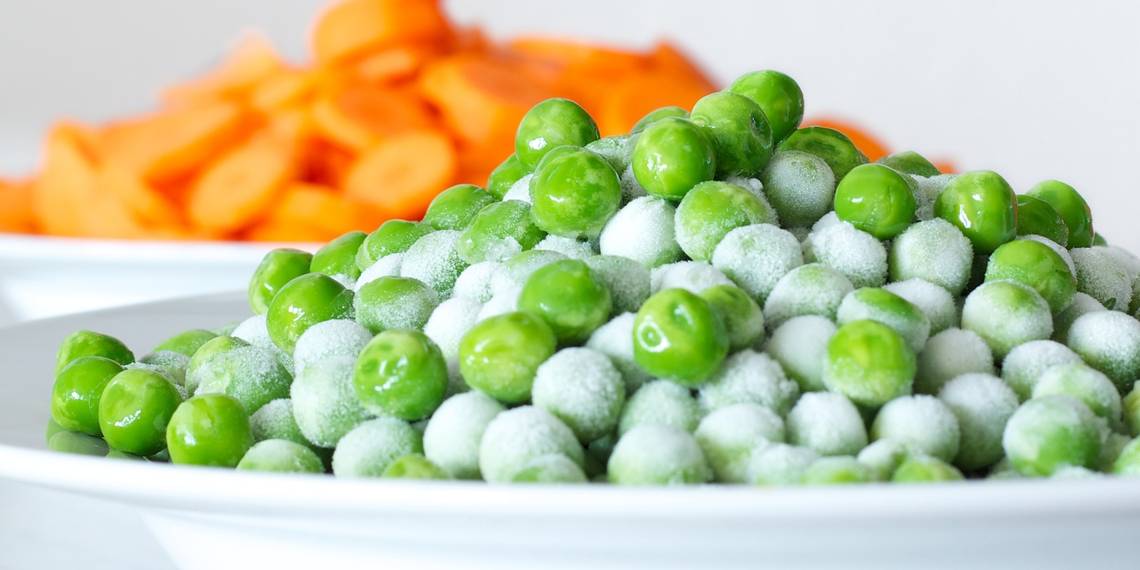
With this method, it's all about how you're framing your photo. Below is a completely untouched example of a photo taken using this method. The natural lighting offers all you need to light your product or item.

Canvas Paper, Styrofoam Board and Foil
The second method makes use of foil as a means of creating a reflector in minutes. A small styrofoam board is all you'll need, but if you find a larger size, you can always wrap the foil around the section that will be bouncing light on to your item.
Just place your white canvas paper on your table, and angle the foil reflector so that the light from the window bounces on to your item.

Below is an example of an untouched photo using this method:

To really see the difference that the reflector can make, the photo below (left) was taken with the reflector in place, while the photo on the right was taken without one. You can see the difference in the light, particularly with the chili on top.

Post-Processing
There are some very basic settings you can adjust with just about any photo editing tool that will make your photos pop even more. There's no need to shell hundreds of dollars over for Photoshop when you can make all the difference with just adjusting the exposure, brightness, contrast and sharpness of an image.
If you're a Mac user, you can opt for Fotor, a free desktop app that gives you access to a few cool filters, tilt-shift features and more. For our purposes, you won't need more than the basic features listed under the 'Adjust' tab.
You can increase each of the settings - exposure, brightness, contrast and sharpness - to get a brighter image that showcases your product or food.
Below is an example of the image taken above using the reflector, and then adjusted using Fotor:

Below is another example of an image taken using nothing more than one sheet of canvas paper:

If you want to keep it all in the cloud, you can use one of several solid online photo editing services, or even use Snapseed in your browser (provided you're a Chrome user). Linux users can opt either for Darktable or Shotwell, while Windows users can use Photofiltre. And then there's the cross-platform option available to all - GIMP.
If you're on the lookout for a bit of inspiration for your food photography, we have a list of five places you can find mouthwatering, and beautifully taken, photos of food.
Do you have any tips for how to take photos with a perfect white background? Let us know in the comments.
Image credit: Basileia Gorgo/flickr