You love retro games. Perhaps you play great old games on your PC, perhaps you still have some old game consoles (and other devices that make nostalgic sounds); you might even have built a classic gaming machine, converting an old PC – or even a Raspberry Pi – into a retro gaming rig.
If so–and you know how to use a printer, glue, and a crafting knife–then you could use this guide to turn your most beloved games into pieces of virtually unique 3D pop art.
Even if you're not a fan of old games, these DIY pictures can make excellent gifts to people who love 8 and 16-bit video games from the 80s and 90s.
What You'll Need
To make one of these pieces, you will need:
- A color printer
- Thick A4 paper – don't go too thick, however, as your printer may be unable to spool the sheet.
- 2-5mm foamboard
- 1mm Plexiglas
- Glue (check that it will glue Plexiglas)
- A craft knife or scalpel
You may also require a good art package, such as Paint.NET, GIMP (which is just as useful as Photoshop in many cases) or Photoshop.

The idea is simple: you find an image you like, print it out several times, then cut out and layer the various elements to a board, thereby mounting the image and creating a 3D effect.
Execution can be tricky, and is certainly time-consuming. You'll need to set aside an afternoon for this, certainly for your first attempt.
That Other, All-Important Component
As well as the above, you'll also need a game. One that you really like, with those blocky graphics that will stand out and immediately mark the finished piece as being from a retro gaming title.
What makes a good subject?
Ideally, it should be something with great pixel artwork, on both the main character, any other characters you want to feature, and for the background.
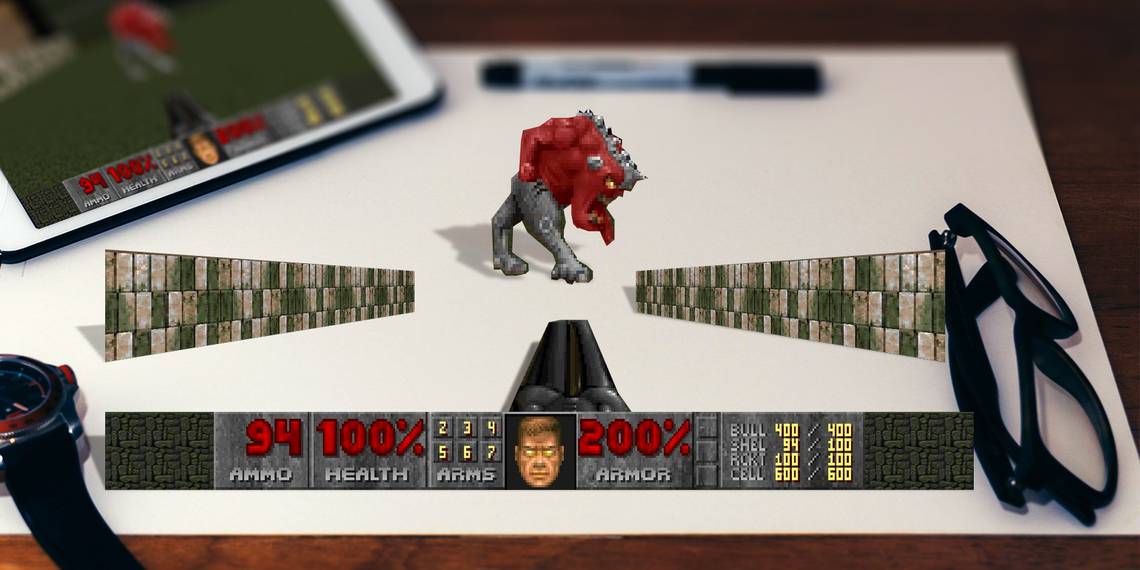
Note also that we're going to be mounting your score, lives remaining, etc., so these will need to be of a suitable size and readable. In the image above and throughout the steps below, I've used a freeware clone of 8-bit and 16-bit classic Turrican called T2002X, but there's no reason why you shouldn’t go further back and make a piece based on Space Invaders, or even come a little further forward and bring something like The Sims or Half-Life into 3D pop art relief.
Having trouble finding a game, or don't have emulation software? Don't worry – you should be able to find images online, or better still, game footage on YouTube.
Step 1: Capturing the Image You Want
You'll need to use a print screen function to capture the image you want to turn into your retro gaming 3D showpiece. If you're running the retro game on a Windows PC, you should be able to do this using the standard WINKEY+PRINT SCREEN button; however some games run in what is basically a layer above the desktop, which means that capturing an image using the native method will result in just a picture of the desktop.
For these games, you'll need a third party image capture tool, such as Greenshot.

Capturing the image may require you to use the game's pause function; this may look unsightly. Unless you're planning to incorporate the word "PAUSED" into your finished piece, or if you find that the screen capture is dull because your character has no movement at that time, you have a few options.
- Get someone else to press the screen capture button.
- Use assets from the game's installation folder.
- Take several captures, and edit them in your chosen art package.
When you're done, you should be able to output at least two images to your printer:
- The level background or environment
- The main characters and score/energy information (this may also have the background; don't worry, you'll be cutting things out soon).
Although you're using screenshots, don't feel you have to be locked into the image you captured. Play around with it if possible, to create a scene that is truly unique.
For printing, we recommend you run a test print on standard A4 paper first. Concerned about ink usage? That's fine – just switch the printer settings to black and white or fast draft first.
Ready? Let's get started.
Step 2: Print Your Images

Before printing, ensure you have loaded up your printer with the correct, thick paper. For this example, I've used Ice White A4 paper from Canford, which is about 1.5 times thicker than stadard printer paper; A4 is similar to Letter size; you might opt to go a little thicker. Basically, your printer should be able to move the paper through and around the rollers without running into problems.
Regardless of how thick the paper is, give the ink plenty of time to try before moving onto the next step.
With your background printed and dried, it's time to trim your foam board down to a matching size, and glue the background to this. Using foam board adds stability to the project; using card in place of this will result in a scene that begins to sag and curl as time passes.
When gluing the background, take care to apply the adhesive evenly.
Again, if you're concerned about ink usage, particularly of black ink, you might switch things around a little. If the scene has a black background (as many retro arcade titles do) it's worth selecting a sheet of black foam board. All you need to do is use your image editing tool to delete the black background before you print.
Step 3: Cut Out the Pixels

You'll need plenty of time for this stage. Get setup with a decent knife and a cutting board and cutout your characters, score, and any foreground or background elements you wish to bring into the 3D look.
You're likely to get tired with this step; we recommend taking it easy, cutting out each character or element and then taking a break.
Step 4: Arranging and Mounting Your Scene

Before you begin mounting the scene, spend a few moments arranging the cutout pixel art; at this stage, focus on the main characters, rather than score/power information.
Remember, you don't need to feel hamstring by the original image. If you feel you can bring drama to the images by moving them closer together or further apart, go ahead and do so. When you're happy, cut some small blocks of foam board to mount the pixel art; if you're using 2mm board, you'll need to stack two blocks.
Before gluing, ensure the blocks are positioned relatively out of sight.
Step 5: Using Plexiglas for Smaller Elements
For smaller items like the score, power bar, timer, laser blasts, etc., use the Plexiglas. All you need to do here is cut it into small pieces, ensuring that each is of a suitable size to create a 3D effect for the elements in question.

Different elements will require different sized pieces of Plexiglas; as a rule of thumb, score and other HUD data should be higher from the background than your characters.
Game Complete!

Wait for everything to dry, and take a look at the finished piece. If you're happy with it, take the opportunity to really show it off, perhaps mounting it on a shelf or wall.
Have you built a retro gaming 3D scene? Feel free to share yours below – we'd love to see it!