You've learned how to make a website and read our jQuery guide. What's next? Creating a password protected area for your website is essential for keeping your stuff secure. Fortunately, it's easier than you may think!
Getting Started
There are many ways to password protect a website. You could setup an online database and code your own login system, or you could use a content management system such as Wordpress.
Today I'll be showing you how to password protect your website by using your web server.
You'll need an Apache web server to follow along. Many other web servers provide similar functionality, but the configuration steps needed may be different.
Apache is one of the most popular web servers on the planet, and as the name suggests, it serves web pages. A common phrase you may have heard is LAMP, which stands for Linux, Apache, MySQL, and PHP/Python/Perl. You won't need any programming languages or databases today, and you don't need Linux either -- the Windows variant is called a WAMP stack.
There are many variations now, as many websites switch to database engines such as PostgreSQL or web servers such as NGINX, but LAMP is much easier to say than LEMP, LAPP, LNMP, or LNPP, so it can be considered as more of a catch-all phrase.
If you use a web hosting service to run your website, you are all set (providing it's running Apache). If you're not sure what type of hosting you need, then check out website hosting explained. If you want to develop or experiment on your own computer, you'll need to create a virtual web development environment.
What Is an .htaccess File?
Htaccess, or hypertext access is a configuration file. It's used to configure Apache to your needs. It works on a per-directory basis, so you can have one set of rules and configurations for your media hosting, and another totally different set for your blog. Htaccess files are called so after their name. An htaccess file is a text file called .htaccess. Notice how it does not have a name, rather the extension is called htaccess. This may be hidden by default in Windows, so take a look at how to view hidden files and folders in Windows if you're having trouble.
Here's some of the cool things htaccess can do:
- Block spam visitors.
- Compress pages on-the-fly.
- Prevent image hotlinking.
- Serve custom error pages.
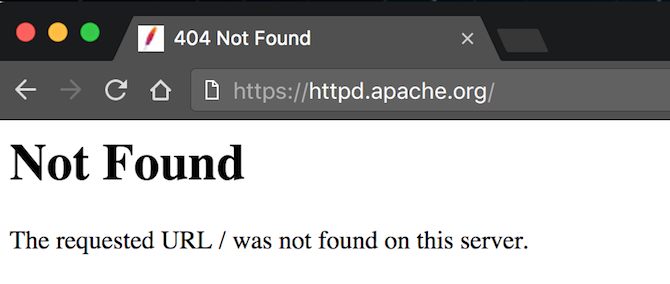
You may have seen default error pages. They get the job done, but look quite basic:
With Apache you can make these pages much nicer, along with a whole host of other features!
Configure htaccess
Now that you know what it is, let's setup htaccess. You first need to enable it, which is done by editing the httpd.conf file, which is another Apache configuration file. Find the following line:
<Directory "/var/www/htdocs">
The directory path (/var/www/htdocs) is the location of your website root. This may be different if you have changed it. Change the following subsequent line from this:
AllowOverride None
To this:
AllowOverride All
Restart Apache and you will now be ready to use your htaccess files. If you're using an online hosting provider, you may need to configure these options in your online control panel.
Here's the code you need to put in your htaccess file:
        AuthType Basic
AuthName "MUO Secret Area"
AuthUserFile /.htpasswd
Require valid-user
Save this htaccess file anywhere you like. Putting it at the top level will password protect your entire website, or you could put it in a specific directory, and only have it protect that folder.
There are two key things this is doing. The AuthName is presented to any user who attempts to login. In this case, it is set to "MUO Secret Area", but you can change this to anything you want. The AuthUserFile needs to point to a valid .htpasswd file. This file needs to contain a list of usernames and passwords in the following format:
user:password
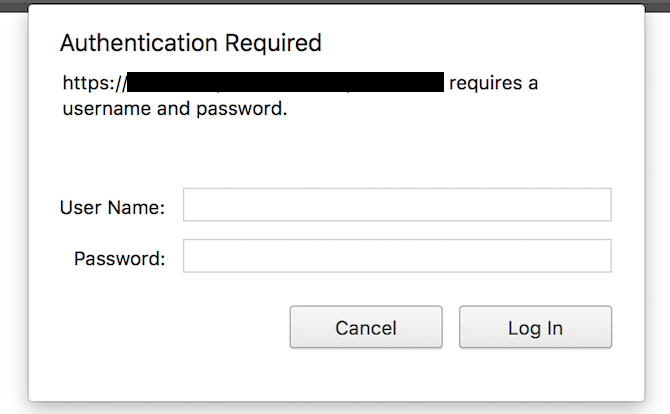
That's it! Your website or directory is now password protected. Here's what that looks like when you are prompted for credentials:
Your browser controls the look and feel of this login box, so it's not possible to configure this. You may want to create strong passwords, and ensure that the rest of your website security can stand up to any potentially nefarious actions.
Going Deeper
Now that you know the basics, let's look at an advanced example. Say you want to give your Raspberry Pi web server access to your protected directory. You could configure the Pi to supply the correct login credentials, but it's even easier to allow password free access for a specific IP Address.
Configure your Pi with a static IP address, and then replace the previous example with this new code:
        AuthType Basic
AuthName "MUO Secret Area"
AuthUserFile /.htpasswd
Require valid-user
Order deny,allow
Deny from all
Allow from 127.0.0.1
Satisfy any
This code contains the same instructions as the previous example, with the addition of a few extra lines at the bottom. The most important one is this:
Allow from 127.0.0.1
This tells Apache to allow the IP Address 127.0.0.1 password free access. Anybody coming from a different IP Address will need to supply a valid username and password. Make sure you change 127.0.0.1 to the IP address of your Pi or any other device you wish to supply access to.
Here's the default error page if you don't login correctly, or don't have the correct IP Address
Performance Tips
Htaccess provides a brilliant way to configure a variety of things on your web server, particularly if you don't have much control over the rest of the server. It's easy to get carried away however, and reduce the performance of your website significantly. If you're able to, consider using PHP or any other language to perform complex tasks, and save htaccess for when your requirements are smaller, or you don't have full control of the server.
Did you learn anything new today? What are your favorite htaccess tricks? Let us know in the comments below!


