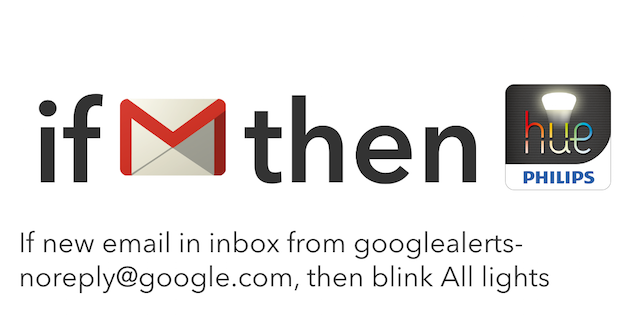
Google Alerts are nothing new. They're an excellent way to receive automatic emails about the topics, people, or events that interest you the most. You can also setup a Google Alert to receive emails every time you've been mentioned online.
Similar tools are available through Twitter and Facebook. With IFTTT, you can take this a step further by having your lights in your home change each time you're mentioned in cyberspace! Here's how to do it.
Setting up a Google Alert
First introduced in 2003, Google Alerts are an easy way to stay on top of the subjects and news that interest you the most. For example, with Google Alerts, you can receive a notification every time new content is posted on your favorite show or sports team. Have a favorite actor or film? You can track news on these topics too.
You must have Google and Gmail accounts to activate Google Alerts. Once you do, visit the Google Alerts page to get started.
From this screen, you'll notice the following sections: My Alerts, Me on the web, and Alert suggestions.
Once you've created alerts, they are added to this first selection. From here you can edit the alerts or delete them. Click on the Settings icon to choose a delivery time for your alerts and whether you'd rather have your alerts sent in a single email called a Digest.
You can also schedule the number of times per day that you'll receive an update. Alerts can go to your primary Gmail account or an alternative.
The second Google Alerts section automatically lists your name as it is listed on Google, and your email. Alert suggestions offer various subsections including companies, movies, and technology. To add new alerts on either of the last two sections, click on the "+" next to the topic. You can also add alerts by filling in the "Create an alert about…" box at the top of the screen.
You may have various email addresses or perhaps go by different names. Be sure to add an alert for each of these to get a broader picture of what's being said about you online.
Twitter Alert Setup
In recent months, Twitter has tweaked the service's notification tools considerably. These changes are ongoing and may be slightly different than the ones discussed here. To create alerts, visit Settings > Email notifications from your main Twitter page. Email notifications are on by default. Click "Turn off" to change this setting.
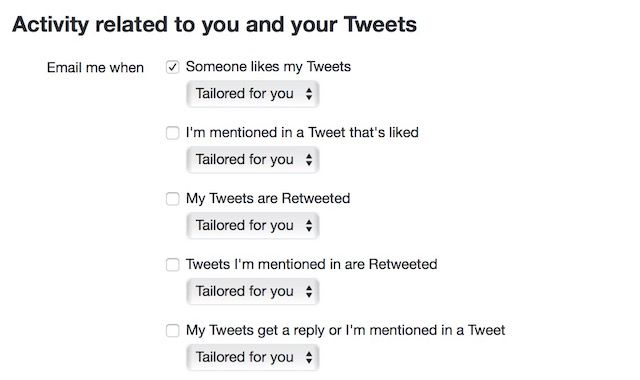
Twitter organizes the Email notifications screen into three sections: Activity related to you and your tweets, Activity related to your Retweets, and Activity from your network.
Options listed under each section are self-explanatory. For example, you would check the adjacent box to receive an email every time someone likes one of your tweets or you're mentioned in a tweet that's liked. Each option includes a toggle featuring two choices: "Tailored for you" and "By anyone."
"Tailored for you" is part of a larger feature on Twitter called "Tailored Suggestions." Think of this as the secret sauce or algorithm that the social network uses to customize the Twitter experience for each user. Based on your movements on Twitter, the service learns what interests you the most. In doing so, future content is "tailored for you."
In selecting "By anyone," this customization is turned off, at least when done on this screen.
Besides email notifications, Twitter also offers separate settings for mobile and web alerts. Locate these under Settings > Mobile and Settings > web notifications, respectively.
Facebook Settings
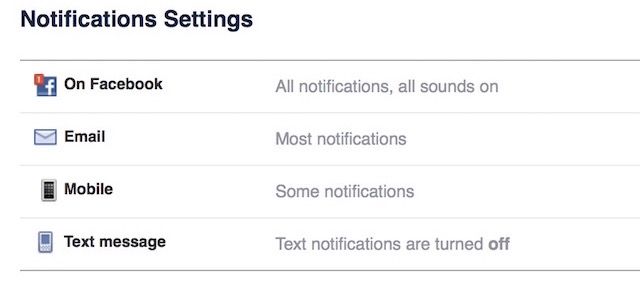
On Facebook, notifications are accessible from the main Settings page. From here, you will find settings for email, mobile, and text messages. These settings aren't as robust as the ones found on Twitter. These may change without notice.
Choices for email notifications include: all notifications; important notifications; and only notifications about your account, security and privacy. You can also turn notifications on/off for Pokes and upcoming birthdays from this screen.
About Those Lights
We've gone over how to receive alerts when someone is discussing you online through Google, Twitter, and Facebook. It's now time to receive alerts using the lights in your home.
For this exercise, you will need to have a Philips Hue system installed in your home. You'll also need to visit the IFTTT website or use the IF app on your iOS or Android-based device.
What is IFTTT?
Before getting started, it's important to summarize what IFTTT, or "If This Then That" can do. The free service allows everyday users to create chains of statements, called "recipes," which are triggered based on changes to other Web services such as Gmail, Facebook, Instagram, and Pinterest.
Create Your Recipe for Twitter or Facebook
In our examples, we're going to blink our lights every time we are mentioned on Twitter or Facebook. Keep in mind that other options are available, including the ability change the color of your lights each time there is a mention on either service.
From the main IF screen in the app, select the recipe icon at the top right of the screen, and then select the "+" button. Next, select "Create a Recipe."
In big letters, you'll see "If + Then +." Tap the first "+" and find Twitter or Facebook, depending on your preference. Under Choose a Trigger for Twitter, select "New Mention by you." For Facebook, the closest thing in IFTTT to a mention is "you are tagged in a photo." Select Next.
Next, select the second "+" in the "IF + Then +" formula and find Philips Hue. Under Choose an Action, select "Blink Lights." On the next screen, select the lights you'd like to blink every time you've been mentioned online. You can choose All lights or individual ones. Select Next and then Finish.
Follow These Steps for Google Alerts
To get Philips Hue to react to new Google Alerts, you must setup a recipe using a Gmail email account.
As you would with Twitter and Facebook, from the main IF screen, select the recipe icon at the top right of the screen, and then select the "+" button. Next, select "Create a Recipe." Tap the first "+" and find Gmail. Under Choose a Trigger, select "New email in inbox from." Here, add the email address googlealerts-noreply@google.com, then select Next. Select the second "+" in the "IF + Then +" formula and find Philips Hue. Choose the action you'd like to use.
This recipe is limited in that it includes all of your Google Alerts, not just the ones that mention you.
Don't have Philips Hue? There are plenty of alternatives; many of these also work with IFTTT.
The next time you want to know whether someone is talking about you, activate a Google Alert or keep track of what's going on through your Twitter or Facebook account. Better yet, put Philips Hue to work each time you receive an alert.
Do you know what people are saying about you online?
Image Credit: bright red police light by Jim Barber via Shutterstock

