You might use an administrator account for yourself on your PC, but maybe you don't trust other people with that kind of access.
Whether you want to keep an eye on your children's computer usage or need to simplify a computer for a loved one, blocking off parts of Windows is useful. Even if you lock your PC when you're not using it, the access that other user accounts have could be a problem.
Let's take a look at different ways to lock down user accounts in Windows 10.
Use Standard Accounts and UAC
The simplest way to restrict an account's permissions is to make it a standard account. These limited accounts can run software and change settings that don't affect other users, but they don't have total control.
For instance, a standard account can't install software, modify internet connection settings, or change the system time.
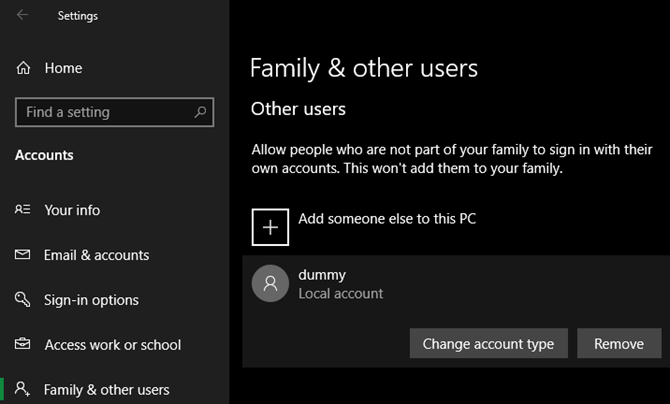
To change an account's permissions, visit Settings > Accounts.
On the Family & other users tab, click an account name under Other users, then hit the Change account type button. This lets you choose between Administrator and Standard User.
If you need to create a new account, click Add someone else to this PC. Walkthrough the steps to sign in with a Microsoft account (if you want) and when prompted for the account type, choose Standard User.
When discussing user accounts, you should be aware of User Account Control (UAC), a Windows feature that lets you run programs as an administrator only when needed. With a Standard account, UAC requires you to enter an administrator password to take admin actions, like installing software or changing system-wide settings.
Administrators, meanwhile, only need to confirm a prompt to do so. This means you should make sure to lock your computer when you aren't using it. Review our explanation of UAC and admin rights for more information.
Take Advantage of Microsoft's Family Group
Standard accounts are great when you don't want other people messing around with your PC's settings. But they don't account for the unique challenge of keeping kids safe when using a computer. For that, you should try Microsoft's "family group" feature in Windows 10.
To start, head back to Settings > Accounts > Family & other users. You can set up a new child account on your PC, but it's a bit easier if you click Manage family settings online to open the Microsoft Family Safety page. Sign in with your Microsoft account to continue.
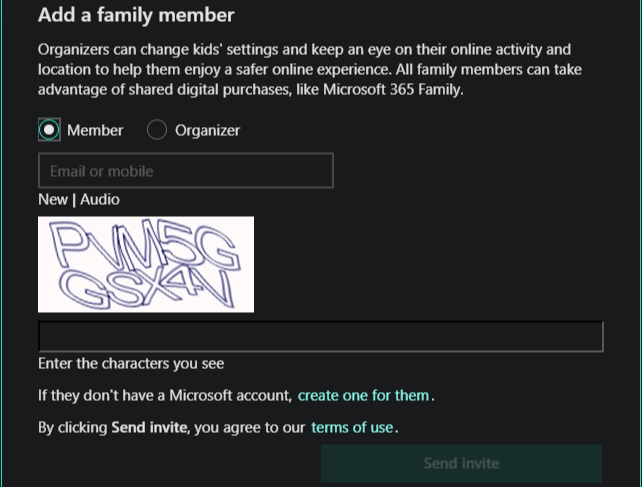
If this is your first time setting this up, click the Create a family group button. You'll then see a prompt to add a user to your family.
Select Member and enter the email address or mobile number tied to your child's Microsoft account. Complete the CAPTCHA, then click Send invite.
If your child doesn't have a Microsoft account, click the Create one for them link at the bottom. You can create a new Microsoft account using their existing email address, or make them a new @outlook.com account.
Your child will receive an email with an invitation to join your family group. They must accept this before the family settings will take effect, so make sure they do so. After they accept it and sign into the computer with their Microsoft account, you can start using the family group options for them.
While the family feature also lets you manage your children on Xbox One and Android, we'll focus on Windows 10 devices here.
Managing Your Family Group Members
Once your child's account is accepted into your family group, you can change various options about how their account works. Visit the Microsoft Family Management page to configure this.
There, you'll see each member of your family listed. Choose Activity under their name to see the apps your child has used, what websites they've visited, web searches they've performed, and their screen time.
Along the top, you'll see the following items to manage these:
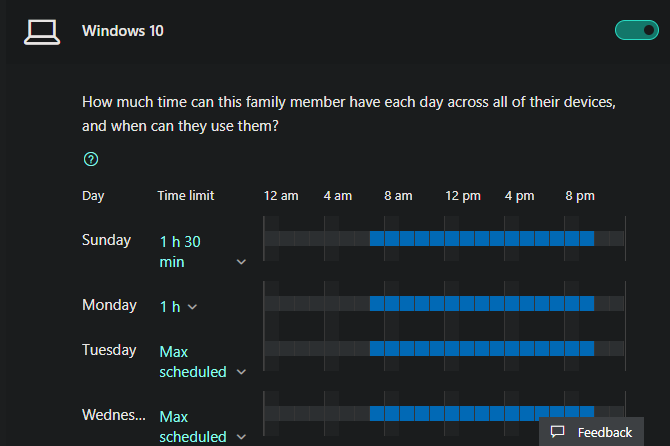
- Screen time: It allows you to choose how much time the person can spend on the computer, plus what hours are allowed for use. You can set a Time limit of anywhere from 30 minutes to 12 hours. It also lets you set limits for each day of the week. So for example, you could allow two hours of time on Fridays but only allow use from 7am to 10pm.
- App and game limits: If you'd like to get more specific with your limits, use this panel to select specific apps and/or games to restrict. You can see how often your children use apps on average, then use similar settings to the above menu to pick how much time they can spend and when they're allowed to use the apps.
-
Content restrictions: This page lets you choose your child's age to automatically allow content appropriate for their age group. For example, a 14-year-old will be able to watch PG-13 movies and play video games rated Teen or lower.
- You can also choose specific apps and games to always allow or always block, including alternative web browsers.
- Finally, you can block inappropriate websites in Microsoft Edge with a slider. Turning this on blocks other browsers, and you can always allow specific websites if you like. For more control, you can restrict access to only an approved list of sites.
- Spending: Here you can require your approval for the child to buy items in the Microsoft Store, as well as emailing you when they buy something. You can also put money in your child's account to allow them to buy content of their choice.
- Find your child: If your child has an Android device, you can install the Microsoft Launcher app to see where they are here.
Utilize Group Policy Tweaks
Group Policy is a tool in Pro editions of Windows that lets you control all sorts of account aspects. While it's intended for corporate use, you can make lots of awesome tweaks with Group Policy, too.
The required tool isn't officially available in Home versions of Windows, but you can use a workaround to install the Group Policy Editor on Windows Home to get it on those editions.
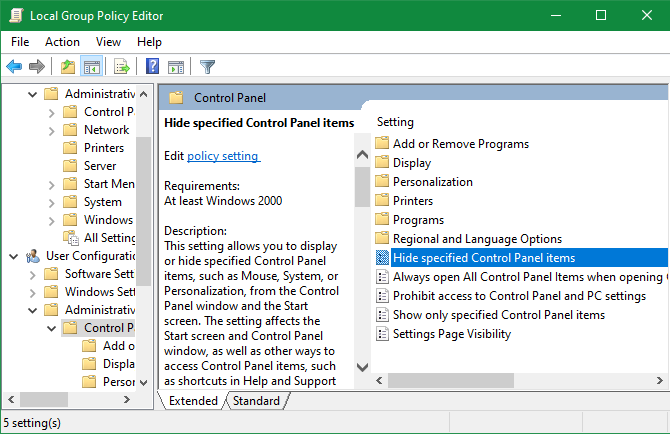
To access the Group Policy editor, press Win + R to open the Run dialog and type in gpedit.msc. Then you'll need to navigate to the item you want to change; double-click to change its status from Not Configured to Enabled or Disabled. Check out some of these tweaks to lock down Windows:
- Computer Configuration > Administrative Templates > Windows Components > Windows Installer and enable Turn off Windows Installer to prevent anyone from installing software.
- User Configuration > Administrative Templates > Control Panel, then use Hide specified Control Panel items to remove some entries, Show only specified Control Panel items to create a restricted list, or Prohibit access to Control Panel and PC settings to remove them entirely.
- User Configuration > Administrative Templates > System contains Prevent access to the command prompt and Prevent access to registry editing tools so savvy users can't use them as workarounds. Also, Don't run / Run only specified Windows applications lets you control what software the user can run.
- User Configuration > Administrative Templates > System > Ctrl + Alt + Del Options lets you remove the user's ability to change their password, open the Task Manager, log off, or lock the PC.
- User Configuration > Administrative Templates > Windows Components > File Explorer can Prevent access to drives from My Computer if you don't want an account poking around in the file system.
- Computer Configuration > Windows Settings > Security Settings > Account Policies > Password Policy holds several options that let you restrict passwords. Set Maximum password age to force users to change their passwords, and Minimum password length so people can't use short passwords. Password must meet complexity requirements forces passwords to contain at least six characters and contain a mix of letters, numbers, and symbols.
The Group Policy Editor supports many more tweaks, but the ones listed above let you lock down major Windows features.
Allow Microsoft Store Apps Only
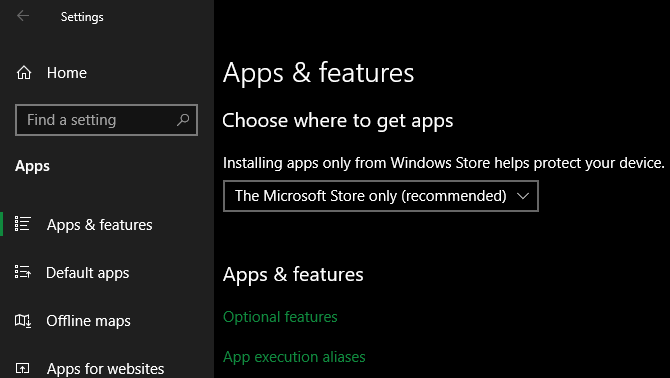
The majority of apps on your PC are probably from outside the Microsoft Store. However, if you'd like to lock down an account by blocking it from installing software, you can enable a setting in Windows to only allow software installs from the Microsoft Store.
You'll find this under Settings > Apps > Apps & features. At the top, change the dropdown box to The Microsoft Store only to prevent install of apps from other sources. Combined with the Group Policy edit above to block access to the Settings app, this should keep your PC free of unwanted software.
Compared to traditional desktop software, Store apps don't require as many permissions and are thus safer for your computer. Take a look at our comparison of Store and desktop apps for more info.
Try Lockdown Software Tools
If none of the above did the job for you, you might need to turn to software that locks down your Windows PC further. For another option, check out deep freeze tools, which reset your PC to a base snapshot every time you reboot.
FrontFace Lockdown
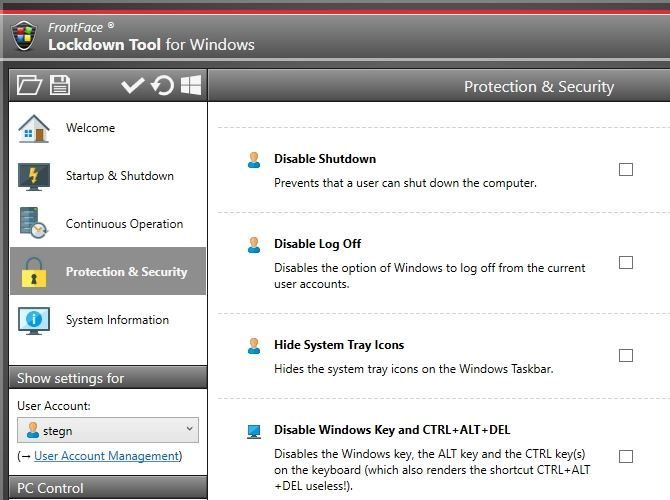
This app is meant to lock down a PC that's acting as a kiosk. Since it collects common lockdown options all in one place, you can still use it to secure your own PC.
The Welcome tab on the left lets you pick from two preset profiles: Digital Signage Player PC and Interactive Kiosk Terminal. They contain settings so you can leave a computer out on a table for the public and not worry about people messing with it.
If you'd rather customize these settings on your own, check the Startup & Shutdown, Continuous Operation, and Protection & Security tabs on the left.
You can set a program to automatically start when an account logs on, shut down the PC at a given time, disable access to the Task Manager, and even hide System Tray icons. Some of these changes will affect the entire machine, while others apply to only one user account.
FrontFace provides a great way to beef up a restricted profile, especially if you don't want to track down all the settings individually.
Download: FrontFace Lockdown (Free)
Install-Block
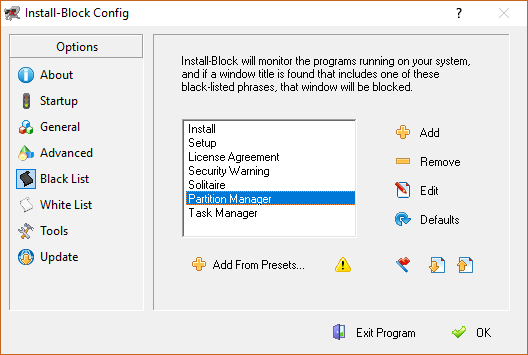
This tool lets you require a password to run apps that you specify. You can also choose keywords (like "install" and "setup"), then the app will auto-detect any windows that use those words and block them. It also lets you easily block certain Windows features, just like the Group Policy editor.
The app offers a free trial with a generic password, preventing it from offering any actual security. The full version is $19.95 if you decide it's worth buying.
Download: Install-Block (Free trial, $19.95)
How Do You Lock Down Your PC?
These options let you restrict your computer to pretty much any level you'd like. Whether you want to keep inexperienced users from installing software or want to protect your kids as they use a computer, you can do it with these tools.
The above tools should be enough in many cases. For more resources for parents, though, have a look at the best parental control apps for Windows.
Image Credits: Rawpixel.com/Shutterstock


