Love it or loathe it, everyone and their dog is on Facebook nowadays; so like anything that's popular in life, it has been utterly subverted by marketing types. One incredibly effective use of a Facebook hosted brand page is to incentivise people to like the page by creating some secret members-only content; commonly referred to as a "fan gate". This is filled with exclusive videos, downloads or perhaps a shopping coupon - we use one here at MakeUseOf to give our fans easy access to all the current competitions [Broken URL Removed].
This kind of basic Facebook app was relatively simple to create in the past, but Facebook now requires all page tab apps to have a secure version - an HTTPS access url - but that's another $100 a year on top of your existing hosting costs for your site. Even if you run a small e-commerce store, you might use PayPal as a payment provider and therefore have no need of SSL certificates. But worry not, as Facebook has also partnered with Heroku - a cloud hosting company - which means you can create your own basic Facebook app, and host it for free, on a secure server. Want to know more? Read on as I make a basic Facebook fan-gate page tab app, hosted for free, on Heroku.
Register as a Developer
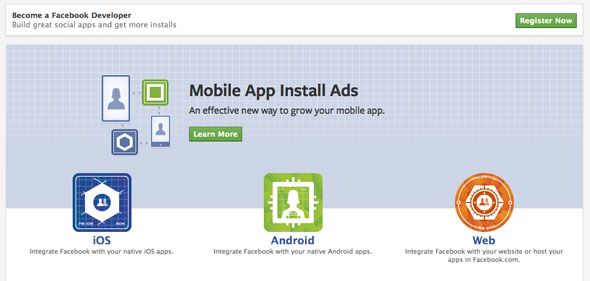
Before making any apps, you'll need to be a registered developer. Go to developers.facebook.com to get started, and click the green Register button on the top right if haven't already. You do need a phone number to register, but otherwise it's free.
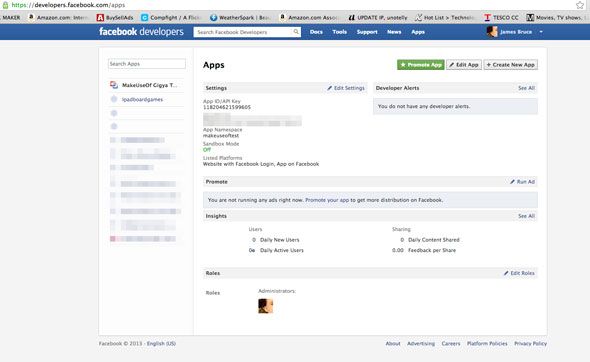
If you're already registered, great - click Apps on the top toolbar to get an overview of your current apps.
Create a new app
Here's where the fun starts. Click on Create New App. The naming doesn't really matter, but obviously choose something relevant. The namespace field will be appended to your fan page URL when the user clicks on that tab; you can leave it blank, but then they'll see the app ID in the URL instead, which is a little uglier. The namespace must also be unique, so don't even bother with something like "testapp" or you'll get an error. Finally, check the box that says you want free hosting from Heroku.
After filling in the captcha you'll be invited to choose the type of hosting you want from Heroku - select PHP, and accept. Facebook will automatically create a new account for you at Heroku if you don't already have one, and pre-populate the URL settings in your basics, which is nice of them. In fact, it's very hard to mess this step up.
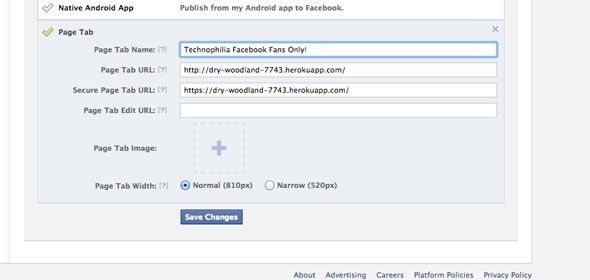
From the app details page, you would also want to set the type of app to be a "Page Tab", and ensure the relevant URLs are entered there too - again, this should be automatic. Then save.
Heroku First Steps
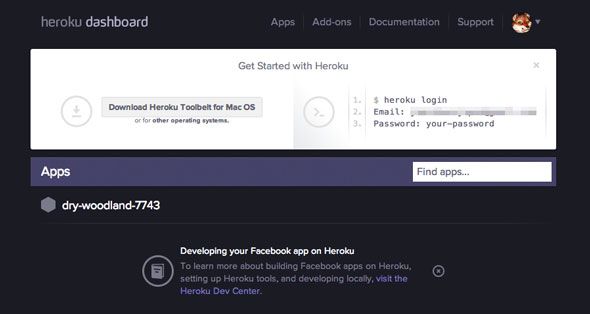
When completed, you'll get an email from Heroku with details of how to change your password, and download the Heroku "toolbelt" for your system. For those of you not familiar with Heroku, it's not a traditional host in the sense that you can login to an FTP address and upload files; instead Heroku works with Git, a version control system. Once you have the toolbelt installed, you first need to clone the site to your local drive - this gives you a directory that's a mirror of what's hosted on Heroku. Whenever you make changes to these files, you sync them all back again to update Heroku.
The instructions to do this first sync are contained within your welcome email, and it's a simple one-line command unique to your hosting address - just copy and paste from the email. Your hosting URL is completely arbitrary - in my case it was dry-woodland-7743 - it's randomly generated and doesn't matter at all because users won't see it. Open up the newly created directory, and take a look around.
Heroku has put in quite a lot of functionality, but we don't need most of it. Open up index.php and take a look around. Find the following lines near the start of the file:
$facebook = new Facebook(array(

             'appId' => AppInfo::appID(),

             'secret' => AppInfo::appSecret(),

             'sharedSession' => true,

             'trustForwarded' => true,

            ));
and immediately after that, copy in these:
$signed_request = $facebook->getSignedRequest();

            $liked = $signed_request['page']['liked'];
Don't worry if this is all too complicated for you - I'll give you a finished template soon. A signed request is sent to your app from Facebook which includes some information about the user - whether they have admin access and whether they have liked the page or not. If you want to know precisely what is sent, add the following:
print_r($signed_request);
and you'll get a full printout of the signed request object.
At this point, I should admit that I was having real trouble getting the signed request working - it appeared that Heroku was stripping the data on page load, and it was only after loading the JS API (a good 10 second after the initial page load) that the page would refresh and indicate the correct "liked" status. Thanks to this Stack Overflow question, the solution appeared to be stripping out the code that enforces HTTPS for unsecured users. Delete the following block of code at the start of the template:
// Enforce https on production

            if (substr(AppInfo::getUrl(), 0, 8) != 'https://' && $_SERVER['REMOTE_ADDR'] != '127.0.0.1') {

             header('Location: https://'. $_SERVER['HTTP_HOST'] . $_SERVER['REQUEST_URI']);

             exit();

            }
Now, when the page is loaded, you have a Boolean variable - that's a true or a false - which tells you whether the user has liked the page or not. You can use this with a simple if statement to show either content a or b:
<?php

             if( $liked ):

             echo('fan');

             //this is your secret content

             else :

             echo('not a fan ') ;

             //this is shown to potential fans

             endif;

            ?>
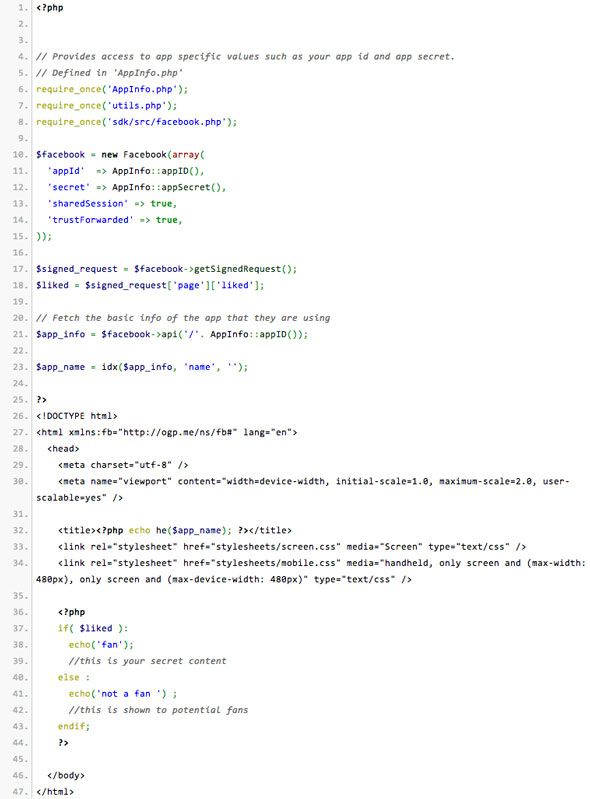
Place that just after the opening <body> tag in index.php. Now, if you've previewed your page on Heroku, you'll notice it has an awful lot of additional functionalities, showing pages you've liked, buttons to post updates etc - we don't need any of that really, so I stripped it all out including the JavaScript SDK for Facebook, leaving only the CSS and our fan-gate. Here's the stripped down code I ended up using (this is an image - copy paste from PasteBin if you wish):
You should edit the sections that say "not a fan" and "fan" to contain your default and secret content respectively. If you prefer to keep your content in a separate file, use:
include("secret.html");
to import external files.
Sync With Heroku
Once you've made all the necessary edits to your file, you need to sync back up with Heroku - we do this by "pushing" our local copy to the "master branch" at Heroku. Making sure you're in the correct directory from the command line, type:
git commit -am "changes messages"
(you can replace changes message with a note to yourself of what changes you actually made this time - it's good practice to keep these records)
and then
git push heroku master
Wait for the command to finish, as it may take a while.
Final Step: Add the App To Your Page
Now that the app is built, we need to actually add it as a tab to your brand page. Curiously, this is done using a specially crafted URL:
https://www.facebook.com/dialog/pagetab?app_id=YOUR_APP_ID&redirect_uri=YOUR_APP_URL_ON_HEROKU
Replace YOUR_APP_ID with the ID listed on your app details, and YOUR_APP_URL_ON_HEROKU with the URL for your Heroku hosting. Loading this special URL will then initiate the "add to your page" dialog, from which you can select the right brand page to add your page tab to.
Then hey presto - it'll be a new button on your page, like this:
As you can see, we haven't specified an image for the tab yet so it's left as default - you can do this from your app details page. That's basically it though; if you load that tab, my replacement index.php will either show you as a fan or a not fan. Or whatever you customized it to show:
I'll admit - this process was harder than I expected, but it does completely avoid the need to host anything on your own server or get SSL-certified. If you have any questions or issues, ask away in the comments and I'll try to help out. If the comments are closed, head on over to our Answers site; and please, if you found this tutorial helpful, do share it on your favourite social network. Also, you'll probably want to check out our free, complete guide to social media marketing, and consider adding Pinterest to your strategy too.


