You need a media center solution, and you've heard about Kodi. Is it suitable, and can you install it on your Raspberry Pi? And once you've done that, how do you turn it into a world-beating home media center? We'll show you how.
You won't need much to get started with your Kodi and Raspberry Pi media center. But if you'd like to enhance the experience, there are a few things you can add to the basic setup.
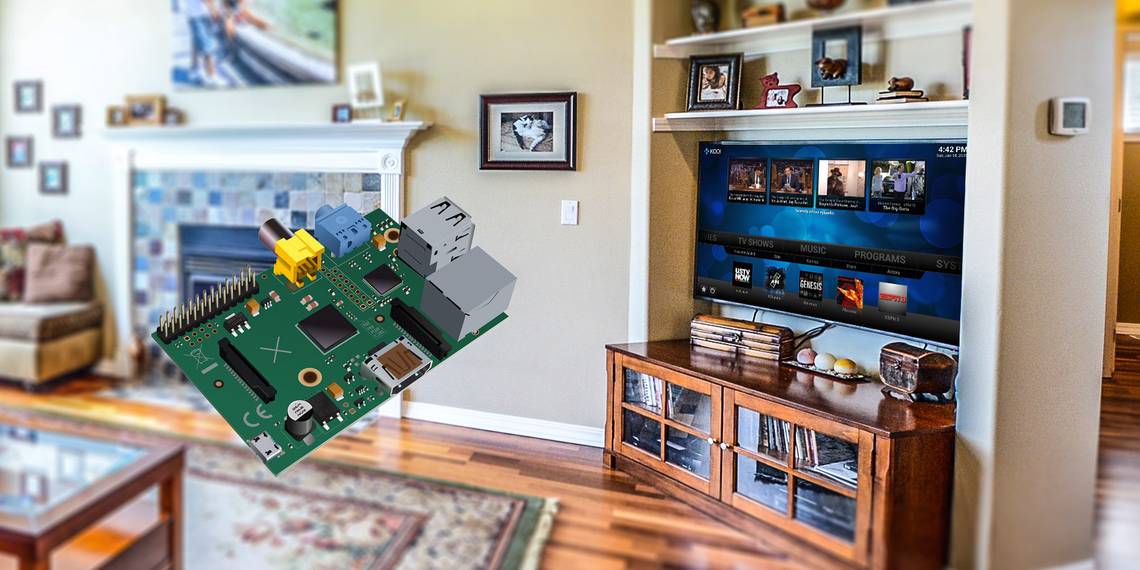
Raspberry Pi Media Center: Basic Setup
You might already have a Raspberry Pi. Alternatively, you might be about to buy one. At a minimum, you'll need:
- Raspberry Pi Model B+ or later (we recommend a Raspberry Pi 3B+).
- Optional USB Wi-Fi dongle for pre-Raspberry Pi B+ or 2.
- HDMI cable.
- 2A USB power adaptor, or specific Raspberry Pi power supply.
- MicroSD card (8 GB or more recommended).
As long as you have a PC to download your preferred operating system and write to the microSD card, you should be ready to go.
Advanced Setup for a Raspberry Pi 3 B+ Media Center
There have been many iterations of the Pi since its 2012 launch, but to enjoy superior performance from Kodi, OSMC, or OpenElec, use the most recent model, the Raspberry Pi 3B+.
For a standard setup, relying on the microSD card is fine. However, if you plan to use the Raspberry Pi as your Kodi system long-term, then a more reliable storage solution is needed. The Raspberry Pi supports USB storage, which you can use for your own library as well as downloaded media.
Connecting a USB HDD to your Raspberry Pi for Kodi is a smart idea. Keep reading for more on this, and some other advanced hardware options.
How to Install Kodi on Your Raspberry Pi
Two options are available for installing Kodi on your Pi.

Standard Kodi Install
If you're running Raspbian Jessie on your Raspberry Pi (or any of the many other Raspberry Pi-compatible Linux operating systems) you can manually install Kodi with ease via the command line.
With your Raspberry Pi already set up, simply open a terminal window and enter:
sudo apt-get install kodi
Once this is done, you'll need to make a config file edit to ensure that the media center software automatically loads whenever you boot your Raspberry Pi.
sudo nano /etc/default/kodi
Change the ENABLED setting to 1:
ENABLED=1
Press Ctrl + Z to exit, making sure you save the change.
Otherwise, you can run Kodi with a mouse click from the desktop, or with a single command in the terminal:
kodi
You're good to go!
Install a Kodi Operating System on Your Raspberry Pi
More preferable, however, might be the option to have a dedicated Raspberry Pi running an already-optimized version of Kodi. This way, it will automatically boot into the media center software without any fiddling around with text files.
You have three main options here: LibreELEC, OpenElec and OSMC.

To use OpenElec, you can either download the operating system from openelec.tv [Broken URL Removed] or use the NOOBS software to select it from a list (see below). OSMC can also be installed via NOOBS, or you can download it from osmc.tv.
For LibreELEC, head to libreelec.tv.
Manual installation will require you to first format your microSD card, then copy the unzipped download to the card using dedicated SD card writing software.
The best option for this is Etcher, which you can download from etcher.io. This is available for Windows, macOS, and Linux, and is the easiest flash memory writing tool, suitable for SD cards and USB thumb drives.

Once installed, launch Etcher, making sure the microSD card is inserted into your computer's card reader. Click Select image to browse for the OpenElec or OSMC image file, then confirm the correct drive letter is displayed under Select drive. Finally, click Flash to commence writing.
Etcher will display a message when the IMG file has been written, and the data checked.
Your SD card can then be removed and inserted into your Raspberry Pi. Next time you boot, Kodi will be ready to use!
See our guides to installing a Raspberry Pi OS with NOOBS or installing a Raspberry Pi OS to a microSD card for more details on the process if you get stuck.
Remote Control
Having a USB keyboard to hand is always good idea, as you can just plug it in and navigate the Kodi user interface. Most of these Kodi keyboard shortcuts should work on the Raspberry Pi. If you're using a Raspberry Pi 3 with built in Bluetooth, or have a compatible Bluetooth USB dongle for the device, a Bluetooth keyboard will also be useful.
You have another choice though: several mobile apps are available for iOS and Android, which can control your media center over the network. We'd recommend those produced by Kodi on either platform. On iOS look for Official Kodi Remote in the App Store, whereas on Android find Kore by the XBMC Foundation.

Once installed, these apps will auto-detect your Kodi installation if they're connected to the same home network as your Raspberry Pi.
You also have various options for additional hardware that you can add to your Raspberry Pi Kodi media center. These include adding a sound module, or even an IR receiver for use with a physical remote control.
Supercharge Your Raspberry Pi Kodi Media Center
At this point, you've got everything you need to enjoy your Kodi media center. But you can take things further. With the right hardware and peripherals, you can make your compact Raspberry Pi media center the envy of your friends and family.
Use Ethernet, Not Wi-Fi
We've recommended using the Raspberry Pi 3, but this is really for performance reasons rather than anything else. As the Raspberry Pi 3 ships with a built-in wireless dongle (and Bluetooth too) you might be tempted to use this.
If your Pi is situated close the router, and you have a strong signal, then this should be OK, but for the best results---particularly when streaming HD content---you should be relying on an Ethernet cable.
This might mean using powerline adapters, but the important thing here is to get the best possible picture and sound quality, so use whatever works.
High-Quality Sound for Kodi
To accompany your Raspberry Pi 3-based Kodi home theater, it's a good idea to consider some audio improvements.
By default, you'll get sound via HDMI, and this should be fine. After all, most TVs have reasonably good audio. But if you want enhanced audio, perhaps output through a soundbar, then you'll need an external sound module.
Various USB-compatible options are available but on the whole, these are unreliable or inconsistent. Instead, you should look at the Full-HD PCM5122 Amplifier X400 Expansion Board.
IR Remote
We mentioned above how a remote control mobile app can be with any Kodi device, but if you're more inclined towards dedicated remote hardware, you'll need an IR receiver on your Raspberry Pi.
Several of these are available, either USB or something that connects directly to the Raspberry Pi board. They all ship with a remote control included, enabling you to easily navigate your Kodi home theater. Note that for regular searches and adding third party repositories, however, you'll need something with a keyboard or at least a keypad.
Find a Compatible Hard Disk Drive
For extended storage, a hard disk drive is vital. A standard 8GB microSD card will quickly run out of space if used for storing media. Meanwhile, a 64GB (or larger) card cannot be expected to work indefinitely.
While modern SD storage is far more reliable (thanks to better error correction), it is safer to rely on a HDD. Most USB hard disk devices can be connected to a Raspberry Pi, although whatever you use will need its own power supply.
You can even hook up a SATA drive to your Raspberry Pi using a storage expansion board.
Only Install the Add-Ons You Need
Finally, you need to be aware of the add-ons that are available for Kodi, and which ones you'll use. With such a vast selection of add-ons to choose from (official and third-party) you should stick to a narrow collection of options. The more add-ons you choose from, the more will need updating, and this will slow down your Kodi experience.

Along with popular services like YouTube, Hulu, Spotify, and BBC iPlayer, it's even possible to install Amazon Video, Plex, and Netflix.
Niche add-ons can be found too: TED Talks, specific YouTube channels, podcasts and far more can be found in the add-on repository. It's best to research what you want first, lest you end up spending too much time browsing the endless lists.
Build Your Own Raspberry Pi Home Theater Today
We won't pretend that putting this together is easy, but it is certainly straightforward and achievable within an hour. Once Kodi is setup in your living room or bedroom, you'll be able to enjoy the vast selection of add-ons provided for your entertainment, and with a few hardware enhancements, your little Raspberry Pi will be able to produce results comparable to media center hardware costing ten times the price! And for more tips, check out other ways to build an affordable home theater.
Want more from your Raspberry Pi Media Center? Why not add RetroPie or RecalBox for some retro gaming fun?