What's the best way to game on a Mac?
As an Apple gamer, you've probably heard this joke before, as your PC gaming friend sends you an image of him playing Counter-Strike on his PC while he uses a MacBook as a mousepad.
Nevertheless, Apple products have some of the most powerful hardware available. With a little tweaking, and some hardware upgrades, you'll be able to provide your snickering friend with an informed answer next time he tries to troll you.
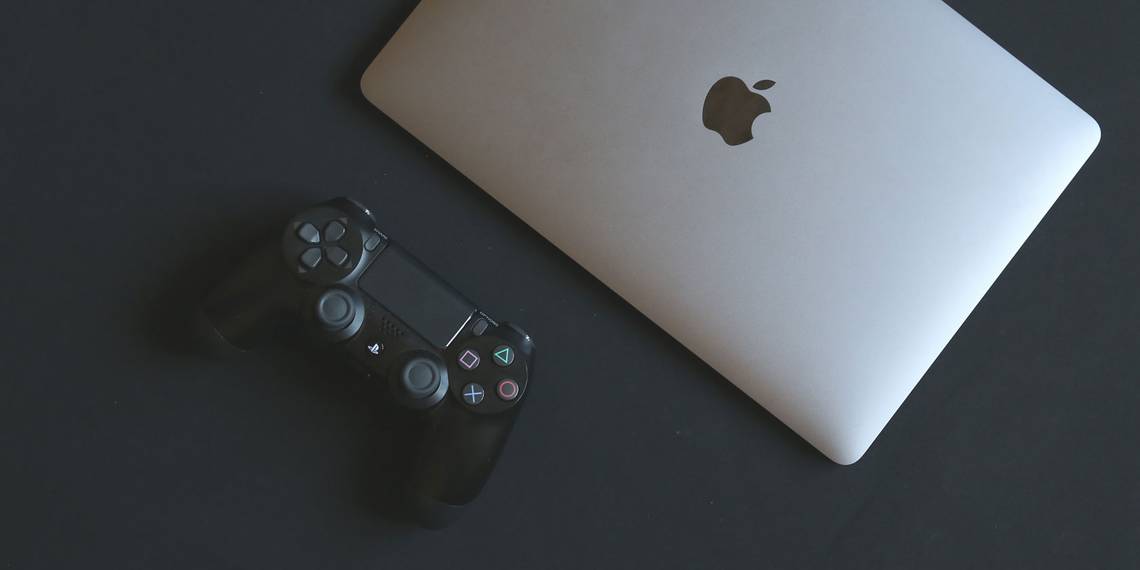
1. Get a Controller
Your Mac can use all sorts of controllers, whether wired or wireless, as well as official console controllers or generic options. Of course, for some genres (like shooters and strategy games) a mouse and keyboard is far superior. But a controller is much more suitable for platformers or racing games.
If you already own a game console, there's a good chance that you can pair its controller to your Mac:
- PlayStation 4: Use Bluetooth to pair your DualShock 4 to your Mac, or just connect it with a USB cable.
- Nintendo Switch: Nintendo's Joy-Con and the Pro Controller also work over Bluetooth. First shut down your Switch to stop it from connecting to the controller. Then simply hold down the black pairing button on the side of the Joy-Con (the part that clicks into the Switch) until the green lights start flashing. For a Pro Controller, you'll find the pairing button on top of the controller by the charging port. On your Mac, go to System Preferences > Bluetooth, find the controller, and hit Connect.
- Xbox: Unfortunately for Xbox users, because of Microsoft's proprietary controller interface, you'll need special software to connect your controller. There's no easy way to connect it wirelessly, but installing an app called 360Controller will let you connect it via a USB cable.
If you don't own a controller already and are interested in a third-party device, the Steam Controller from Valve is a great option. The setup is straightforward, and is easiest when done through the Steam platform.
2. Use an eGPU
If your Mac is compatible with the Thunderbolt 3 standard, you might look at investing in an eGPU, or External Graphics Processing Unit. This is another graphics card, in addition to your internal video processor, that sites in a chassis outside your computer and amps up your graphics power.

eGPU acceleration can greatly increase the performance of your games and allow you to use certain external monitors with your machine. It also enables you to use powerful graphics-related accessories such as VR headsets.
In order to use an eGPU, your Mac must have Thunderbolt 3 and be running macOS High Sierra 10.13.4 or later. It's a costly endeavor, but we've taken a look at some great eGPU choices for your MacBook if you'd like to give it a try.
Note that while Thunderbolt 3 uses USB-C, not every USB-C port is Thunderbolt-compatible. Additionally, some apps require you to have an external monitor attached directly to the eGPU chassis in order to utilize eGPU acceleration.
If you have macOS Mojave 10.14 or later, you can select exactly which apps you want to utilize your eGPU's power. To do this, click on the app once to select it, then hit Cmd + I to show its information window.
If the app doesn't self-manage its GPU selection, you will see a checkbox that says Prefer External GPU, which you can select to prioritize your eGPU's power.
Other Hardware Ideas
If your Mac is not compatible with Thunderbolt 3, you might still be able to upgrade it in other ways. A good place to start is seeing if you can increase your RAM. Take your machine to your local Apple Store and ask if its RAM is upgradeable.
Most modern MacBooks have the memory soldered to the logic board, so they aren't upgradeable. But it's worth a shot if you have an older computer.
3. Use Different Game Clients
You can have the most powerful gaming rig this side of E3, but it won't do squat without games. Make sure you're getting the best deals so you can play more for less.
The most obvious place to look first is the Mac App Store, which has a whole sidebar tab for games labeled Play.

The selection is not bad, it's constantly updated, and Apple has recently worked on cultivating and displaying more indie titles. Despite this, you may want to avoid buying games on the Mac App Store due to its relative lack of gaming discounts compared to other platforms.
As you probably know, the biggest library of Mac-compatible games by far is on Steam, Valve's gaming marketplace. You just need to download the Steam desktop app, create a free account, and you're in.
Unlike the Mac App Store, Steam has sales year-round. There are two in particular you should look out for: one around the holidays and one in the summer. Steam's interface is also easy to use---it displays an Apple logo on all Mac-compatible games, and you can even browse the macOS section of Steam to filter by OS.
Humble Bundle is another site that allows you to purchase games at a discount, with some of the proceeds going to charity.
Additionally, Blizzard's Battle.net platform is Mac-compatible, which runs games such as World of Warcraft and Diablo III. EA's platform Origin is also available for Mac, but its selection of compatible games is limited.
4. Tweak Your Software
Now that you've got your hardware set up, you're almost ready to play. Just take a few moments to optimize your macOS settings for gaming.
Check Your Hard Drive Space
It's important to make sure you have enough free space to install and run your games. A lack of free space can hinder performance. You can check this easily by click the Apple Logo in the top-left corner of the screen, then choosing About This Mac > Storage.
Activity Monitor
Use this program to get a quick look at every process that's running on your Mac. Quit anything that you're not actively using so you get every last bit of processing juice. To quit an app, select a running process and hit the icon that looks like a stop sign with an x inside, in the top-left corner.
Activity Monitor will also tell you which internal graphics system your machine is utilizing: the high-performance discrete GPU or the integrated GPU. You should prioritize quitting any apps that are using the high-performance GPU.

Disable Login Items
Certain needy apps assume you want them to launch every time you log in (we're looking at you, Spotify). Turn these memory-suckers off by going to System Preferences > Users & Groups > Login Items, selecting them, and hitting the Minus button in the corner.
This way, you won't have to manually close them all the time.
Graphics
As referenced above, many Macs actually have two graphics systems installed, one for better performance and the other for better battery life. You can tell your Mac to prioritize the graphics system that performs better: the discrete GPU.
Go to System Preferences > Energy Saver and turn off Automatic Graphics Switching. This can increase performance, but at the cost of your battery life.

If you have an external monitor, you can also set that as your primary display. Under System Preferences > Displays > Arrangement, you'll see your monitors represented by blue boxes. One of those blue boxes will have a white bar at the top.
Drag the white bar to whichever blue box represents the monitor you want to make your primary monitor. By default, all applications will now launch on this monitor.
5. Adjust Graphics Settings In-Game
Now that you've optimized your macOS graphics settings, you should make sure they're are also optimized in-game.
These settings will be different for every game you play, but here are some good general tips:
- Play around with the screen resolution settings in your game. You want it to run fast without sacrificing your graphics or frame rate too much. Also test out the differences between running the game in full-screen and windowed modes.
- There may also be some presets for Low, Medium or High graphics. You can toggle these based on the relative power of your graphics card
- If your game is still struggling to perform, you can try selecting its icon in Finder, hitting Cmd + I, and selecting Open in Low Resolution. Your graphics will suffer, but speed should improve.
Before purchasing, you should always check the system requirements of a game to make sure that your Mac is up to snuff. If your system doesn't meet the requirements, you're better off avoiding it.
6. Use Boot Camp to Run Windows
Despite having the same (if not better) hardware capabilities as a high-end PC, the Mac platform lags far behind in available software titles. Fortunately, Boot Camp lets you install Windows right on your Mac. We have a complete guide to using Boot Camp to install Windows on your Mac. Boot it up, install Steam, and get gaming!
Of course, taking this road negates almost all the above advice in this article, but sometimes you just have to play Overwatch.
Better Mac Gaming Performance in No Time
As you can see, being a Mac user and being a gamer aren't mutually exclusive. Armed with these tips, you'll be playing games at lightning-fast speeds on your glorious Retina screen in no time.
If you need some suggestions on games to play, check out awesome Mac games that cost under $20.