Did you buy an HP TouchPad when they were insanely cheap last year, but never really get around to finding out what it can do? This User's Guide To HP TouchPad outlines everything your tablet can do. Don't miss it!
Developed by HP as a competitor to Apple’s iPad, the HP TouchPad is a tablet computer with a 9.7 inch screen, storage totalling 16 GB, 32 GB or, in rare cases, 64 GB, that can connect to wireless networks and be used for all manner of tasks: browsing the web, checking email, playing games, word processing, reading books and much more.
Featuring the webOS operating system, the TouchPad offers a user interface that is polished, attractive and–most importantly–easy to use.
Table of Contents
§1–Intro: What is a HP TouchPad?
§3–Getting Started with the HP TouchPad
§7–Searching with Your HP TouchPad
§9–Accessories for Your TouchPad
§10–Useful HP TouchPad Settings
§11–TouchPad Maintenance and Settings
§12–Conclusion: Have Fun With Your TouchPad!
1. Intro: What is a HP TouchPad?
Developed by HP as a competitor to Apple’s iPad, the HP TouchPad is a tablet computer with a 9.7 inch screen, storage totalling 16 GB, 32 GB or, in rare cases, 64 GB, that can connect to wireless networks and be used for all manner of tasks: browsing the web, checking email, playing games, word processing, reading books and much more.
Featuring the webOS operating system, the TouchPad offers a user interface that is polished, attractive and – most importantly – easy to use.
Released in mid-2011, the TouchPad has had a chequered history already: it was cancelled and reborn, and then sold for a very low price (as low as $99 in some stores!). This shouldn’t distract your attention from the fact that this is a competent piece of hardware, at least every bit as good as the Android tablets released around the same time.
1.1 How Does it Differ from an iPad?
There are many ways in which the TouchPad differs from the iPad. Naturally, of course, there are similarities.
Both devices feature a single hardware button for interacting with applications and menus, with the majority of other functions (volume aside) courtesy of software buttons displayed on the 1024x768 TFT LCD display. Like the iPad, the display features a capacitive multi-touch interface allowing the use of more than one finger at a time, and both devices have 1 GB of RAM.

The differences come mainly in the operating system and some of the hardware. Current versions of the iPad have a HD display, front and rear-facing cameras and a quad-core graphics processor alongside the dual-core central processor. The TouchPad – very much a creation of 2011 – has a single 1.2 GHz (1.5 GHz in the white models) dual-core CPU.
More specifically, while both types of tablet computer have some very similar uses, the Apple iPad has the benefit of the huge App Store which – as of February 2012 – offers over 725,000 apps. By contrast, the TouchPad has native access to just 10,000 apps, as of December 2011.
1.2 Different TouchPad Models
While the majority of users probably own the standard, black, 16 GB TouchPad, there are in fact several others. The majority of TouchPad tablets come with only Wi-Fi connectivity, which means that you will need to use a mobile phone with wireless tethering or find a Wi-Fi hub to connect to while you’re out and about.
However, there are some (rare) HP TouchPads with 3G connectivity. Rarer still are models with 4G, which are believed to have been shipped only to HP employees. Such versions may appear on eBay from time to time.
The standard TouchPads available are:
- Black, 1.2 GHz, 16 GB, Wi-Fi
- Black, 1.2 GHz, 32 GB, Wi-Fi
- White, 1.5 GHz, 64 GB, Wi-Fi
1.3 The Future of the HP TouchPad
In the run up to Christmas, the TouchPad was the third biggest selling tablet computer after the iPad and the Amazon Kindle Fire. Not bad for a device that was consigned to history a few weeks after launch.
WebOS’ history has been surprisingly chequered, of course. Developed by Palm, the initial webOS mobile phones were not well-received, resulting in Palm being purchased by HP. Given that Palm and HP were once rivals in the handheld computer market, this was something of an ignominious capitulation.
In truth, you shouldn’t be concerned about HP’s inability to decide upon a strategy for this device. The company has made several curious decisions over the past few years but their fire sale tactic of shifting all of their TouchPad stock was so successful that they had to build more.
This indicates a strong following for the device, and with the webOS platform set to be made open source by HP during 2012, the direction for the device and its operating system can be decided upon by enthusiasts and experts.
The hardware itself is likely to be suitable for use up to five years, meaning that you can be confident that this tablet computer will do everything that you need it to do.
2. Understanding WebOS
Getting to grips with any new operating system can be tricky, but fortunately webOS is so fiendishly simple to use that you probably won’t have any problems using it at all.
While the issue of creating the optimum touch-based user interface was thought to have been completely solved with iOS or Android Ice Cream Sandwich, the truth is that there are many ways in which a comfortable UI can be presented. The Metro UI of Windows Phone and Windows 8 is another way, the version of BlackBerry seen on the PlayBook is another.
For many people, webOS is perhaps the ultimate alternative to iOS – offering a pleasingly smooth, polished experience with a logical, intuitive interface. The webOS development team have kept things very simple, resulting in just a few gestures and regular commands for you to learn.
2.1 Easy to Use Interface

WebOS’ easy-to-use interface is based on “cards”, a system whereby each running application can be switched to run in the background to allow multitasking. Menus are minimal in webOS applications, while multitasking makes it possible to switch between 10 cards.
The standard method of interfacing with any touchscreen device is with taps, swipes and pinch-to-zoom gestures – the TouchPad is no different. Similarly, you can enter text with either an external keyboard or the software keyboard, which is displayed whenever a text field is tapped.
Users of webOS will find that the copy and paste system very simple to use, even displaying confirmation that the selected text has been copied to the clipboard.
2.2 Finding Your Way Around the TouchPad
When held in portrait mode, the Touchpad has a small lozenge-shaped button below the screen.
This is the most important button on the device: the Home button. Using this you can switch between apps, close menus and return to the Home screen. It can even be employed when you need to restart your tablet.
Beneath this you will find the USB port in the side of the case. This is a micro-USB port, which can be used for charging or swapping data between your TouchPad and your computer.
On the left edge of the HP TouchPad you will find two speaker grilles. On the top edge the headphone jack and power button are located. Beneath these – mounted on the front of the tablet above the display – is the camera.
Finally: the volume rocker is on the right-hand side.
Note that the 360 degree screen orientation of the HP TouchPad is such that any of these controls might be in a different position, depending on how you’re holding the device!
2.3 Swipes, Taps and Zooms
The basic controls for the TouchPad are very simple.
To select an app that you wish to launch, to activate a control and to interact with dialogue boxes (such as the shut-down menu) all you need to do is tap the screen. You will notice that there is a useful ripple effect – like a pebble dropping into a pond – indicating where you have tapped your TouchPad’s screen.
Moving between different cards (see below) and unlocking your TouchPad is made possible by swiping your finger across the screen. Note that dirty fingers will leave marks on the touchscreen – make sure you wash your hands before use if you’ve been playing in the mud!
Zooming into a web page, document or image is a simple matter of using your thumb and forefinger to alter the magnification. Pinch your fingers together to zoom out, and spread them apart to zoom in – you can practice this in the Photos & Videos screen (accessed via the Launcher), where you will by default find some images in the Wallpapers menu. Open one of these and then use the pinch gesture to zoom in and out. Once zoomed in, you can use your finger to drag the image around with a gesture that is part tap, part swipe.
One last tip: although the Home button will take you back to the standard HP TouchPad view, you can also use a swipe up motion with your finger from the lower frame of the device, finishing about an inch into the corner of the screen. (This is considered an “advanced gesture” and can be enabled/disabled on the Screen & Lock settings, accessed via the Launcher.)
2.4 Cards, Menus and Multitasking

You can get started with the TouchPad by selecting one of the shortcut icons across the bottom of the screen. The most obvious is that in the lower-left corner, which launches the tablet’s web browser.
This will open to display a search bar and keyboard – all you need to do to browse is enter a URL or search term. Don’t want to browse the web? Tap the Home button (which is now illuminated) to shrink the browser window back to the desktop.
As a card, tap the browser window to return to normal size or you can launch another app, either via the shortcut menu or by opening the Launcher (use the arrow in the lower-right corner).
From here you can launch another app – perhaps the Calculator this time. Once again the app will display in full screen mode, and while you cannot have multiple apps on screen together you can run several at the same time. Tap the Home button to display the Calculator in card mode; you should see the Browser in card mode, and you will be able to swipe the screen to switch between them.
You can stack cards, which would be great for developing a workflow. Rather than scattering your currently open apps across the home screen, you can tap and drag a card to group it with another, thereby “stacking” the apps. You might group the Calculator and Browser together, for instance. Sometimes groups are created automatically – for example, links clicked from the Email client will automatically group a new Browser window with the email message. This offers a very useful means of managing your work!
You will notice that when an app is open, its name is displayed in the top-left corner of the screen. This is also how you would access that application’s menu. Tap this to display what options are available – in the Browser, for instance, you will be able to access your web preferences.
Closing an app is easy: press the Home button to see the app in card view, then swipe the card upward so it flies off the screen.
2.5 Using the Keyboard
Whenever you need to enter text your TouchPad will display the keyboard. This is done when you tap into the text field of an app or web page, for instance, or when you launch email or use the messaging tools.

You will notice on the Home screen that there is a Search bar. We will deal with this in more detail later in the guide, but for now you can tap your finger on the “Just type...” text and the keyboard will appear.
A standard QWERTY keyboard layout is displayed, with text in lower case and some additional symbols “greyed” out; these can be accessed by tapping and holding a key. The Shift key will display upper case characters as well as activate the greyed symbols. Note that when typing every time you start a new sentence an upper case character will be displayed by default.
With the Tab button you can switch between text fields on the form you are completing. Another button you should be aware of is the symbol button to the left of the keyboard, which you can use to add smileys and symbols not dealt with on the primary keyboard screen.
Spelling errors are auto-corrected by default. This option can be altered by opening Launcher > Settings > Text Assist, where you will find additional options for auto-capitalization and more.
Spell check will display a line of red squares beneath the queried text. You can tap this to display alternative spelling options, useful if you are prone to the occasional mistype. If you’re unhappy with an auto-corrected spelling, you can tap the backspace key to revert to what you typed.
To close the keyboard, use the button in the lower-right corner.
However, you might wish to resize the keyboard. Do this by tapping and holding the close keyboard button – a selection of four options, XS, S, M and L will be displayed, each representing different keyboard layout sizes. Test all of these to decide which you are most comfortable with.
2.6 Select, Copy & Paste
As with any computer operating system, you will need to copy and paste text from time to time. This might be to capture text from a web page and save it to a document, or it might be something more complicated.
Fortunately, webOS makes it easy on the TouchPad.

We’ll use the example of a web page – open the Browser and find a site that you visit regularly. Once the page loads, find some text. You might want to use the pinch gesture to zoom in for this next step.
Tap and hold a single word – you will see the characters highlighted in yellow with arrows at either end, while a small context menu with the words Select, Select All and Copy appears. If you’re happy with the single word, tap Copy; if you would rather copy more words, use the arrows to increase the selection.
When you use the Copy button, the legend “Selection Copied” will appear across the top of your HP TouchPad display. You will then be able to paste this content into another app. We can quickly test this using the search field. Tap into the search box and then tap and hold. This will display another context menu, with the options Select, Select All and Paste. Use the last option to paste the text into the field.
Copy and paste can be used across all apps on the HP TouchPad.
3. Getting Started with the TouchPad
You should have your HP TouchPad close to hand – you might even be reading this guide on it – but in order to get the most out of it there are a couple of things that you need to do.
In order to use your TouchPad to its full capability you will need to create a user account. This is used to manage all of the usual user profile related items, such as contacts, calendars and tasks; the account will be setup online with the details used to store TouchPad backups as well as your credit or debit card details for use in the HP App Catalog.
You will also need to be aware of what steps are used for updating your TouchPad. There are a few clunks in the version of webOS that ships with the tablet, but fortunately these have been overcome with system updates.
3.1 Creating an Account
The first thing you should do with your TouchPad is to create a HP webOS user account, which you should be prompted to do when you boot the tablet. If this doesn’t happen, don’t worry: you can create an account via Launcher > Settings > Accounts. With the account created you’ll need to provide an email address – you can specify which services to use it with, such as Contacts, Calendar, Local file storage, and several others.

(Follow the same process when setting up an email account.)
This account can also hold your credit card details for use with the HP App Catalog. You can add these details by opening Launcher > Downloads > HP App Catalog > HP App Catalog > Preferences & Accounts and inputting the required information.
3.2 Updating Your TouchPad
Although your HP TouchPad is ready to use out of the box, it is unwise to proceed until you have run all updates.
This is easy to do, although your will need an active Wi-Fi connection. If you have problems making this connection, skip forward to section 8.1 where you will find further details.
To update your HP TouchPad, open Launcher (via the arrow in the lower-right corner of the display) and select Settings. From here, tap System Updates and then Check for Updates. If there are any updates available, you can then download and install them.

There are other ways of updating your device and apps and once you have this first update applied you can carry on learning how to use your TouchPad.
4. Launching and Finding Apps
No mobile platform can survive without apps, and the TouchPad is no different. While you will find several useful pieces of software included on the platform by default, it will really come alive once you access the 10,000-strong HP App Catalog.
Here you will find apps for reading, apps for writing, apps for completing office-based tasks and even games. There is plenty of choice and while the number of apps is much lower than that found on Android tablets or the iPad, you will find that there are fewer “spam” apps than on other platforms.
There are different ways to access apps. Some are included on the tablet and can be found via the Launcher. Others are accessed via the HP App Catalog and yet more can be found that have been coded by amateur enthusiasts.
4.1 The Launcher
One of the key elements of the webOS user interface is the Launcher, first seen across the bottom of the Home screen.
By default this displays the Browser, Email, Calendar, Messaging and Photos & Videos apps, while the arrow in the lower-right corner will take you into the full Launcher window.

Here, you will see four headings: Apps, Downloads, Favourites and Settings. Try switching between these by tapping the headings; you can also swipe the screen left and right.
Apps can be rearranged in the Launcher by tapping and holding the icons; you can then drag the icon into your preferred position. Any apps installed via the HP App Catalog can be removed from your TouchPad by tapping the X symbol in the corner of the icon. When you have finished moving or uninstalling apps, tap the Done button in the top-right corner.
4.2 Default Apps
There are several useful apps provided by default. These are found in the Apps screen of the Launcher and include the five that you will have seen on the Home screen (Browser, Email, Calendar, Messaging and Photos & Videos) as well as other useful tools such as a clock, access to Bing Maps, a music player and access to the Camera.

If you have any apps that you particularly favour you can add them to the Favourites screen by tapping, holding and dragging to the Favourites heading.
Meanwhile the Settings screen will display all of the options that you will need to configure your TouchPad, from managing accounts and backups to configuring the keyboard and updates to the operating system.
When you’re done with an app, tapping Home and then dragging the card upwards, “off” the TouchPad, will close it.
4.3 HP App Catalogue
You can find new apps to install in the HP App Catalog, which you will find on the Downloads screen in the Launcher.

Tap the HP App Catalog icon to launch the library of free and premium apps that you can use to enhance your tablet user experience. Use the Featured option to find suggested apps from HP, or the Categories button to view the available apps grouped in various ways such as Books, Games and Music. You can use the Bookmark icon next to each app in the library to mark it for further attention; these can be viewed in the Bookmarks screen, while the Search tool, naturally, allows you to browse the HP App Catalog for apps by keyword. You will also be able to group apps using the options at the top of the screen, filtering Recommended, Paid, Free and New apps.
To access the App Catalog and install apps you will need to have an account setup on your HP TouchPad, with a credit or debit card for premium apps. See the earlier section on setting up your TouchPad for more information.
When you have found an app that you like the look of, tap it to view screenshots, check the description and the details on the left and – most importantly – read the reviews to help you decide whether you want to try it or not. If you opt against this app, hit the Back button in the lower-left corner; if you decide to download it, tap the button in the topright, which will either be labelled with the price or the word Free.
4.4 Preware and Homebrew
Beyond the HP App Catalog you will also find a secondary app library that you can access. Preware contains apps and patches, various tweaks for speeding up your HP TouchPad or enhancing some of the basic features.
There are various benefits to installing Preware beyond the patches and tweaks, however. This is the route you must take in order to install homebrew apps, software created by other TouchPad and webOS users to your tablet.

There are many useful and worthy apps that you can choose to install. Some might be completely original, others might be professional apps blocked in your region. For example, the Amazon Kindle reader app cannot be accessed via the HP App Catalog outside of North America but can be installed and used without any problem if installed via Preware.
You’ll find full details on using Preware and App Tuckerbox in the Appendix.
4.5 Top 10 Free TouchPad Apps You Should Have

Loads of great apps are available for the TouchPad, for news, productivity, reading and communication. If you’re spoiled by the choice on offer in the HP App Catalog, this list of free software might help you to settle on one or two apps that you might enjoy. Search for the choices below in the HP App Catalogue.
• Amazon Kindle – this app isn’t quite the full deal yet as it is in beta but works very well, enabling you to purchase e-books and read them on your TouchPad.
• Adobe Reader – the obligatory PDF reader.
• Facebook Tablet – designed specifically for tablet devices, Facebook Tablet delivers all of the latest updates and photos to your HP TouchPad.
• Scratch Word Processor – an excellent word processor with a wide range of features. Data can be saved locally or uploaded to Google Docs.
• Wallpaper Switcharoo Lite – although the standard Home screen background has a good selection of wallpapers to choose from, this app automates the process, displaying themed or random images.
• Box – provides all TouchPad users with 50 GB free cloud storage. See section 5.7 for more information.
• Spaz HD – by far and away the best Twitter client for the TouchPad, allowing the management of multiple accounts arranged in columns.
• WiFi TouchPad File Browser/Uploader – enables you to view the contents of your HP TouchPad from your PC, enabling easy wireless transfer of data.
• Zinio – the popular e-magazine reading tool is available for the HP TouchPad, allowing you to read free articles and purchase entire magazines to read on your tablet.
• Flivr – this very cool piece of software creates a slideshow of the top 500 photos currently on Flickr Explore.
Many more top apps are available for the HP TouchPad, free and premium, so don’t forget to explore!
4.6 Updating WebOS Apps

As you will have seen in section 3.2, updating the TouchPad’s webOS operating system is a very easy process. Just as simple is the process of updating your apps, something that will prove vital for those pieces of software that you use regularly.
When updates for your installed apps are available, you will receive a notification. To install the update, tap the notification and tap the arrow icon to the right of the app name. If multiple apps are listed and you wish to install them all, use the Install Updates option.
4.7 Rating, Reviewing and Removing Apps
To help the webOS community you should spend a bit of time each month rating and reviewing the apps you have used. This is easily done by opening the Software Manager, found in the Settings tab of the Launcher. Here, all apps and services are listed (under Apps or Other) and by tapping one of these you can use the Review App button to leave your rating and a few words about what you thought of the app.
Also available via each app on the Software Manager screen is the Report a Problem button, useful for sending a message about a troublesome app to HP. Problems may concern app content, problems with download and installation, payment or anything else that concerns you.
We’ve already looked at how to remove apps from the TouchPad Launcher, but it is also possible to use the Delete button in the Software Manager under the entry for the app you wish to discard.

5. Mobile Multimedia
With a high quality display, stereo speakers and a 1.3 MP front facing camera, the HP TouchPad is a portable multimedia centre that allows you to enjoy music, TV and movies as well as record your own material using the camera.
Thanks to a browser that supports Flash, web based video services can also be enjoyed!
You can also use the TouchPad to enjoy photos that you have saved, either locally on online with a service such as Facebook.
5.1 Watching Video & TV

By copying videos to your TouchPad or downloading them from your preferred cloud storage solutions, you can enjoy a great portable movie experience.
This is made possible using the Photos & Videos app, available by default through the Launcher. The popular MPEG4, H.263, H.264 formats are compatible, allowing you to enjoy a wide variety of videos from movies to TV shows and more. Simply select your video clip from the menu on the left and it will begin playing in full screen, so make sure you choose a clip of suitable resolution. You’ll be able pause or skip to the next track if needed.
Speaking of TV: the browser on the HP TouchPad allows you to enjoy streamed TV thanks to the presence of Adobe Flash. If you’re in the UK, you can enjoy BBC iPlayer; elsewhere you can view YouTube videos and with the help of homebrew apps it is possible to enjoy a wider selection, such as Hulu.
5.2 Listening to Music

As you might expect from a device with at least 16 GB of storage, you can store a lot of music on your TouchPad. These might be DRM-free MP3, AAC, AAC+, eAAC+, AMR, QCELP or WAV files that you have ripped from CDs or downloaded to your computer and then copied to your tablet, or you might prefer to take advantage of music stored in the cloud. Podcasts can also be downloaded to your device with the right app or via a web link. Once again, Flash enables you to enjoy streamed audio from your favourite web pages.
You can also enjoy streamed tracks from services such as Last.fm (subscription required) or use an Internet radio app to tune into your favourite stations!
5.3 Viewing Photos
In addition to video, the TouchPad’s 1024x768 pixel XGA display is ideal for enjoying photos and high quality images.
Once again you access stored images by opening Photos & Videos, where the libraries and albums are listed on the left hand side. If you have the Facebook app installed, then you can sync with your account and have any photos stored on Facebook copied to your TouchPad.

When viewing photos you can zoom in and out using the pinch gesture, while printing is also an option if you have a Wi-Fi ready printer. You can also play the contents of a folder as a slideshow, or email single images via the controls in the bottom right corner of the screen. A delete button is also provided for discarding unsuitable images.
Screen grabs are very easy to capture on the TouchPad and can be viewed in the Photos & Videos screen. Simply hold Home and Power together; the screen will “flash” and the grab will be saved to the Screen captures folder.
5.4 Built-in Camera
Although next to useless for taking photos of anything other than yourself, the TouchPad’s front facing camera is useful for video conferencing.
From the 3.0.5 update there is a specific Camera app (opened via the Launcher) that can be used to for snapping whatever is in range. After the app has launched it automatically displays a mirror image of what is within range of the camera lens. You might, for instance, use the camera as a high tech mirror for shaving or brushing your hair. Note that any images you snap or stream via video conferencing will be sent normally.
In the right corner of the camera app (top or bottom, depending on orientation) you will see a camera button, which toggles between still and video mode. The video mode can only record when the tablet is in the portrait orientation, while the standard camera view will work in either position.
To snap a frame or begin recording, press the green shutter or red record button.
When used in conjunction with the Messaging app and a Skype account, you can use the camera and built-in microphone for video conferencing. This can be done by launching Messaging or Phone & Video Calls, using the application menu to open Preferences & Accounts and adding a Skype account. To video chat, simply select a contact from the Messaging or Phone & Video Calls app, tap and select the video call option.
5.5 Copy Data to Your TouchPad

Although there is no actual syncing tool for the TouchPad, you can nevertheless connect it to your computer as you would any other mass storage device. Images and video you have stored on your PC or Mac can be copied to your tablet for viewing later, while any data that you have been working on using your TouchPad – perhaps a word processed file – can be sent to your computer. Just drag and drop the files using your file browser.
To copy data to and from your TouchPad you must first configure it as a storage device. This is done by connecting a USB cable from your computer to your tablet.
Once connected, the tablet will detect the powered USB cable and ask you to tap the USB Drive button if you wish to enter the mass storage mode, or Close to use the connection to just charge your tablet (more on that later). Note that if you choose Close, the USB icon will be displayed for the duration of the connection, and you can tap this to toggle USB Drive mode.
5.6 Safely Disconnecting Your HP TouchPad

As with any device that is connected to your computer via USB, you should take care in safely removing it.
This is especially important for the HP TouchPad. While any device with storage that can be accessed by your computer’s file manager can experience corrupted data if disconnected improperly, the TouchPad will also rebuke you with a message!
Naturally you don’t want to see the message any more than you want to run the risk of damaging any of the data on your TouchPad, so to correctly remove it begin by closing the Windows Explorer window that you used to browse the tablet’s contents.
Next, find the device listed in the System Tray and select Eject. You can also use Windows Explorer to Eject the device, just as long as you’re not currently viewing the contents of your HP TouchPad.
Mac users should drag the icon for the drive from the desktop to Trash.
5.7 Cloud Storage
The lack of removable storage for tablets and mobile phones has accelerated the rush towards cloud computing, typically the provision of a large chunk of storage space held on a remote server and accessed through the Internet.
Many cloud storage solutions are available for the TouchPad, from Google Documents to Dropbox (both of which can be added to your TouchPad as accounts rather than apps) but if you have purchased a HP TouchPad then you might as well take advantage of Box, available from the HP App Catalog.

This app gives any TouchPad owner an amazing 50 GB of free storage space, certainly more than enough for most users. The service is free and the app is free – all you need to do is install the app and register to use it!
With cloud storage you can upload any vital data you want to keep, where it will be accessible via your web browser on other devices such as your PC or mobile phone.
6. Messaging Options
Various options for communication are available on the HP TouchPad, from the expected email to text, voice and video messaging.
These are all available from just two native apps. First comes the Email app; this can handle multiple accounts, allows the movement of messages between folders as well as printing and is presented with a useful panelled interface making it very easy to get a full screen view of what is going on.
Messaging, meanwhile, is handled courtesy of a single app, designed to allow users to enjoy communication with their contacts with the minimum of fuss.
6.1 Navigating the Email Client
In order to use the email client, you must first have setup an account, as described in Chapter 3.
With this done, launch Email from the Launcher bar; note that you can also add an account using the Email > Preferences and Accounts menu option in the Email client.

After setting up your email account, it will be listed in the left-hand pane, much as it would in a desktop email client. In the middle of the screen you should see your Inbox contents listed, while the right-side will display your email message. At the lower left corner of the middle and right sections you should notice a small panel, comprising three vertical lines, which can be dragged to alter the amount of screen real estate that is dedicated to each portion of the email app.
These are great for getting a good look at your messages, something that is particularly useful as unlike a desktop email client you cannot open emails in their own window.
6.2 Sending and Receiving Email Messages

To create a new message tap the new email button, represented by a square with a + symbol in the top-right corner. This can be found at the foot of the inbox pane. (At the foot of the message pane you will find the reply, reply to all and forward buttons, as well as the trash button for discarding the selected message.)
An email can be sent from any of the accounts you have setup – simply select using the down arrow at right side of the From: field. Type the name of the recipient in
the To: field; if you have your contacts synced to your device using Facebook or Google, for example, then they should be displayed. Otherwise, enter the email address.
Tap the Subject: field to enter a catchy topic for the message then enter your thoughts in the main message area before tapping Send. Naturally you will need to be only for the message to be sent. If you’re not in range of a wireless hub, the app will wait until you are online before attempting to send again.
Email messages will drop into your inbox based on the options you set for the account. Via Email > Preferences and Accounts, tap the account you wish to edit and use the Sync Criteria section to decide how many messages you wish to store on the device (for instance, a day, a week, a month, or all) and specific a period for the client to poll for new messages over. A good option might be every 30 minutes.
Click Done to confirm your changes.
6.3 Further Email Settings
While you’re viewing the Account Settings screen, it is a good idea to take a look at some of the other options. In the Full Name field you should add your name the way you want it to appear in your recipient’s inbox.
Meanwhile the New Message field will allow you to display an icon for mail in the notification bar as well as determine whether or not an alert should be played. You can also define a Signature for messages that you send from your HP TouchPad, while the Reply-to Address can be added if it is different to your usual email address.
Finally you can specify default folders in your email folder for sent, draft and trash items.
6.4 Messaging with Skype, Yahoo, AIM & More
Available from the Apps screen of the Launcher, Messaging allows you to manage and use accounts for popular chat networks such as Skype, Google Chat, AIM and Yahoo!, while any HP TouchPad that is tethered to a webOS smartphone can be used to type and send SMS text messages.

Once again, you will need to use the Accounts screen as described in Chapter 3 or open Messaging > Preferences and Accounts to add the details of the specific instant messaging account that you wish to use.
After setting the account up you will be able to manage the online/offline status via the dropdown menu in the top-left, which by default is set to Available. When expanded, this menu also displays options for individual accounts if you have set more than one up (for instance you might have added AIM and Skype accounts), enabling you to specify which account should be online. Naturally, when an account is online, you will receive messages.
Sending a message is simple; just select the recipient from your list of contacts and type the message. If you’re using Skype you can use the drop-down menu in the top-right corner of the chat window to use the voice or video calling options, the latter of which will activate your TouchPad’s video camera. Details on making Skype video calls can be found in Chapter 5.
Messaging options on the TouchPad are well regarded and this is hardly a surprise – you can chat with contacts on many popular networks and take full advantage of the device’s hardware when doing so!
7. Searching with Your TouchPad
On the home screen of your HP TouchPad you will spot the search bar, where the words “Just type...” appear. Launch the Just Type app and find what you are looking for.
There is more to this tool than searching the web, however. In fact, the search bar can be used for finding apps and documents on your HP TouchPad, making the process of tracking down exactly what you’re looking for very simple indeed.
Along with the standard online search tools such as Google, the HP TouchPad will ask you if you want to add a particular website or online tool to perform search for a particular term. Wikipedia is available by default and others – such as Twitter or a popular online paper will be highlighted as you find search results that link to them.
7.1 Using the Search Bar

Finding what you want on your TouchPad is fiendishly simple. Assuming you have installed a lot of apps and can’t find the one you’re looking for – not an uncommon situation to be in – you can use the search bar rather than scrolling through the Launcher, staring and wondering what it was you were looking for.
All you need to do is tap into the search bar and type the name of the application that you want to use. For instance, you might want to record some audio; so type “voice”, which will immediately give you the option to launch Voice Recorder.
This is displayed in the All tab; it will also appear in the Actions tab should you choose this view.
However, if you typed the word “voice” into the search bar to find a relevant link on the web, you can cast your eyes down the search options, select Search Google and watch as the results load up. Alternatively, you might already have the intention of searching for “voice” on Wikipedia, so under the Search Using section, tap Wikipedia to display the entry for voice on the popular online encyclopaedia.
7.2 Searching Contacts and Content
Where search sources are available for the TouchPad, they can be added when performing a search. These can be accessed via the Search Using... section of the Just Type search application.
This functionality enhances the results that you can achieve, saving time and streamlining the search process. Default sources that ship in webOS include Wikipedia and Amazon. You can even use the search tool to find results in the HP App Catalog.
Contacts, too, can be displayed via the search box, displayed in the All tab and the Contacts tab. Typing a name and then selecting the Content tab, meanwhile, will display results from your email inbox.
The Content tab is where your browser history can be searched. You might have visited a page on the BBC website, for instance. Entering “bbc” into the Just Type box will display various options in the All tab, but selecting Content will narrow this down to Email and Bookmarks & History. The latter will display all pages visited in the chosen website, hopefully making it easier for you to find what you are looking for. If this fails, try using a word that describes the previously-visited web page you’re looking for, such as the name of the writer or the subject of the article.
8. Browsing the Web
Probably the first thing you will want to do with your HP TouchPad tablet computer is browse the web. After all, this is a device that is almost made for browsing, with its large high quality display, an easy to grip case and a touch-based user interface.
The HP TouchPad browser, Web, is never far from your fingertips. As you’ve seen in the previous section, it can be launched via the Just Type search tool, but you will also find it lurking at the bottom of the home screen in the Launcher.
Web is capable of opening pages in new tabs or cards, storing bookmarks, sharing links, downloading data from the web, and even offers control over privacy aspects such as pop-ups and cookies.
8.1 Connecting to the Internet
Of course, before you start browsing the web you will need to ensure that your TouchPad is connected to the Internet.
As the 3G version of the tablet is extremely rare, we’ll assume you have the standard Wi-Fi TouchPad and are using it within range of a wireless router. Connecting the router is a case of tapping the down arrow in the top-right corner of the screen and selecting Wi-Fi. This will extend the menu, where you can then tap the Turn on Wi-Fi option.
Following this, the wireless router should be detected. All you need to do now is enter the password to connect to the wireless network; assuming the router is correctly configured your HP TouchPad will be connected to the Internet, where you can receive emails, chat online, download apps and browse the web.

Note that there are other connectivity controls. You can connect to a VPN, for instance, (useful if you’re overseas and want to bypass local restrictions, for instance) while Bluetooth support is provided for you to connect a hardware keyboard.
If at any time you would rather disable any of the connectivity options – perhaps your battery is running low – then you should employ Aeroplane Mode, which can be activated via the notification area menu (third from bottom).
8.2 Using the Browser
There are two ways to launch the Web app, either via Just Type or by tapping the globe icon in the Launcher (web links in other apps will also open the browser when tapped). The second option gives you the opportunity to either enter a website URL or a search term.
With a web page open, you can then enjoy browsing using your finger to scroll up and down the page with the swipe gesture and use the back and forward buttons in the top left corner when necessary. You will also notice a small refresh button on the right-hand side of the address bar; use this when a page has failed to load correctly.
As with most apps, Web can be viewed in portrait and landscape mode, meaning that you can orientate your TouchPad to get the best results for the website you are viewing.
8.3 Browsing the Web with Multiple Cards
Modern desktop browsers have been extolling the virtues of tabbed browsing for several years now, allowing users to quickly switch between web pages within the same window. While multiple tabs are not available on the HP TouchPad, you can open additional cards with different web pages for easy multi-site browsing.
You might open multiple cards by tapping the Web button on the Launcher with other web pages still loaded, or you can use the New Card button (a square with a + symbol) on the browser’s toolbar in the upper right side of the application window. Tapping links in other applications will open the pages in a new card rather than disrupt your browsing.

Also in the top-right corner is the history/bookmarks button, which lists any pages you have saved as favourite bookmarks on the first tab, a history of all visited pages on the second and any on-going downloads on the third tab. Saving a page as a favourite is simple: use the Add Bookmark button to the right of the address bar. This appears as a square with a rightfacing arrow and when tapped offers three options:
Add Bookmark will add the current page to your list of favourite bookmarks.
Share Link opens a new email window with the link and some text pre-populated, waiting for you to send it to a friend.
Add to Launcher, meanwhile, allows you to add the page as a shortcut to the Launcher, where it can be found on the Favourites tab.
8.4 Browser Privacy Preferences
User control of browser privacy has increased in recent years, with many browsers offering users the facility to delete history and cookies, block pop-up messages and web pages and generally prevent the sensation that someone is tracking them.
Fortunately such tools are present in Web, via the Preferences screen in the menu. Here you can set your Default Web Search Engine as well as use the controls in the Content section to Block Pop-ups, Accept Cookies, Enable JavaScript and Enable Flash. Each of these controls has an on/off switch that can be tapped to apply the preferred condition.

Other tools are available. Do you want to delete your history of visited sites? If so, tap the Clear History button. Similarly, Clear Cache removes your temporary Internet files (images, bits of text, etc. that make up a web page) while Clear Cookies deletes tracking cookies, small text files that inform websites that you are a returning visitor (among other things). Finally, should you wish to Clear Bookmarks, this option is also available.
Browsing the web on your HP TouchPad is one of the best experiences offered by the device, so if you haven’t tried it yet, do so now!
9. Accessories for Your TouchPad
There are many reasons for wanting to splash out on accessories for a TouchPad, but the question you should ask first and foremost is: “do I need them?”
After all, a new case for your device costs money, as does the Touchstone dock. You might not really need a hardware keyboard if all you’re planning to do is browse the web and play games, while a screen protector is possibly irrelevant if you never take your tablet out of the house.
While styluses are popular alternatives for those with fat fingers, they’re not necessary for everyone.
9.1 Case

However you would be doing yourself and your tablet a disservice if you continued using the device without at least spending the money on a HP-branded rubberised case.
With a tight-fitting curved design, slots for the audio and USB ports and raised buttons for the power and volume switches, the case features a soft suedette interior and doubles as a duo-position stand. Thanks to a hidden strip of Velcro on the back of the case, you can fold the front cover of the case back, allowing for a low profile for the TouchPad which is ideal for typing or a high profile, perfect for watching videos.
9.2 Touchstone

You might be happy enough with a case that doubles as a stand and a USB cable, but if you want the full desktop experience for your TouchPad you might invest in the Touchstone.
After all, the Touchstone dock uses inductive charging, meaning that your TouchPad can be charged without cables! This enables you to simple stand the TouchPad on the device while the Touchstone – which is plugged in – does all of the hard work.
The TouchPad will also slip into “exhibition mode” when docked (you can preview this via Launcher > Settings), allowing you to enjoy a number of special screens such as a clock, agenda and a slideshow. More are available in the HP App Catalog.
9.3 Keyboard
While the HP TouchPad might feature one of the best touchscreen keyboard experiences around, this isn’t ideal if you have intensive typing to perform.
If you’re one of the many users that have swapped laptops for tablets then the lack of a hardware keyboard may prove concerning at times. You don’t need to worry, however, as HP have released a Bluetooth hardware keyboard with 12 months battery life which powers down when not in use or beyond the range of the TouchPad.
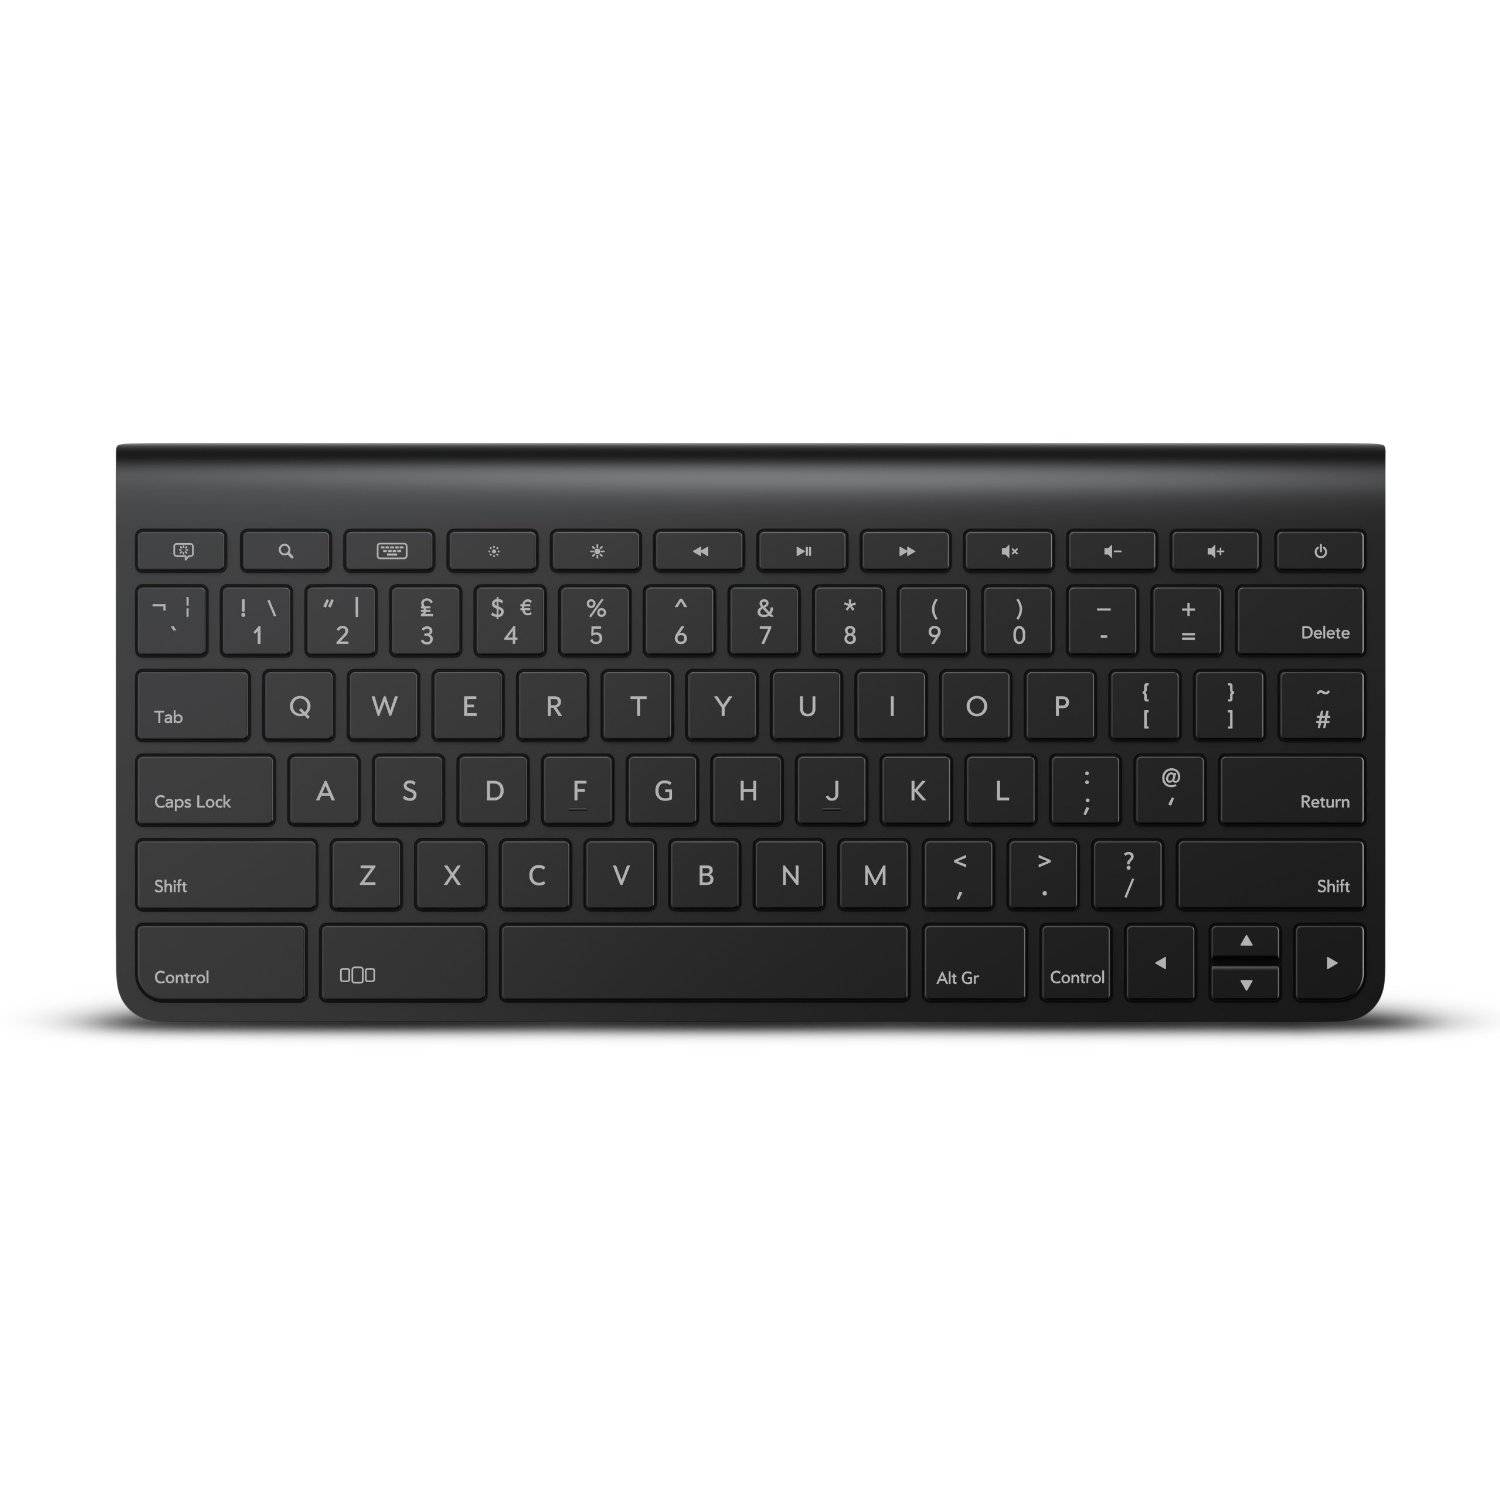
You may notice the similarities with the slimline Bluetooth keyboard that many iMac owners use, and using it is certainly a comparable experience. Connecting this device to your TouchPad is effortless and if you plan on using the tablet for word processing duties this is a must-have.
9.4 Screen Protector
Various screen protectors are available for the HP TouchPad, designed to squarely match the shape of the tablet with holes cut out for the Home button and the camera.
As HP doesn’t offer branded a screen protector for the TouchPad you will need to check online for the options. Retailers such as Amazon and Expansys have a great selection of screen protectors, but note that you will need to avoid the cheaper options if you are going to have any hope of successfully applying the plastic films that are designed to save your TouchPad display from scratches and other damage.
9.5 Stylus
Again, HP doesn’t have a branded stylus in its catalogue, which is hardly surprising – touch screen devices were developed with capacitive displays rather than resistive. This basically means that they are intended for fingers, not styluses.
However, there are many users who prefer a stylus pointing device and you will find many available in different colours and sizes. They resemble small pens and have a soft, rubbery tip which is used in preference to your finger tip.
9.6 Replacement Chargers
Although the Touchstone can handle charging, the HP TouchPad ships with its own battery charger, a device that is basically a wall plug with a removable USB cable.
Replacement chargers can be purchased should the original be damaged or lost, and with a bit of luck you will also find the HP Vehicle Power Adapter for the TouchPad, a useful piece of kit that connects to your car’s cigarette lighter to recharge your tablet.
Many other third party accessories are available, from alternative cases and chargers to keyboards. Where possible, you’re best advised to stick to the HP branded accessories, however.
10. Useful HP TouchPad Settings
We’ve covered a lot in this guide so far but there are various other tools and tricks that you should be aware of to get the most out of your TouchPad, from adjusting the brightness to specifying things such as your preferred language and current location, as well as wireless network printing functionality.
All of these features will enhance the way you use your tablet, with the display settings and network printing options particularly useful. Meanwhile the lock screen can be configured to request a PIN or password, rather than simply dragging an icon.
Each of these options is available via Launcher > Settings.
10.1 Screen & Lock
If you have problems with seeing the TouchPad’s display in bright sunlight or if you want to set a secure lock option, these options can all be controlled from the Screen & Lock icon.
Although there is an Auto Dim feature that can be toggled on and off, the Brightness option is there for you to make the most of your display when using it outdoors. Additionally, you can set the screen to switch off after a set period – 1 minute, 2 minutes, 5 minutes or 10 minutes.
If you wish to improve the security of your device, this can be done using the Secure Unlock options. When enabled, rather than simply dragging the lock symbol up the screen you can select a Simple PIN or a Password, both of which must be entered twice when setting up. The Lock After option, meanwhile, enables you to specify a period of time before the screen switches off.
You may have noticed that the Home button will blink when notifications are pending on your TouchPad. This can be toggled via the Notifications section of the Screen & Unlock settings.

10.2 Location Services
Smartphone users are increasingly asked to provide location-related information to apps and services in order to acquire the best results in searches and maps – but what could there be to gain using location services on a Wi-Fi only tablet?
The answer, of course, is down to the wireless router that you connect to, which can be used to trace your location based on IP address. As a result you should be aware of the Location Services settings, which can be used to specify how websites and apps treat your data.

You can instruct websites to Always Ask for the information or set the option to ignore requests. It is also possible to clear any previously collected location data.
Applications, meanwhile, can be set to Auto-Locate your position, although you might prefer to select Always Ask to keep control of your location-related data.
Finally, you will notice the Background Data Collection option, which is used for sending information to Google about the quality of the location services on the TouchPad.
10.3 Regional Settings
Depending on which country you’re situated in, you might have different regional requirements. For instance: in Germany a different keyboard layout is used. As such you will need to make sure that you have the correct keyboard layout used for the language you are typing in.

Via the Regional Settings screen you can adjust the keyboard layout and auto-correct language, as well as specify the language that should be displayed. It is also possible to change the phone number format (possibly a hangover from the mobile phone devices running webOS, but certainly suitable for using Skype) and selecting a number/ currency/date format. For instance the USA displays the date in short form in a slight different manner to the rest of the world (3/31/12 as opposed to 31/03/12).
10.4 Printing
A much admired feature on the HP TouchPad is the facility to print wirelessly, providing you have a suitable printer to connect to.
Standard USB printers are no good unless you are able to add an Ethernet adaptor to the device. Most modern HP network printers, whether networked by cable or by Wi-Fi should be good for this, however.

To setup a printer in the Printing screen, tap the Add or remove printer button and submit the IP address and name of the printer. The network that the printer is on should also be selected. Note that wireless printers should be auto-discoverable, that is to say, the TouchPad should detect them without your assistance.
Once printing is enabled you can use email, Adobe Reader and other applications to send print jobs, although not that in some cases the formatting of documents might not appear as intended.
10.5 Changing the Wallpaper
Although you should seriously consider the wonderful advantage offered by the free Wallpaper Switcharoo Lite app (see Chapter 4) if you want to make some manual changes to the HP TouchPad’s wallpaper you can do this by opening Launcher > Settings > Screen & Lock > Change Wallpaper.
Here you will find an index of the various folders on your tablet that contain images, and by opening these directories you can select an image that will be set as your new wallpaper.
Images can be those snapped using the camera, saved to your TouchPad from the web or even synced to your device from a social network such as Facebook.
11. TouchPad Maintenance and Settings
You’re bound to get plenty of use from your TouchPad, but it is important to know how to perform specific tasks that will improve the experience.
For instance, charging your HP TouchPad is just as important as knowing how to restart your device or fully close apps. From time to time you might run into issues that demand some additional knowledge (see Appendix) but on the whole you should be able to deal with everything using the following information.
11.1 Rotation Lock

Your HP TouchPad has four orientations, and most native apps will work fine with this, spinning around as needed. However, not all apps can handle this, so it is a good idea to stick to the position that you had the tablet in when you launch apps.
If you’re reading or doing some other task that might occasionally cause you to accidentally alter the orientation of your HP TouchPad, the rotation lock can be activated to prevent any further shifting of axes.
Available by tapping the down-facing triangle in the top-right corner of the display, tapping Turn on Rotation Lock will fix the screen at its current orientation. Note that some apps may over-rule this setting. When activated, Rotation Lock will appear in the notification area as a small circular arrow with a line through it. It can be disabled by repeating the steps above.
11.2 Sounds, Volume and Mute
Volume on the TouchPad is typically controlled via the rocker switch on the right hand-side in the default orientation (with the Home button at the bottom).

However you will find that there are various audio options for the day to day use of your TouchPad, notably via Sounds & Ringtones, which you will find in the Settings screen. Here you will find a switch to toggle sounds – those audio chimes that accompany events such as new email or other notifications – as well as a software version of the volume control. Keyboard clicks can be enabled or disabled, while it is also possible to set a ringtone. While you might think this odd for a tablet with no obvious telephony functions, remember that you can access Skype with the HP TouchPad.
The device’s vibrate function can also be controlled from this screen, as can Beats Audio, the software used to enhance playback of your favourite music.
Finally, for quick audio disablement, you can use the mute function, found by tapping the triangle in the top-right corner of the display. Mute Sound will turn off all sounds; the action can be reversed by tapping the option again.
11.3 Charging
One of the most important things you can do with your TouchPad is charge it. After all, without a fully-charged battery, you won’t be able to use it.
There are two ways of charging the TouchPad. The first is for those of you who purchased the TouchPad with a Touchstone dock. HP’s Touchstone dock uses inductive charging, which is a wireless method of recharging your tablet’s battery. All you need to do is stand the TouchPad on the Touchstone look, no cables!
However this method of charging isn’t any good when your tablet isn’t starting up correctly. If you have left the battery to completely discharge, you will need to plug the TouchPad into your mains electric connection using the adaptor and USB cable.
11.4 Restarting Your TouchPad
From time to time you will find that you need to shut down and restart your HP TouchPad. If you experience slow performance or issues with app responsiveness, turning it off and back on again is usually in order. This can either be done by holding the power button and selecting Shut Down, or by opening Launcher > Settings > Device Info > Reset Options and selecting Restart.

However you might find that simply closing your apps makes a massive difference. Don’t use the standard method of pressing the Home button and dragging the app up, sending it off-screen – there is a better way of doing it that is perfect for dealing with performance issues.
Instead, press Home, then drag the app card down, releasing it when your finger reaches the bottom of the screen. This action will completely close the application, preventing it from taking up any system resources.
There is a chance that your TouchPad will not switch on when restarting. If you had a low battery, then connecting the charger is recommended, as described above. Otherwise, try the trusty power button + Home button combination to get the device up and running again. Simply hold both buttons until the HP logo appears on the display, then release and wait for the tablet to boot.
11.5 Backing-up Your TouchPad
Although you might take advantage of cloud storage solutions (see section 5.6) to keep a copy of the data on your tablet, the HP TouchPad features a backup tool that will create an archive of your HP webOS Account and personal data stored on the device. Backups are stored remotely on HP’s own servers, but can be disabled if necessary.
Data backed up includes:
• Apps installed via the App Catalog
• Calendar events and preferences
• Usernames for online accounts
• Contacts and preferences, photos and links/groups
• Email and Messaging accounts, preferences, usernames
• Launcher settings
• Social networking usernames
• Location services preferences
• Memos
• Web bookmarks and cookies
To activate the backup, head to Launcher > Settings > Backup and tap Back Up Now. To automate the process, slide the Backup switch to On.
Should you decide to disable the backup utility, you will have also be able to erase the remote backups. Slide the Backup switch to Off and tap the Turn Off and Erase button to do this.

11.6 Erasing Your HP TouchPad
If you’re concerned about data security on your TouchPad, you can use the delete tools to discard data that you have stored on it. This might be useful if you have photos and videos you wish to delete, or if you have concerns about the device being lost or stolen. Additionally, deleting all of your data can assist with resolving some performance issues that you might be experiencing.
To access the various erase tools, open Launcher > Settings > Device Info and select Reset Options. Here you will see several options. Along with the Restart and Shut Down buttons, you have a choice of:
• Erase Apps & Data: this is erases all applications that have been installed and related settings and data.
• Erase USB Drive: personal files on the device are deleted, such as any photos or videos that you have recorded.
• Full Erase: applications, their settings and data are deleted, along with the contents of the USB Drive, as described above.
• Secure Full Erase: this makes it tougher to recover your data after deletion, but takes longer to complete. These options can all be used to remove data from your TouchPad, depending on your needs.
11.7 Cleaning Your TouchPad
If you have the benefit of a HP branded case, cleaning your TouchPad shouldn’t take too much effort. Fortunately, for the rest of us, the tablet itself ships with a soft, lint-free cloth that is ideal for cleaning the glass touch-screen.
You will notice that a lot of white dust finds its way onto your tablet, so you might end up cleaning the screen regularly. I wouldn’t recommend using anything other than the soft cloth, although if you’ve somehow touched the screen with greasy fingers a soft paper with the *tiniest* amount of water and the *smallest* touch of soap (just enough to deal with the grease) can be used.
The best option, of course, would be a dedicated cleaning agent which is touchscreen safe.
12. Conclusion: Have Fun With Your TouchPad!
By now you should have realised that the TouchPad is a well-built, well-specced piece of hardware that on paper is every bit as good as the original iPad or the majority of Tegra-based Android tablets (such as the Motorola Xoom).
With the HP App Catalog you will be able to find apps that help you to perform pretty much any task you need. Meanwhile with tools such as Preware and App Tuckerbox (see the Appendix for more on these) you can transcend the restrictions of the App Catalog and install homebrew applications on your tablet.
Even then, if the range of apps and multimedia apps present on webOS 3 is insufficient for your needs there remains the option of installing Android on your TouchPad, thereby enabling access to a vast library of apps and services.
Whichever way you look at it, the HP TouchPad is a winning tablet!
13. Appendix
13.1 WebOS Doctor
In the main guide we’ve looked at ways of getting your TouchPad up and running following errors or faults, but if none of those methods work, you can call the doctor.
Specifically, the webOS Doctor, a utility provided by HP to help diagnose and repair and problems that cannot be resolved by restarting or rebooting. Your tablet might be frozen, for instance, something that can often be identified with a large exclamation mark in a triangle taking up the screen.

Typically, this might call for a reinstallation of webOS, but before doing this, and assuming your TouchPad is responsive, make a backup of your data, following the steps in section 11.5.
Next, open http://hpwebos.com/account and login with your HP account details. Here, select Device Options > Get webOS Doctor, agree to any browser notices and update Java if necessary (the web page will tell you if this needs to be done – download Java.
Click Continue and then use the Download webOS Doctor button, selecting Run. Wait while the utility downloads and runs. In the meantime you could be preparing your HP TouchPad, which needs to be in Update Mode to proceed.
To switch to Update Mode on a responsive TouchPad, first connect the device to the charger and plug this into a nearby mains electric outlet. Next, open Launcher > Settings > Device Info and select Reset Options > Shut Down. As the device switches off, hold the Volume Up button, and connect your tablet to your computer using the USB cable. When the full-screen USB symbol appears, you can release the volume button.
If your tablet is frozen, simply connect the device to your computer with the USB cable.
When the webOS Doctor is downloaded and running, select your country of origin and follow the instructions in the tool to reinstall webOS. Note that you should not disconnect your device until instructed. Also be aware that you may have to wait while the tablet is charged, although this only happens when it had a low charge to start with.
After the reinstallation is done, the Reset Complete screen will be displayed. Click Done, and wait as your HP TouchPad resets, as good as new. You will need to enter your HP webOS Account details and reconnect the tablet to the Internet for your account details to be synced to the device.
(Note that via the webOS Account Details screen you can disassociate your TouchPad from the account using the Remove From My Account button. This is useful to remember should you sell or discard your tablet.)
13.2 Homebrew Apps and Tweaks with Preware
In order to give your HP TouchPad a boost in terms of the number of apps that can be installed and to find the best tweaks to speed it up, you will need to install Preware, an installer program that enables you to add themes, patches, homebrew applications and more.

To install this, you will first need the webOS Quick Install application, which can be downloaded from webOS Nation. You will also need to install the most up-to-date version of Java for your operating system.
Before proceeding, make sure you have updated your HP TouchPad as described in section 3.2.
With and the webOS Quick Install downloaded to your computer, disconnect your tablet if it is currently hooked up and run the software, following the prompts to download and install the Novacom driver. When this is complete, exit the software.

Next, pickup your TouchPad and in the Just Type search box type webos20090606. Under the Launch section you will see Developer Mode listed – tap this, then switch to On in the top-right corner, but ignore the request to set a password.
You’re then ready to connect your TouchPad to your computer using the USB cable, but don’t activate USB Drive mode – instead, tap Close.
Restart webOS Quick Install, where you will see your device named in the small drop-down menu in the upper-right corner. Below this you will see a + and button, and a third that looks like a globe with arrows around it. This is the Refresh button – click it to force the software to check the various sources from which homebrew apps can be downloaded.
This shouldn’t take too long to complete. When it is done, select the Applications tab and in the search box type “Preware”. Select Install to complete the process, and a few moments later you will be able to install tweaks and enhancements on your TouchPad!
Once completed simply exit the webOS Quick Install and disconnect your TouchPad in the correct manner.
Upon launching Preware from the Launcher, you will be able to access a massive selection of homebrew apps and tweaks. Simply tap the magnifying glass search button in the top-right of the screen, type a search phrase and tap Enter. Select the app or tweak you wish to use, check the details, compatibility and screenshots and tap Install.
Preware is effectively a homebrew app catalog, where you will find plenty of new software to try!
13.3 Installing Homebrew Apps with webOS Quick Install, Preware and App Tuckerbox
With the webOS Quick Install software installed on your computer you can side-load homebrew apps and those restricted by region – provided you know where to find them.
The best selection of homebrew apps on the web can be found at webOS Nation, where a search tool can help you find your way through a large amount of free apps developed by webOS users. Many are specifically for the TouchPad, and those that are for webOS phones will display in a window once installed.
To install one of these apps you will of course need to download it first. To do this you will first need to register at webOS Nation.
WebOS Quick Install
App installer files for webOS have the .IPK suffix and these can be loaded up in webOS Quick Install and then deployed to your TouchPad. After downloading the homebrew app of your choice and saving it to your computer, connect your HP TouchPad via USB.
Next, load webOS Quick Install and confirm that your tablet is detected – its name will be displayed in the top-right corner.
To add an app to your TouchPad, click the + button to browse for and select the .IPK file; all that is left to do then is click Install and the app will soon appear on your tablet!
Preware and App Tuckerbox
However for many users this has become a bit of a slow and unnecessary process. Many users prefer to install apps via Preware, which allows you to download the apps directly to your TouchPad,
With Preware you can find tweaks and hacks that allow you to enjoy your TouchPad in new ways. Unfortunately, however, by default it doesn’t display anything from the main HP App Catalog. This is a shame, but it can be remedied.
Thanks to App Tuckerbox you will not only be able to browse the HP App Catalog through Preware, region-locked apps will also become available! This is done by adding the feeds that list the available apps on the HP App Catalog into Preware, a task that is performed courtesy of App Tuckerbox.
In order to install App Tuckerbox, you should have followed the steps above for installing webOS Quick Install on your PC and then added Preware to your tablet.
App Tuckerbox is available through Preware, so se the search facility in that app to find it, then select and tap Install. After installation, open Launcher > Downloads > App Tuckerbox and follow the prompts that are displayed. These register the device with the correct servers, which eventually allow you to access all available apps in Preware.
With this stage complete, tap the Configure Preware Feeds button. Preware will be updated and in a few moments time the process will be complete. You should then launch Preware to confirm that the new feeds have been added.
To do this, open the Preware menu, select Manage Feeds and check that the palm-beta, palm-catalog and palm-web feeds are each enabled. After this, return to the menu and select Update Feeds.
It shouldn’t be long before this process completes and you can begin to enjoy homebrew apps, tweaks, enhancements and official apps all via Preware!
13.4 Speeding Up Your HP TouchPad
With Preware setup and your ability to install homebrew apps for your TouchPad fully enabled, there are several things you can do to improve the performance and speed of your tablet.
Reduce Logging
The first is to reduce the amount of logging that webOS does. One of the key reasons for any poor performance that you might have experienced is logging, the action of recording actions and events that occur. WebOS records these things in order to be able to present a detailed error report, but sadly there is a little too much of it.
Open Launcher > Apps > Phone & Video Calls, tap Dialpad and enter the following number: ##5647# then tap Call. This will open the Collect Logs screen, where the various logging options can be administered.
Begin by using the Clear Logs option, then tap Change Logging Levels... to Set Logging to Minimal. You’re now done, so can return to the Home screen and close the card.
Installing Speed Tweaks with Preware
The following apps, tweaks and utilities can all be downloaded from Preware. You might find them hard to track down if you don’t use the Preware search tool.
• EOM Overlord Monitoring: the ideal partner for the changes to logging that should have already made, this prevents logs of your device activity from being uploaded to the HP servers.
• Muffle System Logging: this reduces the logging on your TouchPad. Even if you have set logging to the minimal level, there is still a lot going on, and this tweak reduces it further still.
• Remove Dropped Packet Logging: installing this prevents the logging of data that hasn’t been sent and received by your tablet.
• Unset CFQ IQ Scheduler: improves the rate at which data is written to memory.
• Unthrottle Download Manager: improves the speed of Wi-Fi downloads.
• Increase Touch Sensitivity and Smoothness: if you have ever noticed the user interface stutter or jitter, this fix will help to fix that
• Quiet Powerd Messages (sic): reduces the internal messages sent when the TouchPad sleeps or wakes.
• Faster Card Animations HYPER Version: improves the animation speed of the cards on the Home screen.
• Ad Blocker: obviously this blocks advertisements. Max Block is an alternative, but you should not install both of these.
• Private Browsing: this adds the option to browse the web without your history being recorded.
Note that after adding each of these tweaks, the system will need to be restarted. A dialogue box will appear instructing you to tap OK to restart. A Later option is also provided if you have other things you need to be doing.
Additional Reading:
- TouchPad Not Charging? Don’t Worry, It’s Probably Not Bricked!
- How To Install More Operating Systems On Your HP TouchPad
- Updating Your TouchPad: The Next Step
- Cloud Storage Options For the HP TouchPad That You Should Know About
- Backup, Restore, And Update Android On The HP TouchPad
Guide Published: May 2012