Don't you just love to take photos of picturesque scenery when you travel? I do. In the past, I have shared my favorite shots via Flickr and Facebook, used them as screensavers, and turned them into magnets. Although I have been playing around quite a bit with wallpapers, for some reason I have never used my own photos as desktop backgrounds.
Not only can it provide immense satisfaction to enjoy your own work, beautiful individual wallpapers also make for a great gift. So let those creative juices flow and craft your first batch of stunning home-made wallpapers. The process I propose here is straightforward and easy!
1: Taking Photos With The End In Mind
The Motif - Before you venture out to shoot that perfect photo, look at your past wallpapers and find out what you like most about them. Is it the motif, do you like scenic shots, are there people in them, do you have a preference for particular colors, are the images sharp or tastefully blurred, what else stands out for you? When I looked at my old wallpaper collection, the theme was obvious: nature and colors! Apparently, I'm not a big fan of black & white images.
Turns out that theme is already reflected in my photography and you'll probably discover the same. Nevertheless, it's good to be mindful about those things before you continue shooting photos.
The Format - Next, you should gain clarity about how you are going to use those photos and what will make editing easier for you. Do you want to fill a dual or triple monitor setup with a seamless wallpaper or do you just have a low resolution laptop that needs some sprucing up? For full flexibility, you should set the highest resolution possible on your camera. Going with just the right resolution (e.g. 800 x 600 pixels), however, will save space on your memory card and you won't have to crop the image. But keep in mind that you might regret choosing a low resolution later! If you're new to photography, Tim Brookes explained why you should shoot raw.
The Shooting - When you start taking pictures, keep your goals and limitations in mind. If you went with the maximum resolution, remember that you will have to crop the image. If you set your camera to take photos at a perfectly matching resolution, note that you will need to use the entire image, so shoot the perfect frame. For a dual monitor wallpaper, use your camera's panorama feature or manually prepare a panorama image that you can stitch together and crop to the perfect size later.
Last but not least, it might be a good idea to review general photography tips, read our beginner's guide to digital photography, and learn about HDRI photography. Some basic knowledge about technique and technology will greatly improve your shots and end result.
2: Cropping To The Perfect Size
Once you're back home, browse your photos and pick your favorites. As I mentioned in a previous article on wallpapers, the perfect wallpaper has to meet two criteria:
- its resolution must be equal or greater than your screen's resolution, and;
- it must match your screen's aspect ratio.
Ideally, you should crop your photo to the exact resolution of your screen. If your screen has a higher resolution than what is supported by your camera, for example when using a smartphone camera, you can mend several photos to build the right size.
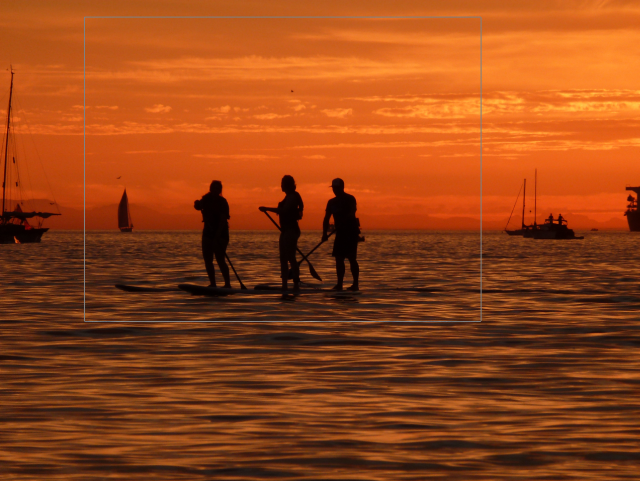
For basic editing, stitching, and cropping, I use IrfanView, one of our Best Windows Apps. I have a FullHD display (1920 x 1080 pixels) and take photos with a maximum resolution of 4320 x 3240 pixels, so after resizing the photo to fit the width of my screen, I still have to lose at least 360 pixels from the top and/or bottom. If you have room to spare and only like a specific frame in your photo, you can also start by roughly cropping that frame, and then start re-sizing and cropping again according to your screen's aspect ratio. For example in the image below, I just wanted the sailboat and the three people.
3: Editing To Perfection
Cropping is straightforward. The tricky part is optimizing the photo and adding effects. The good news is, you don't need Photoshop to edit your photos to perfection! We have covered many great tools to edit images and add effects which of course Photoshop is top among them. On the other hand, you will probably spend a lot of time tweaking settings and deciding which effects you like best.
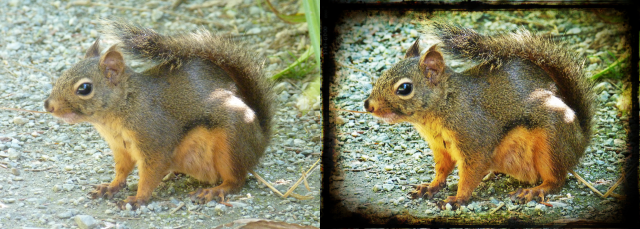
A great tool - if you don't want to download anything - is Pixlr. The web app offers three different modes: advanced, efficient, and playful. I didn't want to be bothered with too many options, so I used the playful Pixlr-o-matic mode to turn the somewhat dull picture of a Squirrel into an interesting shot.
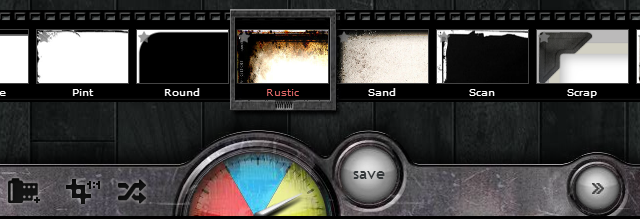
To start, upload your photo. Pixlr-o-matic has only three automatic editing steps: (1) choose an effect, (2) add an overlay, (3) frame it. You can add even more effects, overlays, and frames via the film icon. Moreover, you can auto-crop to a 1:1 ratio or randomize effects by clicking the crossed arrows button. When you're done, click the save button.
Pixlr-o-matic is also available for iOS [No Longer Available] and Android. Nancy previously reviewed Pixlr Express of iOS and MOin profiled the Pixlr mobile app.
What Is Going To Be Your Wallpaper?
Can't decide which wallpaper to choose? You don't have to! Use the default Windows desktop background switcher or a third party wallpaper changer to rotate between multiple images.
What tips do you have for taking photos that make great desktop backgrounds? How do you turn your photos into wallpapers? I would love to hear your ideas!

