If you run your own website or self-hosted blog it’s a good idea to have an email that shares its domain. This will lend additional credibility to your website and make it clear that people are communicating with you in your capacity as webmaster instead of communicating with you personally.
Most web hosts will set up an email account with your domain on their servers, but this can be a headache. The mail client is often terrible. This will force you to either use a client on your PC or set up an elaborate mail forwarding system. You can bypass this fuss by setting up an email with your domain on Google Apps.
Sign Up For Google Apps
Visit the main Google Apps for Business page to start on your adventure. Don’t worry about the “for business” subtitle. The service is free for up to ten users and Google isn’t going to check to see if you’re actually a business.
Click on the Free Trial button. You’ll first need to enter some personal information including a current email address, which can be another Google account. Click next.
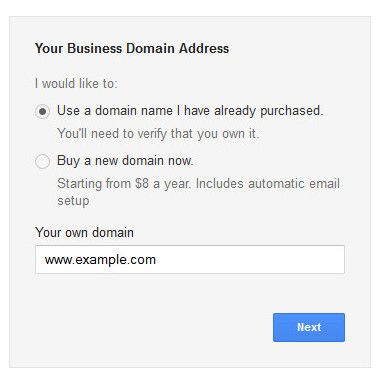
Now you will enter your domain information. You can also buy a domain if you don’t already have one. Click next.
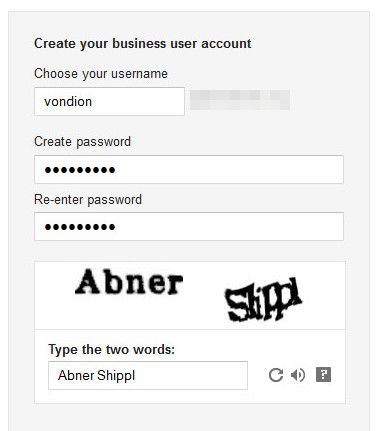
Select your account information including your user name, which will be used in your email address. You will also need to enter a password and answer the Captcha. Then click Accept and Sign Up. It may take a moment for the next page to load, so be patient.
And that’s the basics. You now have a Google Apps account registered to the email address you just set up.
Confirm You Own The Domain
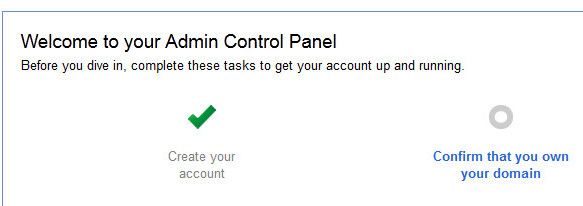
Now that you have an account set up you need to confirm you actually own the domain. You should see the admin control panel, as pictured below.
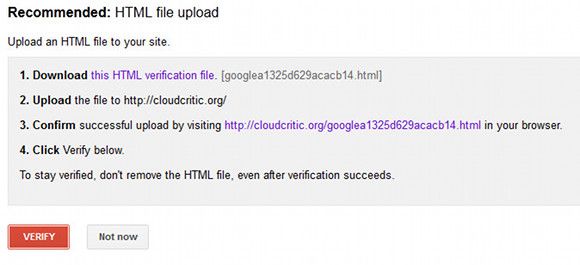
Click on “Confirm that you own the domain.” You will be directed to a page that includes an HTML verification file. Download it and then upload it to your web server as you would any other file. If you don’t have FTP access for uploading files, now is a good time to consult your web host’s help files and download a free FTP client. Make sure you upload the file to a publically accessible folder, not to an FTP folder or database folder.
Next, Confirm your domain by opening the file you uploaded in your browser. You should just see some text saying “google-site-verification” and some characters after that. Now click Verify. You should receive a message saying your domain was successfully verified. Click the continue link to go back to the admin panel.
Set Up Mobile Access
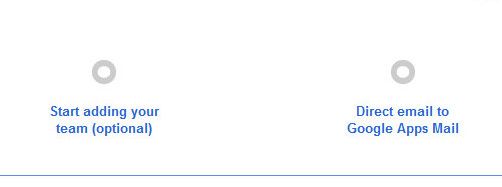
The next step shown by Google is adding people to the Apps account. This is not a critical part of getting your email to work, however, so we’re going to skip to the next step. That’s directing email to your new Google Apps account.
Click on the “Direct email to Google Apps Mail” link. You’ll be directed through a few steps including mobile access. Pay close attention to the mobile access portion if you intend to use your Google Apps email on a smartphone. These steps are different for every mobile operating system you want to access the email account with.
Set Up MX Records
Now the final step is setting up your email’s MX recorders. This will direct email sent to your domain to Google’s servers. If you don’t take this step your email will simply be sent your web host and won’t be sent to Google Apps.
The method used to update MX Records will depend on your web host. Many, including mine, use cPanel, so I am going to use it for explanation.
You first need to log in to cPanel by going to www.yourdomain.com/cpanel. Your web host should have set up a password for cPanel – if you do not know your login information, you’ll have to reset your password or contact your web host’s support.
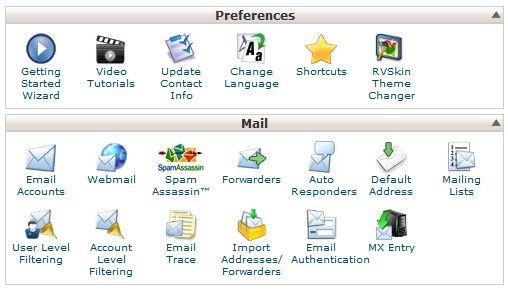
Once logged in, find the MX Entry icon in the Mail section and click on it. This will bring you to the main MX Entry page. There will be a Domain drop-down menu. Open it, then select the domain you are configuring. Wait a moment for the page to update.
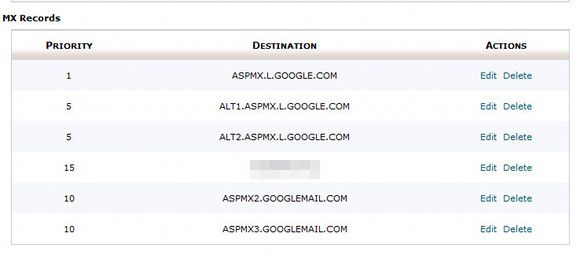
You will see some new options. First among them is Email Routing. Select the Remote Mail Exchanger button. Scroll down to Add New Record and enter the value “1” in the Priority field and ASPMX.L.GOOGLE.COM in the Destination field, then click the Add New Record button. Repeat until your records conform to the table on Google’s MX Record Values help page.
Next, click edit next to your existing MX Record, which will be filed under your domain name. Change the Priority to 15 and then click Edit. When you’re done, it should look like this.
Now send a test email to your Google Apps email to confirm that the record was successfully changed. It should go through almost instantly.
Remember, these are guidelines for an implementation of cPanel, which is commonly used but is not deployed by all web hosts. The basics you need to remember are this.
- Find where MX recorders are altered
- Enter the MX records detailed on Google’s help page
- Make sure any previously existing record has a higher priority number, is turned off, or is deleted. I prefer changing its priority so it could easily be enabled if desired.
Conclusion
Hopefully this information will help you set up a Google Apps email account. The MX records are of course the hardest part to tangle with, but it’s not rocket science. If you can’t figure out where you’re supposed to change the MX recorders on your web host, email their support or check their FAQ. They should be able to direct you to the correct menu, and the issue is so common that they may already have a solution entered into the customer knowledge base.


