Wondering how to record your screen on Windows 10? Maybe you want to document a technical problem or create an instructional video to send to a friend.
Whatever your reasons for needing a screen recorder, you might be on a computer where you're not allowed to install software (or just don't want to). To that end, we're going to show you several ways to record your screen with native Windows tools.
A Quick Note on Screen Recorder Apps
This list specifically focuses on built-in screen recorders for Windows. They're great when you're in a pinch, but we don't advise using them as long-term solutions.
If you often make screencasts, we recommend looking at some of the best screencast apps. They offer many more features to create great screen recordings and are worth a look for power users.
1. How to Screen Record With Xbox Game Bar
Windows 10 users have a built-in tool for screen recording in the form of the Xbox Game bar. It's intended as a game screen recorder for recording and streaming video games, but you can use it to record anything you like.
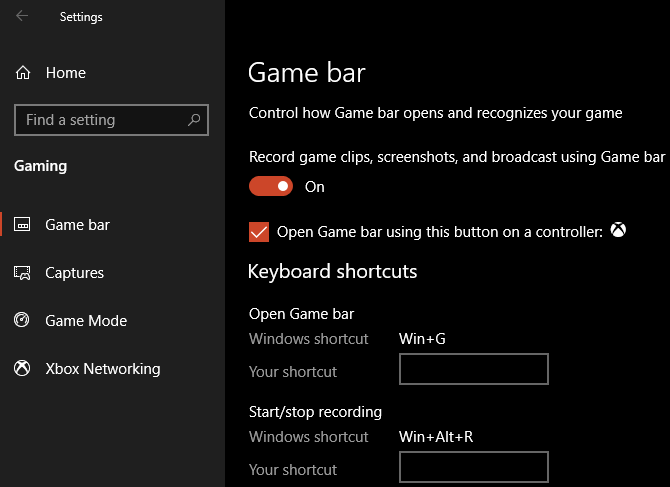
To start, open the Settings app and select the Gaming entry. On the Game bar tab, make sure you have the Record game clips, screenshots, and broadcast using Game bar slider enabled.
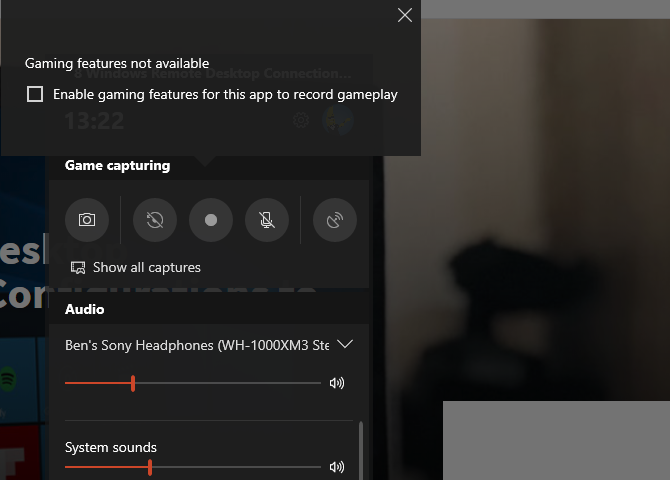
Press Win + G at any time to open the Game bar settings overlay. After pressing this shortcut for the first time, you'll likely see a box of options appear with a Gaming features not available message. This is because the Game bar doesn't recognize your desktop program as a game.
Check the Enable gaming features for this app to record gameplay box to make the features work. Now you can use the Win + Alt + R keyboard shortcut to start a recording any time. If you don't like this shortcut, you can set a new one on the Settings page.
Before recording, it's a good idea to press Win + G once more. Make sure the audio levels for your apps and outputs below are suitable. If you want to record audio from your microphone, you'll need to click the Mic icon in the Game bar options. Alternatively, press the Win + Alt + M shortcut.
To stop your recording, press Win + Alt + R again. You'll then find your recording at C:\Users\USERNAME\Videos\Captures.
2. Use the Steps Recorder
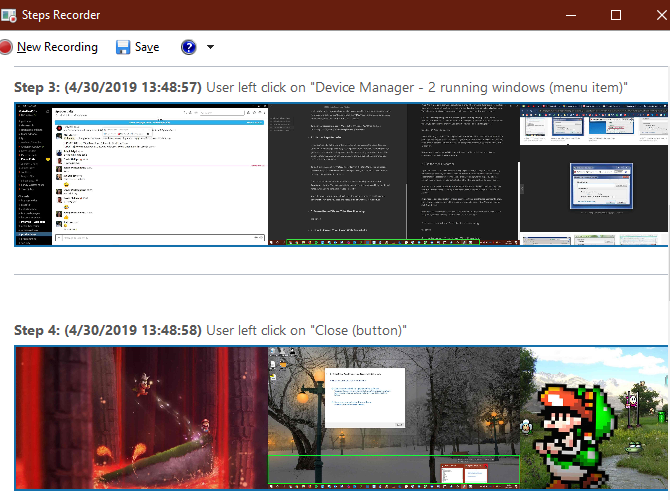
If you don't need a full-blown video recording of your screen, the Steps Recorder (formerly Problem Steps Recorder) is a simpler solution. Instead of recording video, it grabs several screenshots of a process you illustrate. It's a great way to capture the steps you take that prompt an error message, and a suitable alternative when you can't send a large video file.
To start using it, search for Steps Recorder in the Start Menu. This launches a small window; click Start Record to begin. Once you've done so, walk through the steps that you want to capture.
If you need to add additional information about something, click the Add Comment button. This lets you highlight an area of the screen and leave additional notes. When you're done, click Stop Record.
You'll then see a new window with all the information it captured. It will record a screenshot every time you click or type, and keeps a log of what you click on and enter. This, along with some technical info at the bottom, lets someone who's trying to help you see exactly what's going on.
Once you're satisfied with your recording, click Save and choose a place to save it. The data saves as a ZIP file, which you can easily share with whoever is working to fix your problem. You can, of course, keep it for your own use too.
For more tools like this, see our list of free screen recorders for your desktop.
3. How to Screen Record via YouTube Live Streaming
With those two built-in Windows methods out of the way, how do you screen record without installing anything in other ways?
In an interesting workaround, you can use YouTube live streaming as a Windows screen recorder app. Unfortunately, YouTube's Hangouts on Air support page says that this feature is "going away later in 2019". It recommends using YouTube.com/webcam as a quick streaming solution instead, but this doesn't let you record your desktop. Thus, we cover the legacy solution here.
To start, head to YouTube and make sure you're signed in. In the top-right corner of the screen, click the Upload button, which looks like a video camera, and choose Go live. Depending on the status of your account, you may need to verify some information before proceeding.
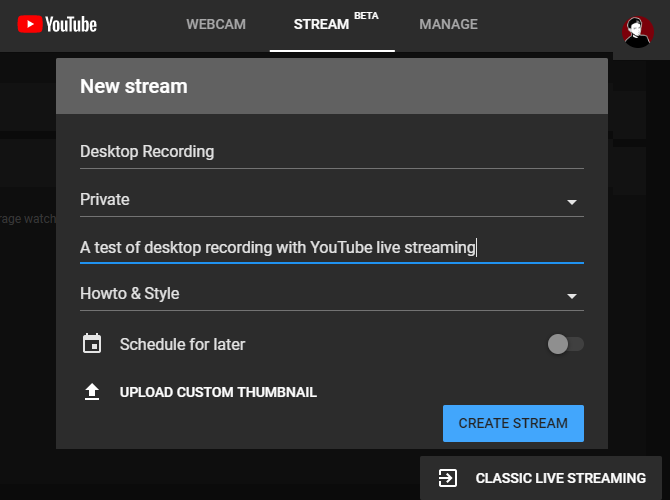
Next you'll see a box where you can add some basic info to your stream. Here, click Classic Live Streaming in the bottom-right corner to access the older interface.
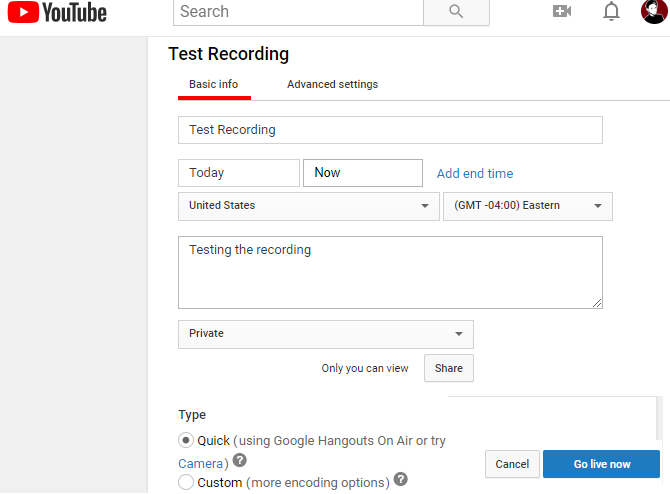
Under the Live streaming section on the left sidebar, select Events. Then choose New live event in the top-right corner.
Here, set the Title, Description, and Category to whatever you like. Importantly, make sure you change the privacy from Public to Private (or Unlisted if you want select people to watch it). Under Type, make sure to select Quick. Click the Go live now button to start.
Starting the Broadcast
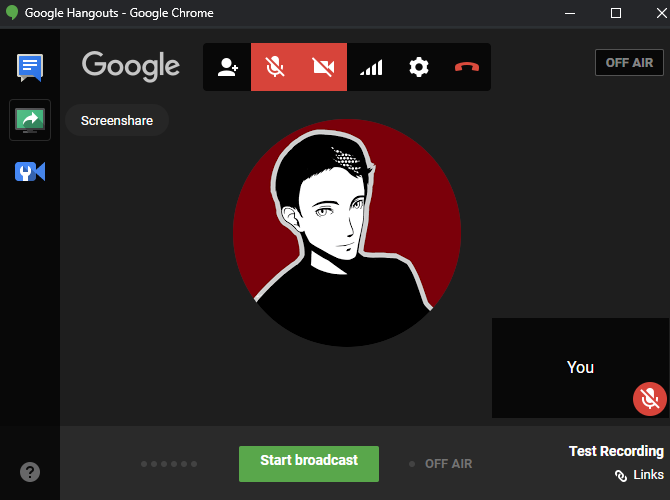
Now you'll see a new Google Hangouts On Air window with your webcam and microphone enabled, just like you're in a Hangouts call. Click the icons at the top of the screen to mute your mic and video if you desire. Then find the Screencast icon on the left side, which looks like a green monitor with an arrow.
Once you click this, you'll need to choose whether you want to capture an entire monitor or just one app's window. Choose this, then click Start broadcast when you're ready to go live.
Proceed through what you want to record, then click Stop broadcast when you're done. After you close the Hangouts window, YouTube will save the video of your screencast to your channel.
Accessing Your Screencast
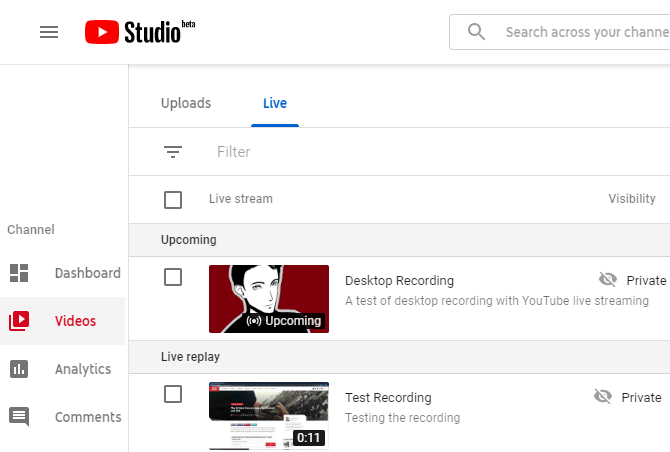
You can find your clip a bit later by clicking on your profile icon at the top-right of YouTube, choosing YouTube Studio, and selecting Videos on the left sidebar. At the top of this page, select Live to show archives of live streams, and you'll find the recording under the Live replay section.
Be sure to change the visibility from Private to Public or Unlisted if you want to share it with others.
4. How to Record Your Screen With PowerPoint
This final Windows screen recorder is closer to a bonus; because it requires PowerPoint, it's not a true installation-free solution. However, as so many computers have Microsoft Office installed, we include it in case none of the other methods work for you.
See how to record your computer screen with Microsoft PowerPoint for details.
Screen Recording the Easy Way
We've looked at several easy ways to screen record on Windows without installing any software. Whether you need a way to do this in an emergency or just want to know every way to record your screen, these give you plenty of methods.
Want a more advanced screen recording and broadcasting tool? You should take a look at OBS Studio and our complete guide to getting started with OBS Studio.

