
Quick Links
Windows includes options to help you configure power and sleep settings for your PC. By default, Windows will go to sleep after a period of inactivity. But what if you want to keep your PC awake for longer?
1. Keep Your PC Awake with PowerToys
Microsoft PowerToys is a collection of advanced tools that lets you do more with your Windows 10 and 11 systems. Its Awake feature lets you keep your PC awake on-demand, either temporarily or indefinitely. To prevent Windows from sleeping while a program is running:
- Go to Microsoft's GitHub page and download PowerToysSetup-X64.exe. Run PowerToysSetup and install the app.
- Next, launch PowerToys and open the Awake tab in the left pane.
-
Here, toggle the Enable Awake switch to turn it on.
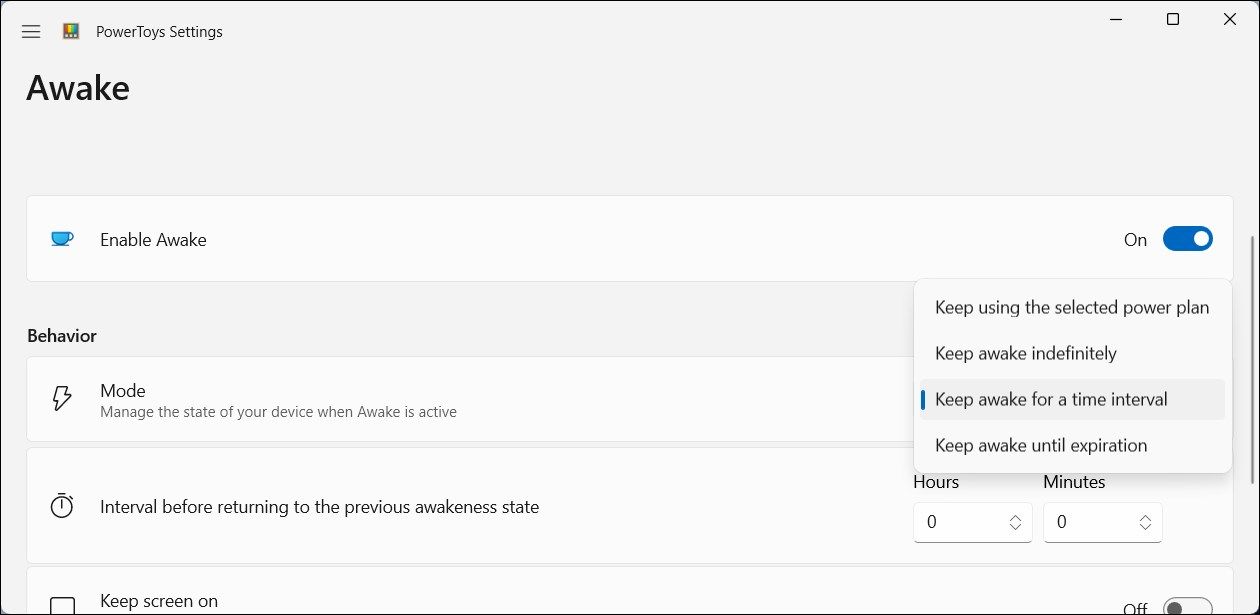
- In the Behavior section, click the dropdown for Mode and select Keep awake for a time interval.
-
Enter the time interval in hours or minutes. For a longer duration, choose Keep awake until expiration and then enter the end date and time. After the interval, your PC will return to the default power plan of your Windows computer. If you select Keep awake indefinitely, your PC will stay awake until you disable this option.
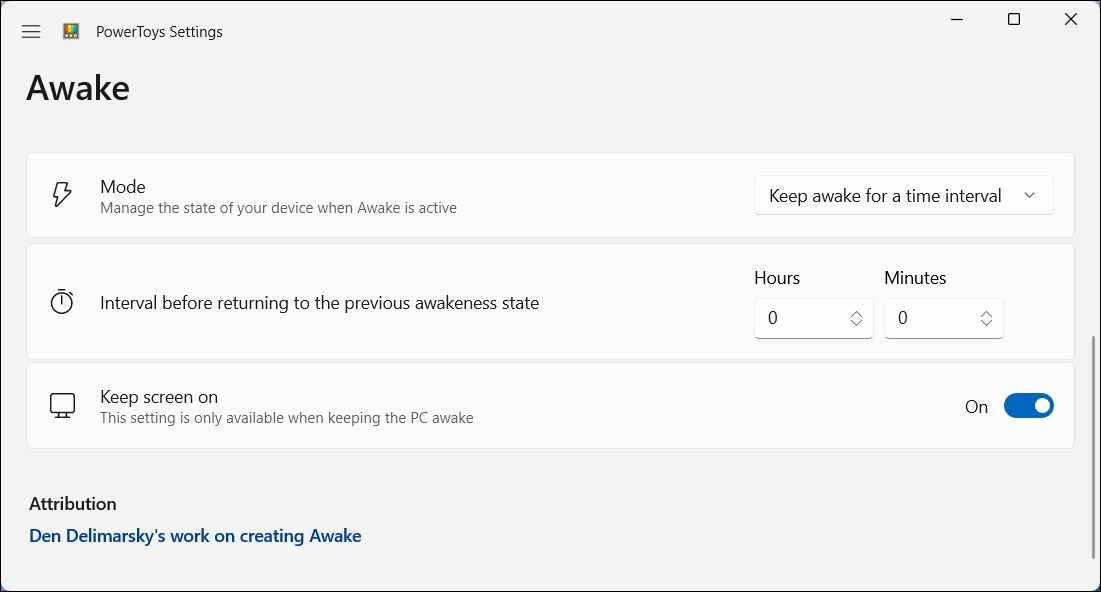
- Next, toggle the Keep screen on switch to ensure your computer doesn't turn off its screen when it's awake.


PowerToys will now keep your PC awake for the specified time. If you need to disable it, change the Behavior Mode to Keep using the selected power plan.
Download: Microsoft PowerToys (Free)
2. Keep Your PC Awake With Insomnia

Insomnia is a free third-party lightweight utility to disable sleep mode on Windows temporarily. When enabled, it calls the SetThreadExecutionState API to inform the system that it is currently in use, preventing it from entering sleep mode.
When you open the program, a pop-up window with the message "This computer can not go to sleep while this window is open" will appear. You can minimize the window to keep it running in the background, and your PC won't sleep. Closing the window will end the app and thus restore your system's default power settings.
On the flipside, it has no option to keep your screen on. If you need to keep your screen on, consider using PowerToys or Don't Sleep.
Download: Insomnia (Free)
3. Use Don't Sleep to Lock Sleep and Shutdown
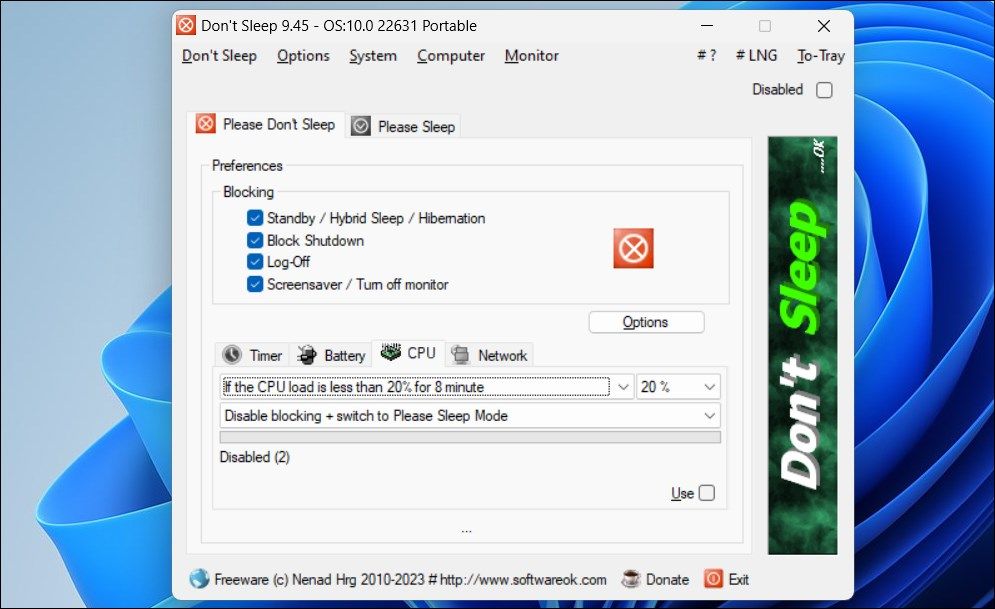
Don't Sleep offers more power management options than PowerToys and Insomnia. It can block sleep and hibernation and keep your screen on. What's more, it can also help you block accidental shutdowns. You can use Don't Sleep to configure both sleep and awake options.
To use Don't Sleep:
- Download and install your preferred version of Don't Sleep (portable or installed).
-
Open the Please Don't Sleep tab.
-
Here, you can select the power options to block under Preferences. By default, all the power options are blocked by the app.
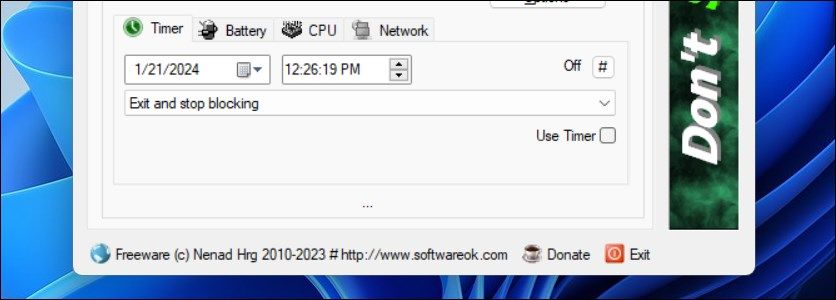
- In the Timer tab, set a time to keep your computer awake before the default power scheme is restored.
- Click the To-Tray option in the top right corner to minimize the app to your system tray.
- To disable the app, select the Disabled option in the top-right corner.


You can also configure Don't Sleep to set aggressive power management rules based on the battery, CPU, and network parameters of your system. Don't Sleep features some additional features in the toolbar. For example, click the Monitor option and select Monitor Off to turn off your display or click Computer to access the power options.
Download: Don't Sleep (Free)
4. Disable Sleep Mode in Settings
You can prevent your computer from entering the low-power sleep state by configuring sleep mode in the Settings app. While this only offers a basic level of control over power and sleep options, it works if you don't want to use a third-party tool.
To change sleep and screen time in Windows 10 and 11:
- Press Win + I to open Settings.
-
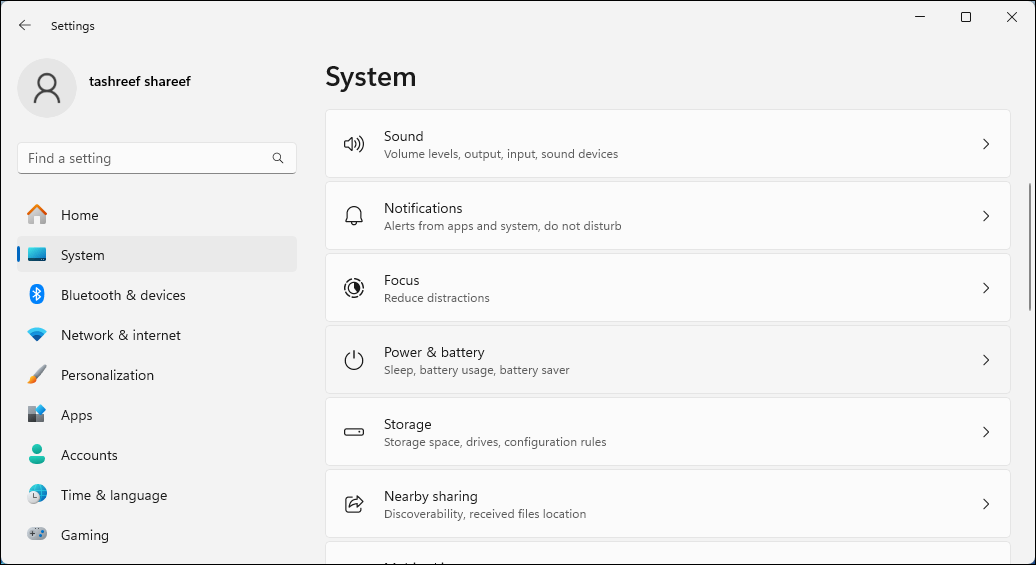
Open the System tab and then click Power & battery. In Windows 10, go to Settings > System > Power & sleep.
- Under Power, click to expand Screen and sleep.
-
Next, click the dropdown for On battery power, put my device to sleep after and When plugged in, put my device to sleep after, and choose an interval from one minute to five hours. Choose Never to turn off sleep mode completely.
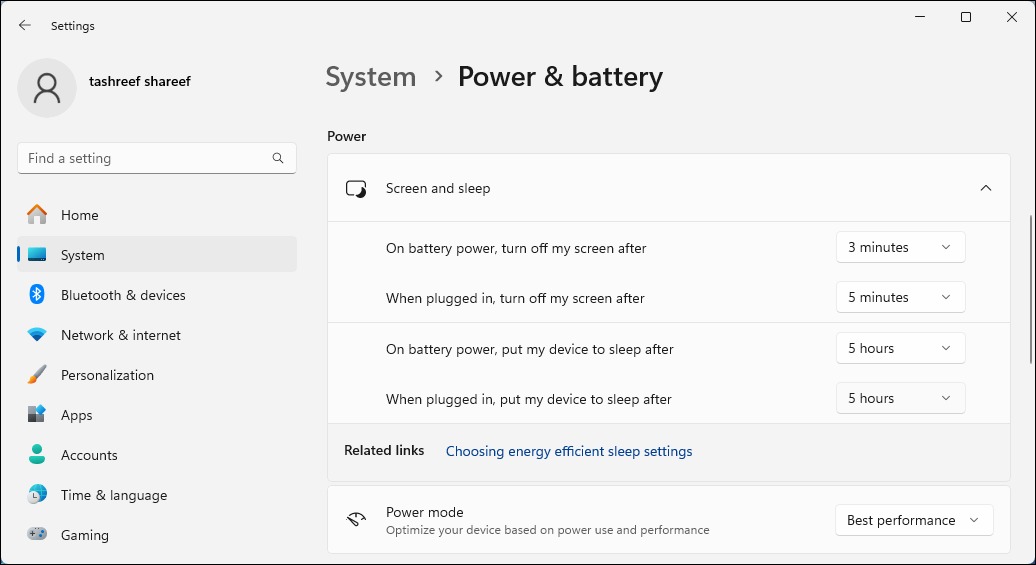
- To configure your screen timeout interval, click the drop-down for On battery power, turn off my screen after and When plugged in, turn off my screen after and choose a duration from 1 minute to 5 hours. Choose Never to prevent the screen from turning off.


Not all programs can suppress the default sleep behavior of your Windows computer. If sleep mode disrupts your workflow, you can use these third-party utilities to keep your PC awake for a short or prolonged duration.