Back in January I treated myself to a new laptop, a mobile workstation. Compared to my old laptop, the new machine was operating at the speed of light. However, with all the software that came and went over the months, and despite regular system maintenance, some minor but annoying bugs had crept in along with the performance slowly declining. At some point reinstalling your machine simply is inevitable. Although my system was not at that point yet, I decided it was time to clear the battlefield last weekend.
To me this is not a tedious task, I actually quite enjoy the process. But the thing is that setting up a system from scratch, plus restoring personal settings, user data and backups, takes a lot of time. Sometimes you may not have the time. Thus, for emergencies it's always wise to have a quick fix better than a Knoppix CD. There are two ways...
Create a System Image
If you currently have a stable and smoothly running system, you can create an image of your system. This is the most comfortable solution because it incorporates all your personal settings and preferences.
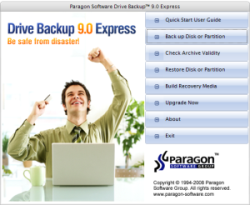
The tool of choice here is Paragon's Drive Backup Express. It's a model piece of software: fast, intuitive user interface, thorough documentation, and it's free. OK, the happy guy next to the menu is a little too much.
To install the program you need to obtain a free serial, which means you have to register with Paragon using a valid eMail address. I think for a software of this quality that's a reasonable thing to ask for.
The setup is straightforward, no more surprises. The menu is the first thing that comes up when the program is loaded. Since Drive Backup uses hot backup technology, backups can run while the computer is being used, which makes it very comfortable to use. Unfortunately, the free version does not offer scheduled backups.
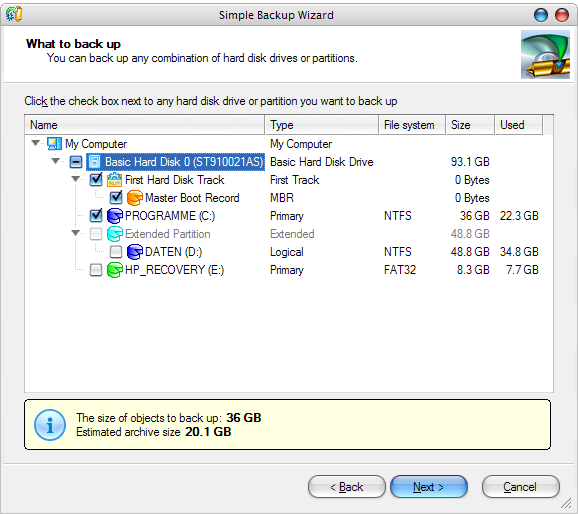
Step 1: Select what you want to back up.
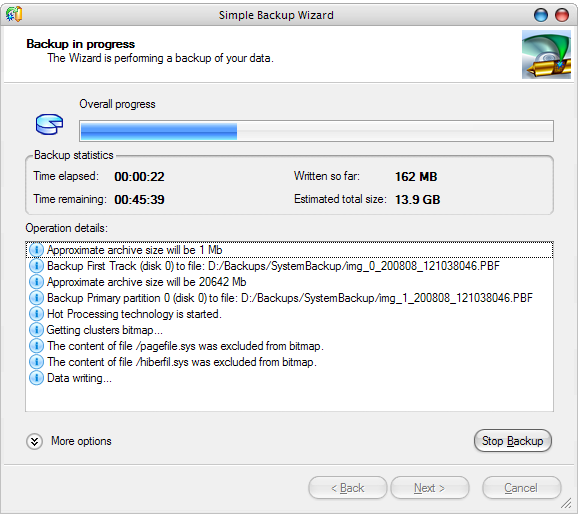
Step 2: Start, sit back and wait or continue working.
Step 3: Check the file for validity.
Step 4: Build recovery media for the case that you cannot boot your computer.
This can be a flash memory stick or a CD/DVD disk. When using a USB stick please be aware that all files currently on the stick will be removed. The stick will become a dedicated recovery medium, so you should get a separate one for this purpose.
Step 5: Disaster!
In case of disaster, insert your recovery medium, start your computer, make sure the BIOS lets you boot from your USB stick or CD/DVD drive, start the recovery program on the stick and launch the Simple Restore Wizard. The whole procedure is very, very well documented in the user guide and it really isn't complicated. However, if you want to be super safe, print it.
When I tried to run the recovery, I had slight issues using the normal mode. The program would freeze half way through loading from CD. So I tried the safe mode and again had some issues, this time with hard drive i/o errors. However, the program continued and once it listed all detected partitions and drives I quickly located the backup file and ran a restoration on my old laptop without any further problems.
Create a Custom Installation CD
If creating an image from a running system is not an option, you can at least prepare an installation CD that will spare you the hassle of manually adding user accounts, drivers, software, and more.
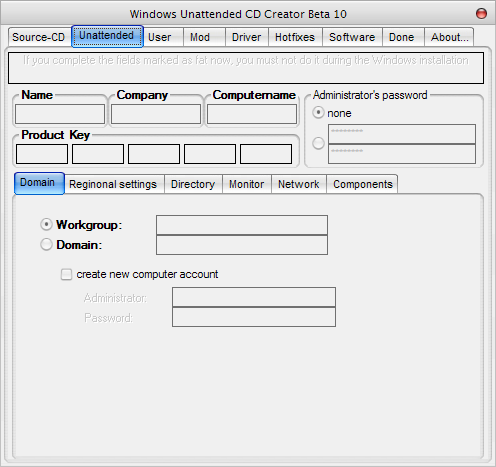
A great tool for this task is Vitali Graf's Windows Unattended CD Creator. What you need is a valid Windows CD and all the software, drivers, patches and hotfixes you wish to include in your custom CD. The program also requires Net Framework 1.1 or 2.0 installed. For the creation of the CD you will naturally need software and respective hardware able to burn ISO images on CD or DVD, and a blank disk.
What's your ritual for restoring your operating system? Which strategies and tools are you applying?


