Just because your site needs to be down for a while doesn't mean it needs to be ugly.
WordPress is a great blogging platform that allows you to make amazing websites for all sort of things, not just a blog. Website owners spend a lot of time working on their beloved piece of cyberspace, but the default WordPress maintenance page, which simply has text saying "Maintenance mode, come back later", leaves a lot to be desired. So here's how you can make the perfect maintenance page that fits in with your website's theme.
Step One: Making The Maintenance Page
The maintenance page consists of a simple HTML file that will be displayed when you put WordPress into maintenance mode. Being the great guy that I am, I've made a template for you to download and edit to your liking. The package consists of two files: the html maintenance file, and the MakeUseOf logo. You can download the files in a .zip archive by clicking here.
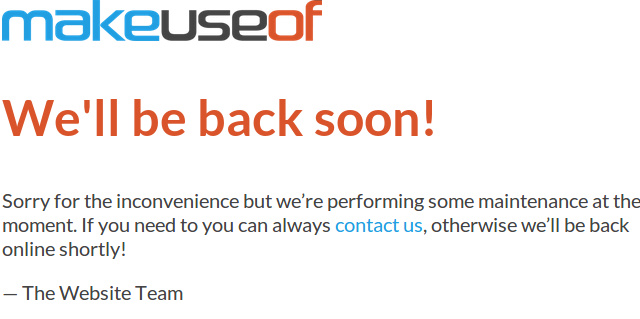
Once you have downloaded and extracted the files contained within the .zip archive, open up the wp-maintenance-mode.html file in your web browser, you will then get a page that looks something like this:
As you can see the page is very basic, but it is themed perfectly for us here at MUO. The font, colours and logo all match our brand. You need to edit the html file, of course, so that it matches the theme on your WordPress site. Simply right click on the html file and select Open With, and then open the file with a text editor. If you're using Windows, I would recommend Notepad++ , a compact word processor with more features than the standard Windows notepad.
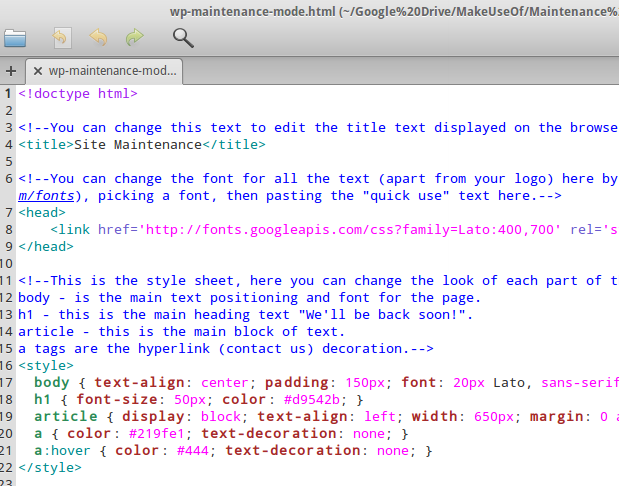
Once you opened the html file, you will see I have added many invisible notes to assist you when editing. They are shown in blue in the screenshot below. You can use these notes to help you edit the maintenance page to your liking.
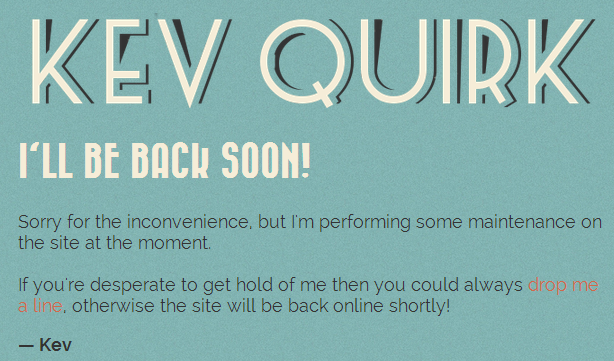
I edited the maintenance mode html file so that it is themed to look like my personal homepage. Here is what that looks like – check out my site and you'll notice it matches my website's theme.
Step Two: Install WP Maintenance Mode
Now that you have your pretty awesome looking WordPress maintenance page it's time to make it work with your site. You first need to install a plugin called WP Maintenance Mode. This is done in the same way as all other plugins: simply go to the plugins page within WordPress and select Add New. Then search for "wp maintenance mode".
There is more than one maintenance mode plugin, so make sure you install the one that's been created by Frank Bültge. Once installed, activate the plugin and click on the settings button underneath where is says WP Maintenance Mode in your list of plugins.
Step Three: Upload Your Files
The third and final step in this process is to upload your maintenance page to your web host, so that you can use it. But first we need to rename the wp-maintenance-mode.html file to wp-maintenance-mode.php. Once you've done that, connect to your web host via FTP (if you're not sure how, then take a look at these really great tips for using Filezilla) and navigate to the wp-content folder inside your websites root folder.
Once there, upload your wp-maintenance-mode.php file along with any other files that are associated with it, like your websites logo, or possibly even a background image for your page like I have. That's it! You're all set to use your new, themed maintenance page.
Step Four: Test Your Maintenance Page
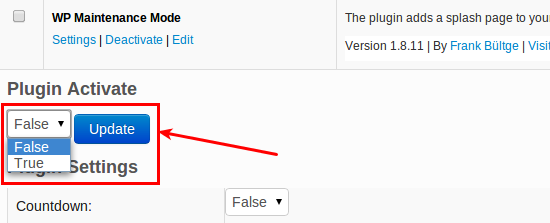
Everything is now set up, you just need to make sure it's all working. Head back to WordPress, where you should still be on your plugins page with the settings for WP Maintenance Mode expanded. All you need to do now is turn maintenance mode on by changing the Plugin Active drop-down menu from False, to True. Then click Update.
If you now log out and navigate to your homepage, you should see your shiny new maintenance mode page displayed. Pretty cool huh? While WP Maintenance Mode is enabled, you can still log in to the WordPress admin back-end by going to http://yoursite.com/wp-admin, where you can make all the changes you need to make whilst your site is in maintenance mode.
Once you're logged in, if you navigate to your websites home page you will see the normal live page that would be displayed when the site isn't in maintenance mode. This is so that you can preview any changes you have made, while visitors will continue to see your maintenance page. Once you're finished, simply change the Plugin Active drop-down menu from True to False, and click Update. All visitors will then see your normal homepage again.
Conclusion
Having a themed maintenance page for WordPress will set you aside from the crowd. Using the default WordPress maintenance page could make your site look unprofessional, and possibly even put your visitors off visiting again. Why take the chance when adding an awesome maintenance page is so easy?
If you have followed this process and made your own WordPress maintenance page, then please: feel free to link to them in the comments section. We would love to see what you guys come up with, and I'm sure other readers would too.

