Google is the Nirvana of most nerds. They've given us things we could only dream of for free. They've showed us on multiple occasions that they're more than just 'the search engine guys'.
One of those occasions was very recently. With its own mobile operating system, Google has been challenging Windows Mobile (not much of a challenge) and the iPhone.
If you've got an HTC Windows Mobile phone, you might not have to buy yourself another device to enjoy the hype. But install Android on your Windows Mobile device instead. Nevertheless, porting this operating system has proven a tedious task, and not all phone types support it yet. Newer GSM devices will have a better chance, and to date CDMA is scarcely supported.
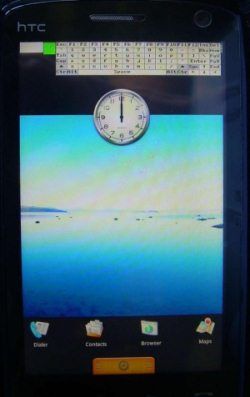
Right now it's not yet possible to boot Google Android as the default operation system. Instead we'll be using HaRET, a Windows Mobile boot loader. Note that we're not running or emulating Android in Windows Mobile, but using it to reboot the phone into Android.
1. Gathering Files
Different phone types require different base Google Android files. Even for supported phones, the files will be scattered over different sites and developer areas. I will supply links for some of the most popular HTC phones.
- HTC Diamond
- HTC Vogue/Kaiser/Polaris/Nike
- HTC Raphael/Fuze/Touch Pro
Again, if you don't see your phone listed, don't give up. Do a Google search with your own model - because it's a user-generated wiki, some major advancements aren't listed on the site yet. When going off-site, always double check your sources, making sure that you aren't downloading any malicious content.
Download the Google Android files for your phone type.
- The latest Android bundle/files for your phone type
- HaRET (executables)
Most sites will supply file bundles, others will put a directory of files online. If need be, download all of those files, we'll be telling you which to use in the next step.
2. Installation
If you're already running a custom ROM, you might want to format your phone. Conflicts can occur when double-modding, and you're probably going to be using Google Android anyway.
First, let's put the files in place. Connect via USB and navigate to your phone's root (this is the mother-folder, the highest directory level). After unzipping your Google Android release, transfer the files you've just downloaded. Putting them in any other directory won't work. You should have something like this:
- HaRET.exe
- zImage (kernel file)
- Initrd.gz
- default.txt
- rootfs.img
- system.img/system.sqsh (Android OS files)
It'll help to shorten filenames. Some have a date or programmer suffix that can be deleted.
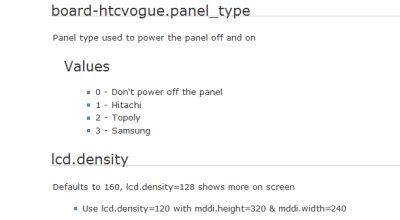
Next, configure your default.txt. Open the file in Notepad and make sure all the values are right. How do you know? Check out a list of Boot Options here. You might need to change phone model, screen resolution, internet access and the like. This will take the most time, but if you keep your eyes open, it isn't a hard job.
Finally, disconnect your phone and use your Windows Mobile file manager to locate HaRET.exe (it should still be in your phone's root). You might want to add it to your applications shortcuts. Open HaRET and press Run.
HaRET will reboot your phone with the Android files. Perhaps in the (near) future, we might be able to install Google Android as the standard operating system. But even though progress is unstoppable, it moves at its own pace.
Did you like the tutorial? Let us know in the comments if you experience any problems. Or better yet, direct that at the your phone type's site. They'll be able to help you with the really technical business.


