Adobe Photoshop is an incredibly versatile program. Whether it's textures, gradients, or paintbrushes, there is no limit to the ways that you can adapt this program to suit your needs.
If you don't like Adobe Photoshop's default color swatches, what can you do? In this explainer, we're going to talk about how to make color palettes in Photoshop for your projects.
Step 1: Find Your Inspiration
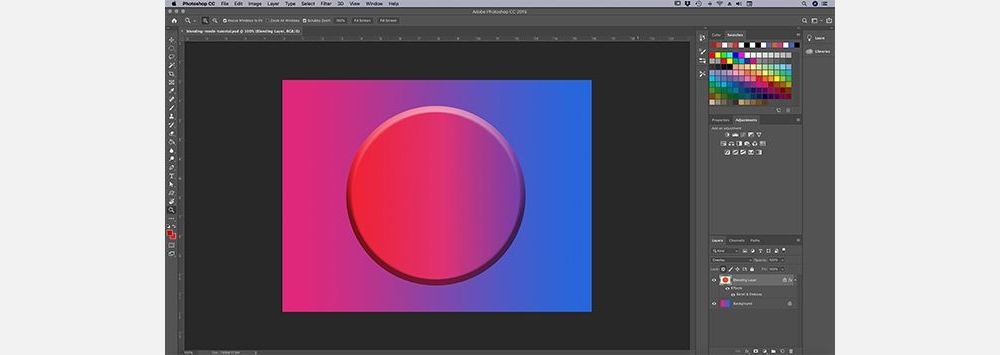
The first thing you'll want to do is open an image to grab each color from. After you open up your file, you'll see a screen setup similar to the one that I have up now.
Your image will be in the center of your workspace, and your default color palette will be along the right side.
Step 2: Access the Color Swatches Panel
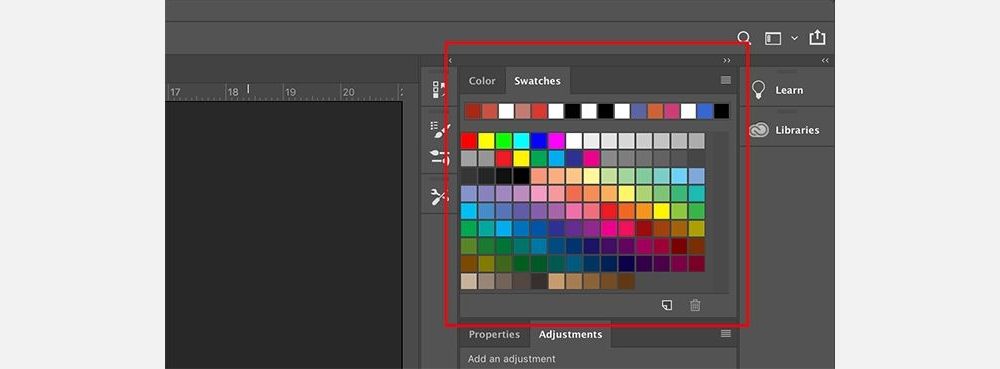
The Color Swatches panel is where we'll be turning our attention to next. It's located in the top right-hand corner of your workspace. This is what your default color palette on Photoshop will look like—a group of squares laid out in a grid.
Along the top row, you'll see a series of colors. These are the colors that I've sampled recently with my Eyedropper tool, resulting in this seemingly random color palette. Adobe Photoshop puts them there so I can quickly pull them up again if I need to. Beneath these samples, we'll find a rectangular grid, the default color palette in Photoshop.
This grid is fine by itself, but we don't need it right now. Let's get rid of these swatches.
Step 3: Delete Unwanted Color Swatches
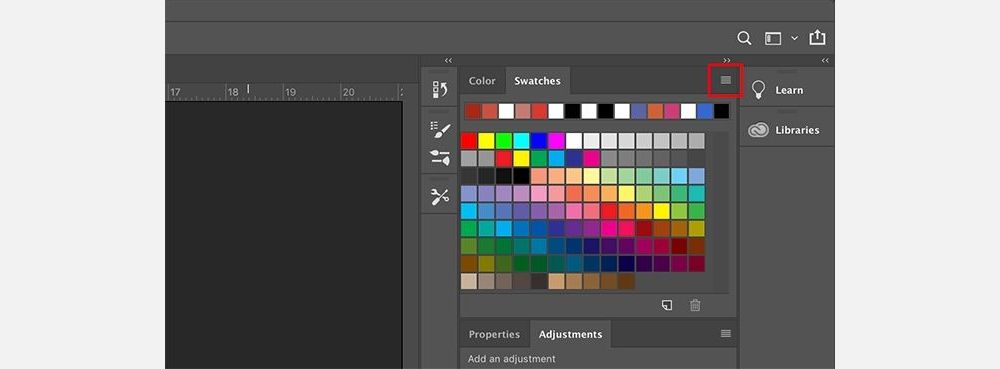
To delete these color swatches, click on the hamburger menu in the top right-hand corner of your Swatches panel.
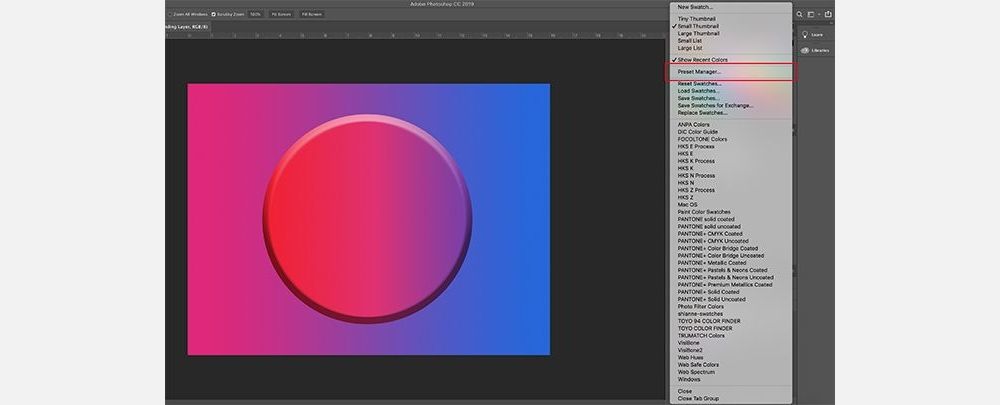
Next, a giant menu will appear. This menu will give you a list of all of the actions that you can choose. It will also give you a list of default colors available to you in Photoshop. Ignore those for now. Instead, click on Preset Manager.
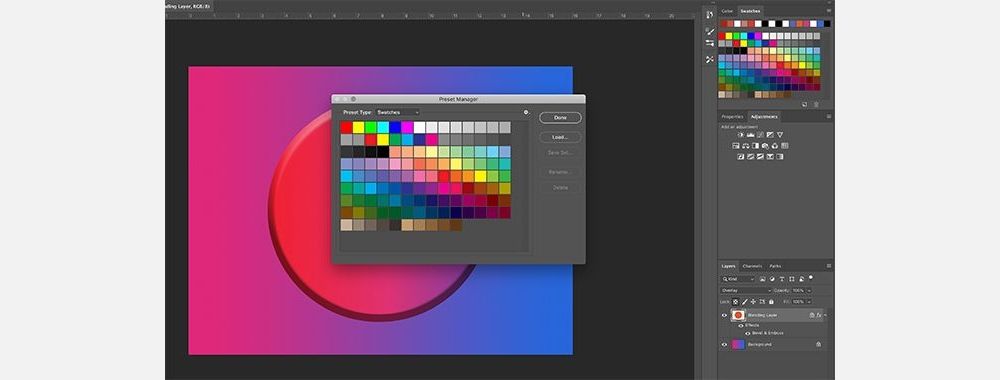
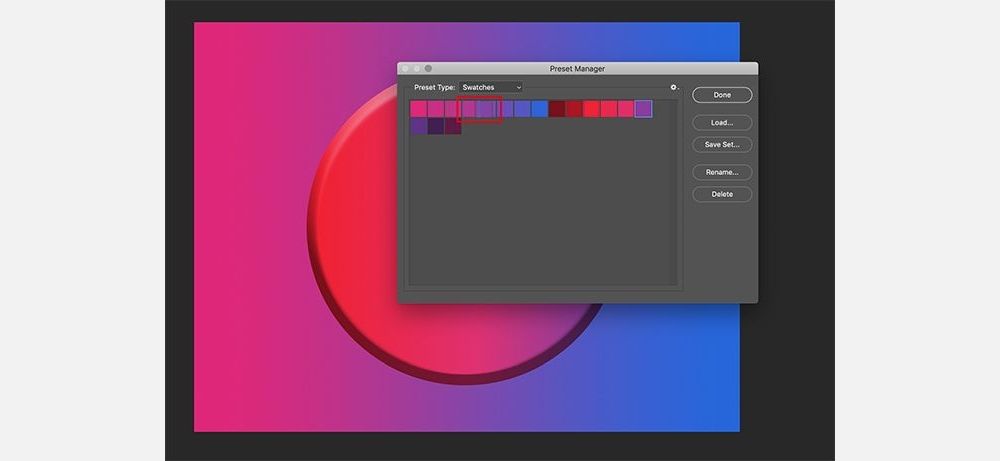
Once you do, a new dialog box will appear. In this box, you can control the color swatches currently active in your Swatches panel.
You can also:
- Load more colors to make the color palette larger.
- Delete colors.
- Rearrange the color grid.
- Rename the colors that you already have.
- Create a brand new Photoshop color palette.
To delete these default colors, Left-Click on the first color.
Then, Left-Click + Shift on the last color to highlight the entire palette. You'll know that it's highlighted by the blue outlines around the squares.
Next, click Delete, and then hit Done. This will not permanently change your default Photoshop color palette. Photoshop already has the template saved; you can always call it up if you need to.
Step 4: Use the Eyedropper Tool
Now that you've gotten rid of your default colors, you're ready to fill the space in with new ones.
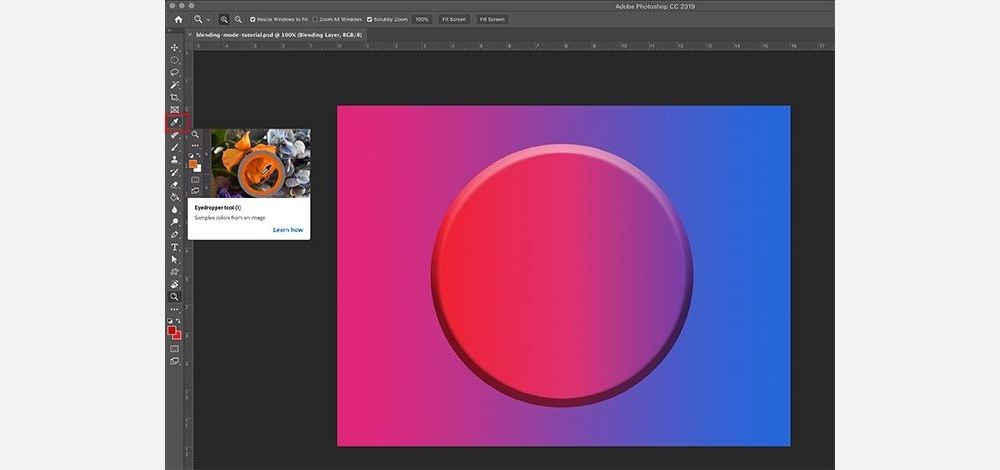
To select individual colors for your custom color palette, activate your Eyedropper tool.
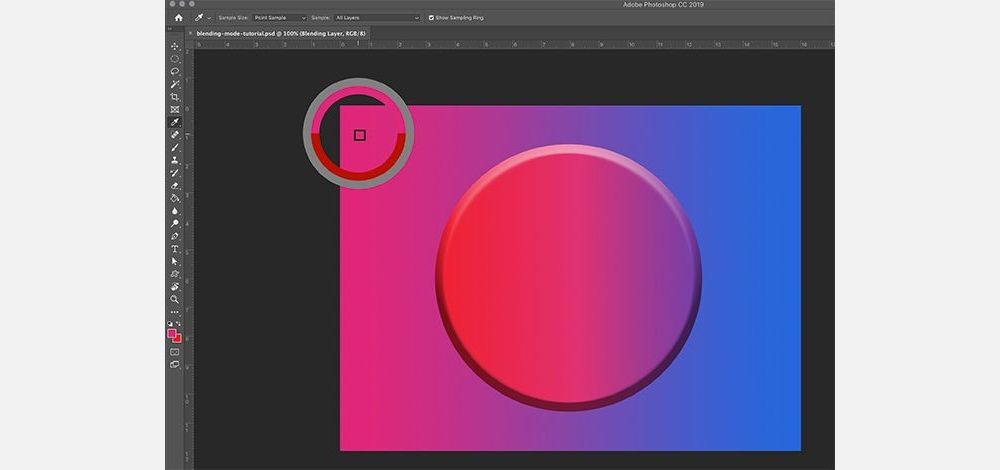
Next, in the top left-hand corner, you'll see a dropdown menu that says Sample. Click into it and choose All Layers.
This All Layers option means that you're sampling all layers in the file at once. This will make the process of picking your colors much quicker.
Step 5: Create a New Color Swatch
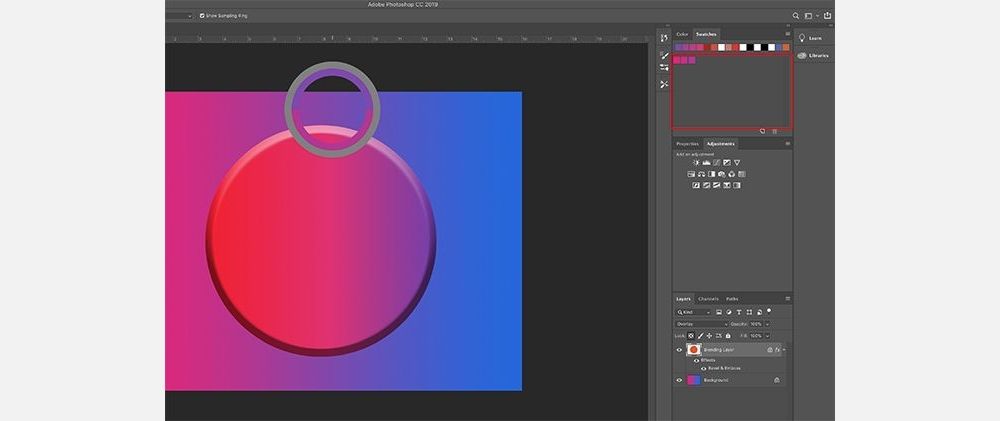
After you have your Eyedropper tool and All Layers selected, click the area where you want to sample your new color.
You'll see a color wheel pop up. At the top of the wheel, you'll see the color that you're currently sampling—in my case, bright pink.
Along the bottom will be the color that you previously selected with your Eyedropper tool. For me, that color was red.
Once you have your color, move your Eyedropper tool over the empty Swatches panel. You'll notice that the cursor switches from an Eyedropper icon to a Paint Bucket icon.
Once the icon changes, Left-Click on the empty Swatches panel. Photoshop will immediately deposit your color as a new swatch.
After you drop the swatch, a window called Color Swatch Name will emerge. This is where you will name your new swatch. You'll also have the option to save it to your library. Once you name it, click OK.
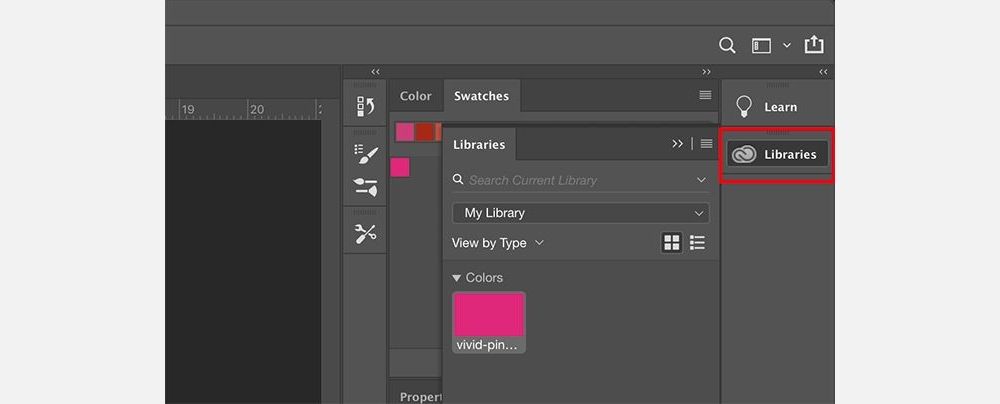
If you clicked the option to save this color to your library, you may see the Libraries panel open up and extend over the Swatches panel, especially if this is the first time that you've completed this step.
We're not going to explore Libraries in this tutorial. To get rid of it, simply click on the button that says Libraries. It will collapse the panel and you can keep working on your Swatches.
Step 6: Finish Creating Your Color Swatches
Repeat the previous step again until you have all the colors you need in your custom color palette. Photoshop is able to store as many colors as you want in the Swatches panel.
Once you have all of the colors that you want, click on the Swatches dropdown menu, and choose Preset Manager again. As we did when we first opened the Preset Manager, you'll see options to Load, Save Set, Rename, and Delete. Instead of deleting colors, however, we're going to rearrange them based on hue.
To rearrange your swatches, click on a color so it's highlighted. Then, click and drag the color to where you want it to show up; you'll know where you've dragged this color by the blue line that shows up as you pull it across the swatches. Arranging the colors like this lets you see if you've sampled the same color twice.
In this case, I did sample the same color twice. To delete that extra color swatch, click on it so that it's highlighted. Then, hit Delete.
After your Photoshop color palette is arranged to your liking, click Done.
Step 7: Save the Color Palette
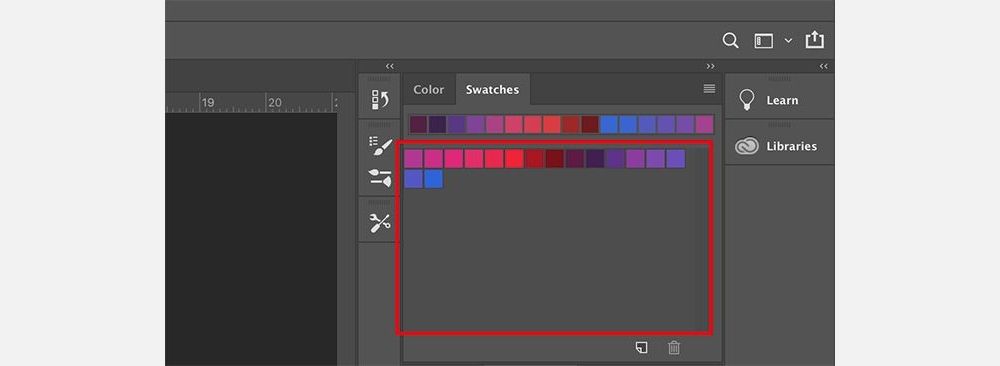
Once you're done with the Preset Manager, you can check out your colors in the Swatches panel. If you're happy with what you have, it's time to save them for future use.
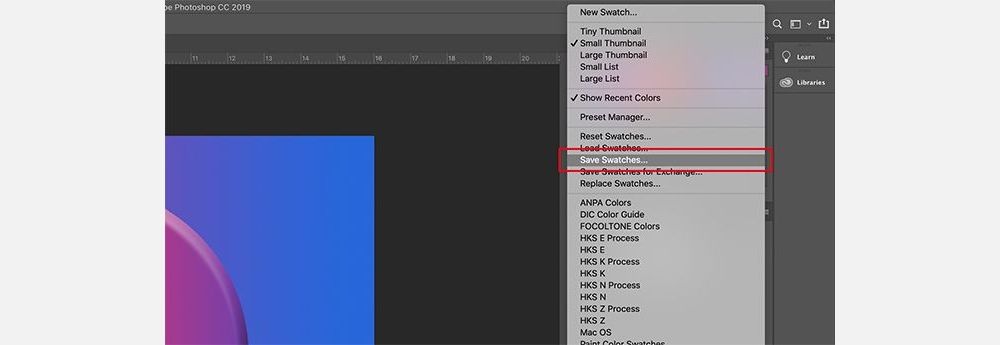
To save these swatches as a custom Photoshop color palette, click into the Swatches dropdown menu and choose Save Swatches.
The Save As dialogue box will pop up for your custom color palette, and you can name it from there. Give it a meaningful name that is easy to remember.
Step 8: Reset Photoshop Swatches Back to the Defaults
Let's say you don't want to use this custom color palette in Photoshop. What if you need the original Photoshop color palettes?
To access them again, click on your Swatches dropdown menu, and select Reset Swatches.
When Photoshop asks you if it's okay to replace your current colors, click OK.
It's important that you do not click Append here. If you do, Photoshop will simply add the default colors to your custom color palette instead of replacing them.
Step 9: Reload Custom Color Swatches
Now that you have your default color palette active, where can you find your custom swatches again? How do you switch back?
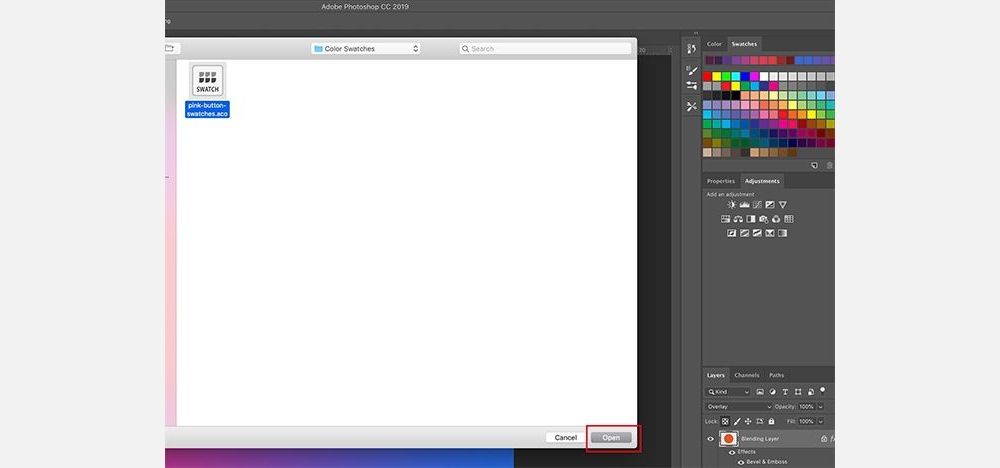
Again, the process is simple. Just go to the Swatches panel, click on the Swatches dropdown menu, and select Replace Swatches.
Inside your Color Swatches folder, you'll find the file for the Photoshop color palette that you want to use. Select the file that you want, click Open, and load it in.
Get the Right Colors for Your Project
Now that you've learned how to create a custom color palette in Photoshop, you can put this skill to good use when designing your next project. Inspiration for a color palette on Photoshop can be anything from a beautiful sunset to your favorite celeb's latest fashion statement.
A well-balanced and appealing Photoshop color palette can take a graphic design project or any other creative endeavor from boring to stunning in no time. If you want your design to soar, choosing the perfect custom color palette in Photoshop should be one of the first things that you figure out.


