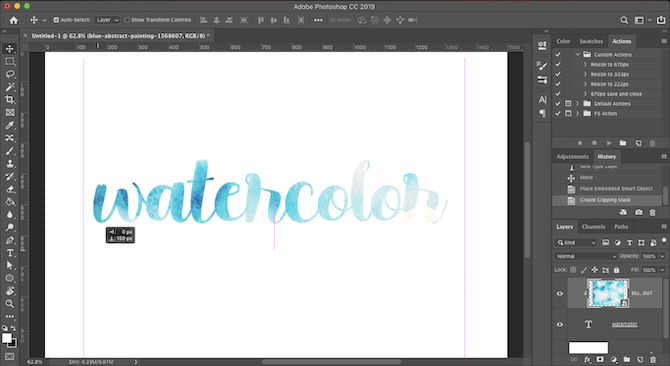
One very easy way to bring text to life in logos, page headers, and other parts of your branding is to add texture to it.
Whether it's a watercolor effect, metal, flames, or something else, texture can bring interest to otherwise flat type.
Here are the steps you need to add a texture to text in Adobe Photoshop...
Step 1: Add Your Text
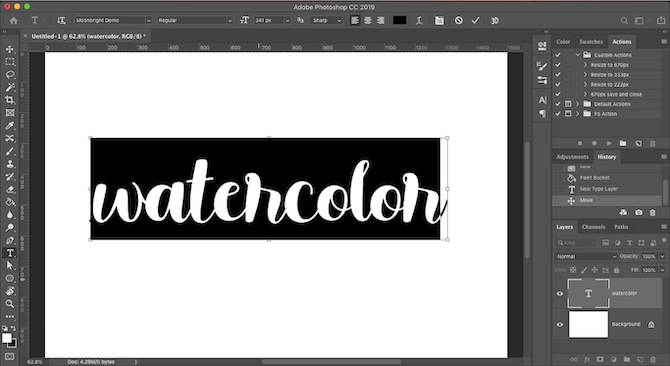
Using the Text tool, type out your text in Photoshop. You need to use a thicker font to make sure the full effect of the texture is visible---at the very least choose a bold variant of your chosen typeface.
Also, try and match the font to the kind of texture you want to use. A handwritten font works well with a watercolor texture; a slab font goes well with a metallic effect, and so on. Check out our guide detailing where to download free fonts to increase your options.
The color of the text doesn't matter as it will soon get covered with a texture.
Step 2: Find a Texture
Your texture can come from two places. You can either make it manually on a separate layer in your Photoshop file, or you can import it from an external image file.
It's easy enough to create your own textures in Photoshop for simple things, like adding a color gradient to your text. However, in many cases you'll be better off using an existing texture from another file. You can find many ready-made ones on some of the best free stock image sites.
Step 3: Place the Texture
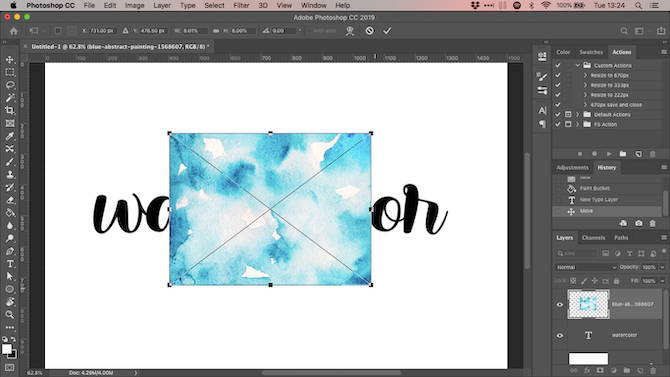
The next step is to place your texture. If you've made your own, make sure it's on a layer that is directly on top of your text layer.
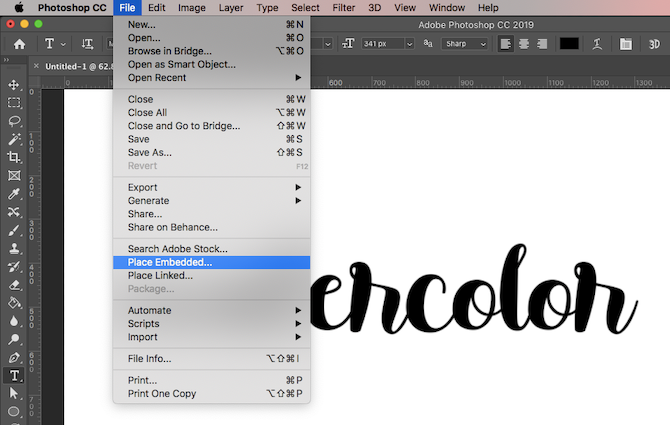
If you're importing a texture from another file, go to File > Place Embedded. Then navigate to the texture you are using and hit the Place button.
If the image is fully covering your text, hit Enter. If it isn't, you can enlarge the texture using the handles at the corner of the image to change its size. (Be sure to hold down the Shift key if you want to maintain the proportions of the image.) Now hit Enter to move on.
Step 4: Create a Clipping Mask
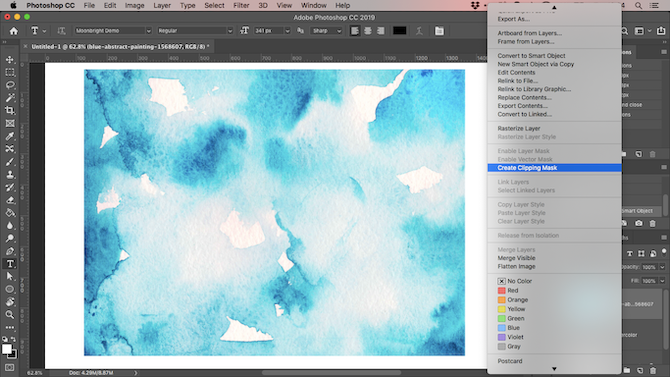
Go to your Layers panel. (If it isn't displayed, go to Windows > Layers.) You should see three layers in your file---the background, the text, and the texture.
Make sure that the layer containing the texture is placed right above the text. Now right-click that layer and select Create Clipping Mask.
The full texture layer will disappear, and only be visible where there's text below it.
Step 5: Adjust the Position
Both the text and texture layers remain fully editable, just as normal layers are. This means you can go back in and edit the text without needing to remove or reapply the texture. Add more text and the texture will automatically be placed on it.
If the texture isn't placed exactly where you want it, select the layer and open the Marquee Tool, or hit M on your keyboard. You can move the texture around by holding the Ctrl key on Windows or Cmd on Mac and dragging the image around with your mouse.
If you want to resize it, right-click anywhere on the text, and click Free Transform. This will reactivate the bounding box around the texture and you can resize it in the same way detailed in Step 3 above when placing the image.
Step 6: Extend or Soften the Text Edges
By now your image should be looking pretty good, and you can leave things there if you're happy. But there's one final, optional step you can try.
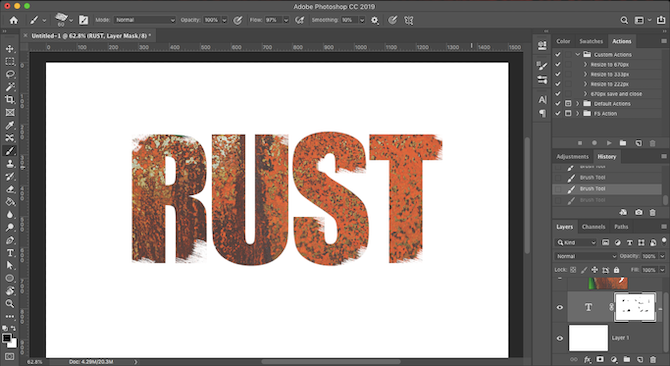
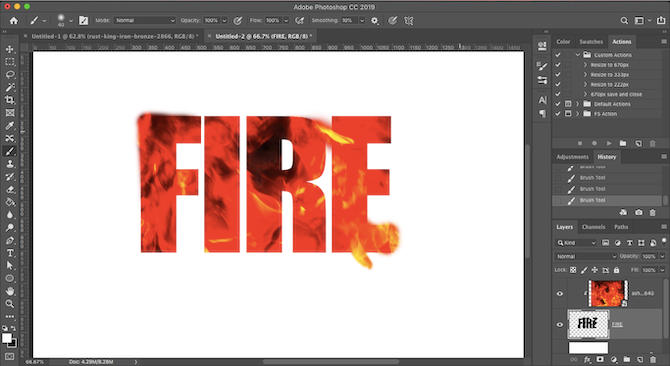
Depending on the type of effect you're going for, you might not always want hard edges on your text. A flame texture, for example, could extend beyond the edges of your characters, or a corrosion effect could eat into them. Fortunately, this is easy to achieve.
To cut away the edges from your text, select the Text layer and click Add Vector Mask. Now choose the Brush tool (B), and select a brush that fits the style you want.
Next, set the Color to black, make sure you've selected the vector mask, and paint over the edges of the text. Paint white to restore any parts you've removed by mistake. It should look something like this:
To add more texture beyond the edges of your text, select the Text layer, then grab the Brush tool. Double-click on the canvas. You'll be prompted to convert the text to a raster layer. This means you'll no longer be able to edit the text, so you might want to duplicate the text layer first to create a backup. Click OK to continue.
Select an appropriate brush and set the paint color to white. Now start painting around the edges of the text and you'll see more of your texture appearing. Because we aren't using a mask here, you have to use the Undo tool to remove any mistakes.
The result will look something like this:
Step 7: Save Your Image
The final step is to save or export your image. Save it as a PSD file to save a master copy with all the editable layers in tact. Or save it as a JPEG to save a flattened copy of the image with a white background.
To save the text with a transparent background, perhaps for use on the web or in another graphic design document, remove or hide the white background layer, then save the image as a PNG file (or a GIF).
Discover More Photoshop Tricks
As you can see, it's quite easy to add a texture to type in Photoshop. The most important thing is to get the right texture and the right fonts. If you need help picking fonts for your projects, our article on font pairing tips will help.
The clipping mask that we've used in this tutorial is a very versatile tool that lends itself to a lot of cool uses. It enables you to crop images in unique ways while making sure they're still fully editable. You can learn one of the best uses in our guide detailing how to crop images using shapes in Photoshop.

