Not all of us are Photoshop aces. But you can learn a few simple creative techniques for greater impact. Combining images with text is one of them.
You can make cool text effects in Adobe Photoshop and you can also do some incredible things with images. But with this uncomplicated tutorial you can "fill" a text with an image. This Photoshop method uses Clipping Masks which is a quick way of creating cut out effects with images. The Adobe Support page describes the basics of a clipping mask.
Let's Fill a Text With an Image
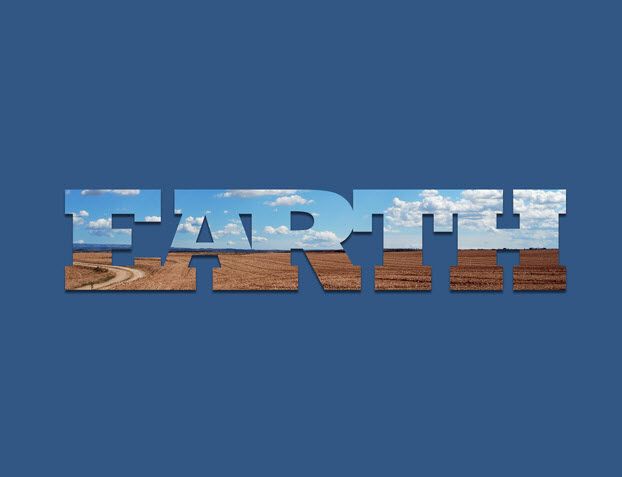
It's a good idea to use an image that echoes what you are trying to say with the text. In this case, we will use the word Earth with an image the reflects our planet. This is what I am aiming for:
Step 1: Choose a big and bold font.
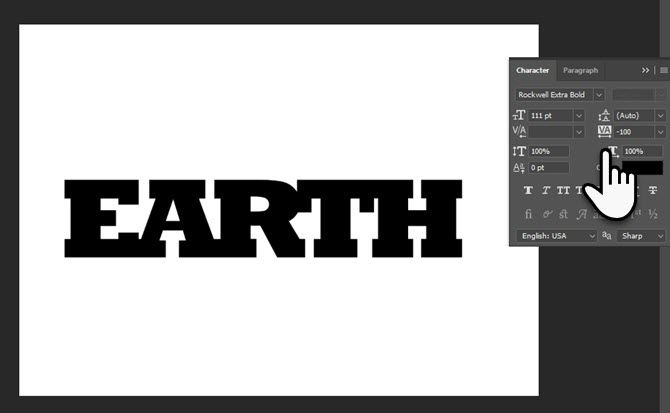
The trick to an aesthetic combination is in the choice of the font that again depends on the word you are trying to communicate with. Big and bold fonts go well in almost all cases. Here, I have picked Rockwell Extra Bold to type "Earth". Here are a few tweaks you can apply to the word.
Open the Character panel.
Use Tracking with a negative value to bring the characters closer.
You can also tweak the space between any two characters. With the text tool active, click on the space between any two characters to insert the cursor. Press Alt and the left or right arrow key to adjust the space. For example, I have almost merged A and R.
Step 2: Choose your image and apply the clipping mask.
Use any stock image or one of your own photographs and bring it into Photoshop in a separate window.
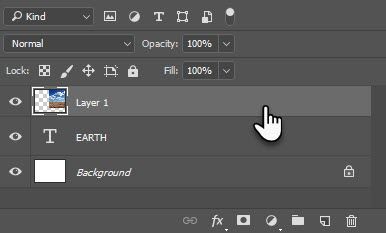
Drag the image on a layer above the text layer.
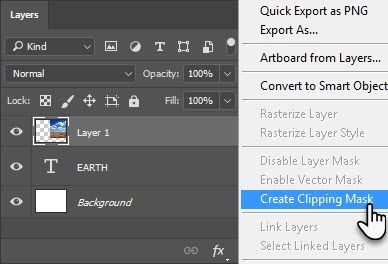
To make the image visible only within the text, apply the Clipping Mask. Right-click on the image layer and choose Clipping Mask.
With the image layer still selected, use the Move tool to position the image so that the best parts are visible through the text. That's it!
Step 3: Add the finishing touches.
The clipping mask is just like a cloak. Even with the mask in place, you can make changes to the font and enhance the effect. For instance, you can choose another font (and the spacing) without breaking the font-image coupling. You can also scale and move the image to fine-tune the look you are going for.
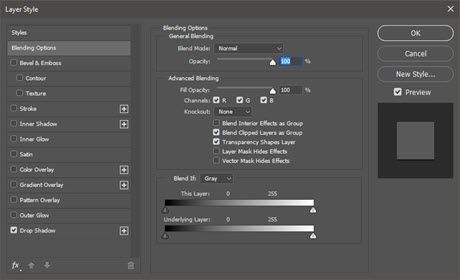
With the image and word in place, add any blending effect. For example, right-click on the Text layer and choose a subtle Drop Shadow.
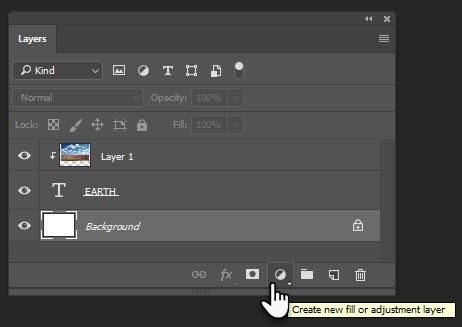
You can also use a background color to highlight the text and image combine. Create a new Fill or Adjustment layer and pick a solid color that looks pleasing.
Save the file as a JPEG. For an image without any background, save the file as a transparent GIF.
Put This to Creative Use
It takes a lot to master Adobe Photoshop. But a quick tip like this can help you dive into it at the shallow end. Learn more about Clipping masks and put them up against your creativity. Maybe, you can create your own posters or give those boring photos some new life with funny words.
How did you find this tutorial?
Image Credit: IM_photo via Shutterstock.com

