VirtualBox is an amazing application. In fact, I would go so far as to say it is one of the most important applications you could install on your computer, if you care about your privacy, security, and the general repair of your system.With VirtualBox, you can browse the Web, test applications, and perform potentially risky operations – all in a completely protected environment, separate from your “real” operation system.
But up until recently, VirtualBox had a pretty major limitation: There was no way to use Windows Aero effects when running Windows Vista or Windows 7 inside VirtualBox. If you are testing software, this makes a big difference: You are not getting the Aero experience most Windows users would get, and your screenshots look wrong. Fortunately, with the advent of VirtualBox 4.1, this can be fixed.
What You Need To Get Started
The first thing you need is VirtualBox 4.1 and up. You can get it here.
Next, you need an instance of Windows 7 running in VirtualBox. Back in 2009, we’ve shown you How To Install Windows 7 on a Virtual Machine with VirtualBox, and the process hasn’t really changed since. Make sure you load that instance of Windows 7 before the next step.
Installing The New Guest Additions
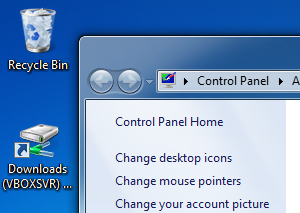
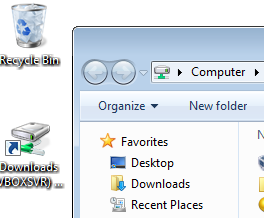
Even with VirtualBox 4.1, you will see something like this when you fire up Explorer:
Meaning, no Aero. That’s because you need to install the latest version of VirtualBox Guest Additions. This is a software package you install within the guest OS (the “virtualized” one), and allow it to integrate better with its host (both guest and host are Windows 7 in my case).
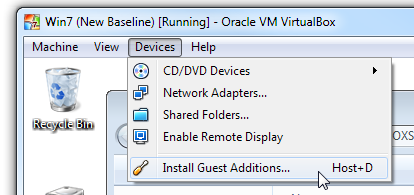
To install the Guest Additions, select Devices > Install Guest Additions:
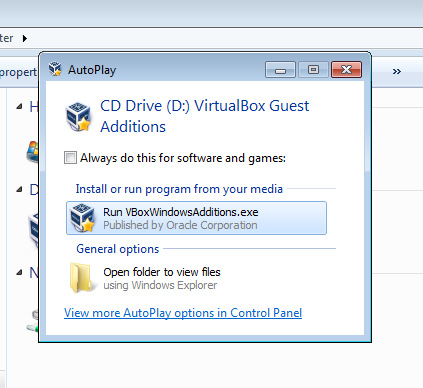
VirtualBox will then insert a virtual CD into your VM, and run it:
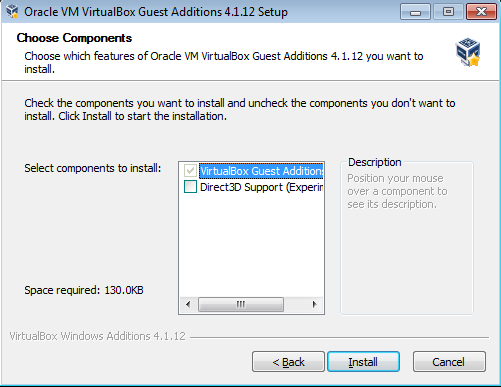
Mind your step now: Aero support is still experimental, and is switched off by default. So we can’t just Next-Next-Next our way through this installer:
Above you see the crucial step. Note that Direct3D Support is switched off by default. You must check this box on for this tutorial to work. As soon as you do, VirtualBox Guest Additions tells you you’re on the right track for Aero:
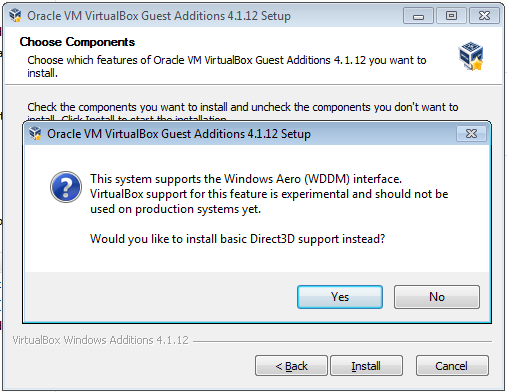
This is a trick question: Click No. You don’t want the basic Direct3D support: You want the new, experimental stuff. Living on the edge! Once you click No, VirtualBox will explain the memory requirements:
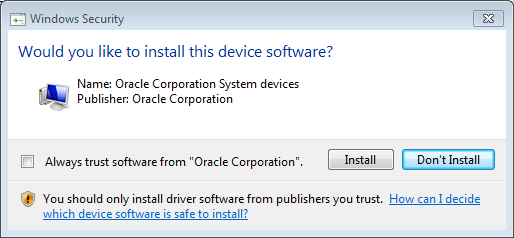
No problem; we’ll get to that part in a moment. Now click Install and let the setup utility do its thing. Windows will ask if you want to install a driver; obviously, you do:
Again, the wrong default is selected for you. Make sure you click Install. This popup will appear more than once, so keep an eye on the VM during this process. Once it’s done, you will be asked to reboot the VM:
Yup: Reboot now.
Confirm Machine Settings
While the VM is rebooting, let’s make sure we have enough display memory for Aero to work. Click Machine > Settings, and then Display:
You can’t change this when the VM is running, so if you see a setting lower than 128MB on the Video Memory slider or “Enable 3D Acceleration” unchecked, shut down the VM and fix that, then load it again.
Enabling Aero
Now that we’re all set, the moment of truth has arrived. Right-click the desktop in the guest system and select Personalize. The Personalization window will open:
Under Aero Themes, just click any theme you like. I went with the default Windows 7 one, and a brief moment later, lo and behold:
Victory! Aero is now switched on within the VM, and any application you install there will work just like it does on a native instance of Windows 7! You can now take screenshots to your heart’s content, and enjoy a better virtualized Windows 7 experience.


![aero[16]](https://static1.makeuseofimages.com/wordpress/wp-content/uploads/2012/04/aero16.png)
![aero[20]](https://static1.makeuseofimages.com/wordpress/wp-content/uploads/2012/04/aero20.png)
![aero[22]](https://static1.makeuseofimages.com/wordpress/wp-content/uploads/2012/04/aero22.png)
![aero[24]](https://static1.makeuseofimages.com/wordpress/wp-content/uploads/2012/04/aero24.png)
