Ready to up your OneNote game? Here's how to get more out of embedded content.
As its name suggests, OneNote is a great piece of software for keeping all your notes in one place. But why stop there? When we write notes, they're generally about something else. Wouldn't it be great if we could store the content we're commenting on alongside the notes we make?
OneNote makes it incredibly convenient to embed media in and among our notes, so don't confine yourself to the written word. Take full advantage of working digitally, and turn OneNote into an information-packed multimedia scrapbook.
1. Print Documents to OneNote
With OneNote, adding notes to an existing document is a breeze, especially if you're handwriting with a stylus. It's easy to embed a full-size digital printout of your document that you can mark up with notes and comments. In fact, you can do so from just about any program on your PC.
When you install OneNote, your PC gains the ability to send documents directly to the program from a print dialog. It's a lot like printing to a PDF.
To get started, open the document that you want to embed in your notebook. I've chosen to open a PDF using Google Chrome, but this process is also useful when you're working with PowerPoint presentations.
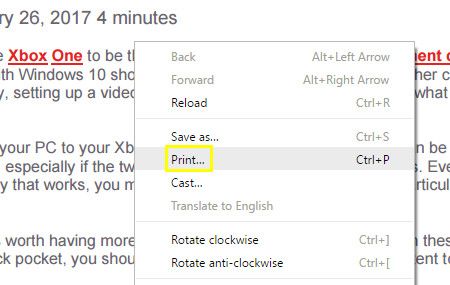
First, access the print dialog. The exact process will vary depending on the program you're using, but Ctrl + P will likely do the job.
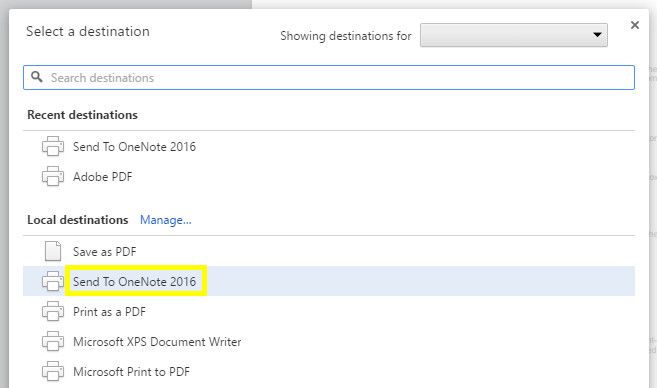
Choose Send to OneNote 2016 as your printer, and click Print. OneNote will open, and import the document in full.
2. Embed Documents as Attachments
OneNote allows users to add a document to their notebook as an attachment that they can access at will. When combined with the software's collaboration tools, we can use this functionality to produce a handy way of keeping track of edits on a shared document.
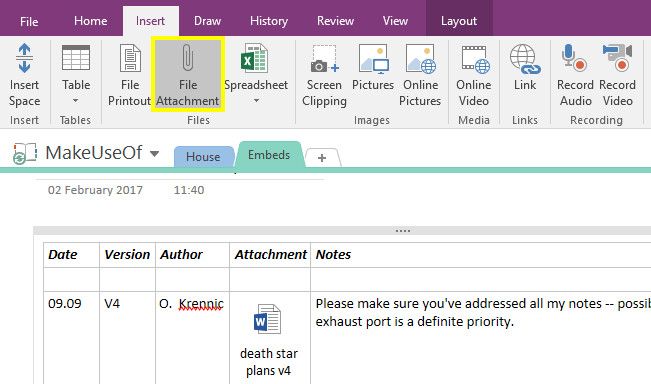
First, create a table via the Table button in the Insert tab. I used five columns, because I want to have space for five pieces of information: the date a version of the document was submitted, its version number, its author, the file itself, and any notes. Of course, your needs may be different.
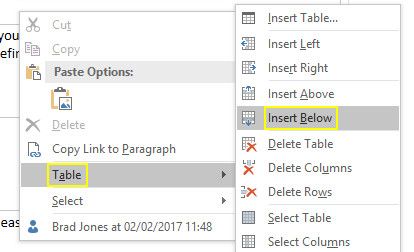
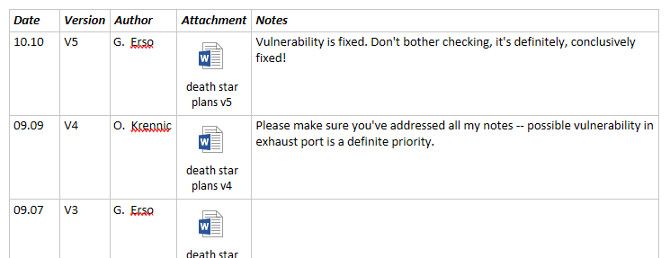
Above, you can see a working version of the table I set up. Next, we're going to add the fifth and final revision of our document. To get started, right-click the header row and select Table > Insert Below.
This will add a new row for our fifth and final revision. To attach the document, click in the appropriate cell and select File Attachment from the Insert tab.
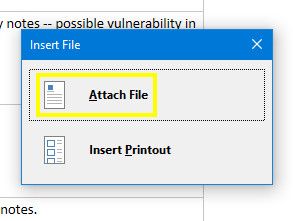
Find the file you want to attach, then click Attach File.
Now, we just need to fill out the other cells in the row.
A collaborative effort is often the best way to tackle a big project, but organization is key. A simple set-up like this one allows all contributors to access each iteration of the document. It's a great way to ensure that no one's work is unintentionally discarded as you make progress, and it makes it very easy to keeping track of the most recent version.
3. Transcribe Audio From Within OneNote
If you've ever had to conduct an interview, you'll know that transcribing audio can be a real drag. Whether you're working on an academic report or a piece of journalism, accuracy is of paramount importance. That means you'll need access to your audio controls to rewind and re-listen -- which can be awkward when you're using one program to take notes and another to play the recording.
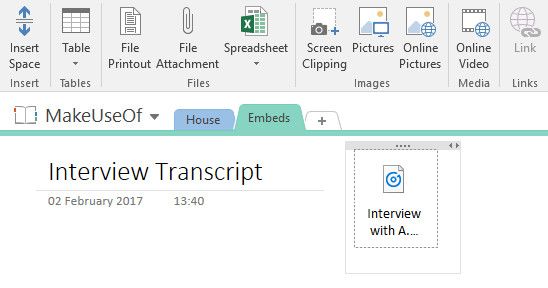
Instead, embed your audio file directly into your OneNote notebook. That way, you won't have to continuously Alt-TAB between your notes and your recording as you work. To get started, head to the Insert tab, click File Attachment and find your audio clip.
The file will be inserted into your notebook. At first glance, it might look like the attachments we were working with earlier, but OneNote also allows us to control playback.
Click on the attachment, and you should gain access to basic audio controls. While there's an active audio element in use, you should also see a Playback tab added to the Ribbon.
From here, you can stipulate a particular timestamp to scrub to, and fast forward or rewind by a pre-defined duration. Skipping back 10 seconds can be very helpful during transcription, so it's worth remembering the shortcut Ctrl + Alt + Y so you can do so without taking your fingers off the keyboard.
4. Embed a YouTube Video for Later Reference
It's easy to embed a YouTube video into OneNote: just copy and paste the link, and you'll see the player appear. However, you can get a lot more mileage out of this functionality if you embed a particular timestamp within the clip.
Imagine you're taking notes on a lecture or an instructional video that you're watching online. You might want to draw attention to a particular passage without typing out the speaker's words verbatim. Alternatively, you could break a long video down into sections so that your notes on a particular topic can accompany the corresponding part of the video.
Here's how to get this kind of framework up and running. First, copy and paste the URL of your desired video into OneNote.
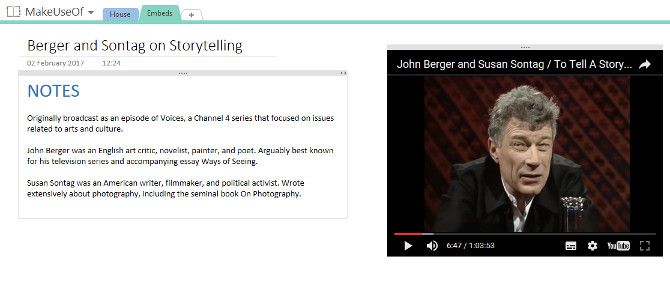
As you can see, the default embed is pretty bare-bones: we get the title of the video, and a player underneath. It's worth noting that we can delete the title, and retain the video as its own element. I'm going to set up a workspace where we can take notes.
Pictured above is an environment where I can watch the video while taking notes, not too dissimilar to the method of interview transcription described above. I've found a point in the video that I want to save for later, so I'm going to link to the timestamp directly in my notes.
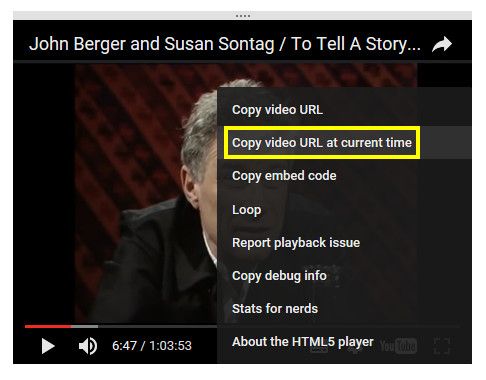
To do so, I pause the video when it reaches the appropriate point. Then I right-click the player and select Copy video URL at current time.
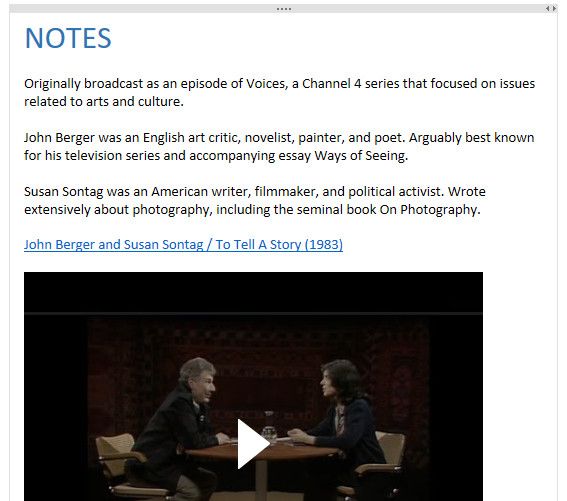
Now, we just need to use Ctrl + V to place the video among our notes.
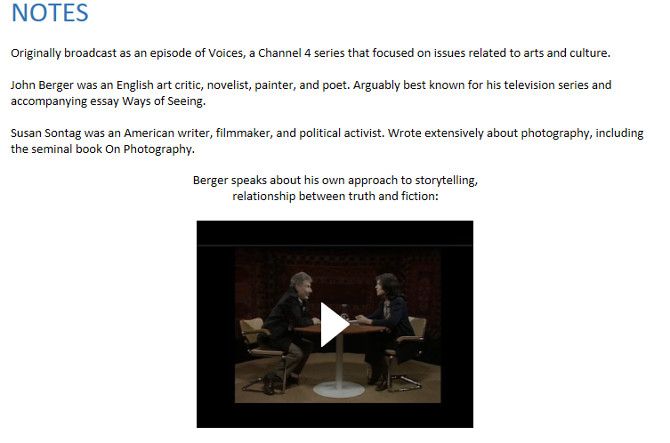
It may look like the original video, but once you start playback, it'll begin at the point you selected earlier. We now have a working link to the timestamp, but we could amalgamate it into our notes a little more neatly.
This kind of note-taking allows us to pinpoint the exact section of a video that's relevant. If we find a clip that's worthy of a spot in our OneNote notebook, it's worth spending a minute to make sure it's easily accessible -- scanning through a video for the relevant section is not fun!
OneNote Supercharged
As we've demonstrated above, OneNote can do some neat tricks with media files. If you liked the tips above, you should check out our OneNote Guide for more great insights.
Do you know another useful way to embed media into OneNote? Do let us know about it in the comments!
Image Credit: MaLija via Shutterstock.com

