So, you have a key on your Windows keyboard that you think is no longer of any use to you, but at times, you still end up hitting it mistakenly.
Or, maybe the key is simply stuck in the keyboard and is no longer functional. A simple way around such keyboard key issues is to disable the particular key altogether. Don't worry, though, as it won't be permanent; You can always switch it on whenever you need the key again.
Here, we've covered the easiest methods to disable any specific keyboard key without any hassles. Let's get started right away...
1. Use the KeyTweak App
There are many ways to disable your Windows keyboard. However, if you only want to get rid of specific keys, you'll need to rely on special tools for your Windows.
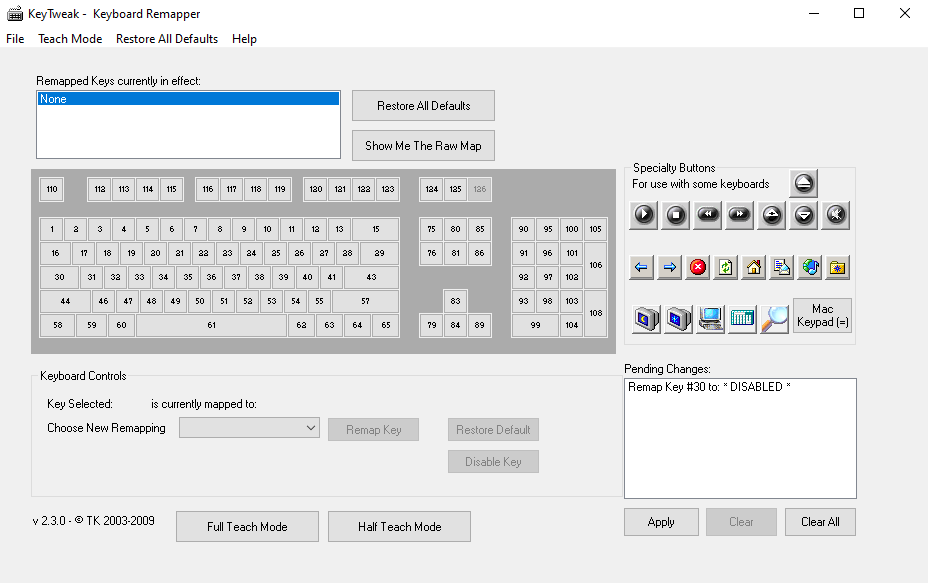
KeyTweak is one such free tool, and it lets you disable any specific key of your Windows keyboard. All you have to do is select a particular key and then go ahead with disabling it.
Follow the steps below to get started:
- Download and launch KeyTweak.
- Select the key that you want to disable.
- Under the Keyboard Controls section, select Disable Key.
- Click on Apply.
You'll then be asked to restart your Windows computer to bring the changes into effect. When you reboot your PC again, you'll see that the specific key has been disabled on your Windows. On top of this, the tool can also help you remap your keyboard keys, readjust your settings, and more. So the tool comes handy in more than one way.
Download: KeyTweak (Windows)
Enabling the Keyboard Key Again
If at a later time, however, you decide you now want to enable all the disabled keys, all you have to do is open the app again and click on Restore All Defaults. Do a quick reboot after this, and all of your keys will be working again.
2. Use AutoHotkey
AutoHotkey is a free scripting language used to automate repetitive tasks on Windows 10. You can also use it to disable a particular keyboard key on your Windows.
First, go over the list of supported keys from the official AutoHotkey website. If the key that you want to disable is supported, download and install AutoHotkey, and then follow the steps below:
- Open any good Text editor and type the key's reference name followed by ::return (yes, that is two colons). You'll find the reference name from the above link. Here, for simplicity, we'll disable the Caps Lock key.
- Save this script (using the .ahk extension) in an easily accessible location—perhaps on your desktop.
- Double-click on this newly created script.
This will launch the AutoHotKey script, and the specific key will be disabled.
If you need to use this key again in the future, you'll just have to stop the AutoHotkey script from the system tray below, and your settings will return to normal. To do that, right-click on the H icon on your taskbar, and select Suspend Hotkeys.
Download: AutoHotkey (Free)
Disable Windows 10 Keyboard Keys Like a Pro
And that's how you turn off a specific keyboard key on your Windows PC. This is all we have for keyboards in this short guide.
However, this certainly isn't everything. There are plenty of cool things you can do with your keyboard on a PC. So make sure you don't stop exploring.


