Want to put together your own digital magazine, but not sure where to start? Time to read "Design and Publish Your Own Free Digital Magazine", the latest manual from MakeUseOf. This digital magazine publishing guide outlines everything you need to put together your own gorgeous online publication, from logos to layout to online publication at Issuu.
By Daniel Malpica, the Editor-in-chief and Designer of [Radiador] Magazine, this manual explains everything you need to know in order to put together a digital magazine of your own. From designing a logo in Illustrator to editing pictures in Photoshop to laying out your articles in InDesign, this guide teaches you everything you need to know if you want to put together and distribute your own digital magazine.
It took the inventor of the movable type printing press, Johannes Gutenberg, an estimated 3 years to complete the 42-line Bible in the mid-15th century. Compare that to today, when a book can be put together in two sessions: a designer working with an Adobe package, and the finished file at a printing press.
Take advantage of the amazing world of modern digital publications: download this guide today and put together your own digital magazine.
Table Of Contents
§1?–?Illustrator and Photoshop: Images and Logos
§2?–?InDesign: Sketching a Magazine
§3?–?Create a Free Account in Issuu
§4?–?From PDF to Other Devices
Introduction to Digital Magazine Publishing
With the arrival of the Internet and its rapid expansion since the beginning of the century, it is clear that time spans, processes, and diffusion of information have accelerated to an unprecedented level. Activities that in other times required years to complete can be accomplished today in a matter of days, even hours. We need just recall that it took the inventor of the movable type printing press, Johannes Gutenberg, an estimated 3 years to complete the 42-line Bible in the mid-15th century (not to mention the decades it took a copyist to print a book with xylography). Compare that to today, when a book can be put together in two sessions: a designer working with an Adobe package, and the finished file at a printing press.
The means we employ for communicating, interacting, researching, looking up our general interests, and making platforms to spread content are now down to a few clicks in our preferred device. Such acceleration due to technological advances demands the internaut be on top of the means of communication; a demand that lessens with the advances themselves perfecting software and devices.
In this period of time, computers and Internet allow us to generate our own spaces to diffuse and promote culture with the greatest freedom, unhindered from authoritative filters beyond our personal criteria. In Mexico, where I’m from, the costs of publishing print magazines is not at all accessible to all; the alternative pathway is much more feasible: get internet, purchase the elemental Adobe programs, learn from everywhere you can (information is out there if you want it!), and familiarize yourself with some coding like HTML or become an advanced user of Blogger and Wix. MakeUseOf is a clear example of where you can gather knowledge for free to help you improve your projects related to technology.
In my specific case, [Radiador] Magazine: literature and arts (which you can visit here: http://losabisnautas.wix.com/radiadorfanzinedigital) was initially thought of as a modest publication. We were looking to build more of a catalogue showcasing emergent poets of my country. However, after completing Issue 0, we decided to stay on board the digital platform and explore its possibilities. The response we got was surprising. The outreach of the magazine, both in readers and collaborators, went beyond national borders and became Spanish-speaking. The same can be said about the age group, now that we have readers and writers born in the 1950s to the 1990s. More than that, the e-platforms allow us to accomplish a professional monthly project in a condensed work team: Emmanuel Vizcaya (in charge of the poetry content) and myself (as editor-in-chief and designer). Thanks to the e-platforms, we are an autonomous project that works to facilitate exposure of and unite writers in Latin America.
In terms of the content, the way we perceive text itself has changed; we can work with interactive articles: embed videos, web pages and other publications that complement the content of our magazine. We can link to the blogs and twitter accounts of our collaborators to invite the readers to get to know the authors and their work better – All a click away.
Furthermore, [Radiador] is a project were we only invest time and effort. After 1 year of work (and 13 issues), we have utilized the free platforms of Gmail, Facebook and Twitter for diffusion, and obtained 38 thousand views in Issuu (approx. 3 thousand per issue). It is evident we wouldn't have reached those numbers or the speed of elaboration if we replaced this with a physical version (plus it feels good to save paper).
In this guide, we’ll provide the basic steps to create a digital magazine, employing a quick and elegant approach to the programs in Adobe Suite CS6: InDesign, Illustrator and Photoshop. Additionally, we’ll introduce you to the free platform, Issuu, where we’ll upload our PDF file and it’ll create a page-turning online magazine in minutes. We’ll briefly mention the use of mobile devices and their formats for a wider distribution of your product: Kindle, iPads/iPods, iPhones and Androids. The programs I’ve used, and which we will employ in this guide, are not economical. However, these professional tools provide an excellent start in the world of editorial design. And as the only initial investment I had to make, the possibilities you can build on are worth it.
So let’s get started, and afterwards challenge yourself to where these basic points can take you with digital magazine publishing.
*To begin, we recommend that at the start of any project, you prepare optimal organization (of folders) that will facilitate control and efficiency throughout the process. For the magazine you can start by dividing content into folders. Create a main folder with the name of your magazine and add sub-folders that will hold its various elements. In my case, I have 3 general folders for my magazine, [Radiador]: Logos & Designs, Textures, and Past Editions. Each edition in turn, has subdivisions for material pertaining to that specific issue: Images, Texts, Complements. Of course, you can have a number of sub-folders. Organizing our work is indispensible, especially as InDesign works with links, so any change in location will break the link to your .indd file.
1. Illustrator and Photoshop: Images and Logos
A magazine uses design to empower its contents, and none is exempt from requiring a characteristic logo that will make it recognizable in the market. In this section we’ll show you how to easily create a logo by implementing an image in the PNG format.
1.1 PNG format and the invisible space
PNG is an image file format that gives you the possibility to create images with various levels of transparency, as well as detecting invisible pixels. This allows us to layer objects on top of each other without having the white rectangular borders of each image (as with the JPG format), so that we are left with the shape of the object itself.
1.1.1. Advantages of the PNG format
The advantage of this format is its dynamic and simple implementation. Furthermore, PNG images are more resistant to digital editing, sending and downloading in emails or websites, unlike other popular formats, such as JPG, which suffer color and quality loss after passing through these filters.
1.2. A quick and elegant implementation: Creating the header of your magazine
1.2.1. Photoshop
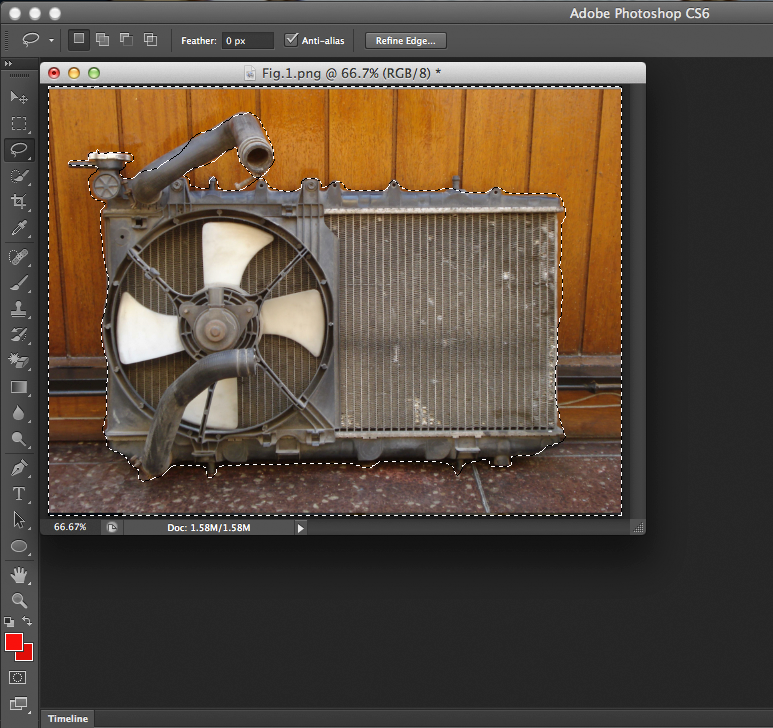
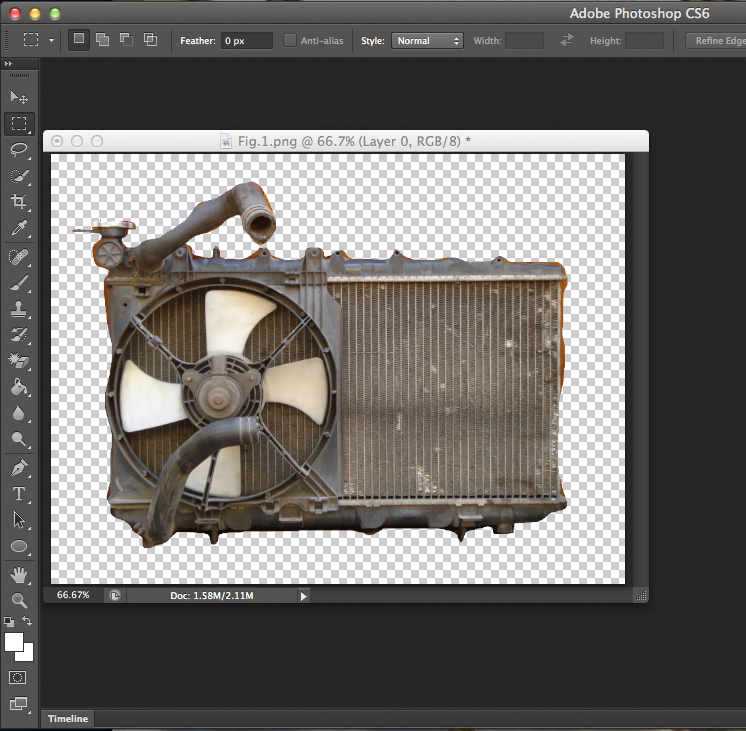
First, you need an image. This could come from an open source image, or a self-made image drawn directly on the computer or scanned. In our case we’ll start by taking an open source photograph (860?×?644 dimension) of a radiator found on the net and opening it in Photoshop.
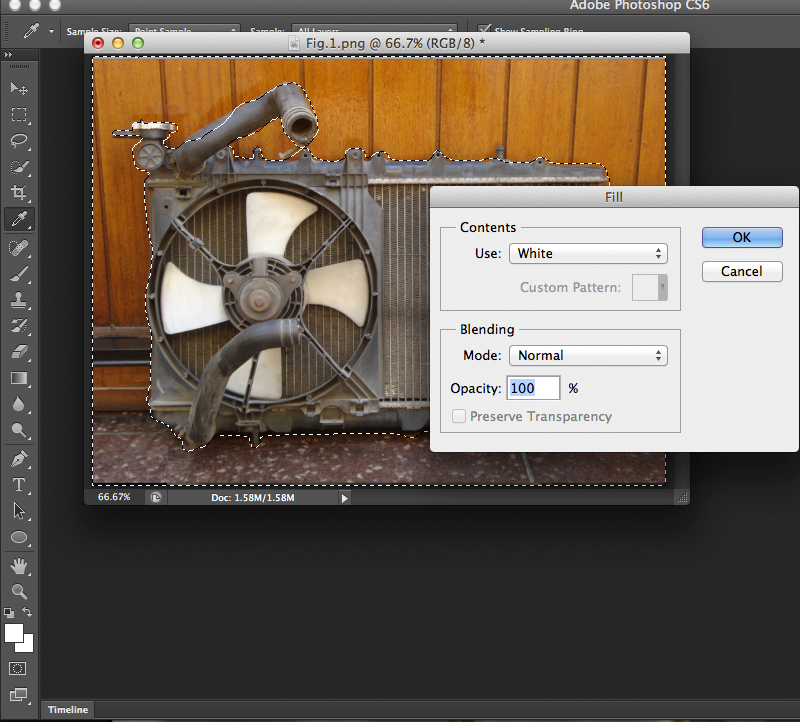
Take the Lasso tool (L key) and select everything outside the image.
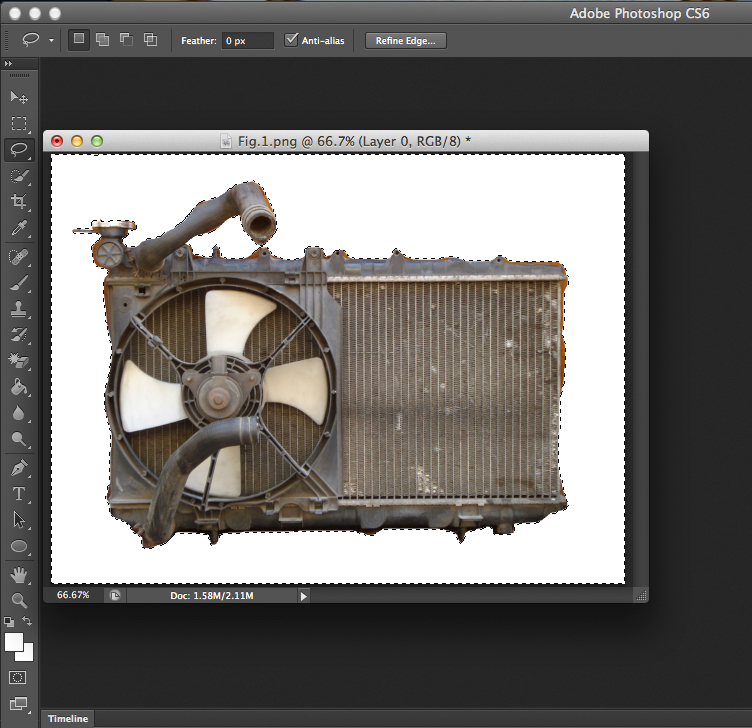
We now have a radiator over a white canvas:
Without removing the selection of the white canvas, we’ll use the Magic Eraser Tool (E key) to delete this space and be left with only a radiator, thus:
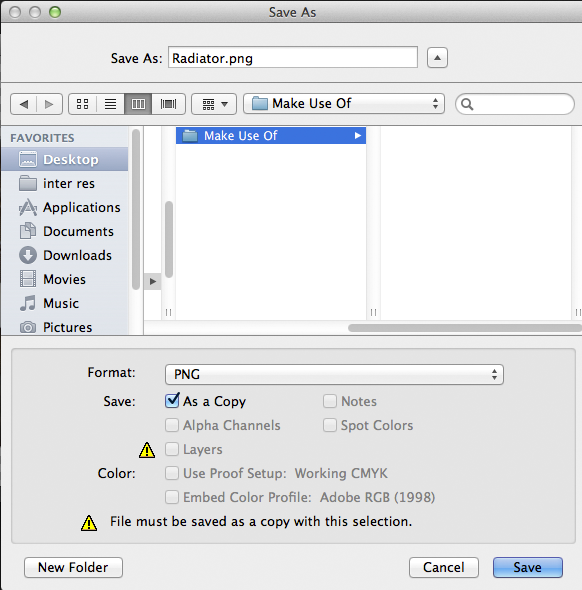
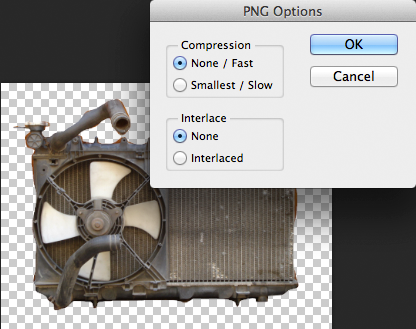
The final step, for now, is to Save As… under the File menu. In the Save window choose the PNG format option, the folder we want to save it in and save. Under the PNG Options window, we’ll check None to everything and hit Ok.
1.2.2. Illustrator
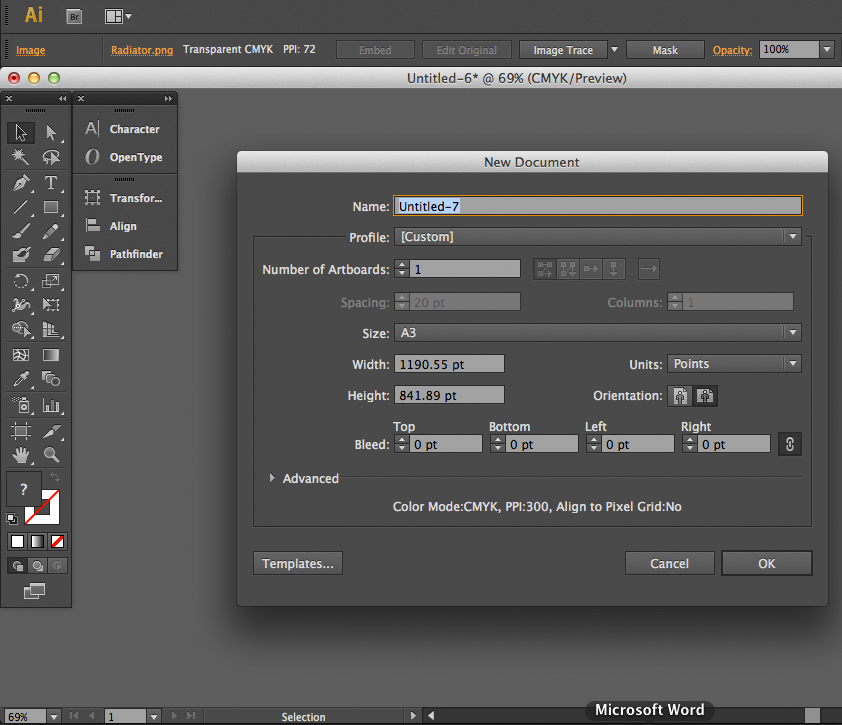
We’ll now open our saved image in Illustrator as a new document. We need enough space to design on our logo; you can determine the measurement of the workspace according to your needs. We’ll choose A3 size for now and import our saved image to this new page.
Illustrator works with vectors, which is an advantage. An image in vectors (or vector graphic) doesn’t depend on resolution – unlike a bitmap image. It’s defined by mathematical formulas, meaning you can scale it without the fear of losing quality or definition.
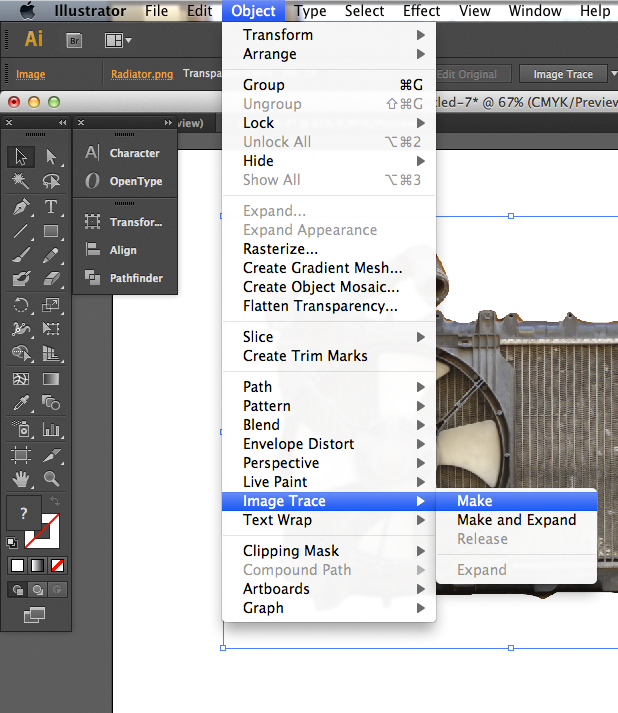
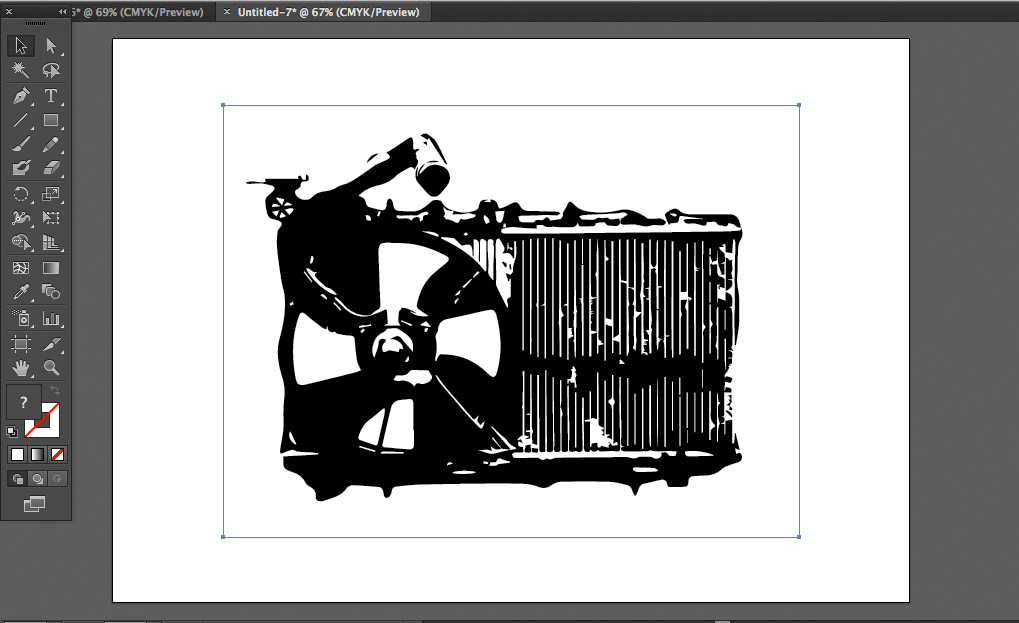
To convert our image to a vector, we first select it. Then, under the Object menu we select Image Trace > Make.
Our image now looks like this:
Keep in mind that when transforming too small an image, you run the risk that your vectorized image loses detail from the original, so take care when choosing the resolution of the image you are working with.
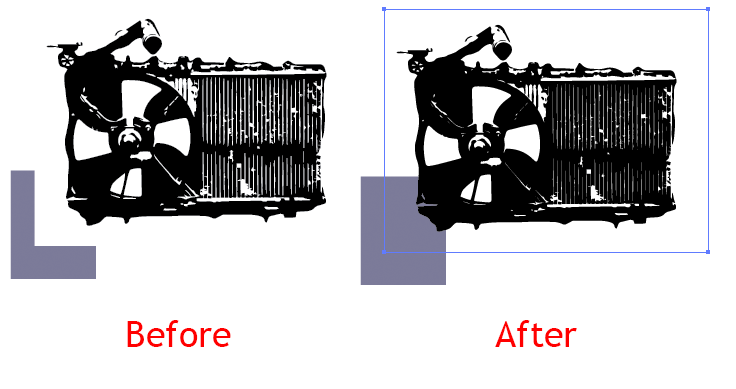
Now, we need to remove the white rectangular filling of the vectorized image to prevent it from appearing in our final result.
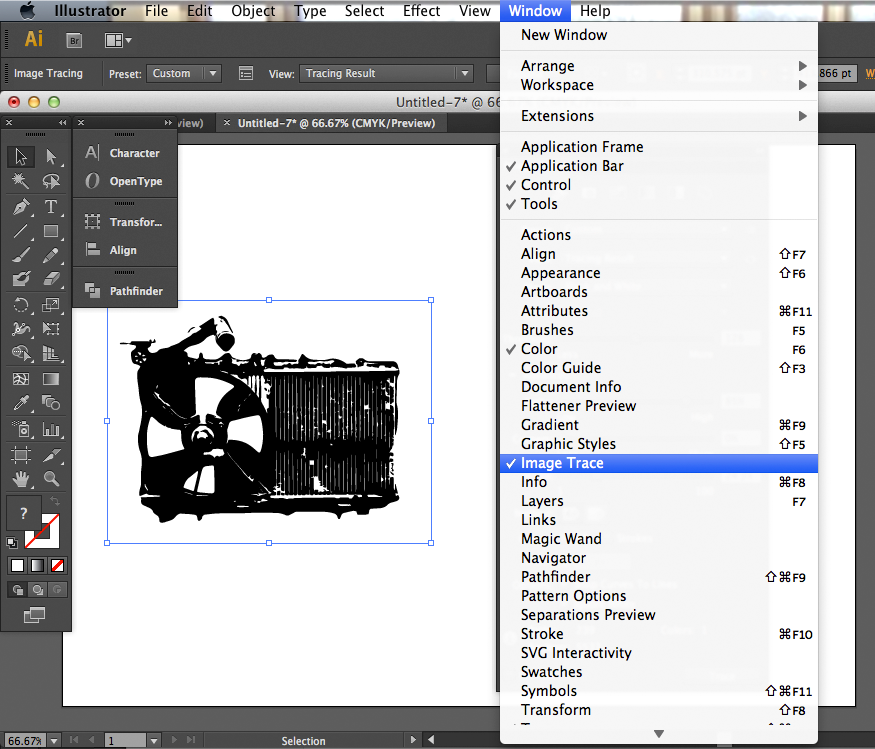
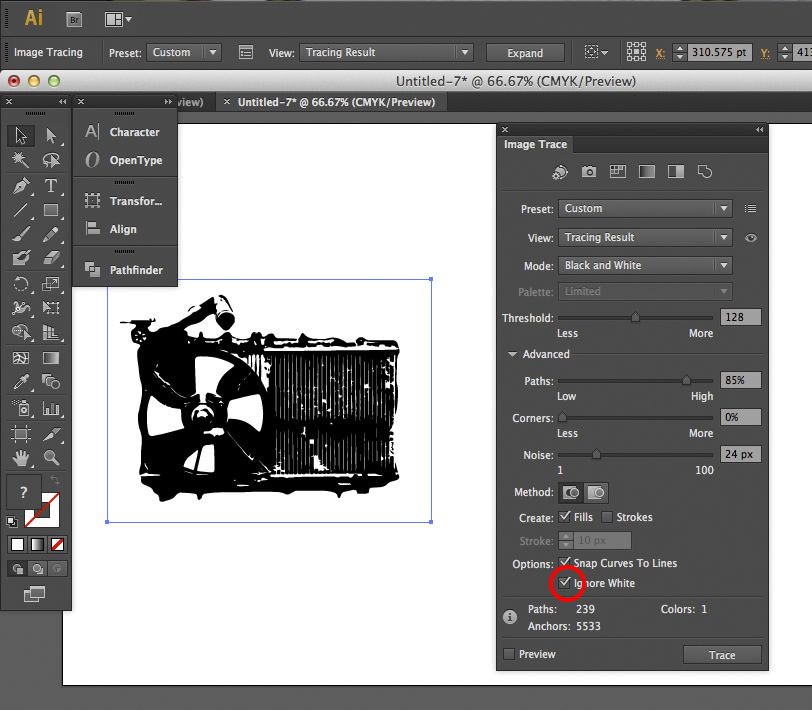
We select the image, click on Window > Image Trace.
A toolbox appears; expand the Advanced list and under Option select Ignore White.
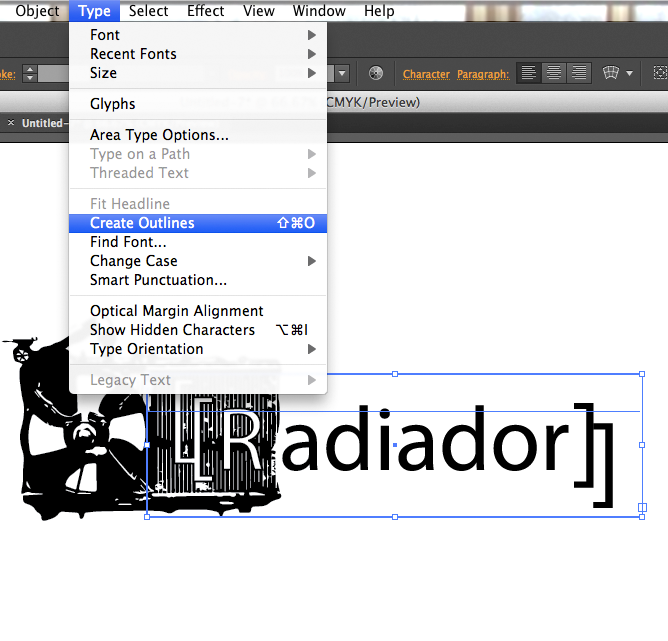
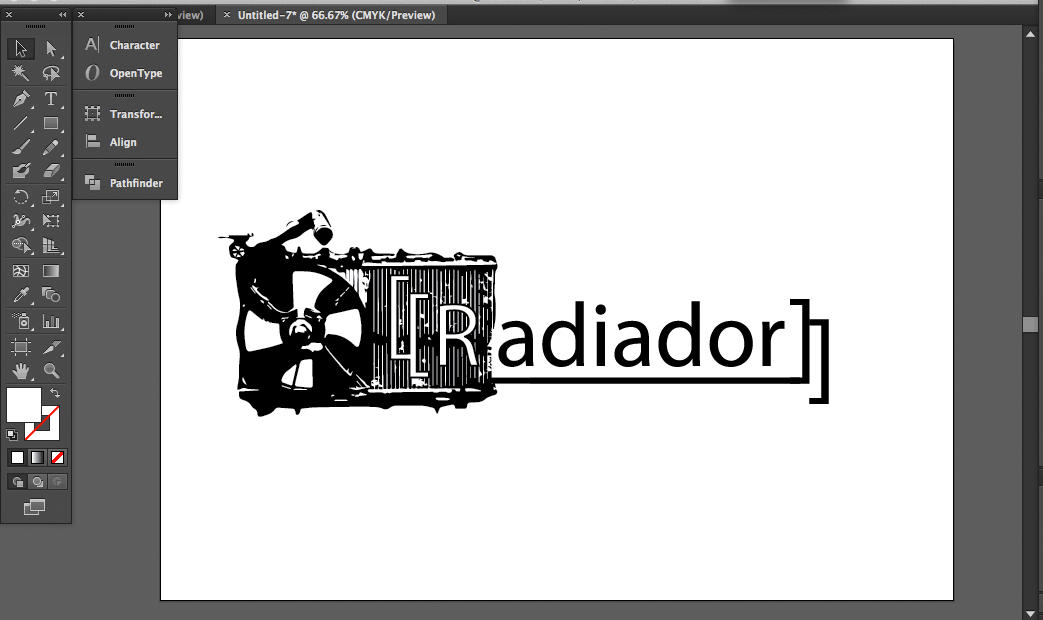
Once your image is vectorized and ready, we’ll add text using our preferred typography. We then select the text object, click on Type > Create Outlines. By converting to outlines, the text can now be manipulated as if it were an image, as a whole or each character individually by double-clicking. Additionally, if you open your file in another computer that lacks the font type you used (after which the program would find an alternative font or not be able to read it), it will still display all converted text exactly as you had it.
Afterwards you can add some complements:
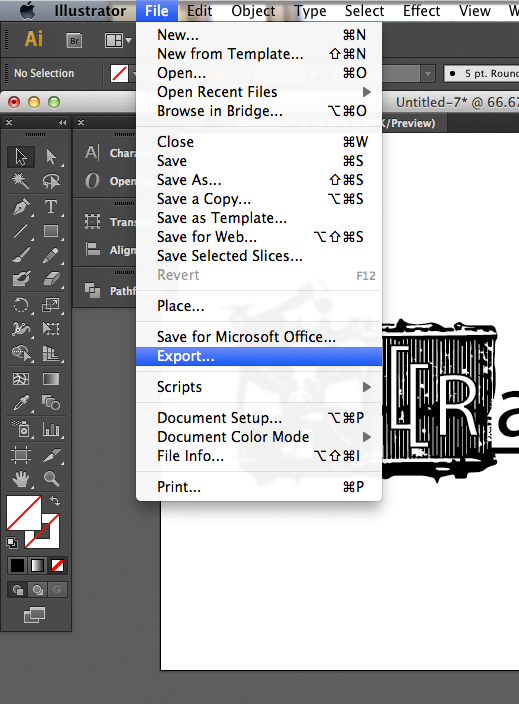
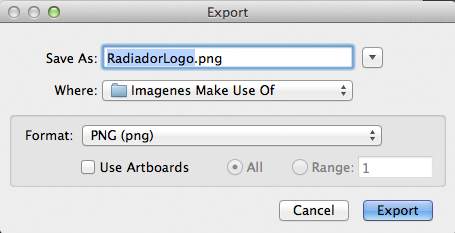
To save the result in PNG we’ll click File > Export…
In the new window, choose PNG format and save it in its corresponding folder.
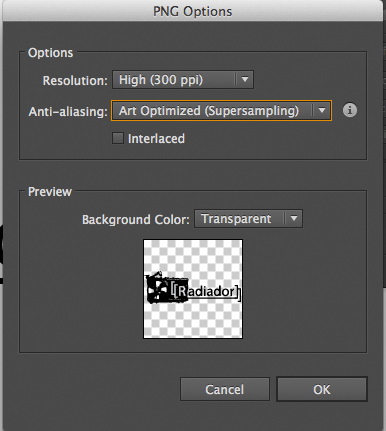
The PNG Options window will appear. Select High Resolution and under Anti-aliasing choose Art Optimized. This last step will take care of aliasing, the ‘steps’ effect caused in the vector to pixel transformation. And you are done! We have a logo ready for a quick implementation. It’s also advisable to save your document as an .ai file in case you want to edit your logo in the future.
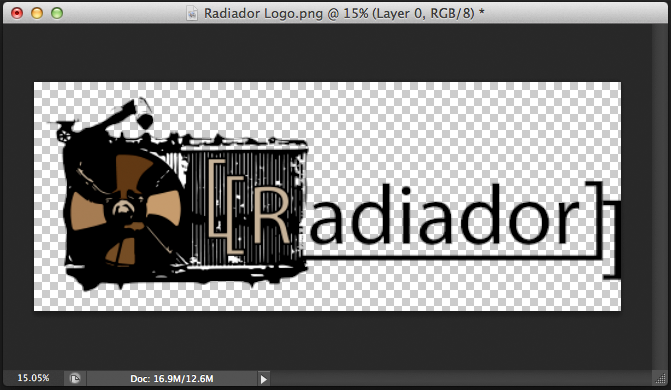
This is the result we get after coloring our logo without much hassle, by using the Paint Bucket Tool (G key) in Photoshop:
Note: If you’re interested in reading a detailed guide to making a logo, we recommend you read The Easy Getting Started Guide To Adobe Illustrator at: https://www.makeuseof.com/tag/getting-started-with-illustrator/
Similarly, if you want a better handling of Photoshop, we recommend a guide specific to Photoshop CS6: What’s New in Photoshop CS6, Your Ultimate Overview: https://www.makeuseof.com/tag/adobe-photoshop-keyboard-shortcuts/
2. InDesign: Sketching a Magazine
2.1. Layout basics
2.1.1. Extension, Size & Intent
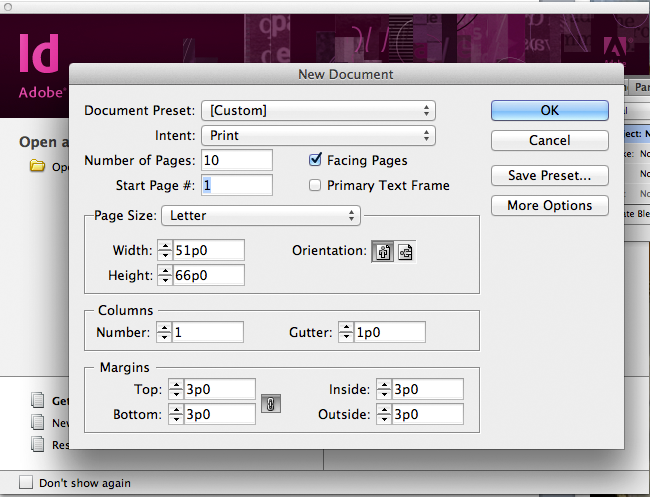
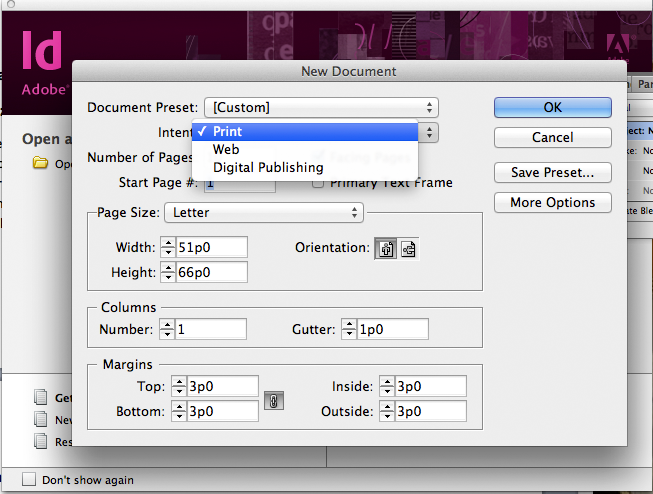
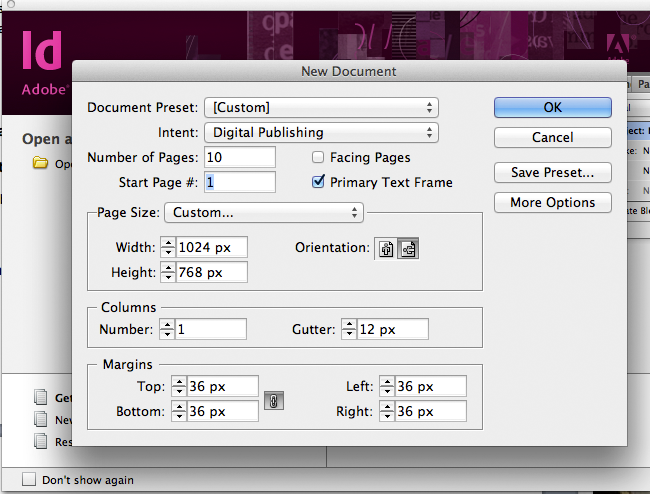
The first thing you need to begin digital magazine publishing in InDesign is to determine the basic characteristics of the layout. For this, we’ll create a New Document. The first window contains various layout options such as number of pages (extent of your document) and page size of the magazine.
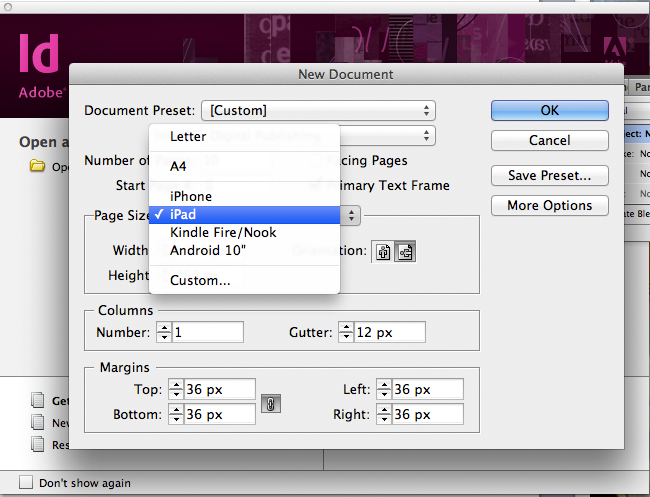
Something new to Adobe InDesign CS6 is the options under Intent: we are no longer limited to Print or Web, but we can now choose Digital Publishing.
With this self publishing option, we can create magazines or eBooks for the iPad, iPod, Kindle Fire and Android 10’’ platforms. We can even choose the placing of the elements in our magazine, horizontal and vertical, in the case of the iPad.
For now we’ll focus on a document for Print, 10 pages (we can always add or delete pages under File > Document Setup, or manually in the Pages tab), with the Facing Pages option, and Letter size pages. We are making a page-turning magazine with an option to later on use the Issuu platform, which we’ll discuss in detail in the last section of this guide. It is evident that the choice of format is subject to what we are aiming for.
2.1.2. Page Numbering & Master Page
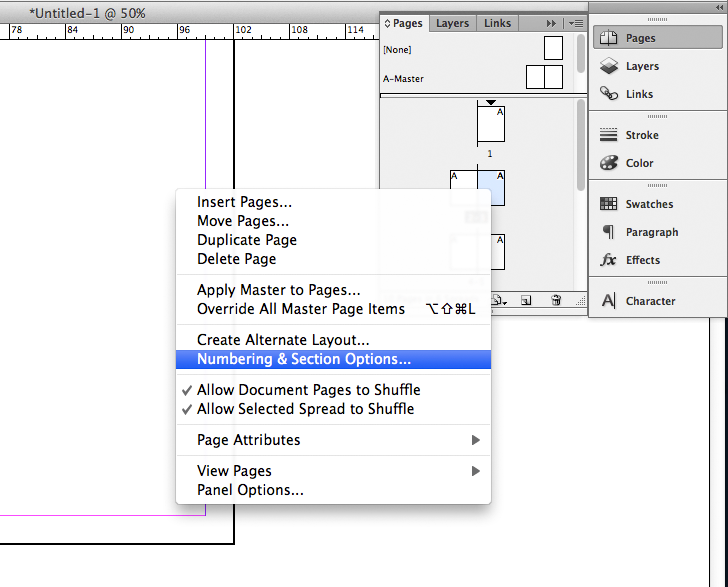
Once our document is opened, we can add pages numbers to each page using the Master Page. In our case, we’ll want to skip the cover and inside cover pages from being numbered, and start at what would be the 3rd page. To do this we open the Pages tab, right click the third page and choose Numbering & Section Options…
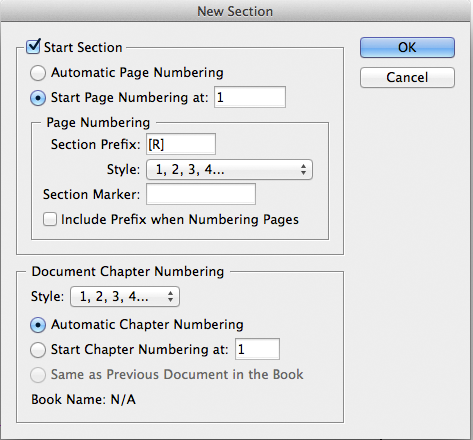
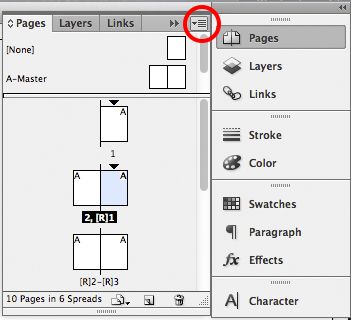
In the New Section window we’ll select Start Page Numbering At… and type “1”. The Section Prefix is a label we choose in order to identify all pages we want numbered in our final document. In this case, we choose to type “[R]” under Section Prefix, for ‘Radiador’. Looking at our Pages tab, we notice the cover and inside cover pages don’t include the prefix label [R], since our numbering starts at page 3. The rest of the pages have changed to [R]1, [R]2, [R]3, etc. We can still see our document’s overall total number of pages (including covers) given by the numbering without a prefix. Note that the Section Prefix, [R], will not be included alongside the actual document’s page numbers (unless we check the box Include Prefix When Numbering Pages).
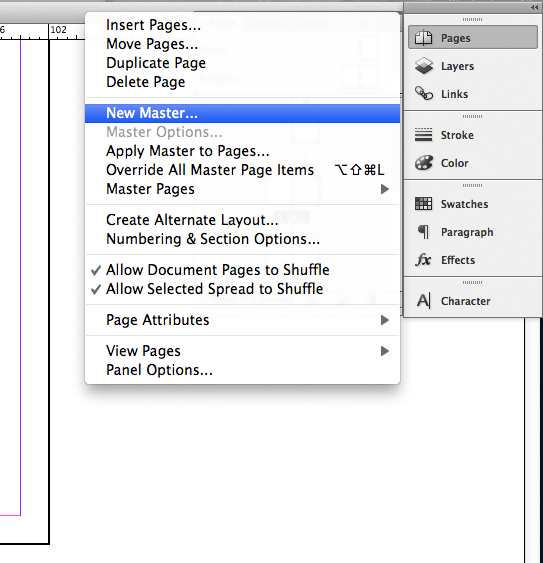
Now we click the button on the top right corner of the Pages tab and choose New Master.
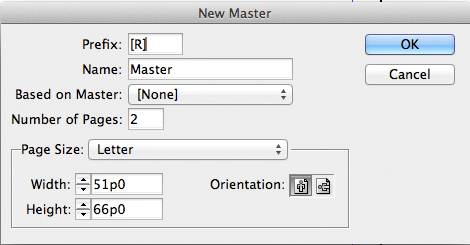
A window appears where we name the Prefix of our new master page. We’ll choose [R] once again and click OK. The [R] Master Page will be later on applied to all [R]-section pages.
The Master Page serves as a design template we can quickly apply to as many pages as we want. In general, it can include repeating elements such as the style of numbering, headings, logos, or background textures. Any change done on the Master Page will be applied automatically to all pages that include it, and in the same way, any object that comes from the Master Page cannot be edited on any other page – only directly on the Master itself.
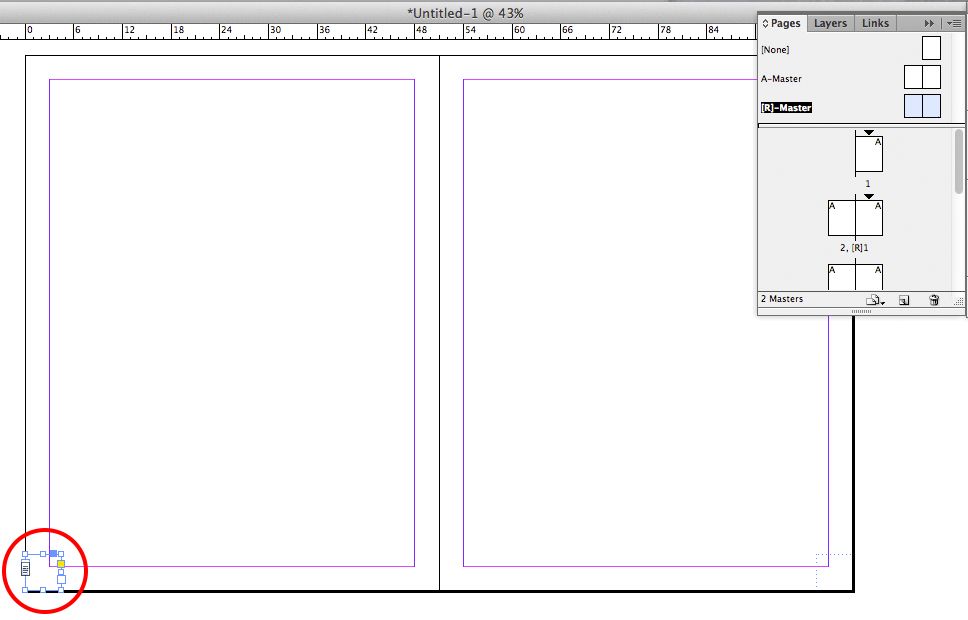
We’ll now decide on the placement and style of our page numbering by working on our new [R] Master Page. We double click the [R]-Master Page and create a text box that we’ll place on the bottom left corner of the left page where we want our page numbers to appear.
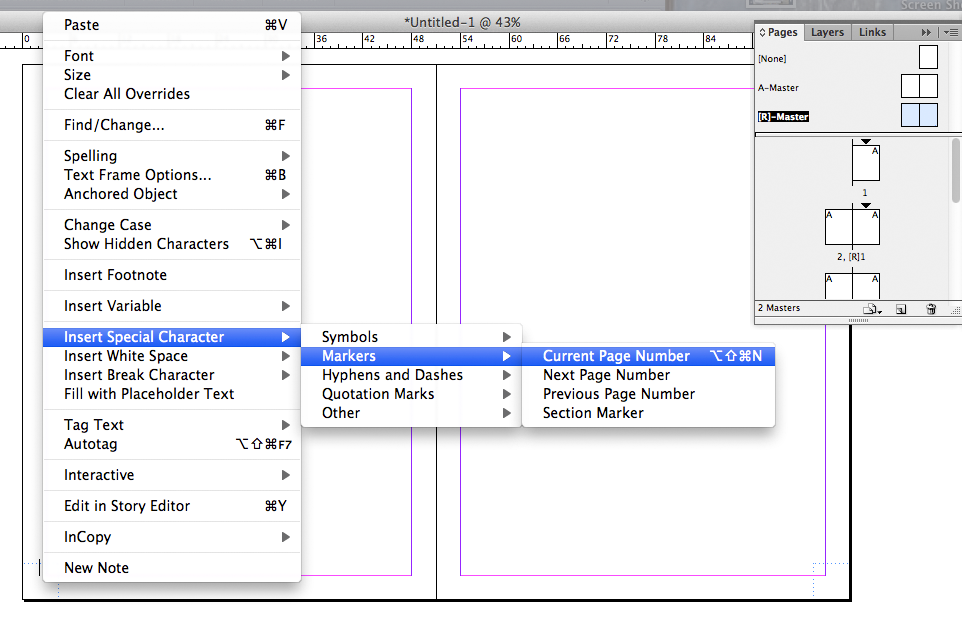
We then double click the text box until the cursor appears. We right click and choose Insert > Special Characters > Markers > Current Page Number.
The result is ‘[R]’, which is the label we had chosen for page numbering under Section Prefix. We copy the text box and paste it on the bottom right corner of the right-hand side page. We now have page numbering for both facing pages. You can change the font, size and color of the [R], which represents the page numbers of the actual document.
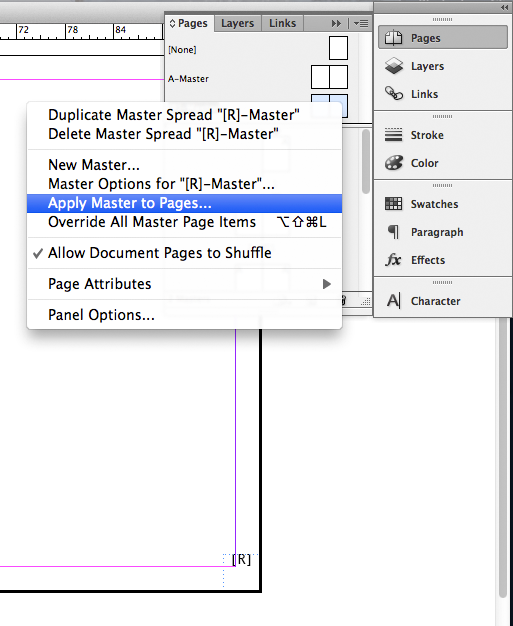
In the Pages tab, we’ll right click our [R]-Master Page and choose Apply Master To Pages…
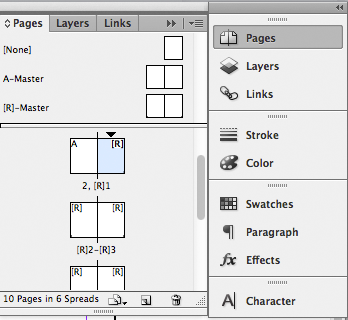
A window pops up, asking us which pages we want to apply the [R] Master Page to. You can select specific pages, if you want the template on say, pages 3, 6, and 8. But we want it on all our [R]-section pages. So in To Pages we choose [R].
Automatically the A-Master Page, which was the blank starting master template on all our pages, has now been replaced with [R], as you can see labeled on top of each page in the Pages tab.
2.2. Editing basics
2.2.1. Setting the Content
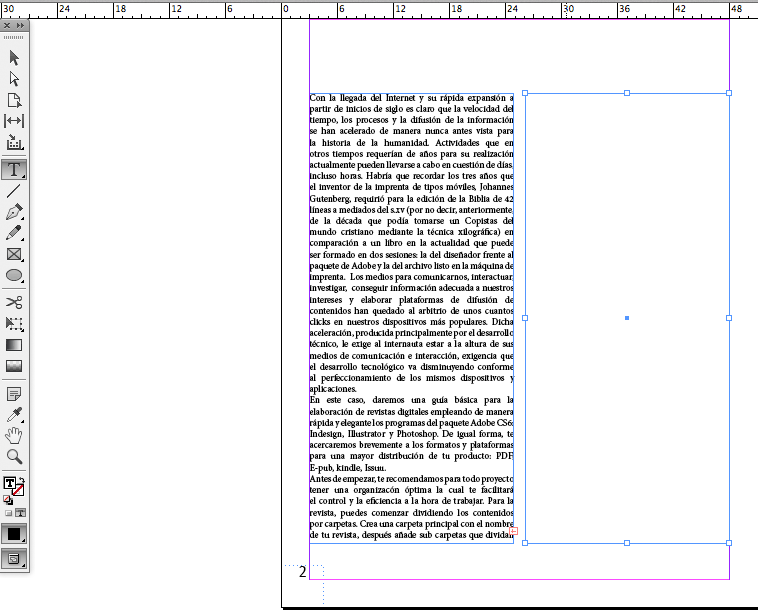
So now we let’s insert our text. We’ll start by selecting Type Tool (T key) in the tools menu, and create two parallel columns on the blank page. We paste all our text in the first column.
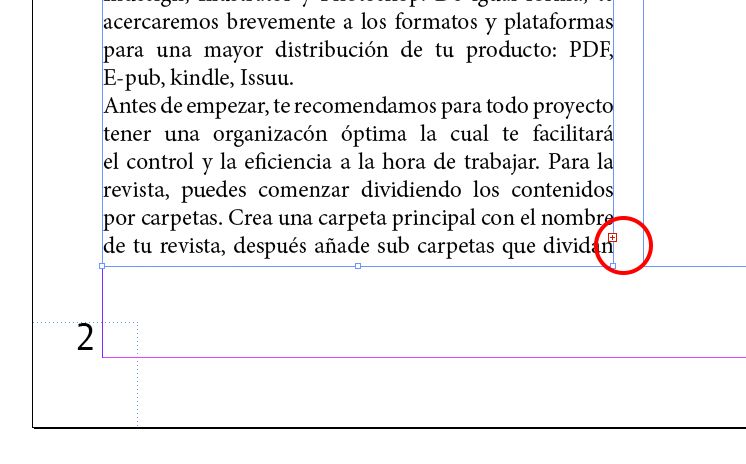
Only a fraction of the text fits here, but by using the Selection Tool (V key) and clicking our text, a box with a plus (+) sign appears.
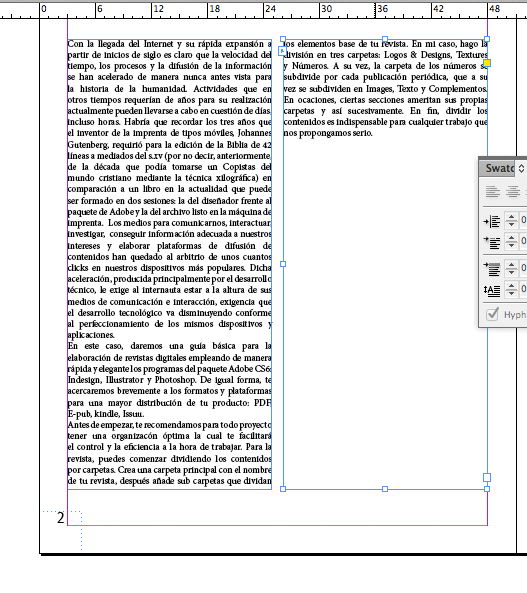
We click it, and then click our second column to place the rest of the text there.
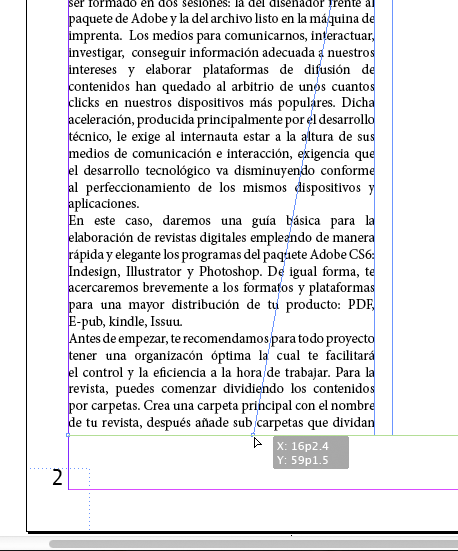
We can keep the regular straight columns, but in our case we’ll change their shape to make it look cool. We’ll use the Direct Selection Tool (A key) and click a corner we want to modify. We can now change the angle to reshape the column.
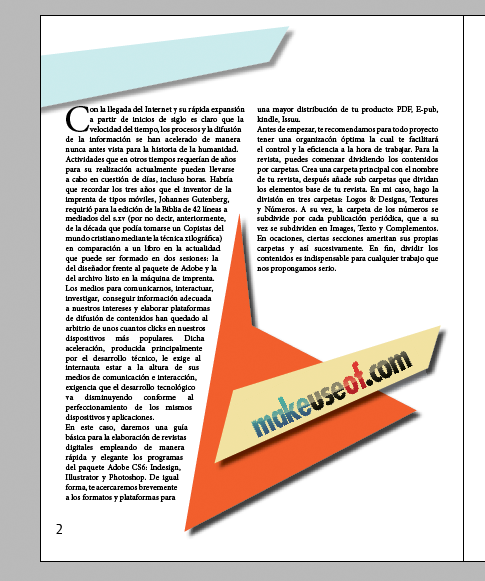
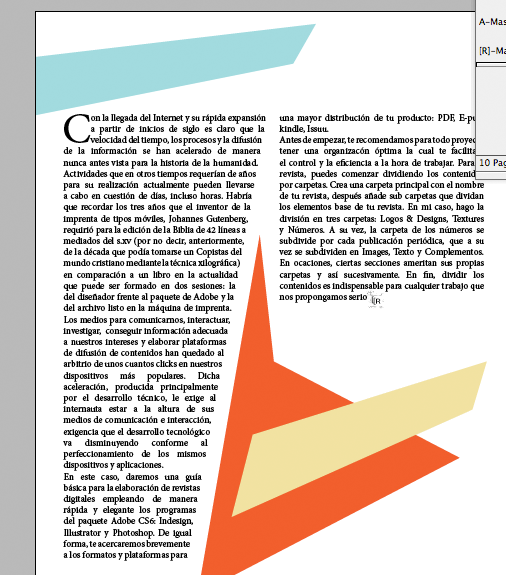
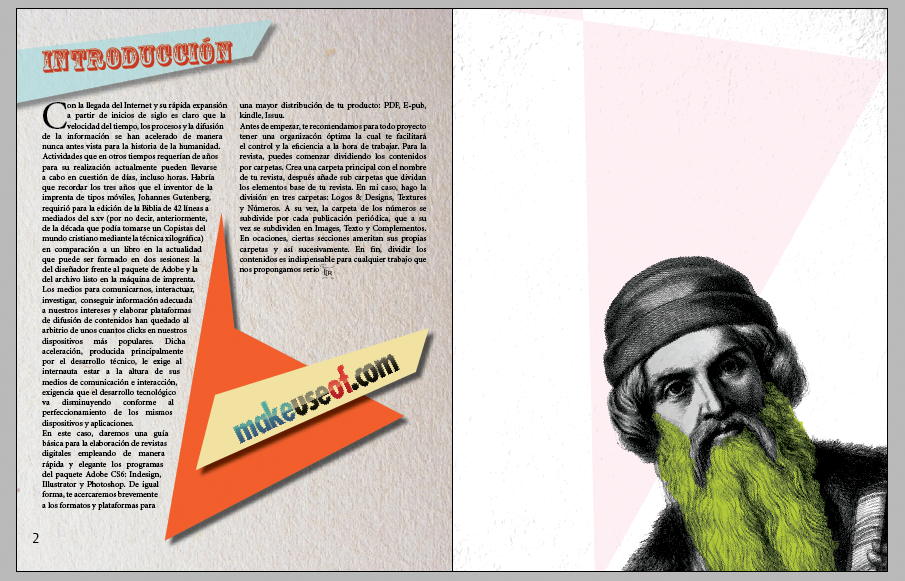
We can shape our text to fit a couple of images (we’ll discuss how to make these images in section 2.3.2 Complements) and after making adjustments to the text with the Paragraph tab, we get the following:
2.2.2. Titles and Typography
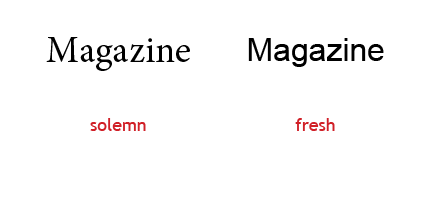
Titles and typography are important and depend on the kind of publication we are making. Fonts can hint at solemn versus fresh/youthful content, depending on the case. Traditional typographies are used in book publishing, specialized contents, legal documents, scientific journals, thesis, and so on. Rounded typographies are usually employed with youthful content.
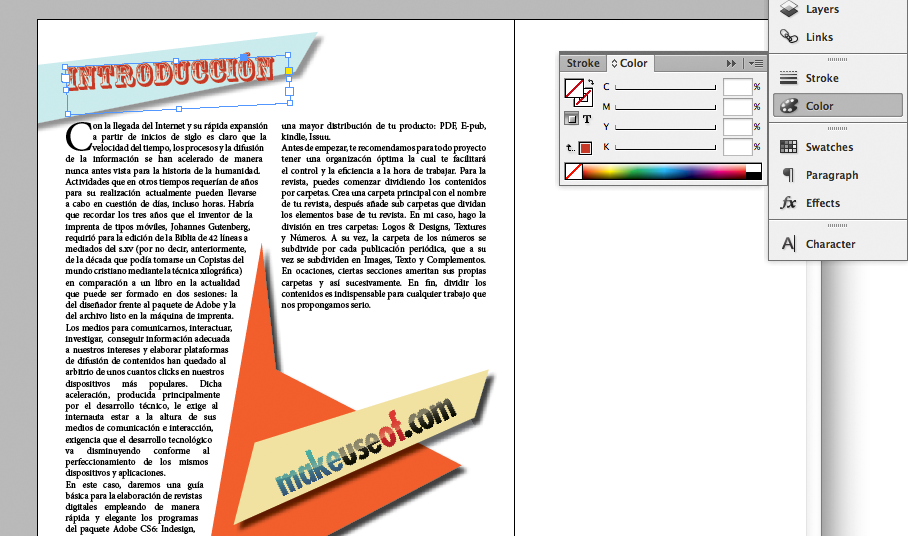
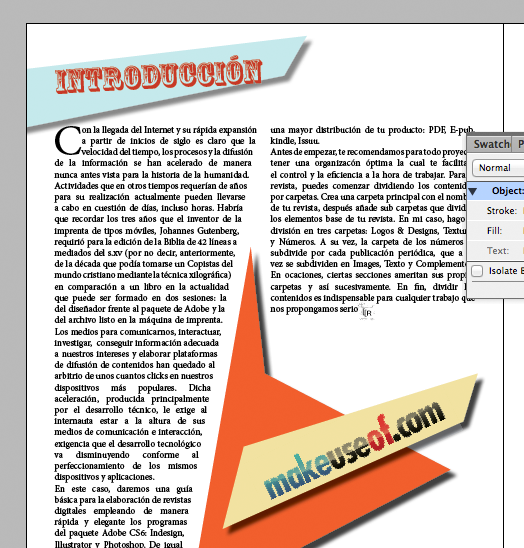
We’ll apply the fun font Rosewood Std in 41 pt and we’ll paint it orange using the color tab. Now we’ll rotate it slightly by selecting the text object and placing the arrow cursor on the top right corner until we get a curve shape, which we can rotate to the desired angle.
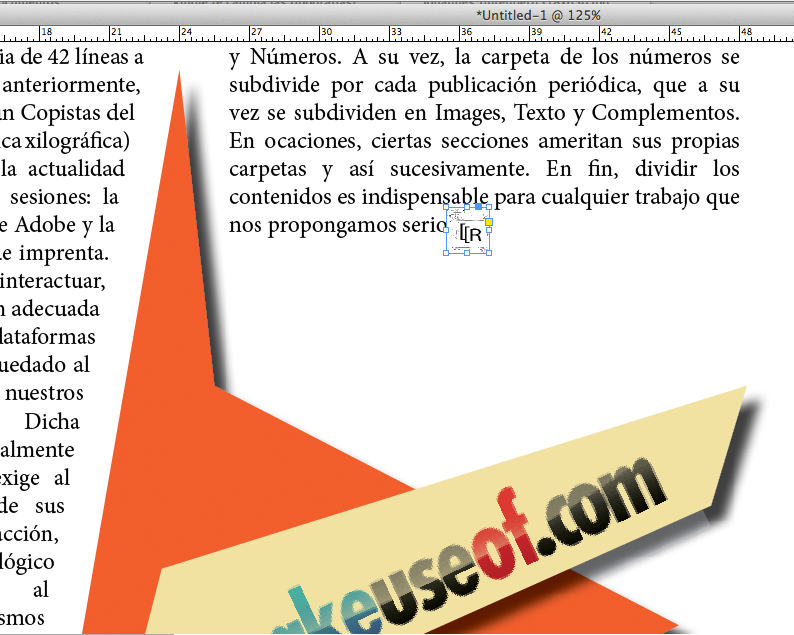
2.2.3. End Signs
All periodical publications tend to use an end sign as a final period. This is a particular seal characteristic to the magazine or newspaper.
2.3. Design Basics
2.3.1. Textures and Screen Brightness
When editing a magazine, we must think of the medium in which it will be published. In our case, we are building a document that will be visualized on a desktop or laptop screen. Keeping the reader interested and viewing our product is the challenge we face. We thus must avoid high contrasts that make the reading experience difficult: White backgrounds mean lots of light from a monitor, and although there are devices like the iPad and Kindle whose screens are design for optimal reading brightness and anti solar glare, it is preferable to work with colors and textures that are kinder on the eyes. If you have white text on a black background, we face the same problem: reading will be tiresome for the eyes, so this combination is not recommended at all.
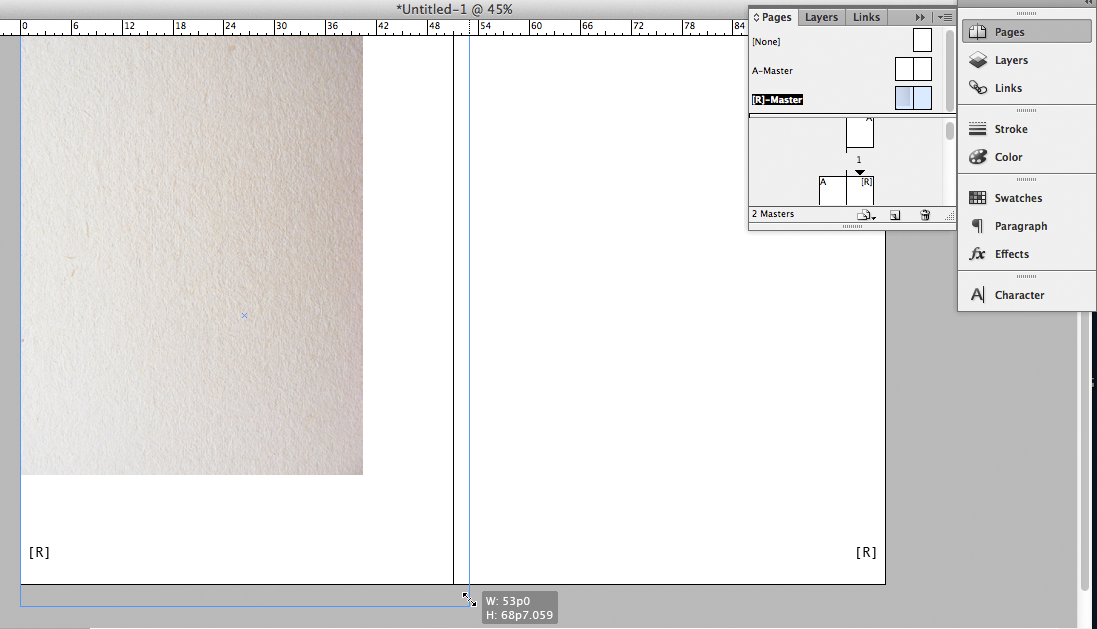
For our document, and given that we are aiming to publish it on Issuu, we’ll choose a background with a texture imitating real paper. To achieve this we’ll go back to our [R]-Master Page and insert the texture of paper. If our texture image is of smaller or larger size, we need just select it and holding down Shift, we can scale it proportionally to an adequate size.
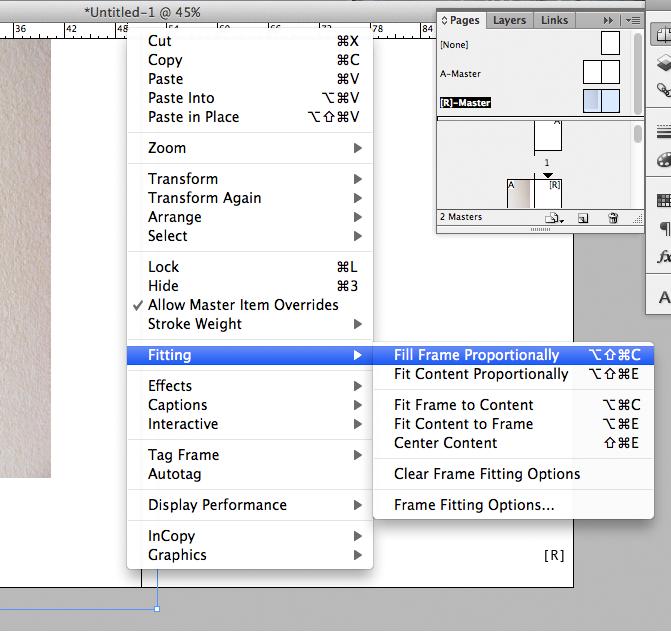
We then right click the image and in the menu choose Fitting > Fill Frame Proportionally. The texture image will be adapted to the exact size.
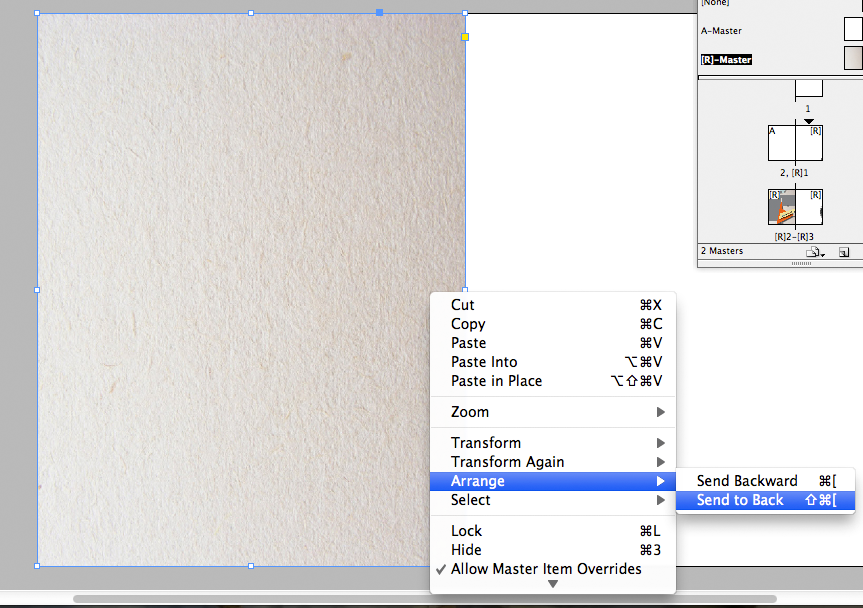
We’ll now right click the texture and choose Arrange > Send to Back; this way we avoid covering up our page numbering.
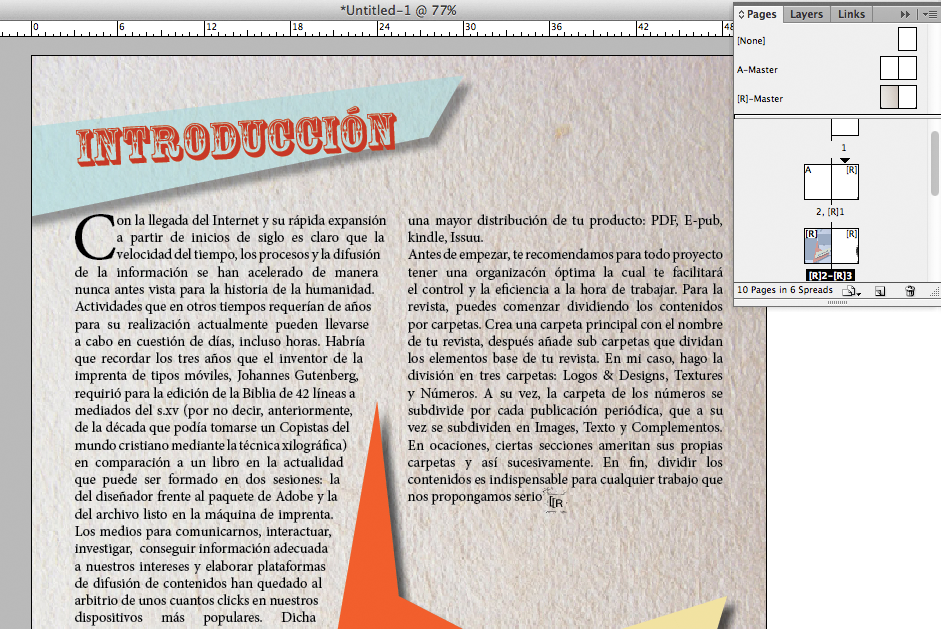
Automatically, all pages under the [R]-Master Page will obtain the new background.
2.3.2. Complements
At this point we can return to the images we added after modifying our text columns, and see how to make them. A great part of the design in magazines is using images and embellishments to complement our content. In this section we’ll talk about irregular shapes, transparencies, and shadows.
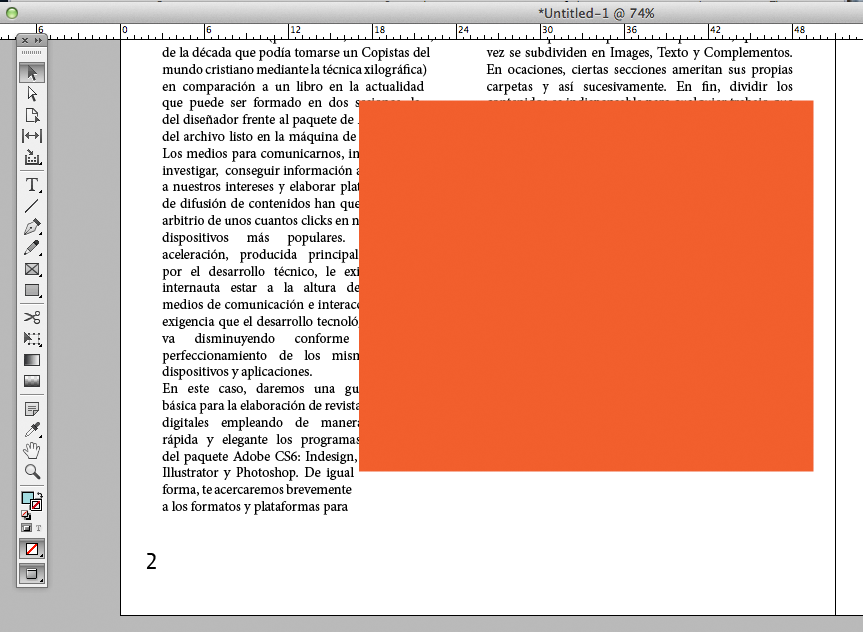
We’ll start by creating a figure with the Rectangle Tool (M key).
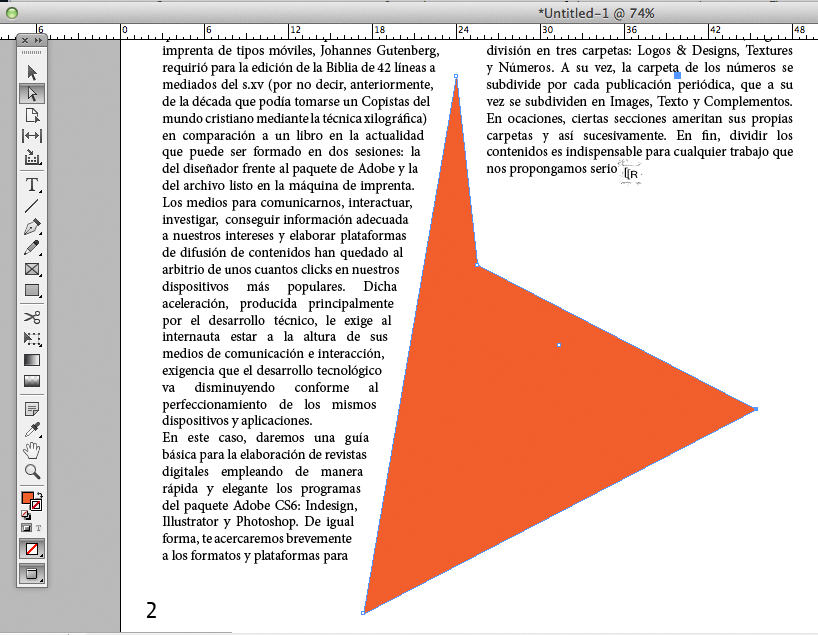
In the same way as we did with the text column, we’ll manipulate the geometrical shape using Direct Selection Tool (A key).
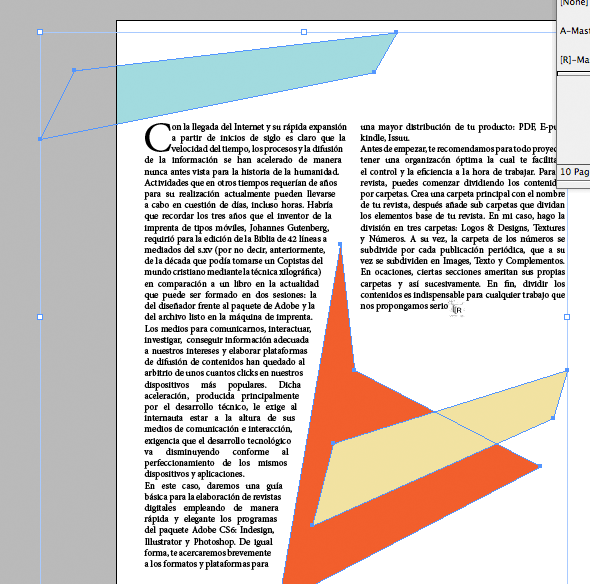
We’ll repeat this step twice, and with Selection Tool (V key), holding down Shift, we’ll select the 3 shapes we just made.
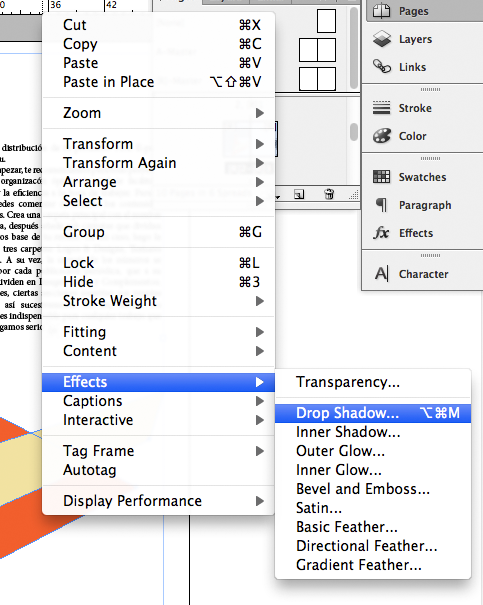
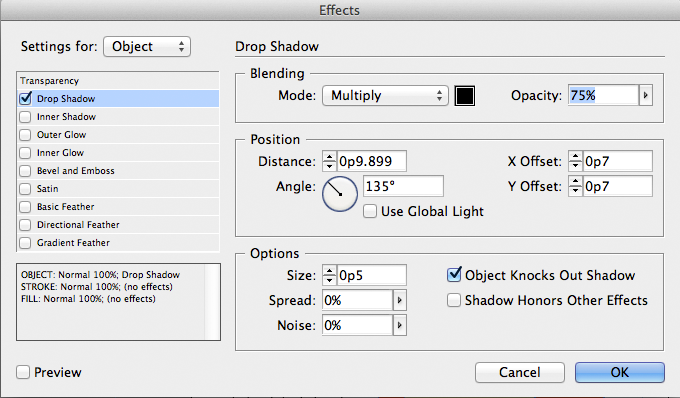
We’ll right click our 3 selected figures and choose Effects > Drop Shadow.
In the window that appears, make sure the Drop Shadow box is checked and click OK.
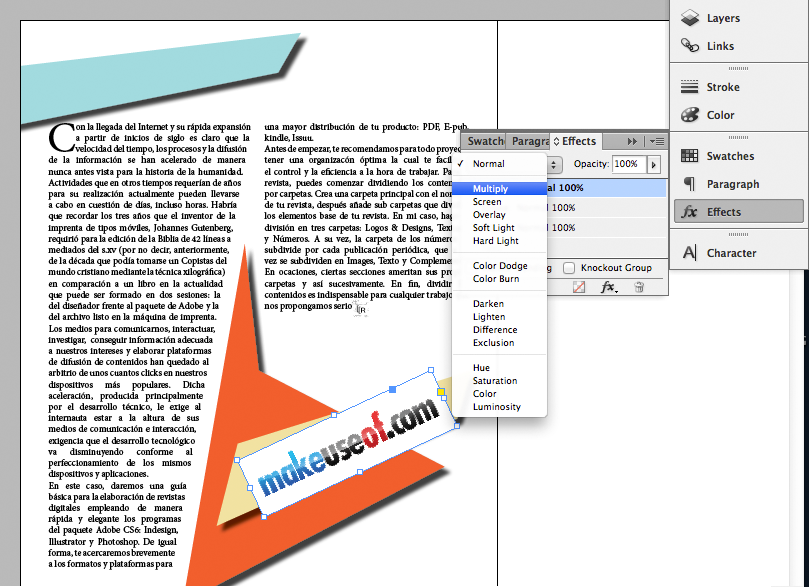
We’ll add the MakeUseOf image on top of our figures. With the image selected, we click Effects > Normal > Multiply.
This blends our images combining the color pixels of each layer, ignoring whites.
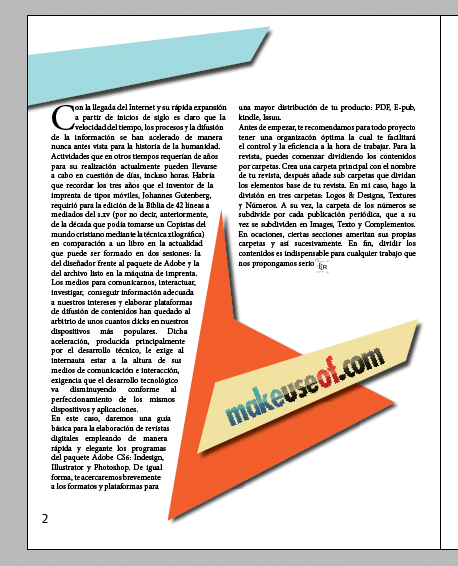
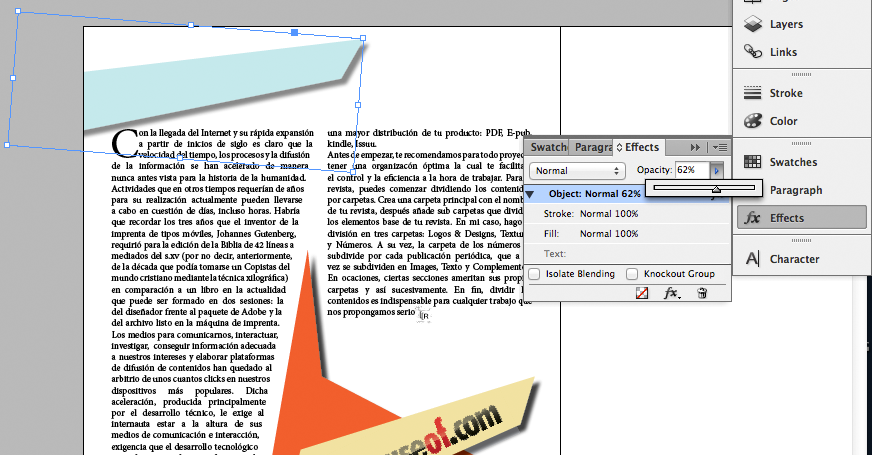
We select the teal-green figure and change the Opacity to 62%.
We can now add the title.
2.3.3. Images
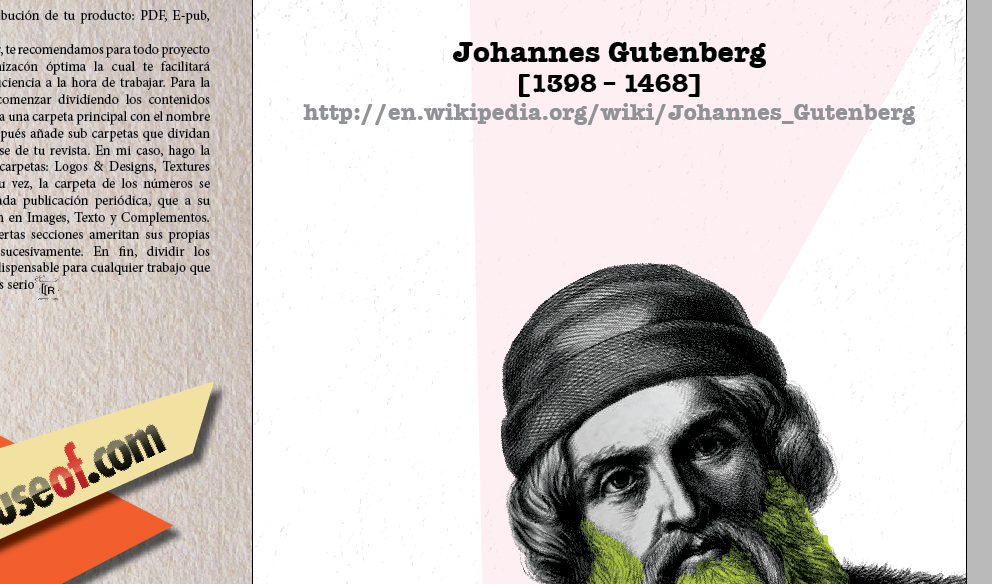
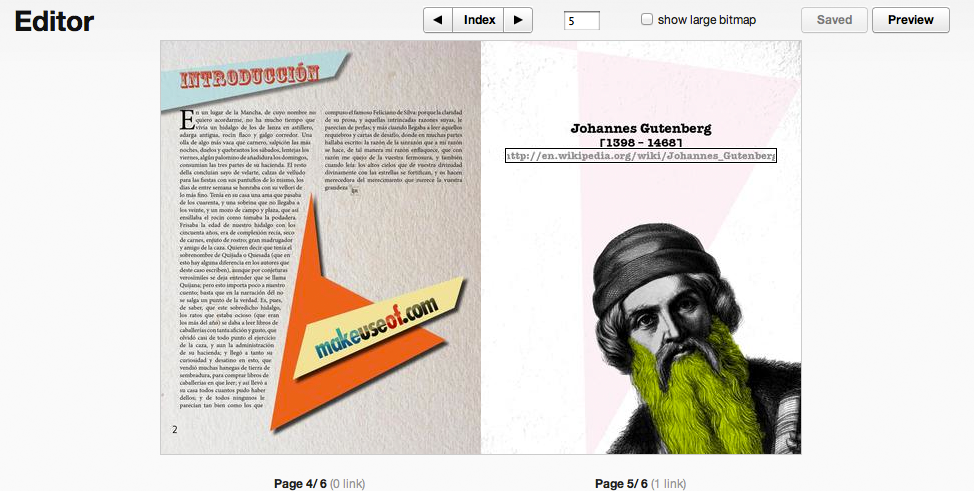
We’ll insert a PNG image of Johannes Gutenberg that I’ve manipulated beforehand, following similar steps as we did in section 1.2. Photoshop. I’ll then add texture and triangular shapes with a transparency filter, and send it back behind Johannes.
2.3.4. Interactive
You can add all kinds of hyperlinks to your magazine to make it interactive. Sharing links to documents, online literature, music, videos, etc, is the beauty of a digital magazine!
2.4. Hidden Track: Design Must-Knows
Images contain lines of direction that direct our focus and guide our eyes around the picture. Text and complements together constitute a pictorial arrangement that lead to similar effect. A magazine is no exception.
The following basic keywords, applied to other visual disciplines (mainly photography), must be considered when making a magazine:
- Placement: Visual weight increases as the object is displaced from the height and base axes center.
- Vanishing point: This is the point where the projections of parallel lines converge, as in a horizon. Such lines help us navigate where the sight of the readers will fall upon.
- Size: Bigger/larger objects will be visually heavier.
- Texture: Backgrounds or details with textures have a bigger weight that plain, smooth finishes.
- Shapes: Irregular shapes have a great weight than regular shapes, as long their contours are well defined.
- Color: White is heavier than black. Warmer colors are heavier than cold ones. Therefore, a red of a certain intensity will be visually heavier than a blue of the same intensity.
- Saturation: The more the information (which we understand as all the elements placed over a white page), the heavier the visual weight, and vice-versa.
2.5. End product: Your Magazine in PDF
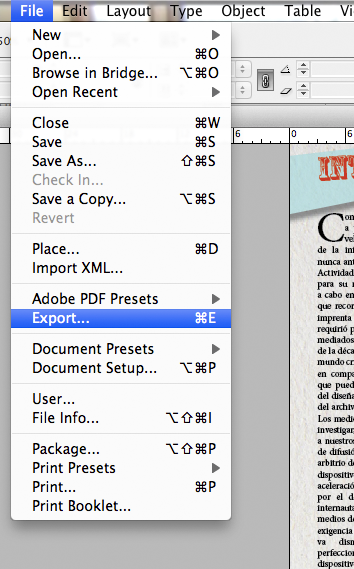
To save your document as a PDF you only need to open File > Export.
In the window that opens up choose Adobe PDF (Interactive) format, and Save.
3. Create a Free Account in Issuu
3.1. What is Issuu?
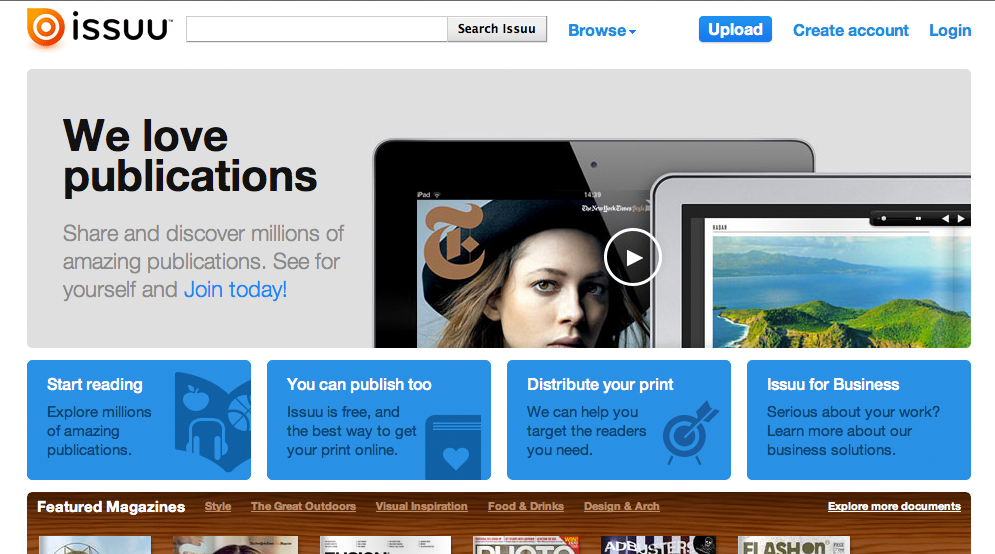
Issuu is a public platform where we can upload PDF documents like magazines, catalogues, brochures, newspapers, etc. It allows you to share your publication to any website, blog, or social networks, like Facebook or Twitter, and visualize it without the need to leave these pages.
You can register to open your account in Issuu at: http://issuu.com/signup
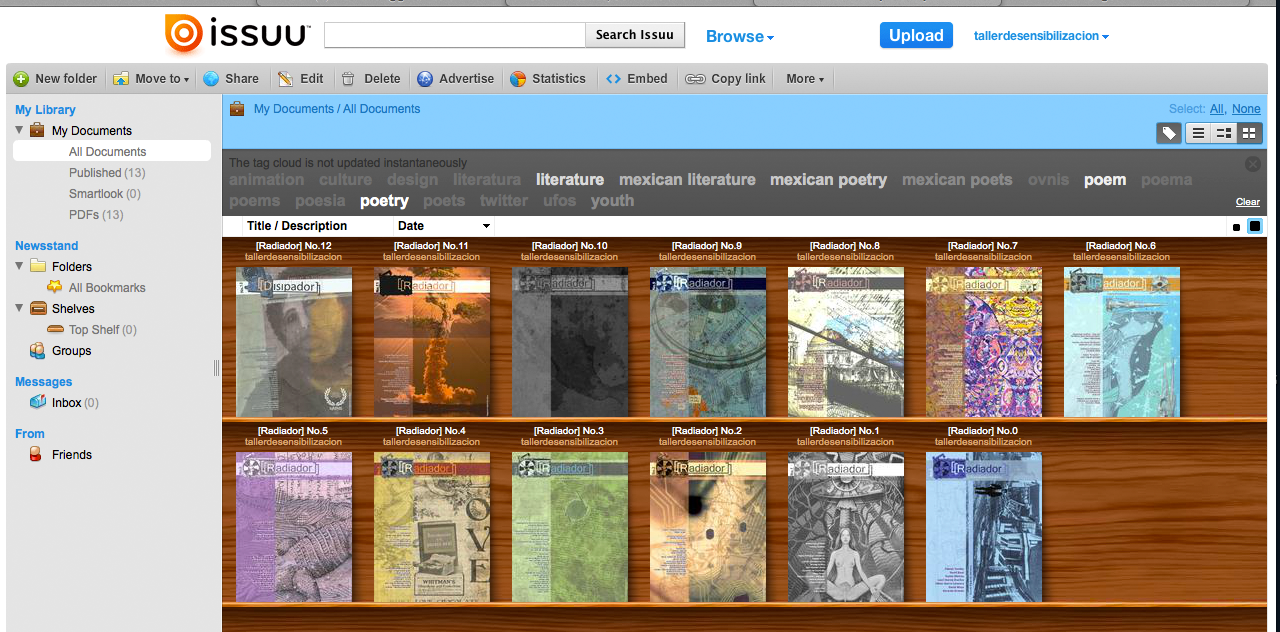
With Issuu you can create a library with all your publications, divide them in folders, monitor visitor statistics, obtain embed codes to publish them on blogs or other websites.
3.2. Uploading Our Magazine
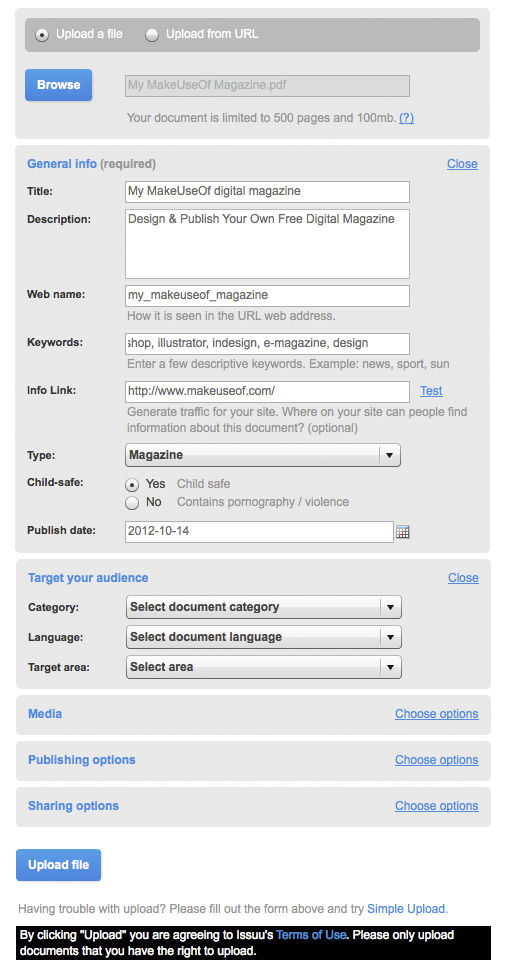
Uploading a document is very easy. Click on the Upload button that is found on the top right corner of the Issuu page. A fill-out form will appear where we can type in the specifications of our magazine.
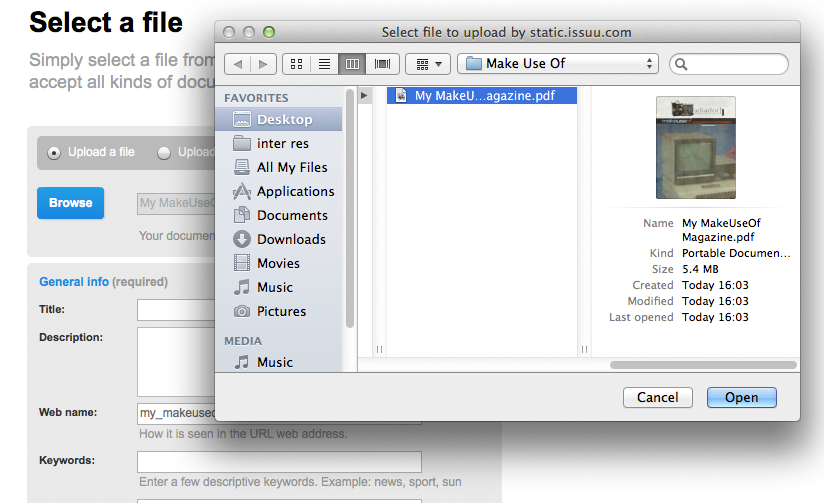
We click Browse and locate the file of the magazine to Open it. To start the upload, we click Upload File at the bottom of the fill-out form.
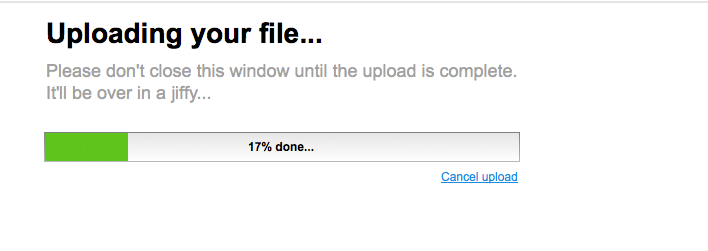
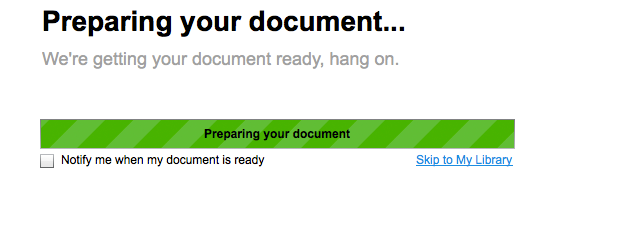
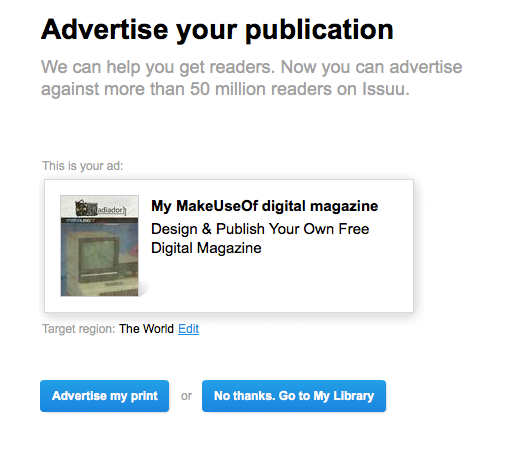
The process to upload our document looks like this:
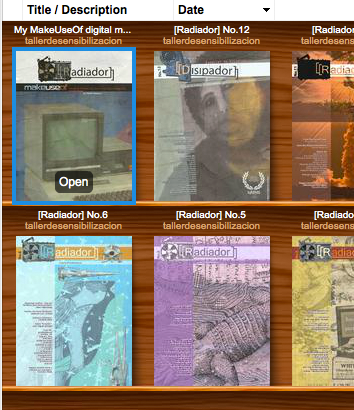
Once uploaded, our magazine should appear in our Library.
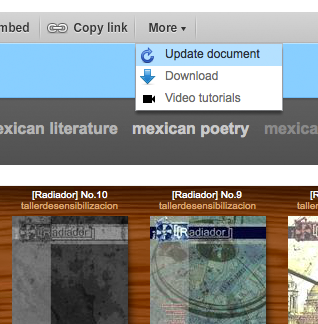
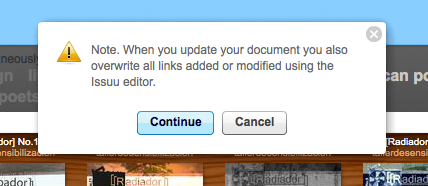
If we want to make a change to the magazine, or find a typo, as sometimes happens, we can go directly to the Library and click More > Update Document. This will allows us to re-upload the document on top of the previous file without losing view counts, affecting our statistics, or Facebook share links.
However, hyperlinks and buttons we place directly using Issuu (see next section) will be erased. So that would be the only thing we’d have to do again.
3.3. E-Complements
Issuu has the option to add buttons and hyperlinks that convert your publication into an interactive one. At the same time, Issuu detects all your hyperlinks. That means, if you include a web address on your document, Issuu will detect it, so that placing your cursor over it will highlight it, indicating the active link.
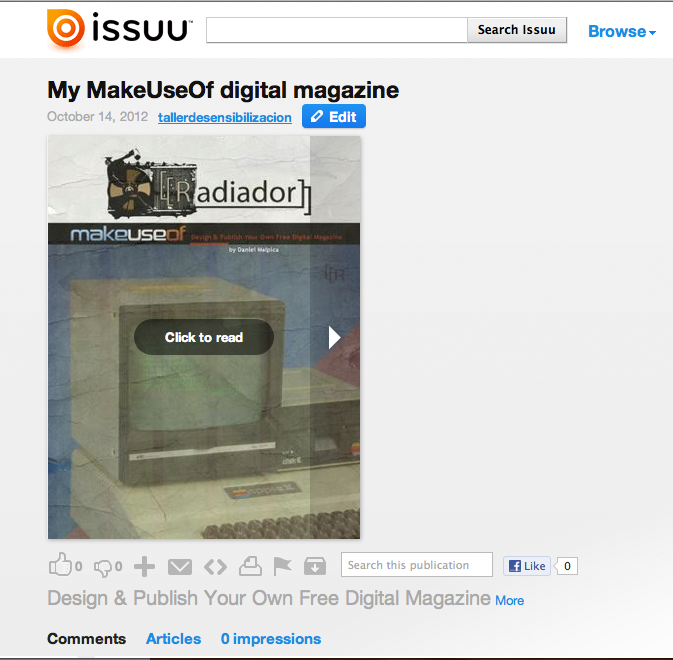
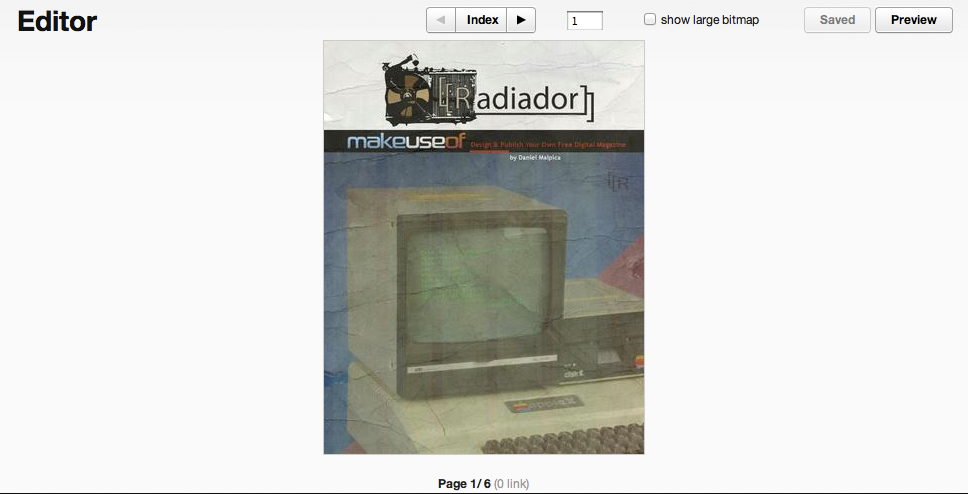
To utilize this option, we need to open our magazine and press the Edit button.
This will send you to the Editor page.
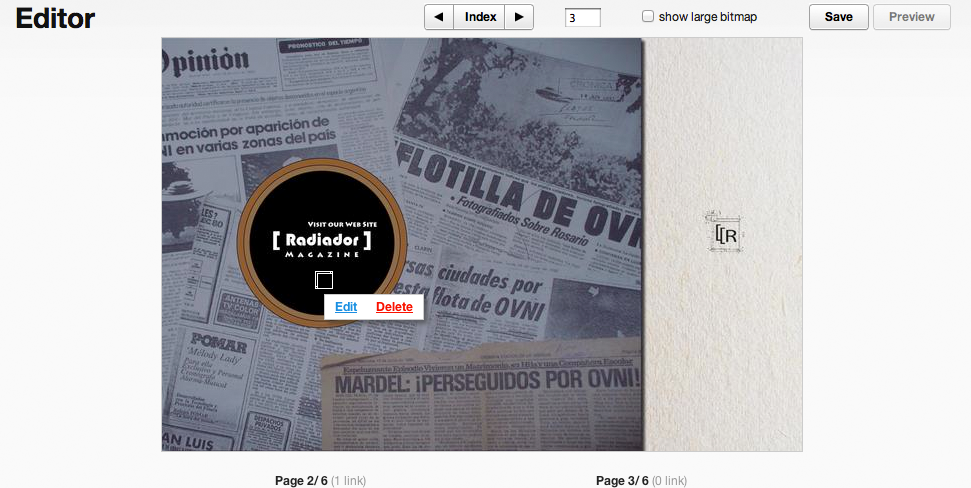
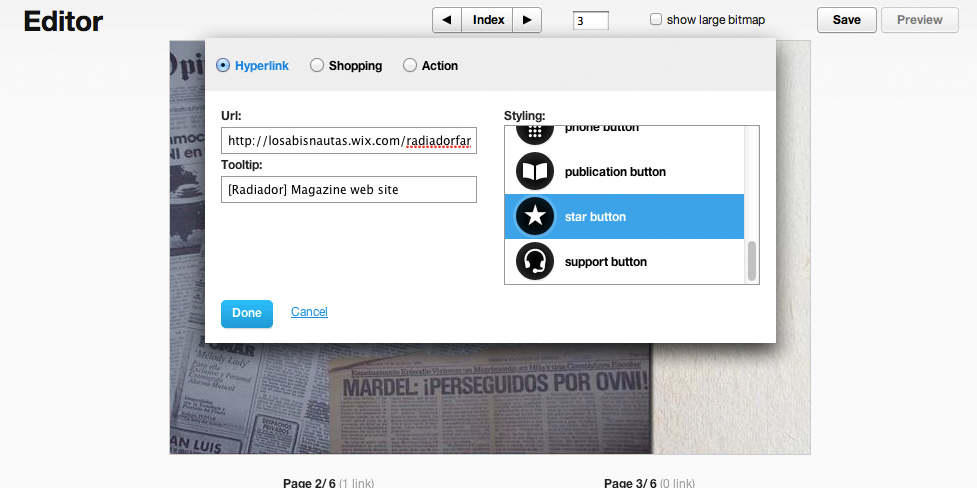
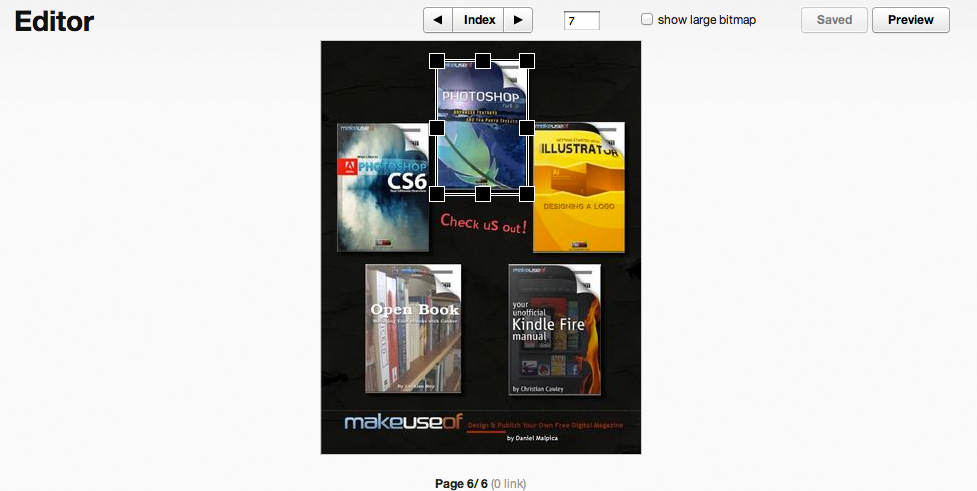
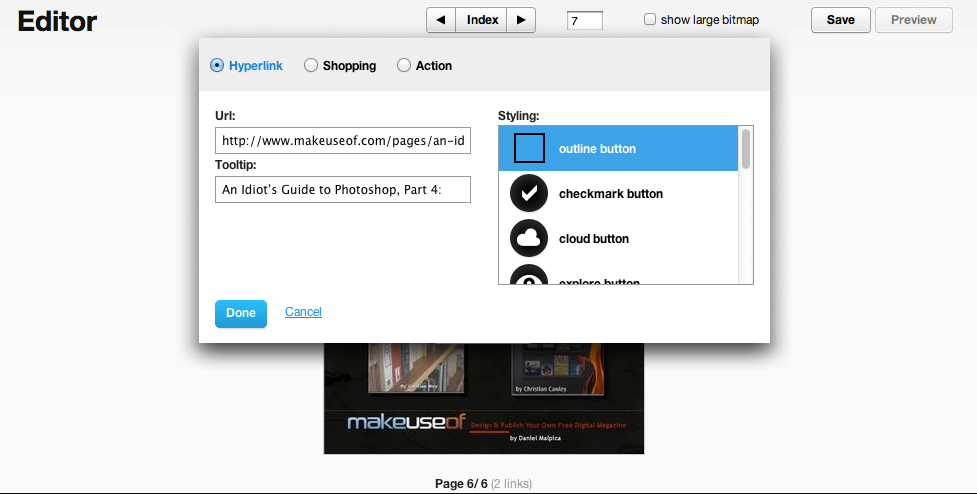
We go to a page where we want to place a link, in this case, the next page. After flipping the page, we click and drag a square on the place where we want to locate our link/button. Two options will appear after we create this square: Edit and Delete. We click Edit and in the window that comes up, we type the link to the web page we want under URL.
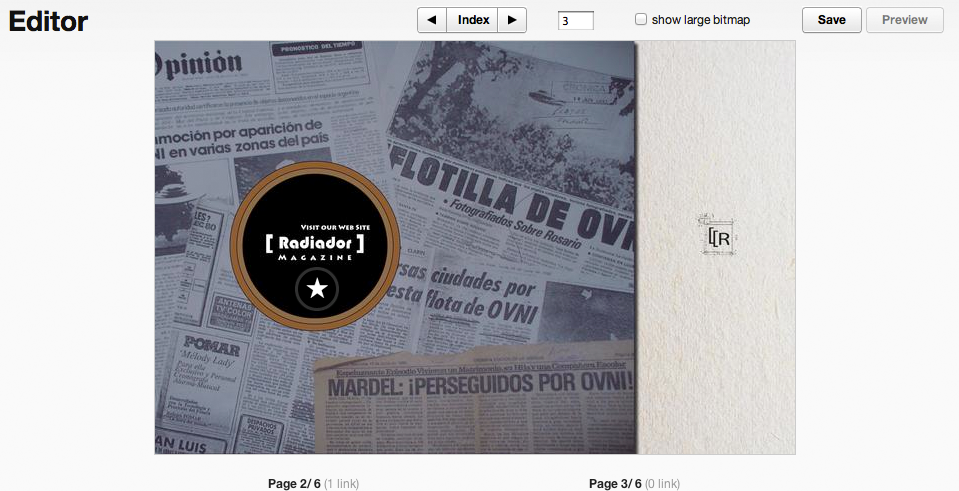
The Tooltip box is where we’ll provide the name of the web address the button will take the reader. For Styling, we choose the Star button and Done.
We then click Save on our Editor page.
Flipping through our magazine, we notice that all hyperlinks we added previously during the design stage have been registered by Issuu.
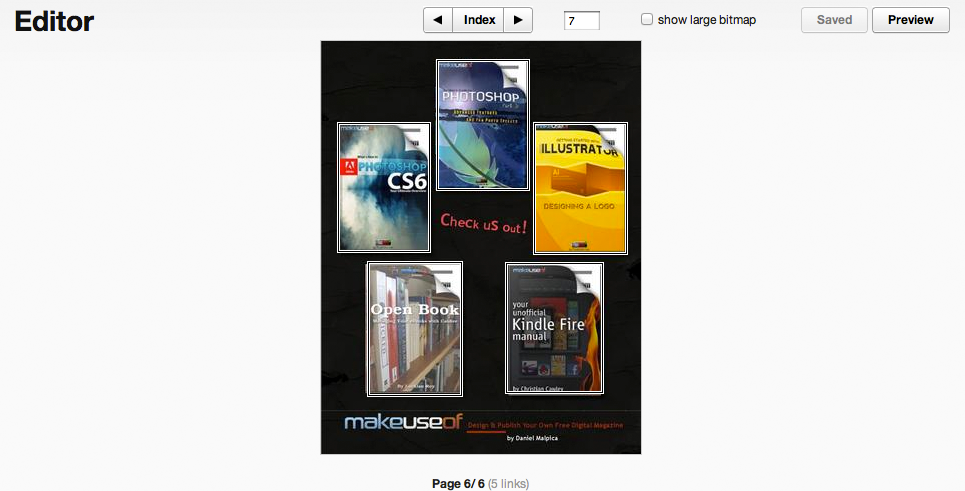
We can also add discreet links that will not cover up our images. Following the same steps we did with the Star button, we now choose the Outline button under Styling. I’ve gone ahead and added the covers of recommended guides for related reading, and added the links to their MakeUseOf address.
3.4. Issuu Mobile: Android and iPhone
Currently, Issuu has an application for Android that allows you to view Issuu content, albeit in a more simple form that in a PC. Issuu has been negotiating an app with Apple, and state that an app for iPhone is coming soon. To download the Android app or check updates regarding the iPhone, visit: [No Longer Available]
3.5. Issuu’s iPad Reader (Beta)
While we wait, I will mention that documents uploaded to Issuu can now be visualized in iPads and iPods through a Reader Beta version. It isn’t as sophisticated as the flash PC version, but you can now open your publication and read it vertically, or as a two-page spread in the horizontal layout. So all you need is the Issuu link and Wi-Fi. The downside is it still isn’t interactive, so hyperlinks we added here will be lost. It’s only a ‘reading’ magazine for now.
3.5. Final [Issuu] Cut
Check out the end result of our sample magazine and give the links a go! (ehm… yeah, if you’re on a PC)
http://issuu.com/tallerdesensibilizacion/docs/my_makeuseof_magazine
4. From PDF to Other Devices
If you are looking to use other free platforms to visualize your magazine digitally other than Issuu, remember that readers such as iBooks and Kindle allow you to import PDF files, so that you can upload your PDF from InDesign straight into an iPod/iPad or Tablet. However, you must remember what you want to deliver with your publication. Interactivity will be gone from the PDF in iBooks or Kindle.
They do, however, allow the two-page spread, albeit a fixed spread, if you export your magazine in InDesign as ‘Spreads’ in the Page Section. This will emulate an open magazine when you see the PDF file through iBooks or Kindle (for the small iPod, a 2-page spread view definitely wouldn’t be appropriate).
Now, it’s not advisable to automatically convert your PDF magazine to another format, such an ePub. What will happen is your output file will have separated the elements of your magazine, such as transparencies, backgrounds, objects and text. So converting elaborate designs may not have a favorable result.
Personally, I’d recommend you have the device you want to choose in mind, and design the magazine accordingly, keeping in mind the limitations that come along with the device, at least using free readers.
Subscribe to MakeUseOf, because an upcoming manual will outline how to create EPUB and Amazon files.
Epilogue
We’ve used Issuu to publish our digital magazine and mentioned how easy it is to upload it, make it interactive, and share it across the net. Apple devices, such as iPads or iPods, were previously incompatible with Issuu due to its use of Flash, but since HTML5, we can now flip through our magazine using these devices (although still no hyperlinks).
We briefly mentioned that InDesign CS6 now lets you choose, under Digitial Publication, which format to work for. That is: iPod, iPad, Kindle Fire, or Android 10’’, in addition to the PDF. So if we were aiming to publish a magazine for, say, iPad or Kindle, InDesign allows you to arrange the content appropriately—and simultaneously—in a horizontal and vertical layout with dimensions specific to the device(s), within the same working space. Digitial Publication, Liquid Layout, and Folio Builder allow us to work with dual orientation, which can then be saved under one document.
InDesign CS6 is also experimenting with an EPUB 3 layout format, which technically allows you to keep some basic layout in place, although again, the result is not guaranteed.
Last note: if you wanted a simpler design or were writing an eBook where layout is basic, converting your InDesign PDF file to the various formats can be done using Calibre – although the results may vary. Check out the Calibre guide at: https://www.makeuseof.com/tag/download-open-book-managing-your-ebooks-with-calibre/.
Check out these excellent articles about digital publishing as well:
- How To Make An ePub File For The iPad, Nook, Kobo & More
- A Beginner’s Guide To Setting Up An eBook Library On Your iPad
- INFOGRAPHIC: The Rise Of e-Reading
- How To Make Your Own eBooks And Publish Them On Amazon
Guide Published: October 2012

