Gmail offers a terrific feature for creating custom email signatures.
And what makes it even better is that you can make and use a different one for each connected email account. Taking a few minutes to do this for your various addresses can save you time in the long run and provide consistency for your recipients too.
Set Up Additional Email Addresses
Obviously, you will need to connect your other email accounts to Gmail in order to use the signatures there.
If you are new to this, you can send emails from addresses or aliases you own. This includes Yahoo, Outlook, Hotmail, business or educational domains, and other Gmail accounts. Just follow these steps:
- Log into your Gmail account, click the gear icon on the top right, and select Settings.
- Click the Accounts and Import tab at the top of the Settings page. For some domains, the tab may just be labeled Accounts.
- Under the Send mail as section, click the Add another email address
- You will then see a popup window. Just follow the prompts to move through the process. Note that you will need to verify that you own the email address, so be sure you have access to it.
You should then see the additional email address in the Send mail as section. At the bottom of that section, you may want to mark the option: Reply from the same address the message was sent to. Enabling this option will insert the address and signature automatically when replying or composing an email from that account.
If you prefer not to enable this option, you can always change the From address manually before sending your email. Then, the custom signature you create for that account will pop right into the message.
Create Your Signatures
Remember, you can create a different signature for each email address you add to your Gmail account. This is super handy, especially if you connect addresses for personal, educational, and business accounts. Be sure to check our article on creating professional email signatures!
To get started, click the gear icon on the top right, and select Settings. By default, you should arrive on the General tab. But if not, just click it from the top. Then, scroll down to the Signature area.
Make sure that No signature is deselected and the option beneath it that holds a dropdown list of your addresses is selected instead. When you view the list, you should see all email addresses that you have connected.
If one is missing, go back to the Accounts and Import (or Accounts) section and check to see if the address is in the Send mail as area. If it is not listed, follow the steps above to connect the account.
Use the Text Editor
Now, choose the email address from the list for the signature you want to create. You will start with a blank canvas and can use the text editor tools to make a basic or even an elaborate signature.
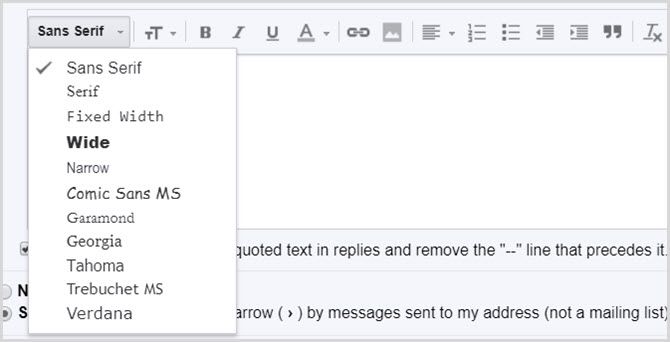
Gmail offers over 10 different font styles to choose from including Garamond, Tahoma, and Verdana. This is a good place to start, so pick your font style and next to it select the text size.
You can then use the WYSIWYG font tools to style the text, such as bold, italics, and underline as well as colors for both the background and text.
Next to the tools for formatting text, you will see an option to link text. Linking text in your signature is convenient for giving recipients quick access to your website, blog, or social media networks. Keep in mind that if your recipients receive emails in plain text, your links will not be clickable for them.
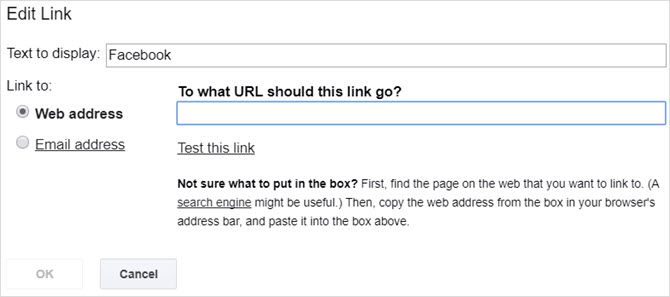
To insert a link, just select the text and click the Link button. If you are linking to a website, the link may format automatically. But, for regular words like Facebook, you will need to obtain the link and pop it into the box that pops up.
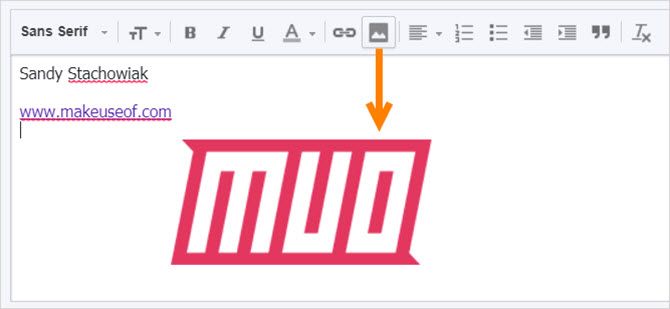
On the right of the link button is the image button. Images are seldom used in personal signatures. However, many companies like their logo to be in employee signatures or if you own your own business, you might like this option. Just move your cursor to the spot you want, hit that Image button, and grab your picture from Google Drive, a URL, or your computer.
Finally, you have a set of options for alignment, a numbered or bulleted list, indents, and quotes. And all the way to the right is a button to remove all formatting. This allows you to experiment with the editor tools and remove the formatting with a click if you change your mind.
Save and Test the Signatures
When you finish creating a signature, you can select another email address in your list and create one for the next account. Just be sure to click the Save Changes button at the bottom of the page, otherwise, you will lose what you have done.
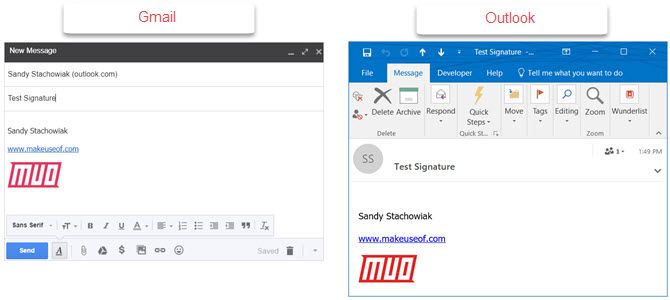
After you create a signature, it is a wise idea to test it out with various email clients. This allows you to see how it will look to your recipients and make sure it appears as you expect. Send an email to Outlook, Gmail, or Yahoo and also check the appearance of the signature on your mobile device email.
Troubleshoot Issues
While it is easy to create your custom signatures in Gmail, there may be some who run into problems.
Here are a few common issues and how to fix them.
- Extra characters in signature: Some Gmail versions do not support text formatting. To eliminate the extra characters, you must remove the formatting like bold, italics, or underline.
- Cannot view signature when replying to a message: If you are responding to an email from your inbox, your signature is trimmed. Just click the three-dot separator to display it. Note that this may also be the case for sent emails.
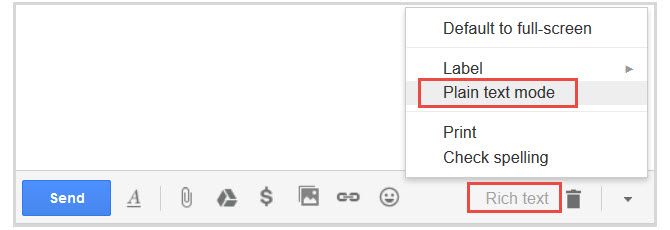
- Unable to format signature: You will need to use Rich Text formatting rather than Plain Text to format signatures. Click Compose to create a new email. In the bottom right corner, click the arrow and make sure that Plain text mode is unchecked.
Are You Ready to Create Your Signatures?
By creating custom signatures for various accounts you can benefit from both consistency and efficiency. This is especially helpful if you always sign your emails the same way. And remember: you can even include a "sincerely," "thank you," or "have a nice day" before your name and contact information.
If you have suggestions or tips for others who are just getting started, feel free to share them in the comments below.

