Halloween is coming up so it's the time to change your Facebook profile picture to something spooky. Last year, I showed how to add a ghost to your Facebook profile picture. This year I'm going to go even further and show you how to turn yourself into a creepy undead creature.
Whatever your Photoshop skill level, you should be able to get something from this article. I've made the process as simple to follow as possible. I'm also providing all the files I used including the final layered TIFF file so you can dig in and explore what I did. You can download them here. If you're just starting out, you can simply swap the picture of me for a picture of you and change almost nothing else. If you line them up right, you'll end up with an awesome image.

On the other hand, if you've got a decent grasp of what Photoshop tools do, but aren't quite sure how to put them into action, then this article is really for you. My whole Photoshop process is recorded as a screencast. I talk through the mix of basic techniques I use to create the final effect. Anyone with a little bit of knowledge of how Photoshop works will easily be able to follow along and put the techniques into action.
Finally, if you're a dab hand at Photoshop, I challenge you to do better than me. Watch what I do then improve on my work and gloat in the comments.
Prerequisites
To work along with this article, you need a decent image editor.
I love Photoshop so that's what I'm using, however, you can easily adapt the process to any other image editing program. If you're on Windows, I'd recommend Paint.NET as a good alternative while if you're on a Mac, Pixelmator is by far the best option. With Linux, you've a few options though I've never used any of them.
If you're using Photoshop like me, having some basic knowledge of how to use the program will really help you follow along. A great place to start is with our four part Idiot's Guide to Photoshop:
- An Idiot's Guide to Photoshop, Part 1: Easy Photoshop
- An Idiot's Guide to Photoshop, Part 2: Useful Tools & Tips
- An Idiot's Guide to Photoshop, Part 3: Pro Tips
- An Idiot's Guide to Photoshop, Part 4: Advanced Features and Fun Photo Effects
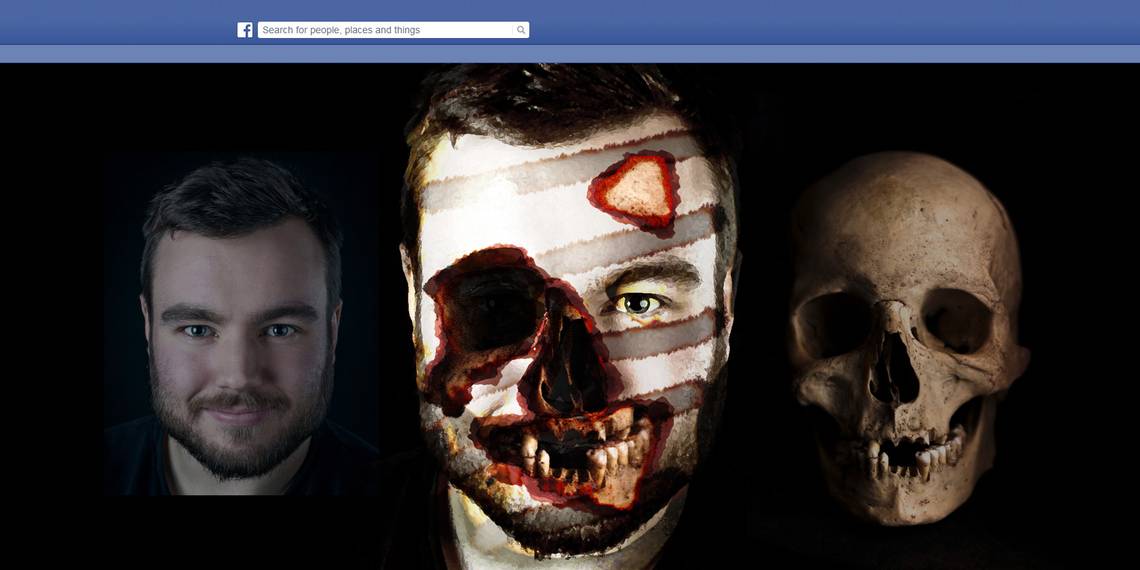
Finally, you also need two images: a picture of yourself, and a picture of a skull.
A picture of yourself is a lot easier to find so start by getting a picture of a skull. I used this one from pixabay. It's included in the resource pack or you can download it directly from them.

Next, you need a photo of yourself with your head positioned similarly to the skull. The closer they match, the easier the Photoshop work is. I'm a fan of selfies in general and for something like this they can work really well. By mixing a casual image with some real Photoshop work, it can make the entire things seem more natural than if you'd used a professionally shot image. A selfie also has the advantage that you can keep taking them until you get one that matches the skull you're using perfectly.
The Photoshop Process
The above screencast that accompanies this article shows my full Photoshop process. To really understand what I do, you should watch it. For the following write up, I'm assuming you already have and want a quick refresher of the steps before you attempt them on your own image.
- Start by loading the two base images into Photoshop or your chosen image editing program.
- Lower the Opacity of the skull layer and use the Transform tool to get its facial features to align with your own.
- Use Hue/Saturation and Curves adjustment layers combined with Clipping Masks to adjust the color and exposure of the two images so they match better.
- Add a Layer Mask to the skull and using the Brush tool set to a low flow, paint the skull so that it's only visible where you want it. This step takes by far the most time.
- Use a new layer set to the Soft Light blend mode to Dodge and Burn — selectively brighten and darken — the skull.
- Use a Curves and Gradient Map adjustment layers to set the overall contrast and color for the image.
- Finish off by creating two Stamp Visible layers and setting them to Soft Light and Overlay respectively. On the first, lower its Opacity so it adds some contrast to the image. On the second, lower its opacity and run a High Pass filter to add some sharpening.
Show Us Your Work
If you work your way through this tutorial I'd love to see your final image. Every time you do something like this, you get slightly different results so it's always interesting to see what other people come up with. The three times I worked through the process for the article, I got different images. Upload it somewhere and share a link in the comments.
Also, if you get stuck at any step or want some feedback, ask away in the comments. I'm happy to help.