It's a small Windows program tucked away in the recesses of Windows own System32 folder.
The Private Character Editor (PCE) is almost a monochrome replica of MS Paint but with a different creative use. If you want to create your own fonts or symbols, this is the tool to fire up.
When you don't have anything to do much with fonts or typography, then the Private Character Editor is one of those little-known Windows features you may have overlooked. But as we will see, the little tools pay us back when we need to use them for some productive tasks.
But I am sure you are piqued by fonts and their creative scope. So, you can spend the next five minutes on the Private Character Editor and get to know it better.
Get to Know The Private Character Editor
The PCE is an "under the hood" program. It has existed in almost all versions of Windows. You can do two things with the editor.
- Make a special text character, symbol or simplified logo that is not available in the installed fonts.
- Edit existing type characters and insert them into documents using your computer's Character Map tool.
There are many third-party tools like FontForge and FontStruct for designing your fonts and symbols. Then, there are umpteen websites for downloading free fonts. But the PCE is right there in your Windows system to help you create a simple symbol or character. It is also a creative exercise to stretch the limits of the software that's right there in front of you.
So, how powerful is it?
PCE provides basic drawing tools for creating and editing those characters with some advanced options.
You can create up to 6,400 unique characters and include them for use in your font library. Once created, use the Character Map to insert them into any document.
Let's dig it out and understand its functions.
There Is More Than One Way to Start the Private Character Editor
Method 1: Use the Search Box.
Start typing "Private Character Editor" in the search box and select it from the results.
Method 2: Access it from the Control Panel
Enter private in the search box, and click Private Character Editor under Fonts.
Method 3: Open it from the Run dialog box.
Press Windows + R to open Run > Type eudcedit > Click OK.
Method 4: Open it from the Command Prompt
Open the command prompt window. Type eudcedit > Press Enter.
Method 5: Give it your own shortcut.
Right-click anywhere on the desktop. Select New > Shortcut from the menu. Type
%windir%\system32\eudcedit.exe
in the field. Click Next to advance to the screen where you give a name to the shortcut. Press Finish to set up the shortcut on your desktop.
You can always pin the window to the Start menu or the taskbar for faster access.
Explore the Private Character Editor Window
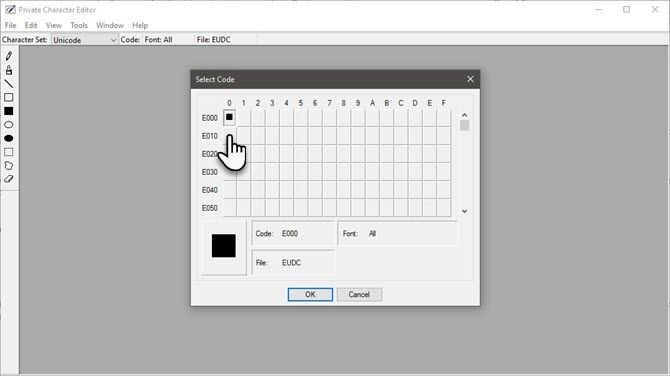
PCE starts with a Select Code window. This window associates the character you are about to create with a specific place in the Windows character library. The funny numbers on the Select Code grid are hexadecimal codes that will be allotted to your new character.
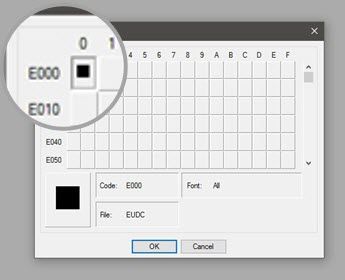
For instance, if you choose the first box, the code will be E000. If you pick the box from the second column and the first row, the code will be E001. Select any of the little gray boxes and click on OK.
Note: By default, PCE uses the Unicode character set.
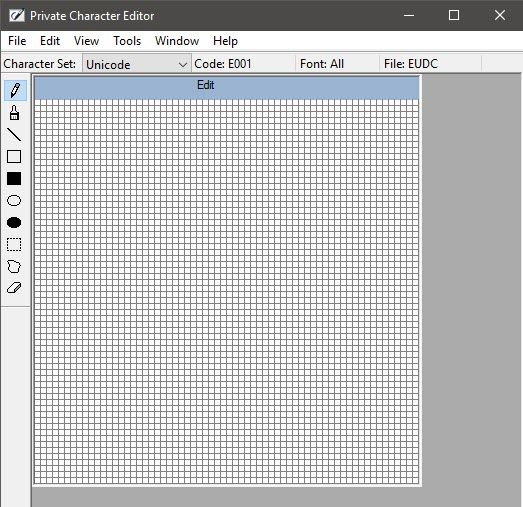
The interface of the editor is barebones with a grid drawing area and the drawing toolbar with 10 tools on the left. You can also access the drawing tools from the Tools menu. The grid represents the total area of a character measuring 64 x 64. Each character that you draw becomes a black and white bitmap (*.bmp).
The drawing area is simple enough for a third grader to understand but the actual drawing takes a calligraphist's hand. My efforts below will show that I am certainly not one.
It takes a lot to use the mouse as a brush. Use the left mouse button to draw in black and the right one for white. This basic interface is enough if you want to create your own typeface. But imagine the endurance and effort!
So, stick to simple symbols that you can use as a "stamp" or a special typeface for an email signature.
Here are two things you can do when you don't want to start from scratch.
1. You can use an existing character as a template to create a new character.
Copy the existing character to the grid. Go to Edit > Copy Character. And then change it with the tools at your disposal. The existing character can also be used as a visual guide in a Reference window next to the Edit Grid (Select Window > Reference).
We will look into this method in detail below.
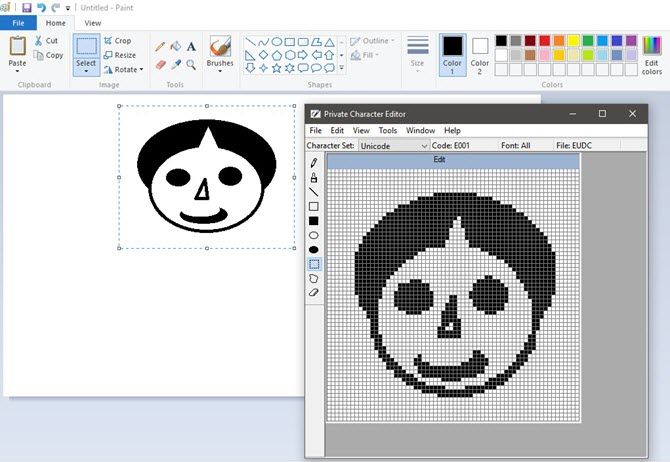
2. You can copy and paste bitmap selections between the PCE and other bitmap drawing programs like Paint. For instance, you can create a bitmap in Paint and then copy-paste it in PCE.
Create With The Private Character Editor
The toolbar has all the basic tools to make your first character from scratch.
- The default tool is the Pencil for drawing on one square at a time. The Brush helps you draw 2x2 squares at a time.
- The Straight Line tool, the Hollow Rectangle tool, the Filled Rectangle tool, the Hollow Ellipse tool, and the Filled Ellipse tool are just what they say.
- The Free Form Selection tool and the Rectangular Selection tool select the different shapes you draw on the grid.
- The Eraser tool removes 2x2 areas of drawing.
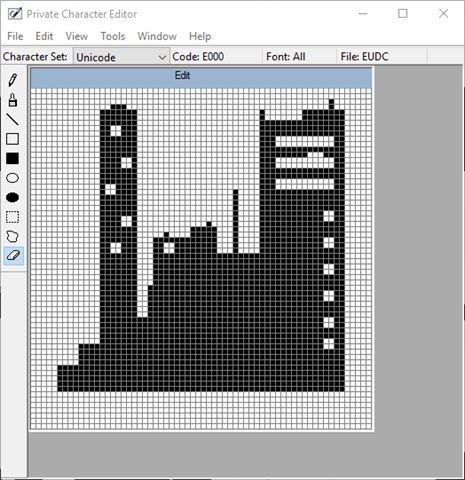
Now, it's all about your creativity and the font you want to create. For instance, I created a skyline silhouette. How does it look? Tell me in the comments.
The Easier Way to Create a Character
Using a pre-existing font as a starting point can be easier. You can choose from any of the installed fonts for download fonts from the sources available online.
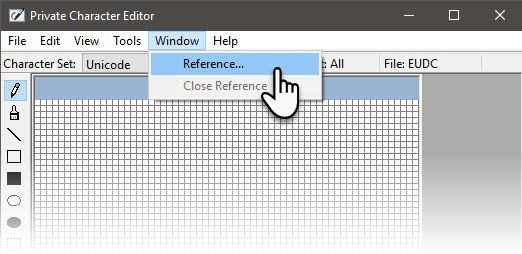
From the Menu, go to Window > Reference.
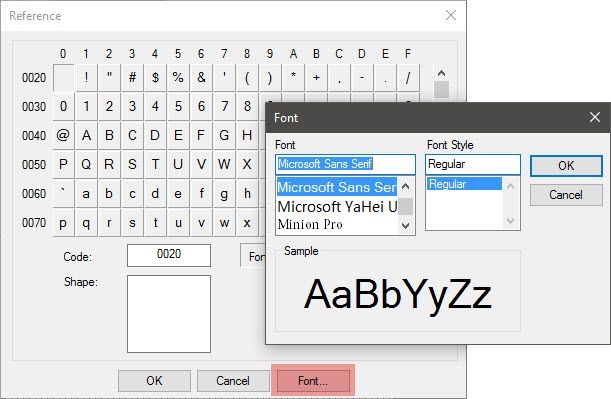
Choose the typeface you would like to use by clicking the Font button on the Reference screen.
Select the character you would like to use as the template for your own. Click OK to load it into the editor.
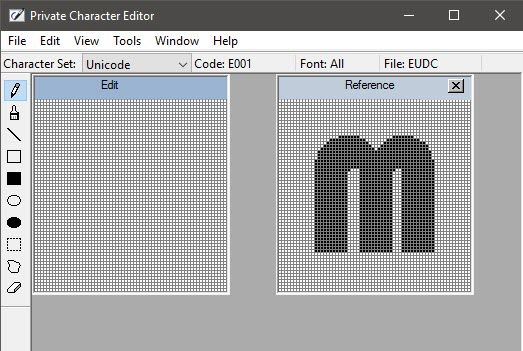
The PCE displays two windows now. The Reference window on the right is your guide. The blank Edit window on the left is your canvas.
Copy the Reference character with one of the selection tools on the toolbar. Select and then press Ctrl + C. Paste it on the Edit window with a Ctrl + V. You can close the Reference window to bring the Edit window front and center.
Go crazy – design your character with all the creativity at your disposal.
Save and Use Your Own Font or Symbol
The process to save a design is the same for both the above processes.
You have two options -- associate the new character with a font family or with all fonts installed on your computer. For a specific font family, your custom character will be available exclusively from there.
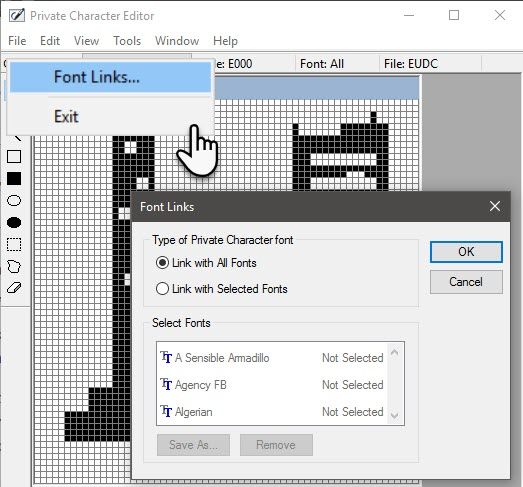
Click the File menu and select Font Links and then click Yes on the next save prompt. Keep the Link with All Fonts option selected and click OK.
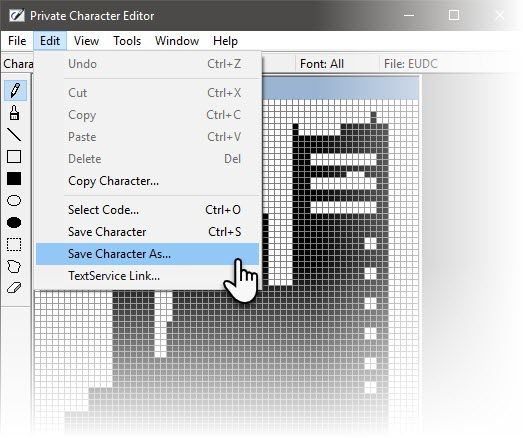
The character is now linked to the fonts in your system. To save the character with a specific hexadecimal code -- click Edit and select Save Character from the menu to save it. You can associate and save the character to a different hexadecimal code too. Select Save Character As instead.
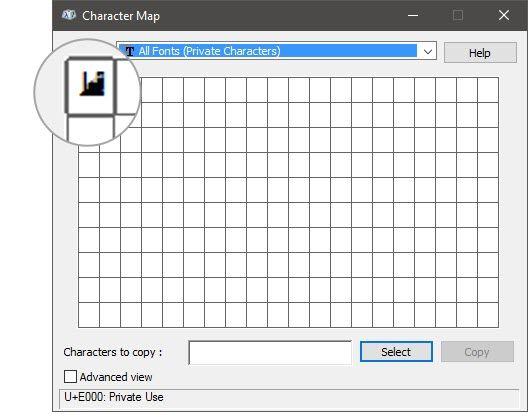
Use the character with the help of the Character Map on your system.
The new character can be found in the drop-down under All Fonts (Private Characters) or under a specific font (Private Characters) depending upon the choice of association in the earlier step. Select the character and hit copy. Now it can be pasted into any application.
Don't get scared if you see a tiny black blob. Just increase its font size like as you would do with any other character.
The Character Map hasn't gone through many changes since Windows XP. The PCE gives you another route to use it.
Do remember:
All rules applicable to fonts also apply to the newly created character. It goes for all font functions like size, bold, italic, etc. Also, custom characters will not be available on other computers unless they are installed there too.
So, your own symbols and characters will work on printed documents but not with emails or shared documents as the recipients will not have it on their systems.
Creative Ideas for Using the Private Character Editor
Creativity does not require constraints but it can help you channelize it. It can be an exercise in fun -- as we have seen earlier while making logos with Microsoft Word or designing an infographic with Microsoft PowerPoint.
What are some of your ideas for the Private Character Editor? Do you think that this tool will find more value if it is not treated as a hidden application?
Image Credit: ARTIST via Shutterstock.com

