There are two major steps on how to start a webcomic; creating the website and drawing comics. Of course, this is a bit simplified, but many people are terrified by the idea of having to create a good online platform for their drawings.
They shouldn't be. Similar to photo portfolios and webshops, other web designers have created a simple webcomic template that's friendly to use and easy to maintain. You guessed it, we're talking about WordPress adaption.
ComicPress [Broken URL Removed]
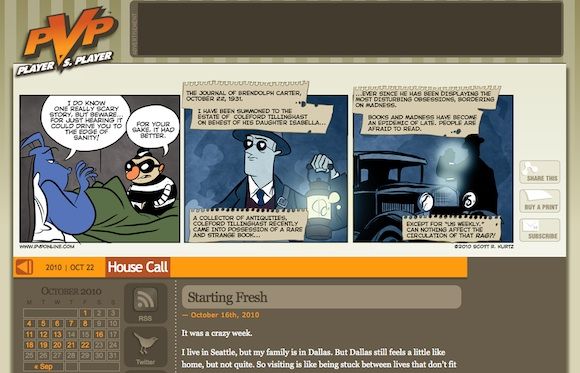
ComicPress brands itself as The WordPress Comic Publishing Theme; and a good one it is. It's used by many popular webcomic publications, including FoxTrot, Player VS. Player (shown below), Dr. McNinja, Nuklear Power, Extra Life, Starslip and Octupus Pie. Check out these websites (and more featured on the ComicPress website) to get a clear idea of what's possible using this theme and a couple of add-ons. Truly, ComicPress shows itself as not simply an amateur interpretation of a good comic publishing platform, but simply the latter in its true form.
There are two display modes for ComicPress, the comic view and the blog. By default, the blog is shown below the latest comic, much like in the screenshot above, but you can also display solely the blog or the comic and save the other for a separate part of the site.
Installing ComicPress for WordPress
In this tutorial, we'll assume you've got a valid WordPress installation - that is, hosted by you and not by WordPress.com. WordPress is a so-called content management system, used as the main ingredient by a large amount of blogs (including this one), company websites, webshops, and soon your very own webcomic. Best of all, it's entirely free.
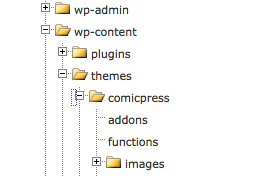
Download the latest version of ComicPress from the website [Broken URL Removed], upload and unzip it into wp-content/themes/comicpress. If your server host's file manager doesn't support the extraction of archives, you'll need to unzip it on your computer and upload each file separately. It's crucial to follow this folder structure to the letter; your theme files need to be in a 'comicpress' folder, all lowercase, or it won't work.
Next, go to Plugins -> Add New in the WordPress sidebar and install both the ComicPress Manager and the Theme Companion plugins, as shown below. Make sure to activate them as well. You are prompted to after every installation, or can do this later on by going to Plugins -> Plugins.
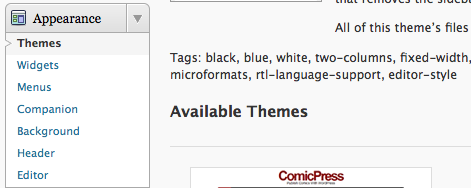
Select Appearance -> Themes in the sidebar and activate the ComicPress theme shown at the lower half of the page, under Available Themes.
In Posts -> Categories, add two new categories; 'Comic' and 'Blog'. You only need to name them, so you can leave the other text fields blank. If everything went right, you now have three categories; Comic, Blog and Uncategorized.
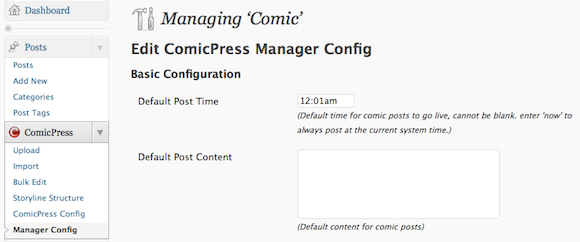
Go to the Posts -> ComicPress -> Manager Config, scroll to the bottom of the page and click the First Run button. This will create the necessary folder structures for managing your comics and publishing an RSS feed. Also go to Posts -> ComicPress -> ComicPress Config, and make sure the installation has detected the 'Blog' and 'Comic' categories you created later on.
You can configure the general ComicPress set-up in Appearance -> ComicPress Options. The options are many, but self-explanatory. Most interesting for a basic installation is the option to disable either blog or comment on your landing page.
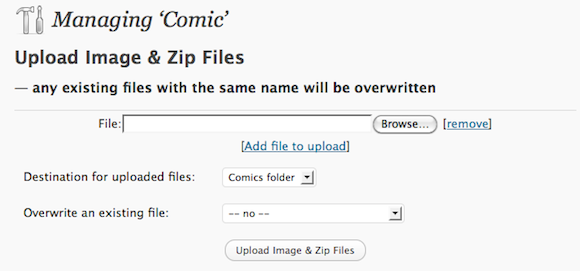
That's all the configuration needed. You can publish your first comic by going to Posts -> Comicpress and uploading a doodle. The image needs to use the following nomenclature: YYYY-MM-DD-Name-of-the-comic.ext, with ext being your file format (e.g. jpg or png), and the name of your comic never containing only one number. Uploading your image this way adds the appropriate title, date, and makes it appear on the site right when you upload.
Do you have any other great webcomic ideas? Let us know in the comments below!


