Rainmeter is the de facto desktop customization tool for Windows. With a code library spanning volumes, there's no end to how many configurations users can manage to accomplish. Rainmeter's most popular use has to be application launchers.
While Rainmeter can provide fantastic RSS Feeds and weather information directly onto your desktop, nothing requires a personal touch quite like custom icons and launchers. Whether you'd like to create a simple application icon, or something a little more interesting, read on to create your very own custom launch icons for programs.
Rainmeter: How It Works
Rainmeter works using simple text files with the file extension INI. These files require certain parameters in order to be read by the Rainmeter program. Here's a an example:
        [Rainmeter]
Update=1000
[MeterString]
Meter=String
Text=Hello, world!
This file will display the string of text "Hello, world!" on your Rainmeter application (on the top-right corner of your screen, by default). It does this using three parameters:
- Update -- The skin will be updated every 1000 milliseconds, or every second. Rainmeter recognizes the update parameter in milliseconds. This is often a requirement in your INI file.
- Meter -- The meter in Rainmeter. The meter options decides how to display your skin. Since our Meter parameter is set to String, Rainmeter will display our information as a string (i.e. a word).
- Text -- Dictates what is loaded through the Meter parameter. Since this Meter is a String, it requires text. "Hello, world!" was our assigned text.
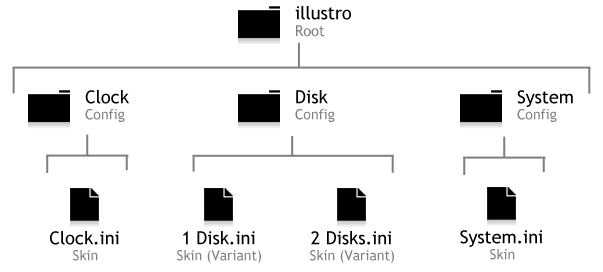
Rainmeter follows a very rigid logical structure, so -- as with any coding -- a single issue could jeopardize the skin or prevent it from appearing on your desktop. That includes following the folder structure of your skins as well.
This structure becomes more complex as skins become more functional. In the following Rainmeter skin, keep both the INI file and folder hierarchy in mind.
Create a Simple Icon
Head to the Rainmeter directory located at C:\Users\[PC Name]\Documents\Rainmeter\Skins. Replace the [PC Name] parameter with the name of your PC (Start > type "manage account" > click Manage your account). Right-click a blank space within this directory, select New, and then Folder.
Name the first folder whatever you'd like, but ensure the title generally describes the contents. I chose muoicons.
Double-click this folder, and create another folder within muoicons. Name this folder after the icon you wish you create. I'm making an Overwatch icon, so I'll name it OverwatchIcon. Then, create another folder within muoicons and name it @Resources. This folder will hold your icon images. That's three folders overall.
Double-click on your second folder (OverwatchIcon in my case). Right-click a space within your second folder and select New, then Text Documents. Double-click your text document in order to edit it, and paste the following:
        [OverwatchIcon]
Meter=Image
ImageName=#@#\<strong>[IconName]</strong>.png
H=<strong>[Height]</strong>
LeftMouseUpAction=["<strong>[Address]</strong>"]
[Rainmeter]
Update=1000
There are three parameters which you must change:
- [IconName] -- Substitute this with the name to the actual PNG image you use for your icon. We will create this later on.
- [Height] -- Changes the size of your icon. While an additional width parameter is available, it won't be necessary for our purposes.
- [Address] -- Within the quotation, replace this parameter with the address of your program. Overwatch, for example, placed under C:\Program Files (x86)\Overwatch\Overwatch.exe. You can also place an email address here as well, and it will open the website using your default internet browser.
After you've changed your parameters, enter your @Resources folder. Paste a PNG image for your icon in your @Resources folder and rename it whatever your [IconName] parameter was replaced by. Finally, edit the [Height] parameter in your original INI file to size the icon.
This method allows you to create an icon from any PNG image, so feel free to experiment with your icon's look. You can even create icons from GIF images as well.
Best of all, you have complete control of the size, image, and location of your icon. Try to be inventive with your icon, perhaps integrating it with your desktop wallpaper.
Create a Background Icon
The above icon will work, but Rainmeter has a few more tricks up its sleeve. Let's say you'd like to change your wallpaper, or pop up an image, every time you mouse over an icon. It's a way to make icons pop out a bit more using Rainmeter.
You can even use the same general format as presented above, except for two key differences: changes to your INI file and an added background folder. First, you'll have to modify your original INI file to the one below:
        [OverwatchIcon]
Meter=Image
ImageName=#@#Images\[IconName].png
H= [Height]
<strong>MouseOverAction</strong>=[!ActivateConfig "<strong>[...background]</strong>" "background.ini"]
<strong>MouseLeaveAction</strong>=[!DeactivateConfig "<strong>[...background]</strong>" "background.ini"]
LeftMouseUpAction=["[Address]"]
[Rainmeter]
Update=1000
There are only two extra parameters in the script above -- all else remains the same:
- MouseOverAction and MouseLeaveAction -- Dictates action on mouse-over. In this particular case, mousing over or leaving an icon will make your background image appear.
!Active/DeactiveConfig activates a skin. Ensure that you change the following parameter:
- [...background] -- Dictates which folder your skin receives its background image from. You should change this to the address of your own background folder. In my case, this parameter is muoicons\OverwatchIcon\background.
When you change the above parameter to your own address, begin at the first (root) folder of your skin. The background.ini parameter tells Rainmeter which file to activate on mouse-over.
Next comes the background folder. In the same folder as your original INI file (Skins\muoicons\OverwatchIcon in my case) create another folder and name it background. Within this folder, create another INI file and paste the following:
        [Rainmeter]
<strong>OnRefreshAction</strong>=!ZPos "-2"
[Wallpaper]
Meter = Image
ImageName = <strong>[ImageName]</strong>.png
This skin is easy to understand:
- OnRefreshAction -- !ZPos stands for Z Position, and determines what place in the Rainmeter load order our image appears. -2 means your image is placed on the desktop, behind most other skins.
Ensure that you change one parameter before continuing on:
- [ImageName] -- This image name refers to the image which appears on mouse-over. Insert the name of your background image here.
Name this INI file background, so its full name is background.ini. In this same folder labelled background, copy and paste the image you want to appear on mouse-over. Your background folder should now have an INI file and an image file. Remember to edit the background.ini file with the name of your image, or it won't work.
Finally, click Refresh all in your Rainmeter window and load your skin. You could either place a whole background image or a smaller image (using a transparent background) placed in a particular section.
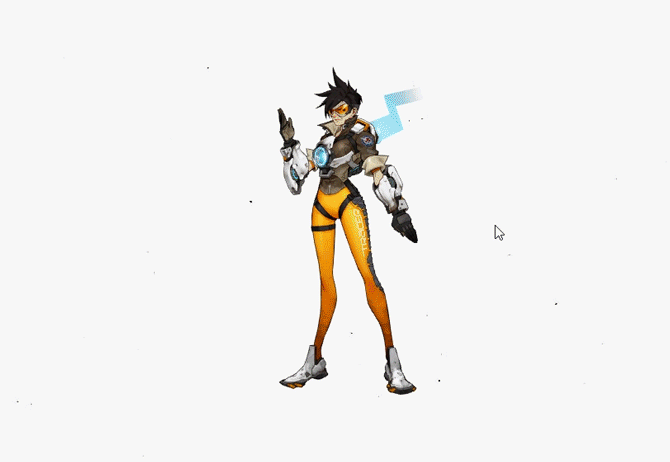
Try to make this overlay or background fit in with your overall desktop setup. In the above instance, my background wallpaper was taken in Japan, so I decided to place the Japanese word for "Overwatch" under my icon.
From Icon to Iconography
Rainmeter is a great customization tool for many different reasons, flexibility is one of them. Learn it, use it, and make it realize your utmost desktop dreams. You might have learned how to make Rainmeter icons from scratch, but that's just the tip of the iceberg! From live wallpaper to 3D holograms, Rainmeter has you covered.
Did you like the walk-through? Which other Rainmeter skins would you like to create? Let us know in the comments below!


