When you think of making slideshow presentations, you probably think of using applications like Microsoft PowerPoint or Keynote. But you should also think about using iMovie.
iMovie is a video editing app that can let you make timed presentations incredibly easily. It gives you tons of audio control, so you can have music as well as recorded narration during a presentation. It also offers great title and transition options to make your slideshows pop.
Read on to see how to set up, edit, and export slideshow presentations in iMovie so your next one is really great!
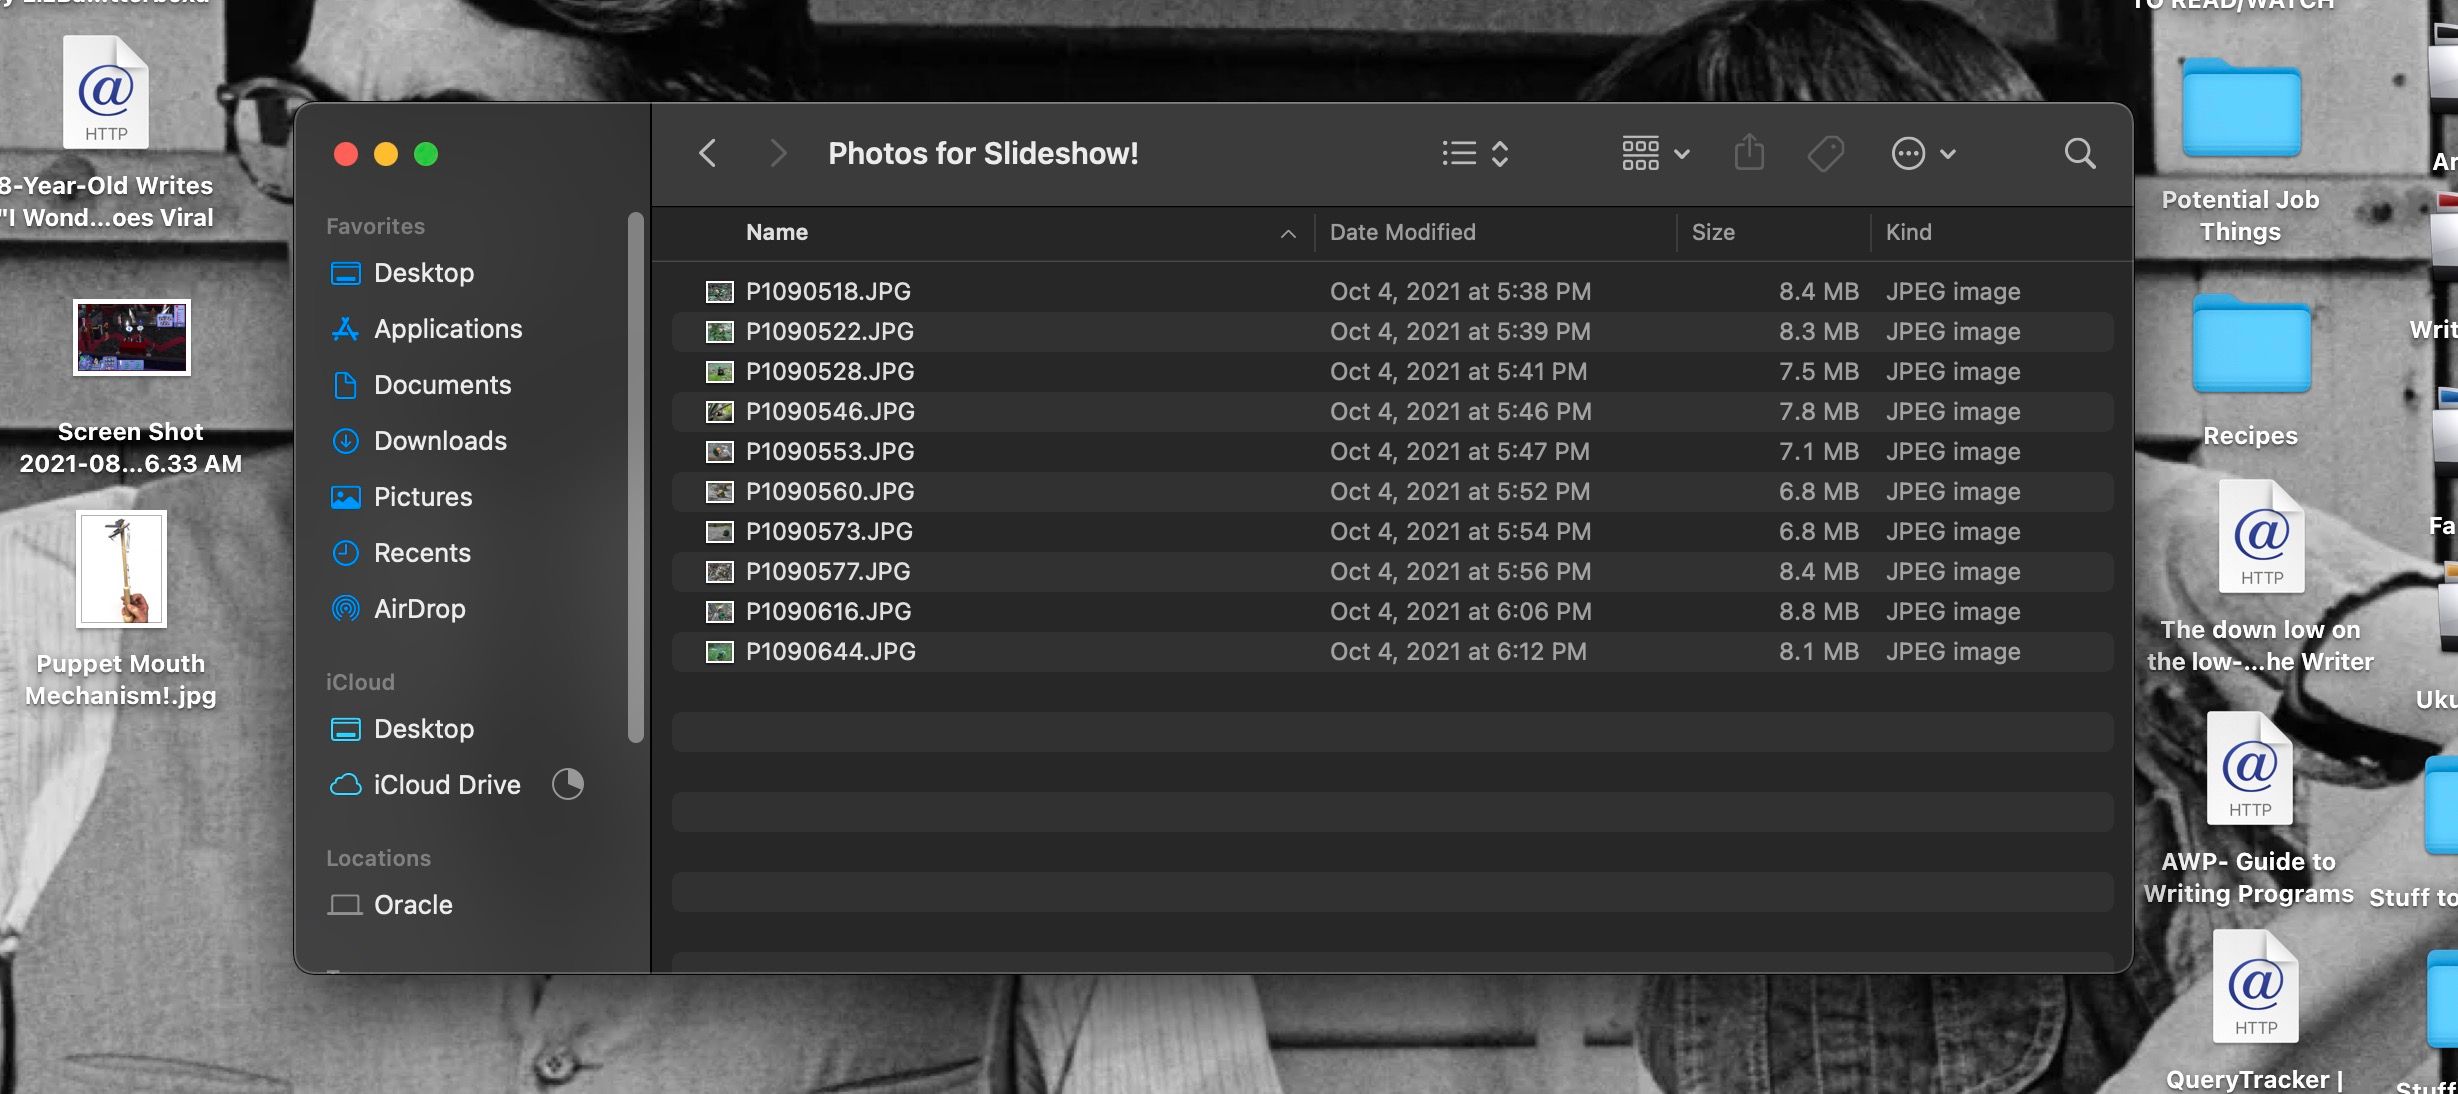
Step 1. Get Your Presentation Photos Ready to Go
When making a slideshow in iMovie, the main things you’ll be able to present are titles and photos. This is great for timed work presentations and presenting vacation photos in a fun way.
Before you start making your presentation in iMovie, though, you may want to have your photos pre-edited and ready to import into the program. You can crop images and adjust color balancing within iMovie, but other photo editing programs will give you more options.
Check out our guide to the adjust tools in the Photos app for some ways to get your photos presentation ready.
Step 2. Set Up iMovie to Make a Slideshow
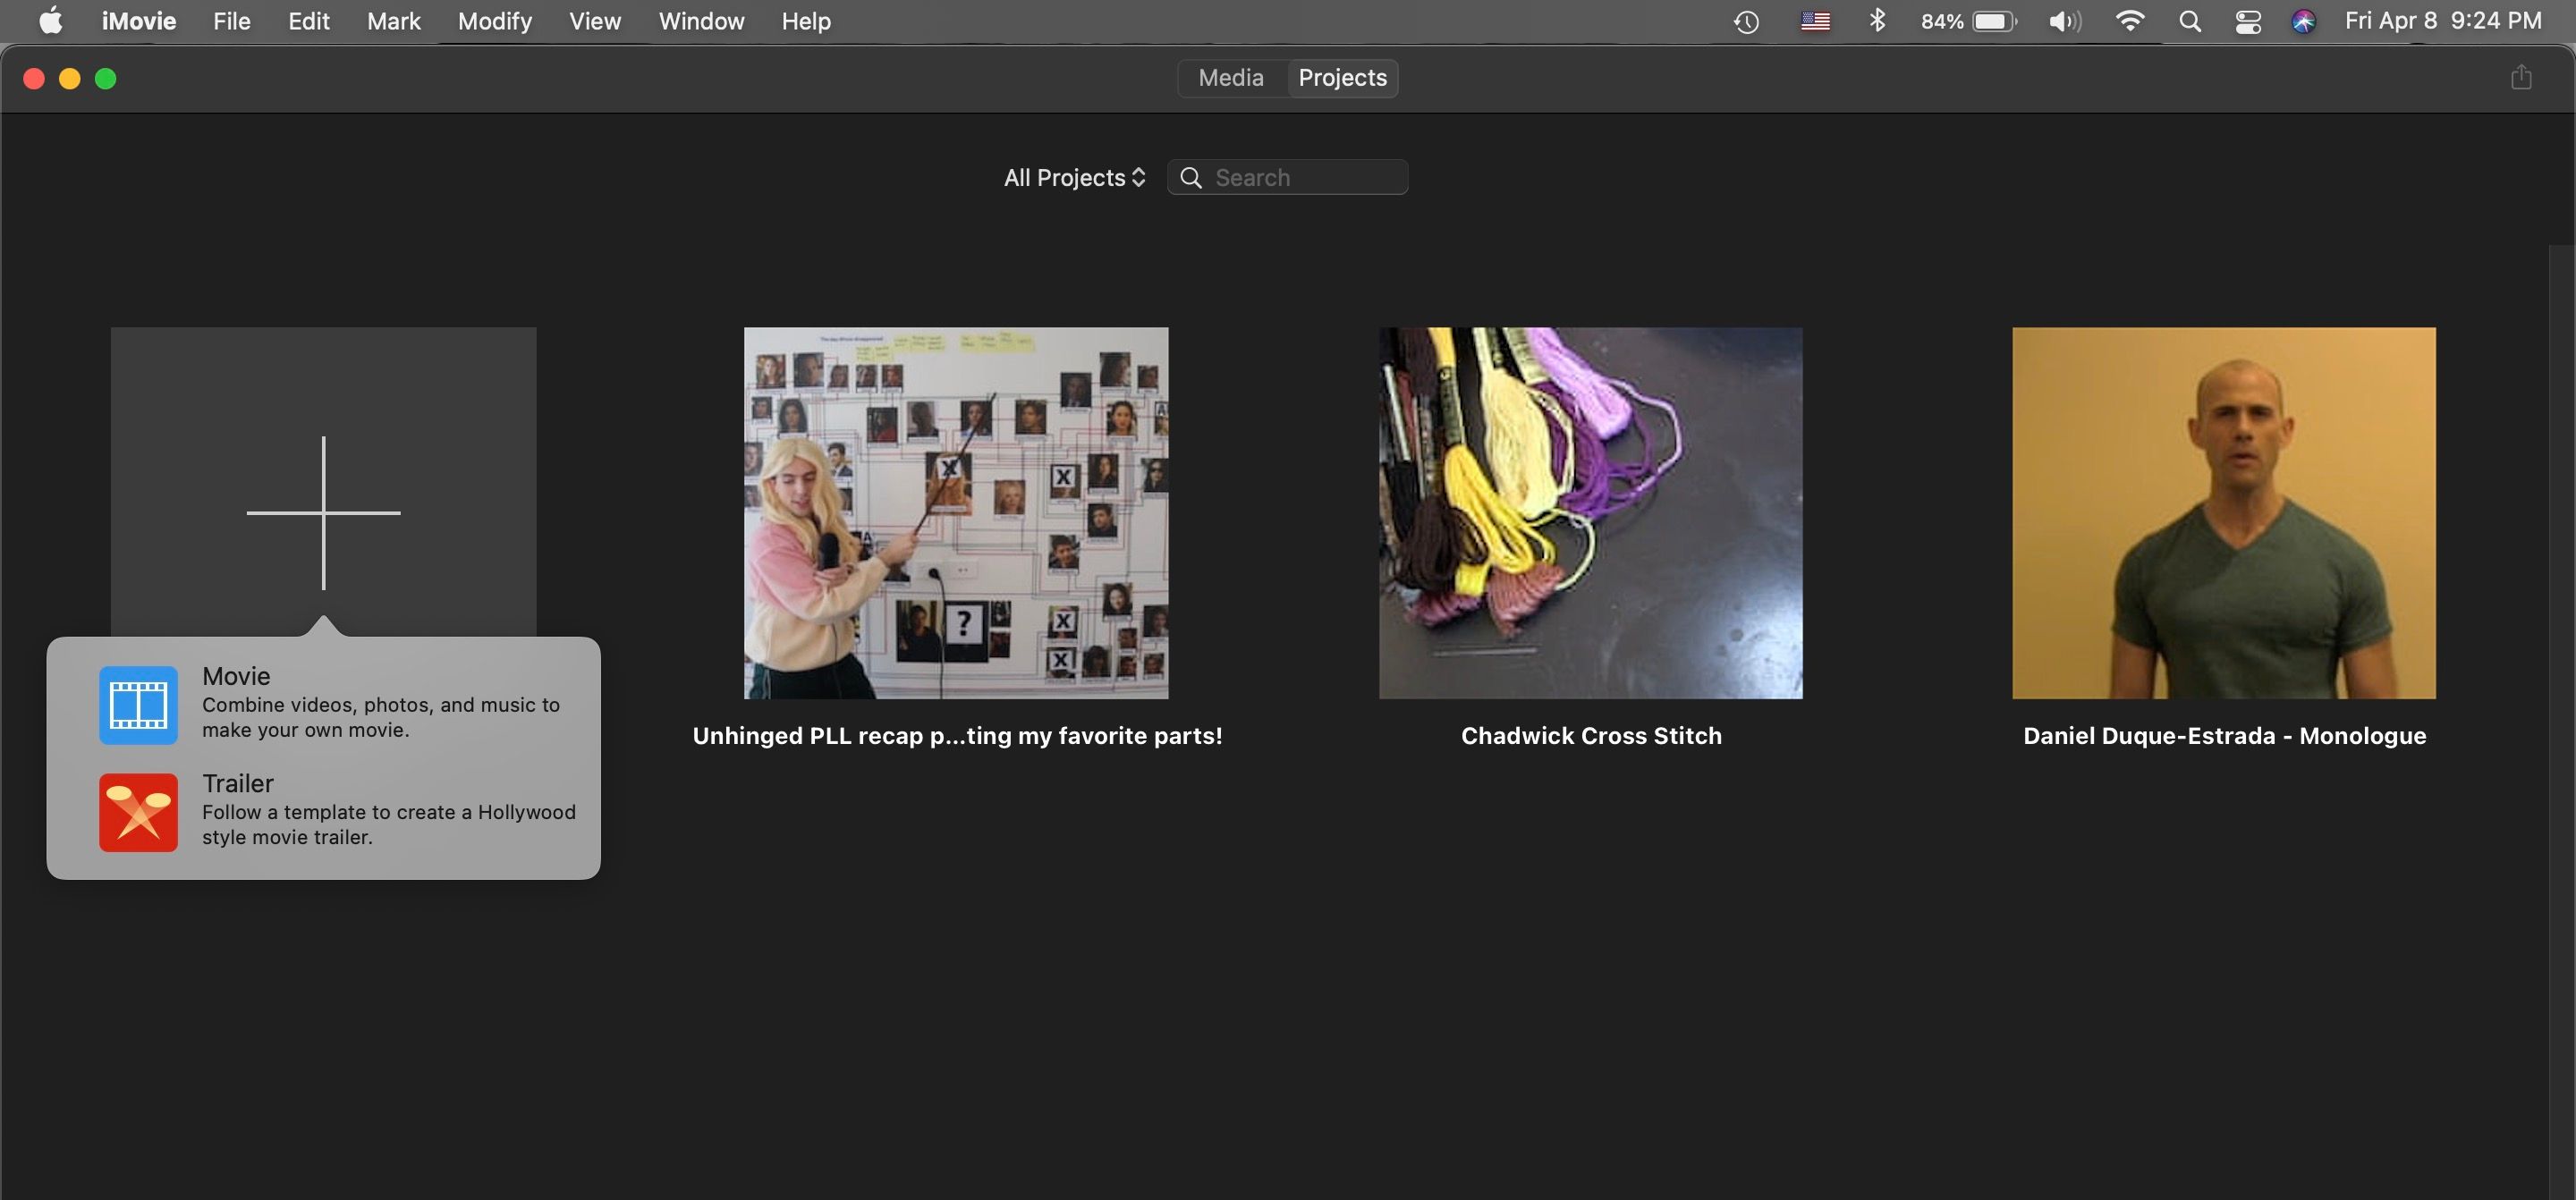
Once your photos are ready, you can go ahead and open iMovie. On a Mac you’ll find it in your Applications folder.
Click the Create New button, and select the Movie option in the menu that appears. You’ll now be brought into an iMovie Project workspace where you can start importing your photos, so you can assemble them into your slideshow.
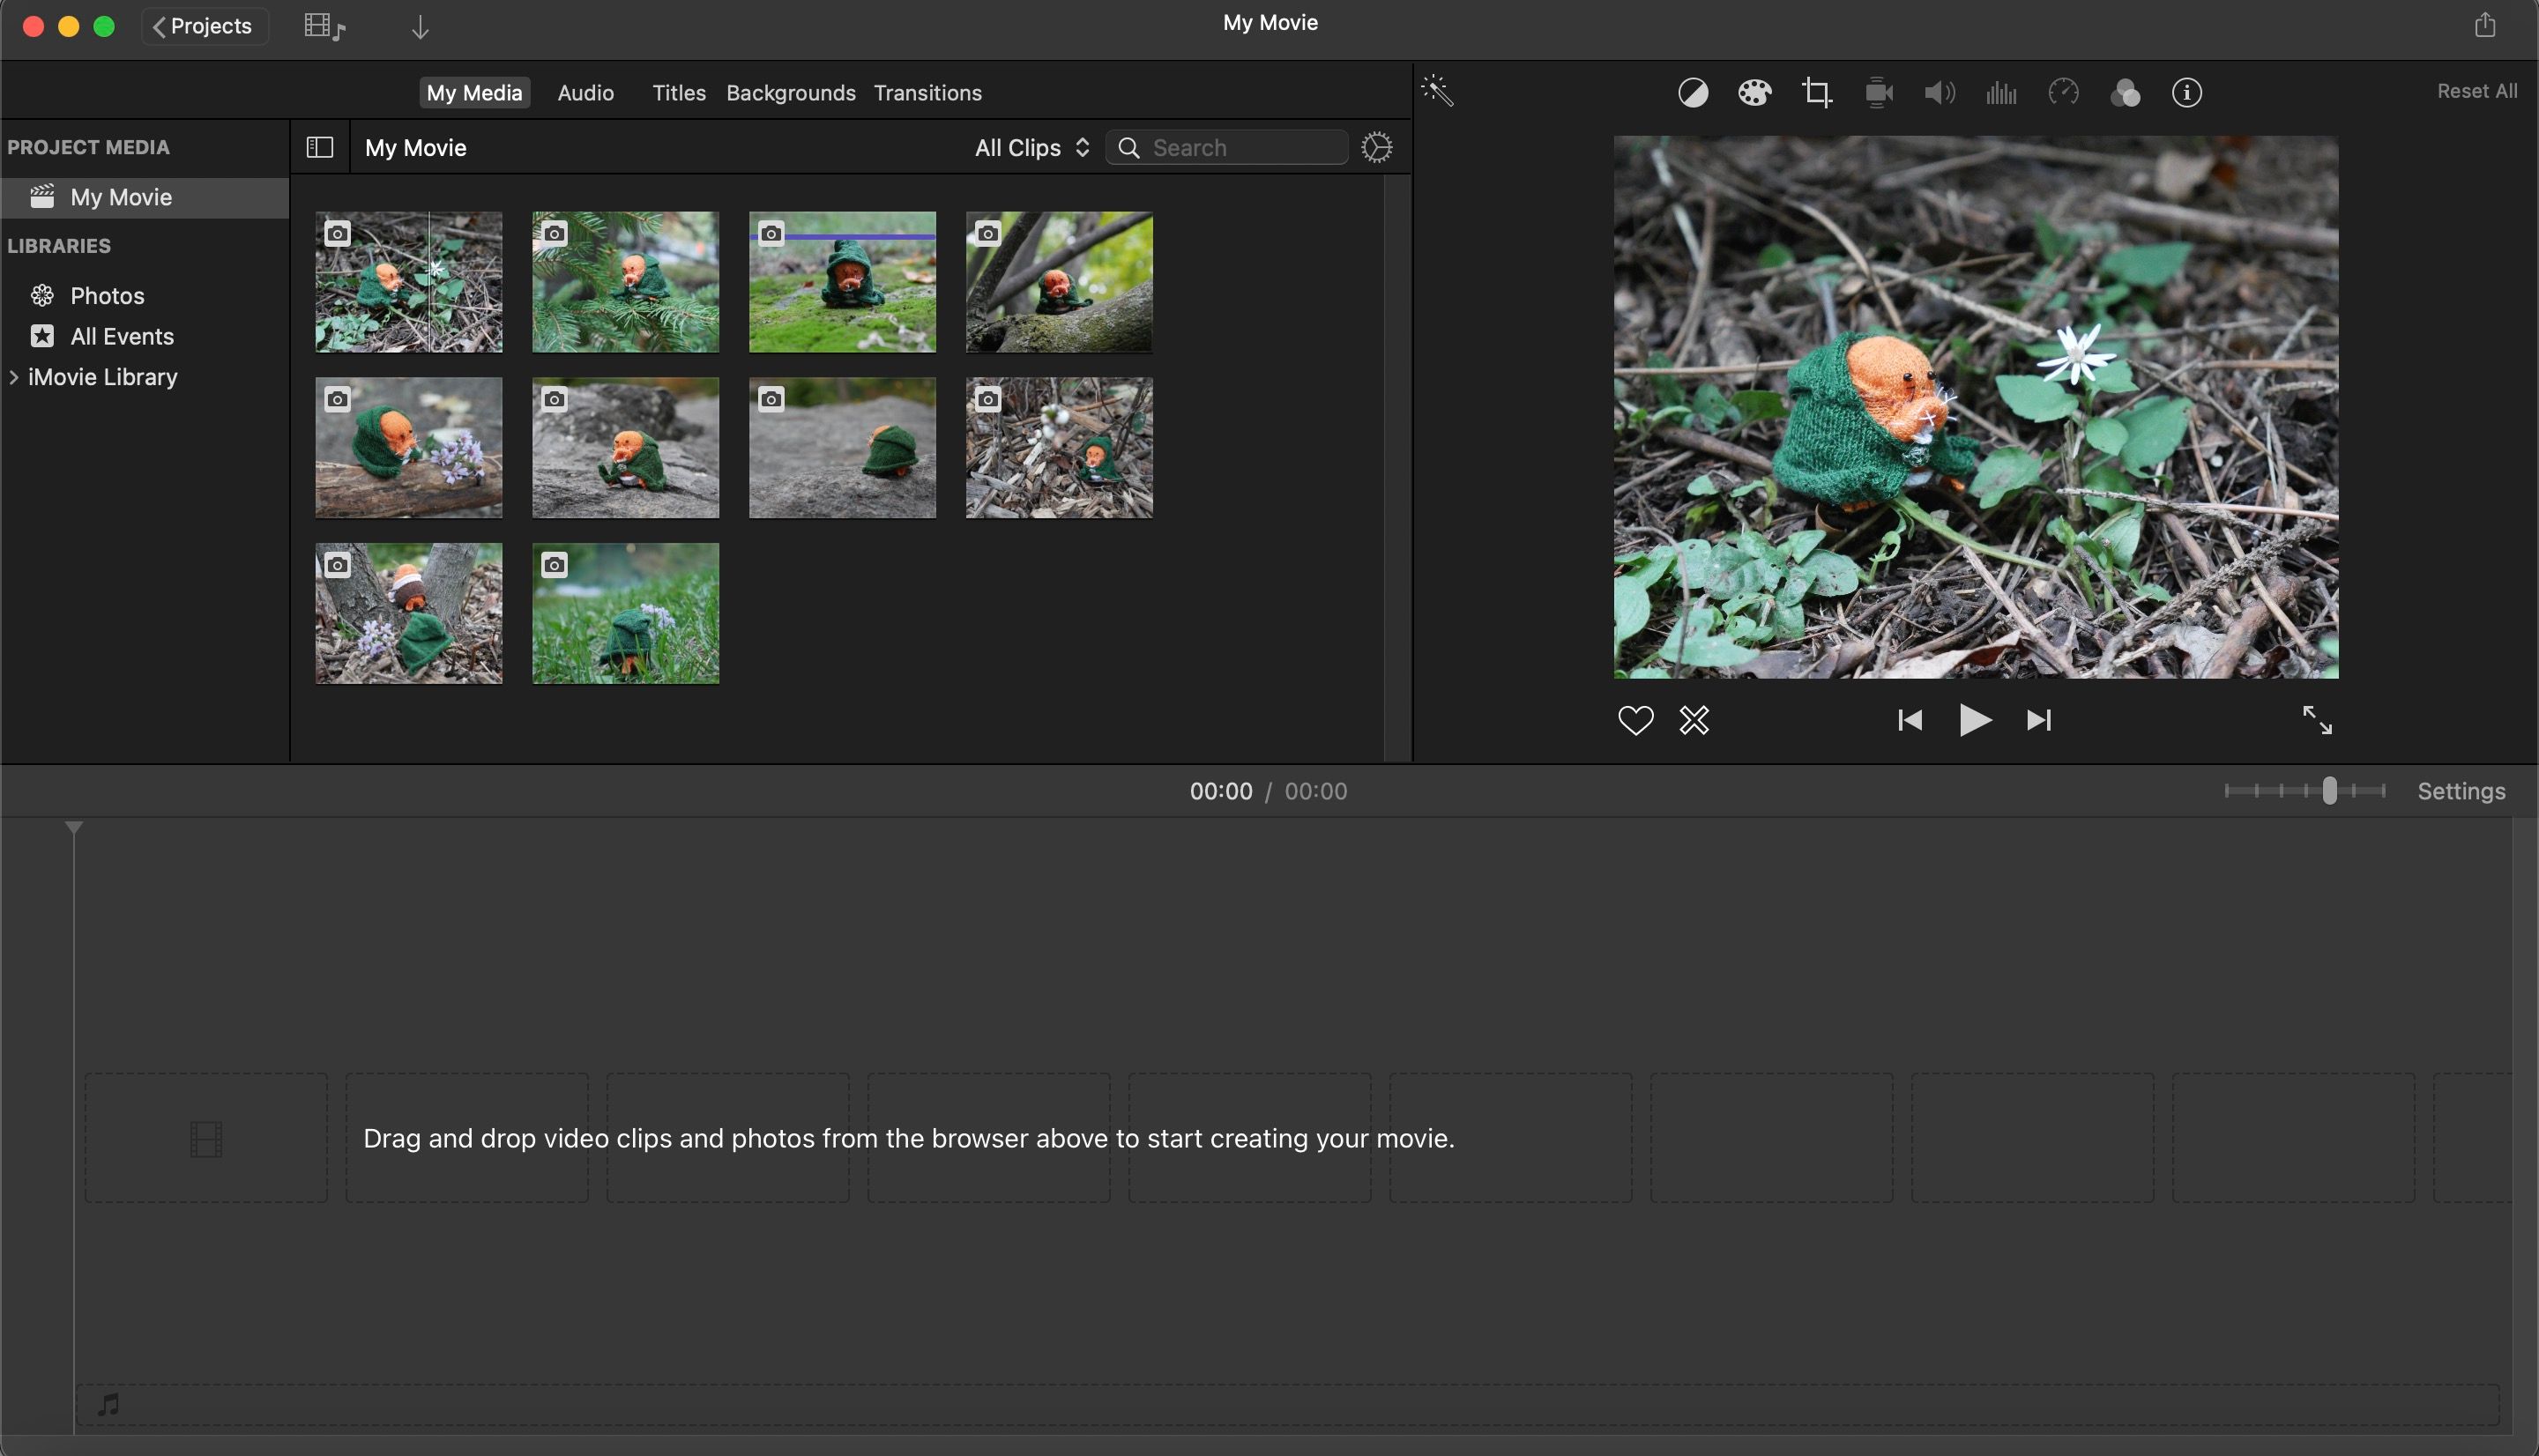
To import, click on the Import Media button under the My Media tab in this workspace, or go to File > Import Media. In the Import window that opens, navigate to wherever you saved your presentation photos, and highlight them all by Shift-clicking on each of them, or clicking and dragging over your whole list. Then hit the Import All button.
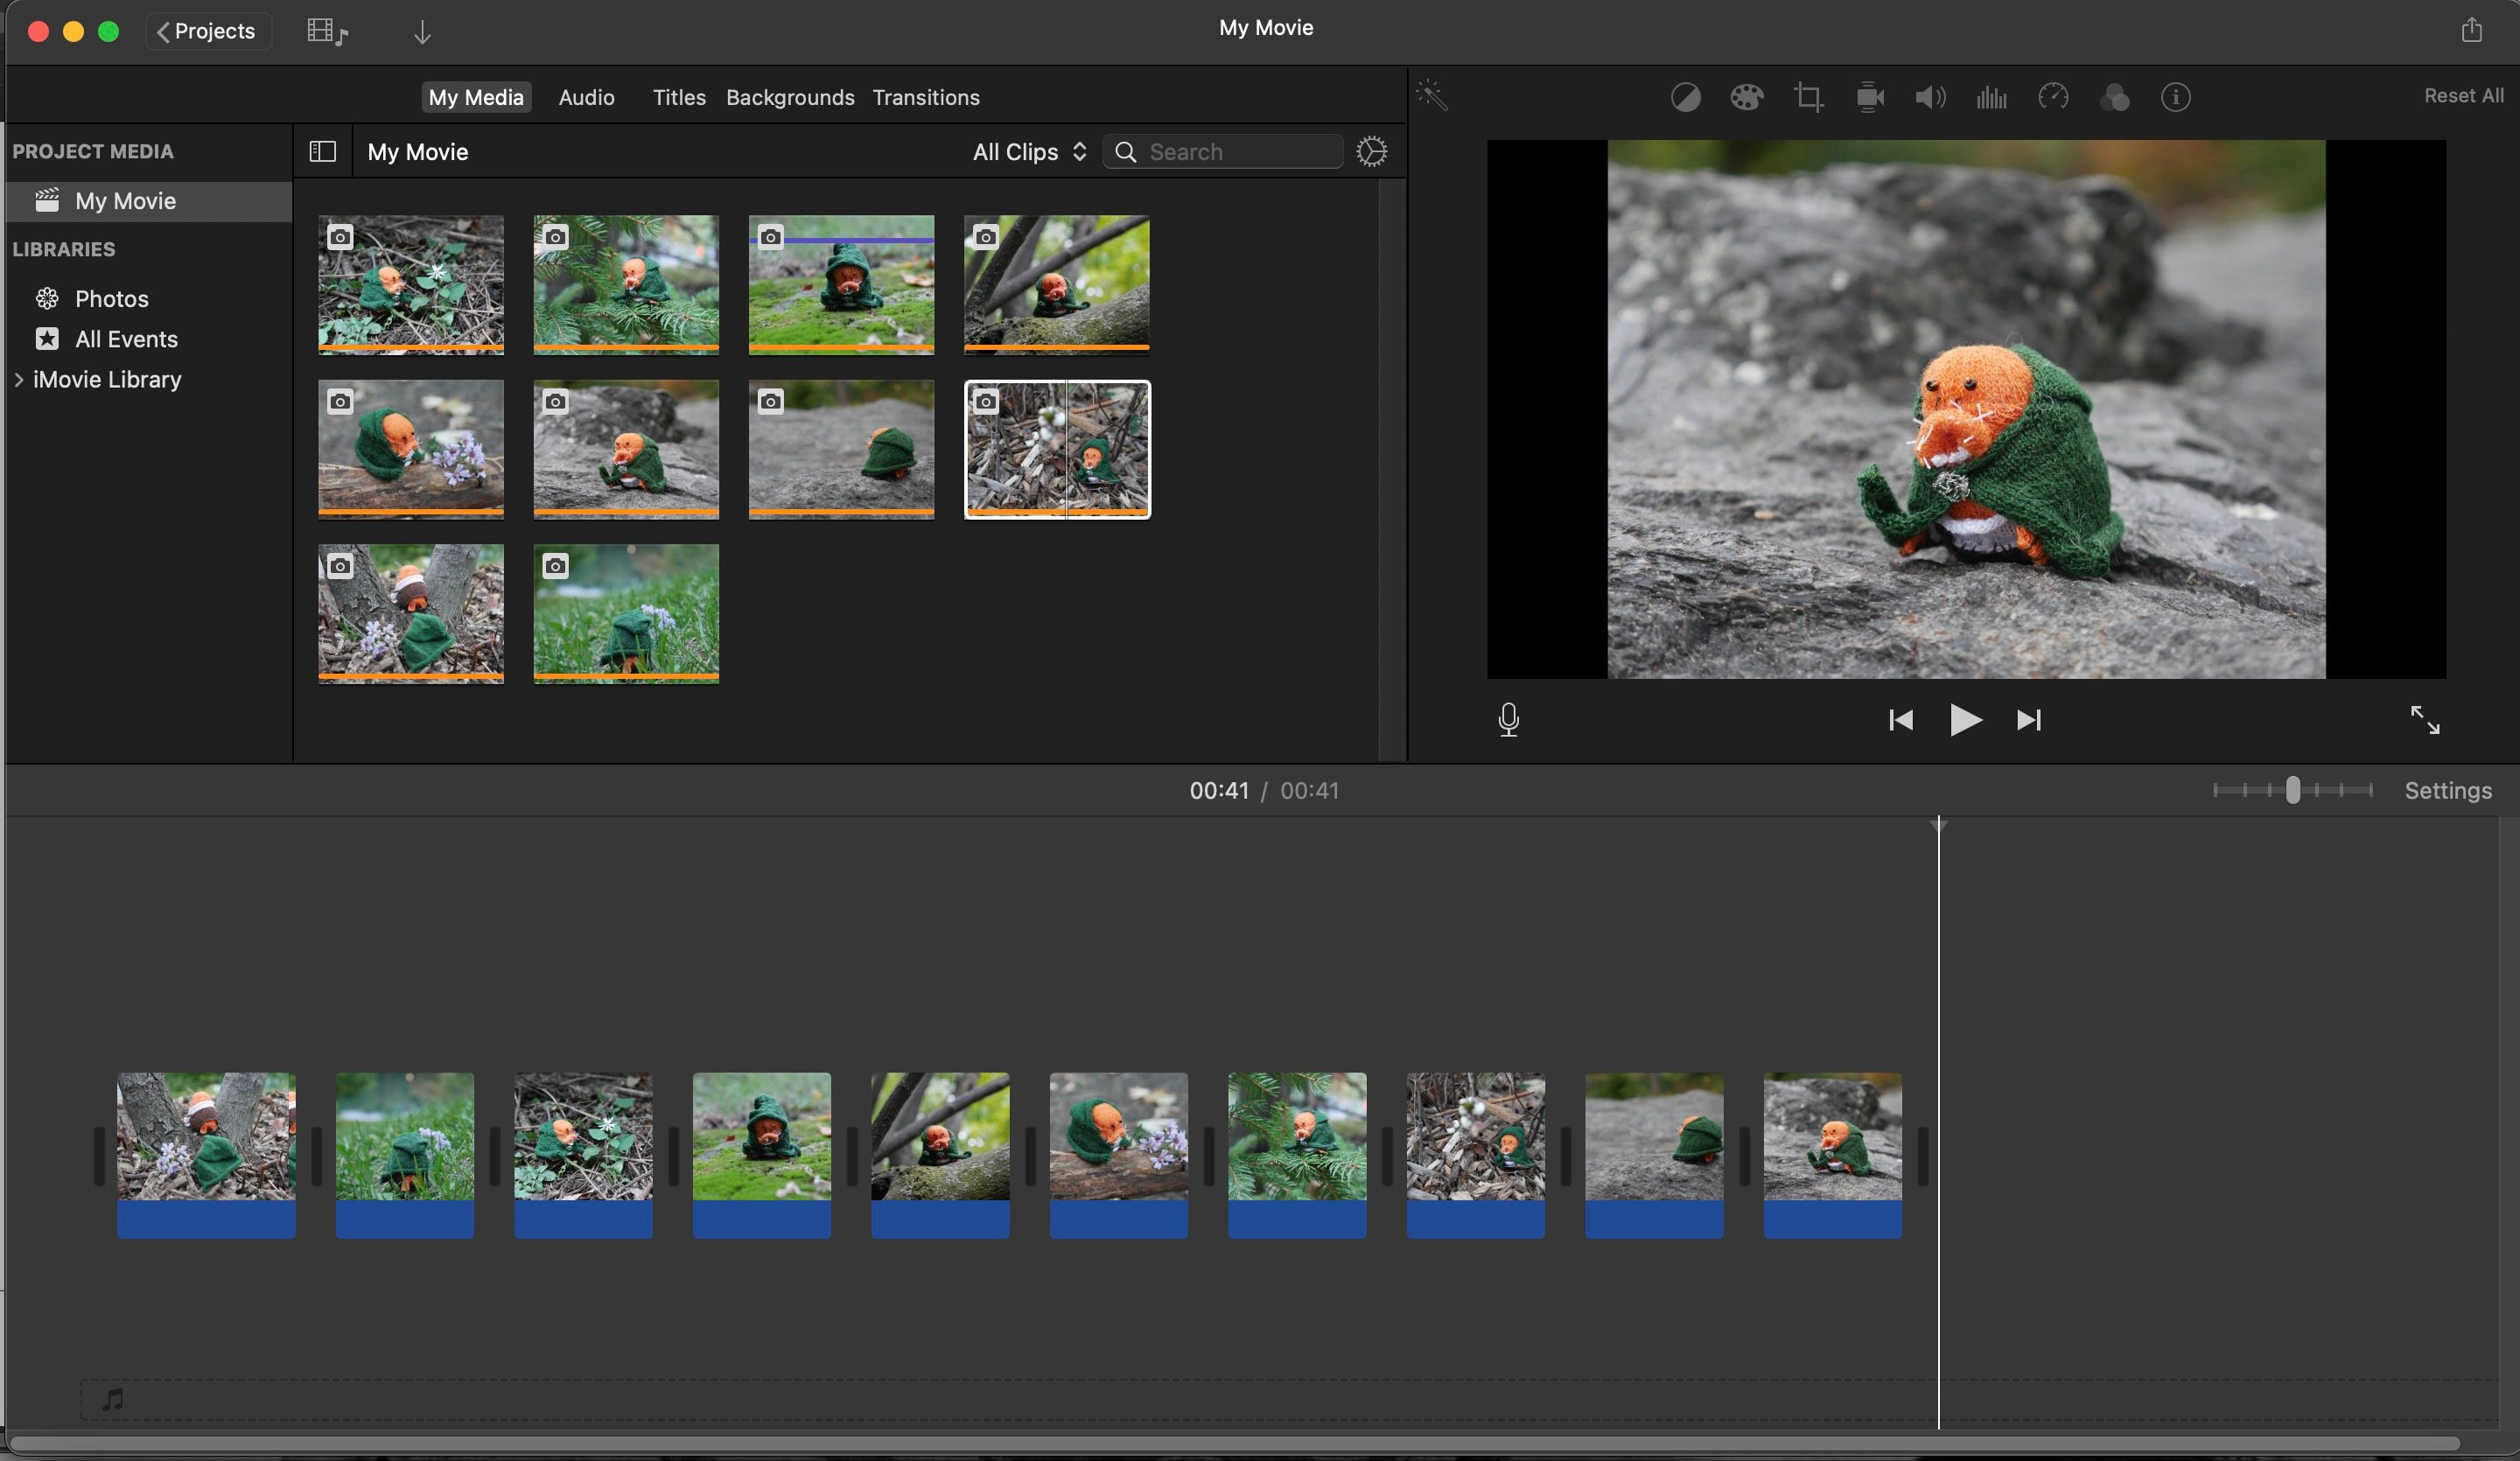
Your photos will now appear where the Import Media button was under the My Media tab, with camera icons on them to denote that they are photos.
Step 3. Put Your Slideshow in Order
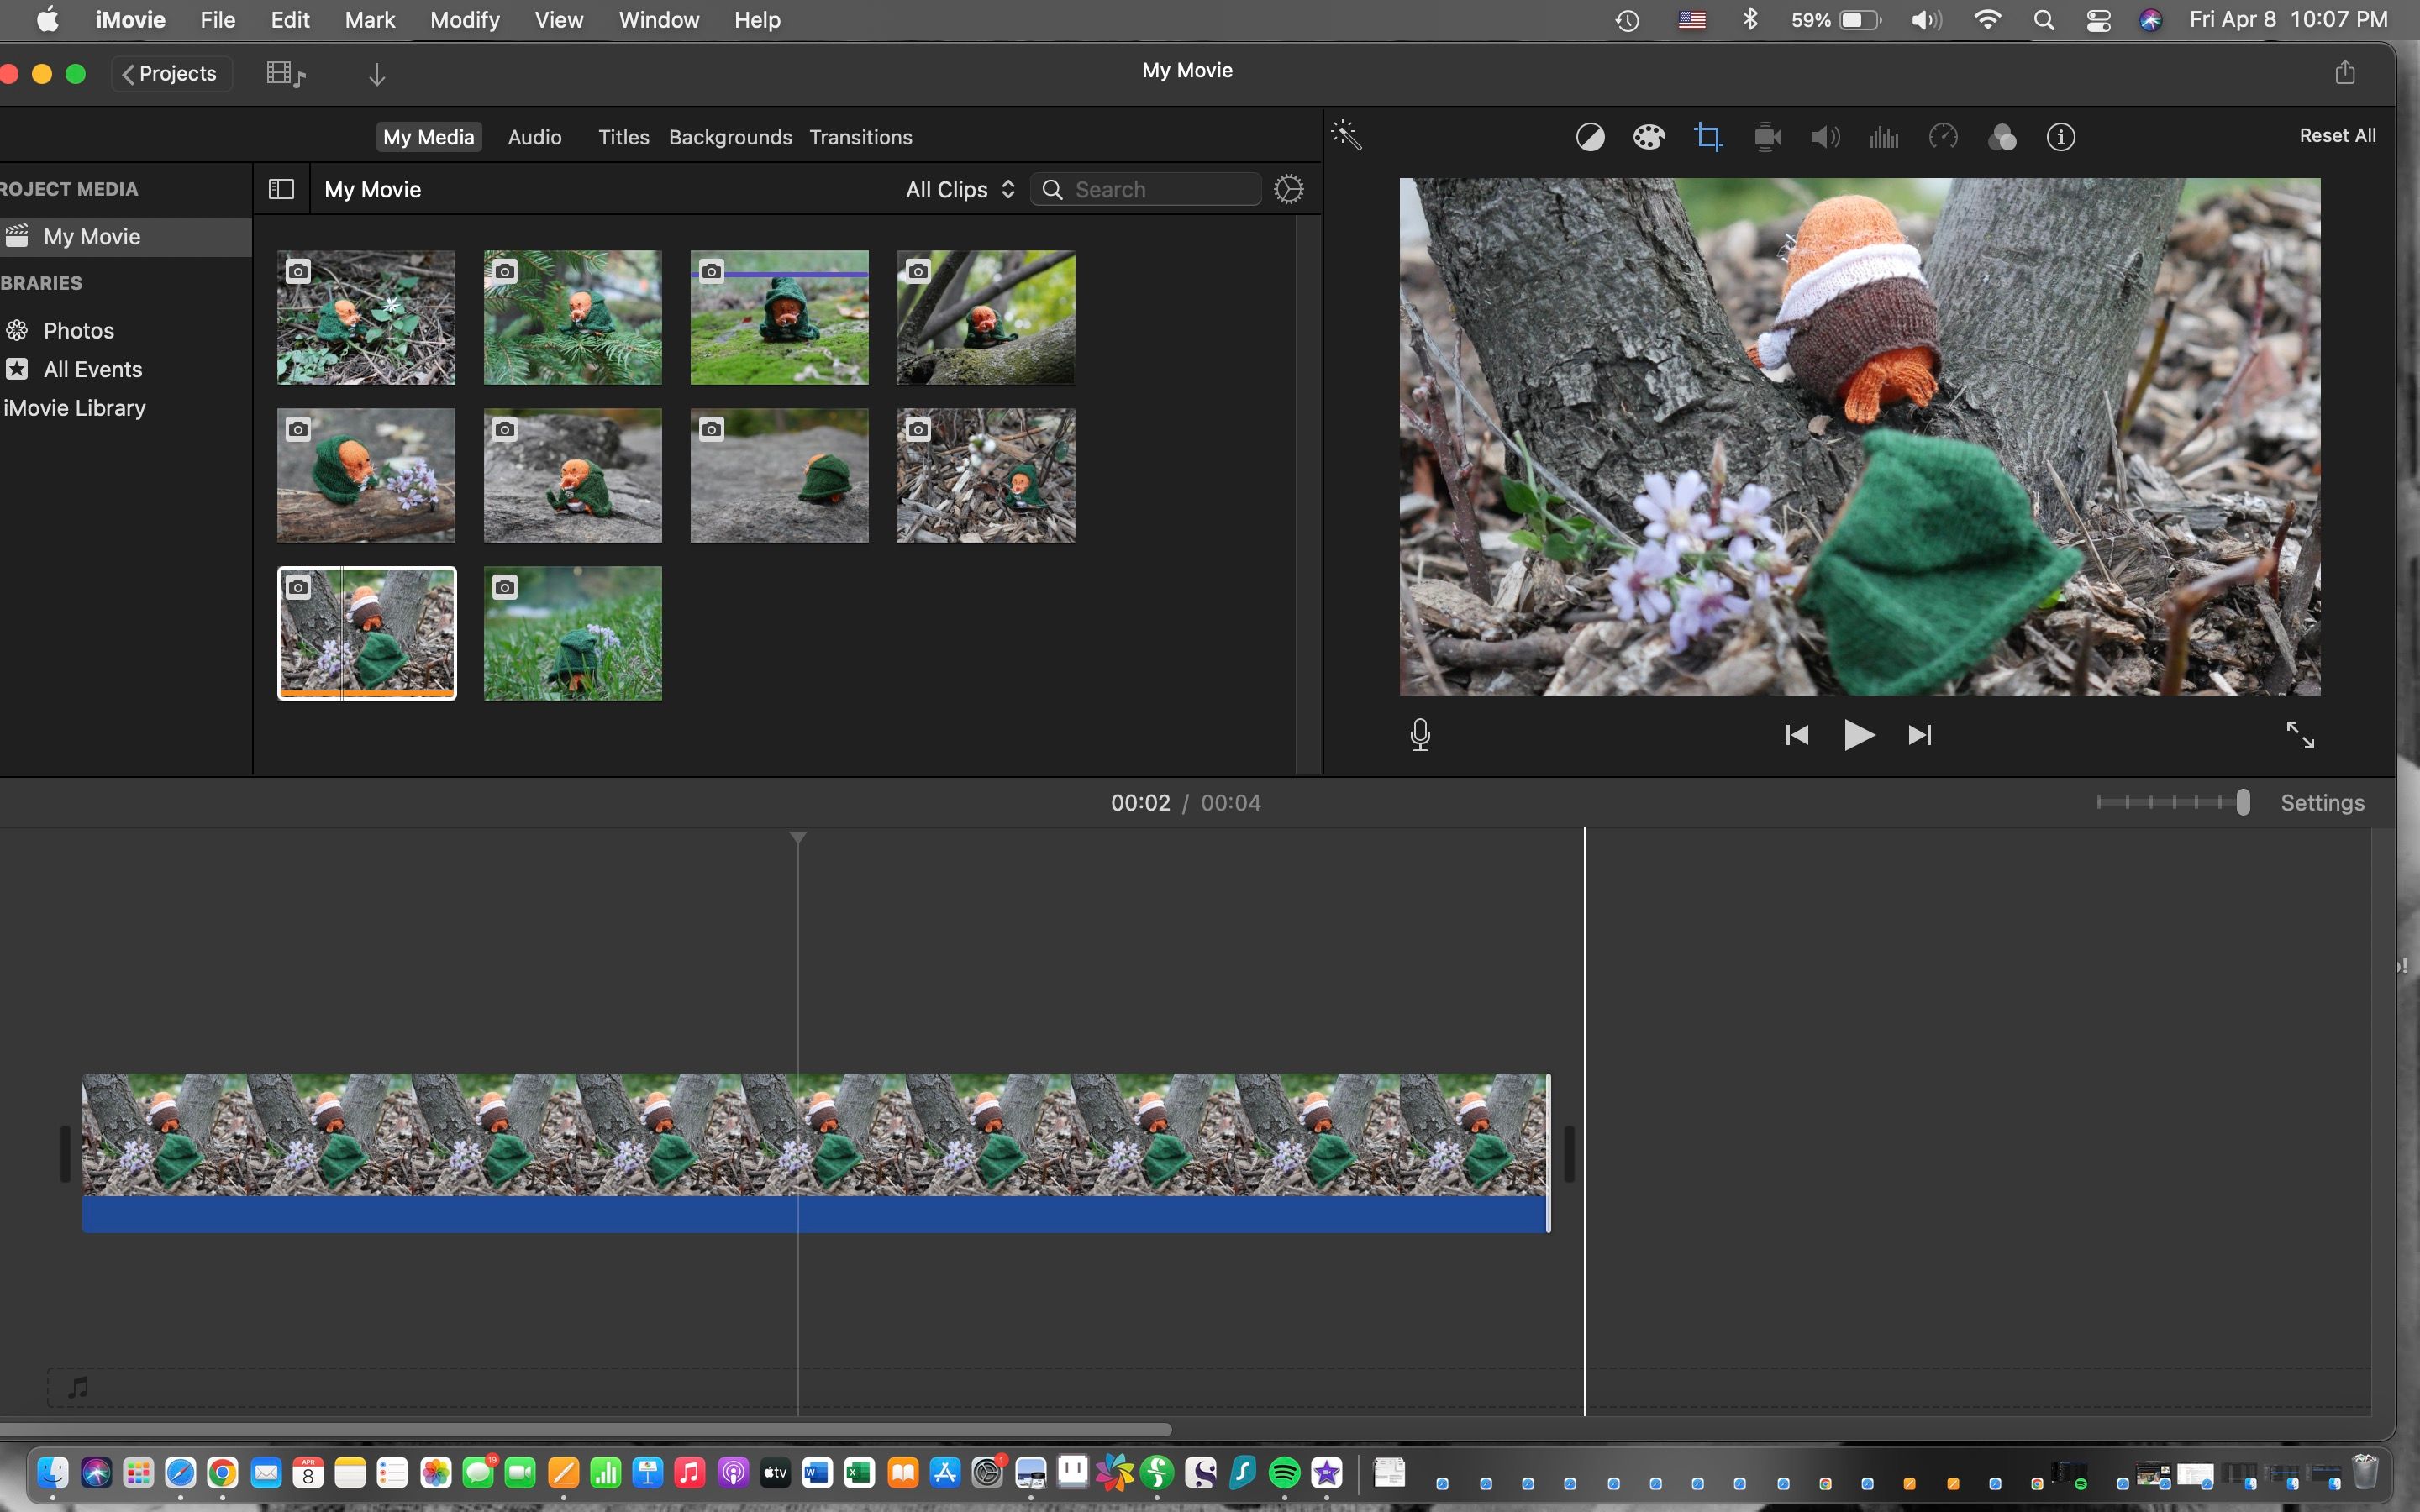
To start putting your slideshow presentation in order, find the first photo you want to appear in your My Media list, then click and drag it into the timeline area below.
Once the photo is in the timeline, iMovie will default to treating it as a clip that stays on screen for four seconds with a Ken Burns effect on it—an effect that starts with the photo zoomed in on, which slowly zooms out over the four seconds.
To adjust the time a photo is on screen, hover your cursor on the right side of the photo clip until it looks like two arrows pointing away from each other, then click and drag it. Drag it to the right to keep it on screen longer or to the left to make it shorter.
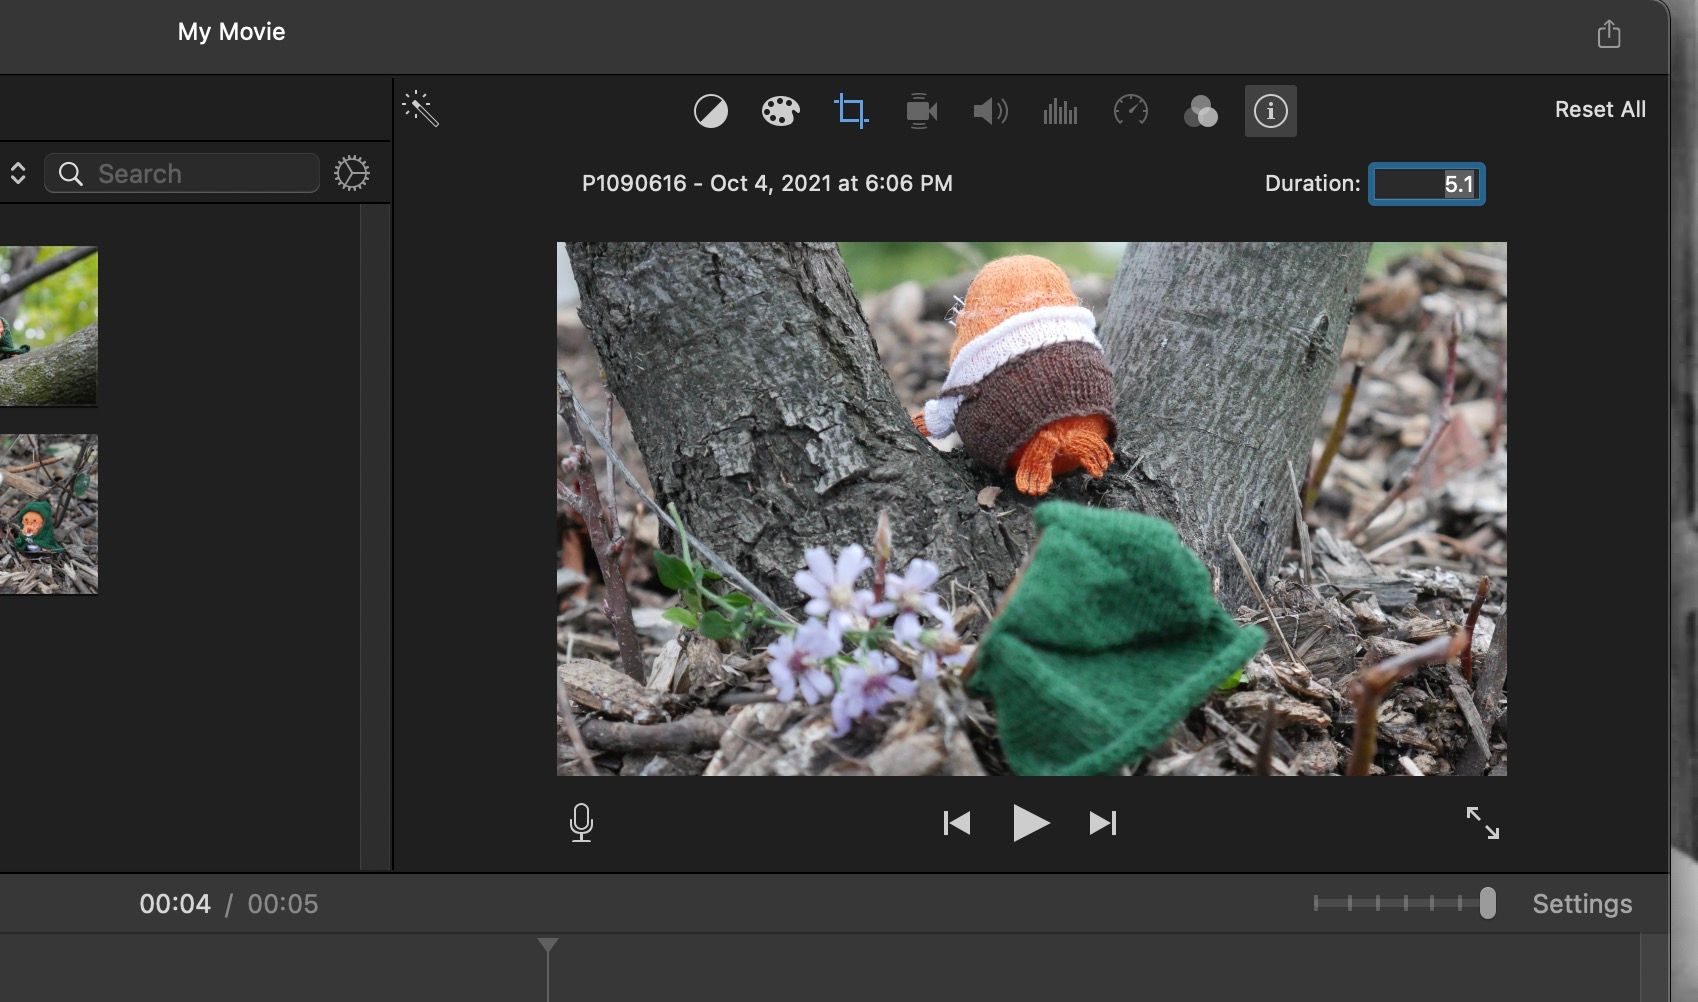
You can also set the photo duration by clicking on the photo clip and clicking the i icon above the media player window. You can set the Duration text box in there to however many seconds you want the photo to be on screen.
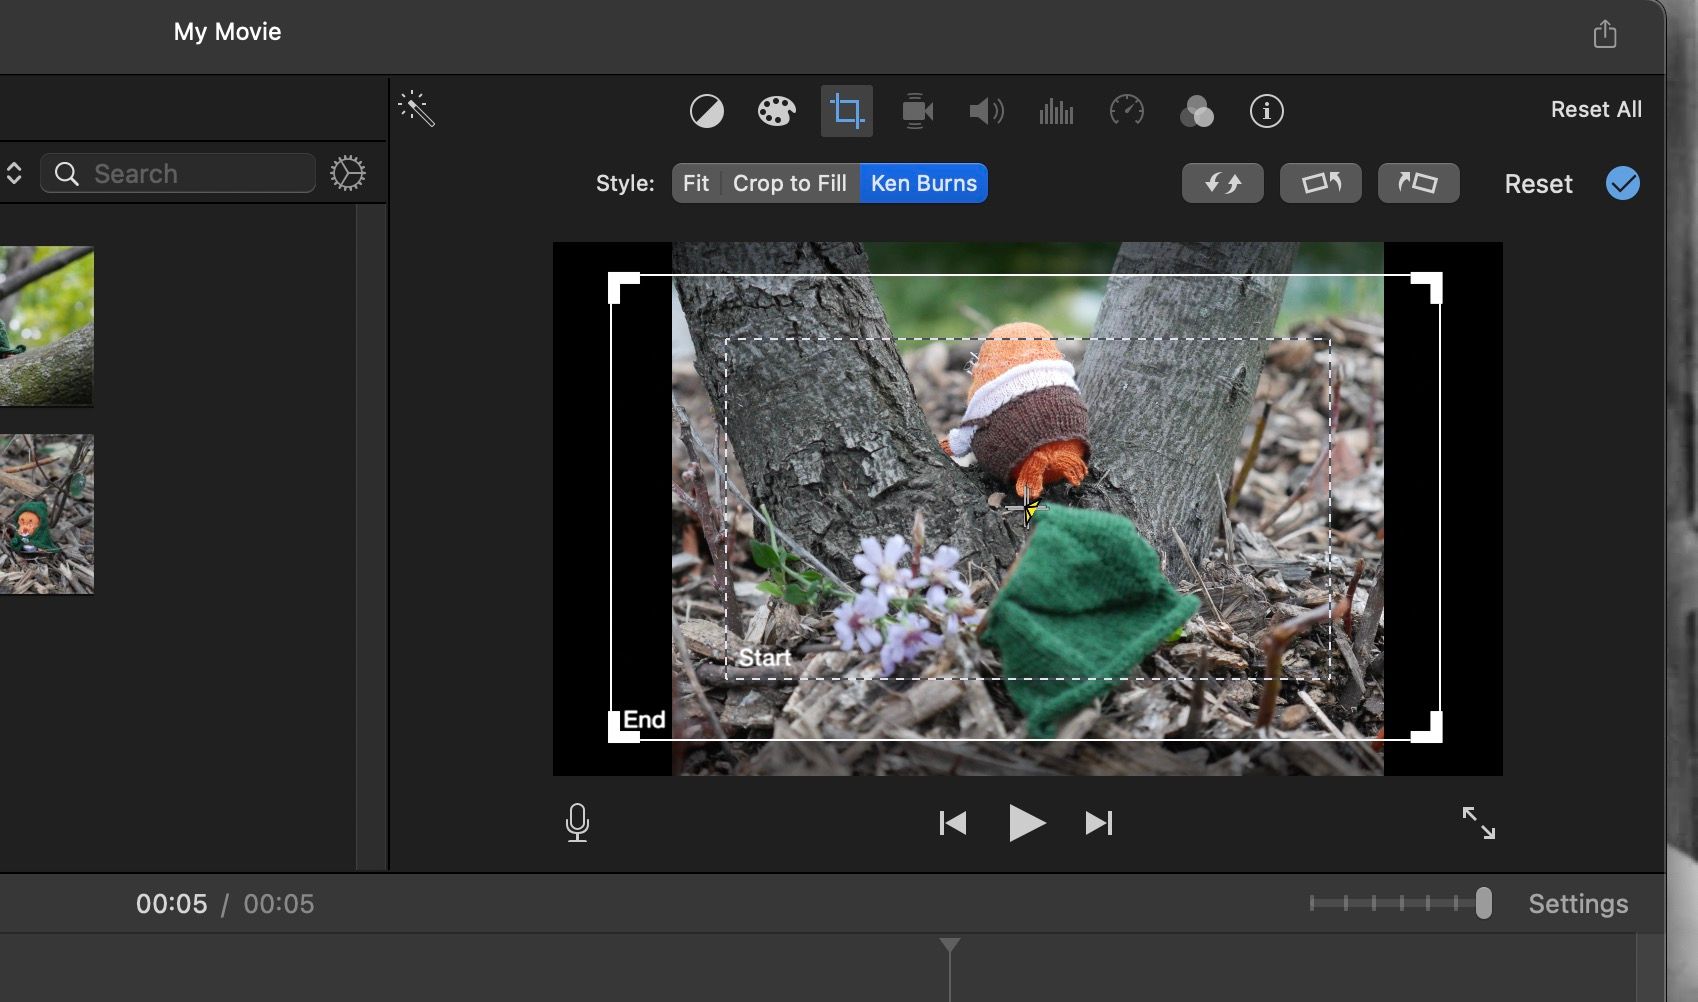
To remove the Ken Burns effect on a photo and instead have it be static, double-click on the photo clip, or click on it once and then click the Crop icon above the media player.
Set the Style there to Fit or Crop to Fill to make the photo static while playing during the presentation. Selecting Crop to Fill will let you decide the dimensions of your photo in the slideshow.
You can also keep the effect set to Ken Burns and adjust the Start and End boxes to decide how zoomed in or zoomed out your picture gets during the slideshow.
Once you’ve decided on the duration and crop style for one photo clip, click and drag your other photos into the timeline after the first one and decide their durations and crop styles as well.
To change the order of your photos in your presentation, just click and drag the photo clips before or after each other in the timeline. To remove a photo from your timeline, click on it and hit the Backspace key on your keyboard. Or Control-click on it and select Delete.
To adjust the view on your timeline to make adding and adjusting clips easier, click and drag the slider at the top right of the timeline to zoom in or out on it.
Step 4. Add Titles and Transitions to Your iMovie Slideshow
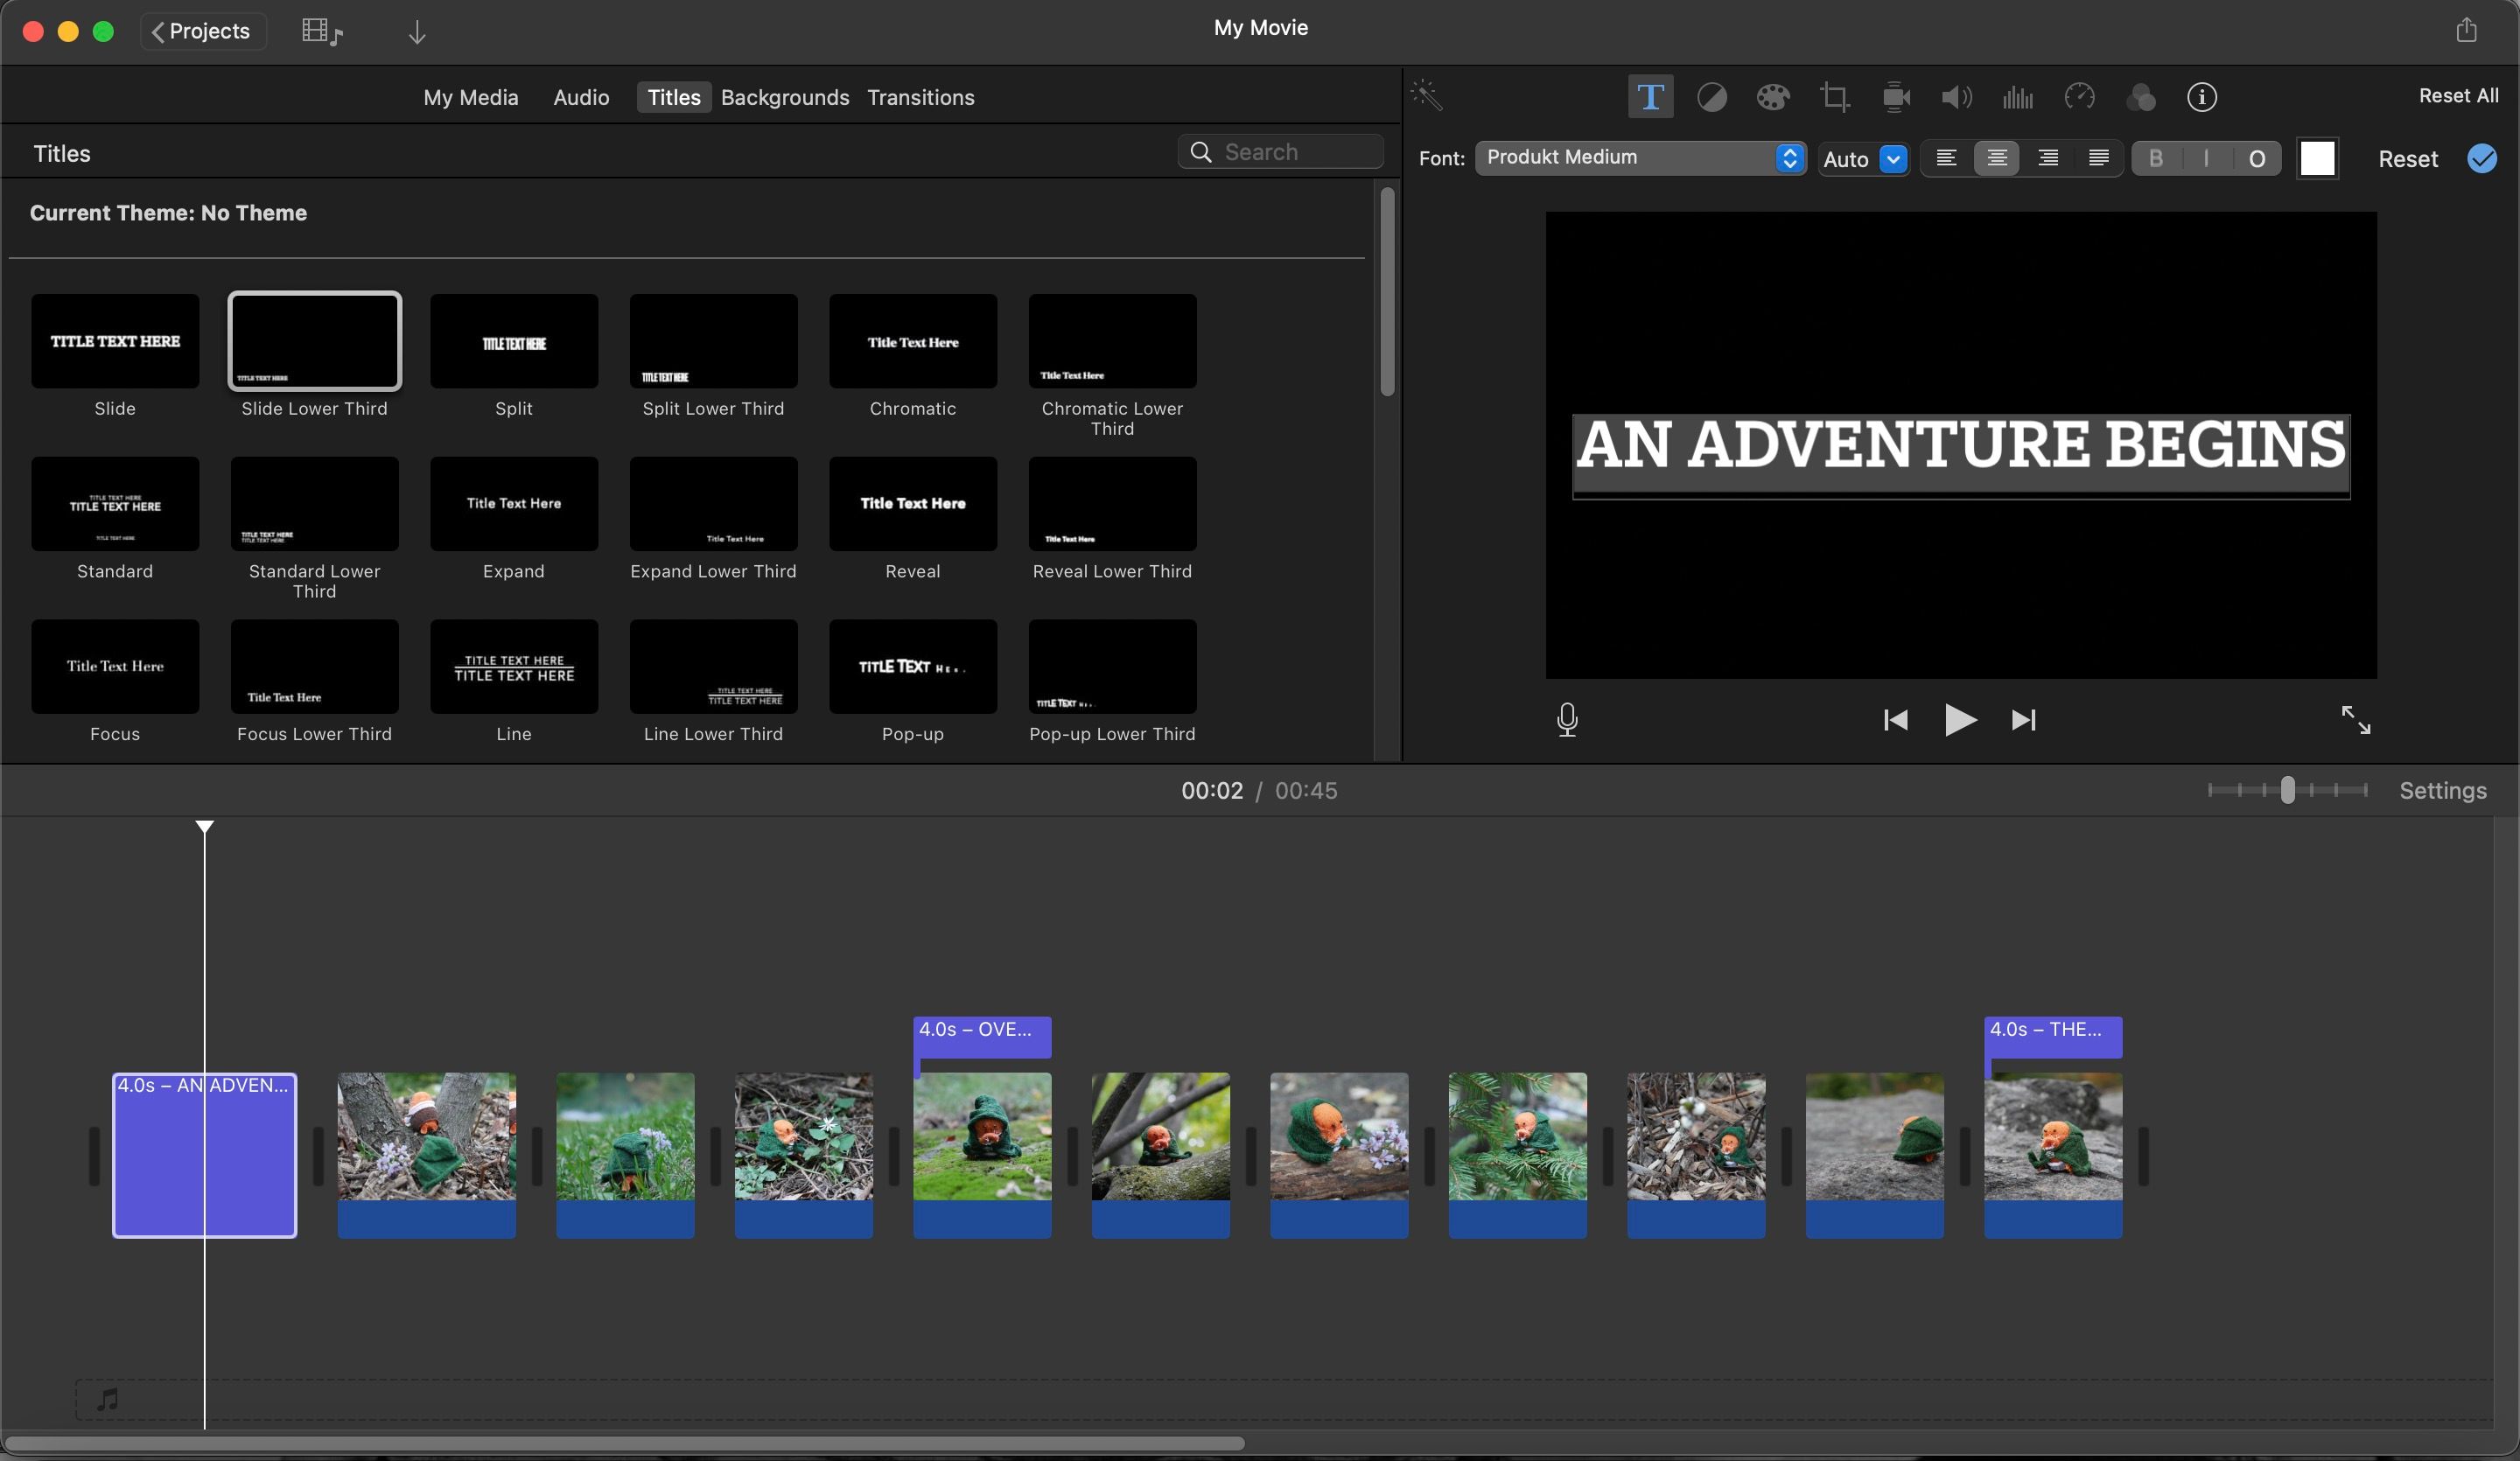
Once your photos are in order, you can add any text you’d like to have in your presentation by adding titles. Click on the Titles tab and select the format you want your text to have. For standalone title text card, try a Slide title type. To show text over a photo, maybe try Standard Lower Third.
Add a standalone title card by clicking and dragging the title type into your timeline to the right or left of a photo, like you would another clip. To add text on top of a photo, click and drag the title type on top of the photo clip in your timeline.
Once a title or text is added, double-click on it, or click on it and hit the T icon above the media player. This will let you type whatever text you want to have on your title. You can also adjust your font here, decide its size and orientation, and select its color by double-clicking on the white box in the T menu.
You can change the duration of titles and delete them the same way you would photos in the timeline.
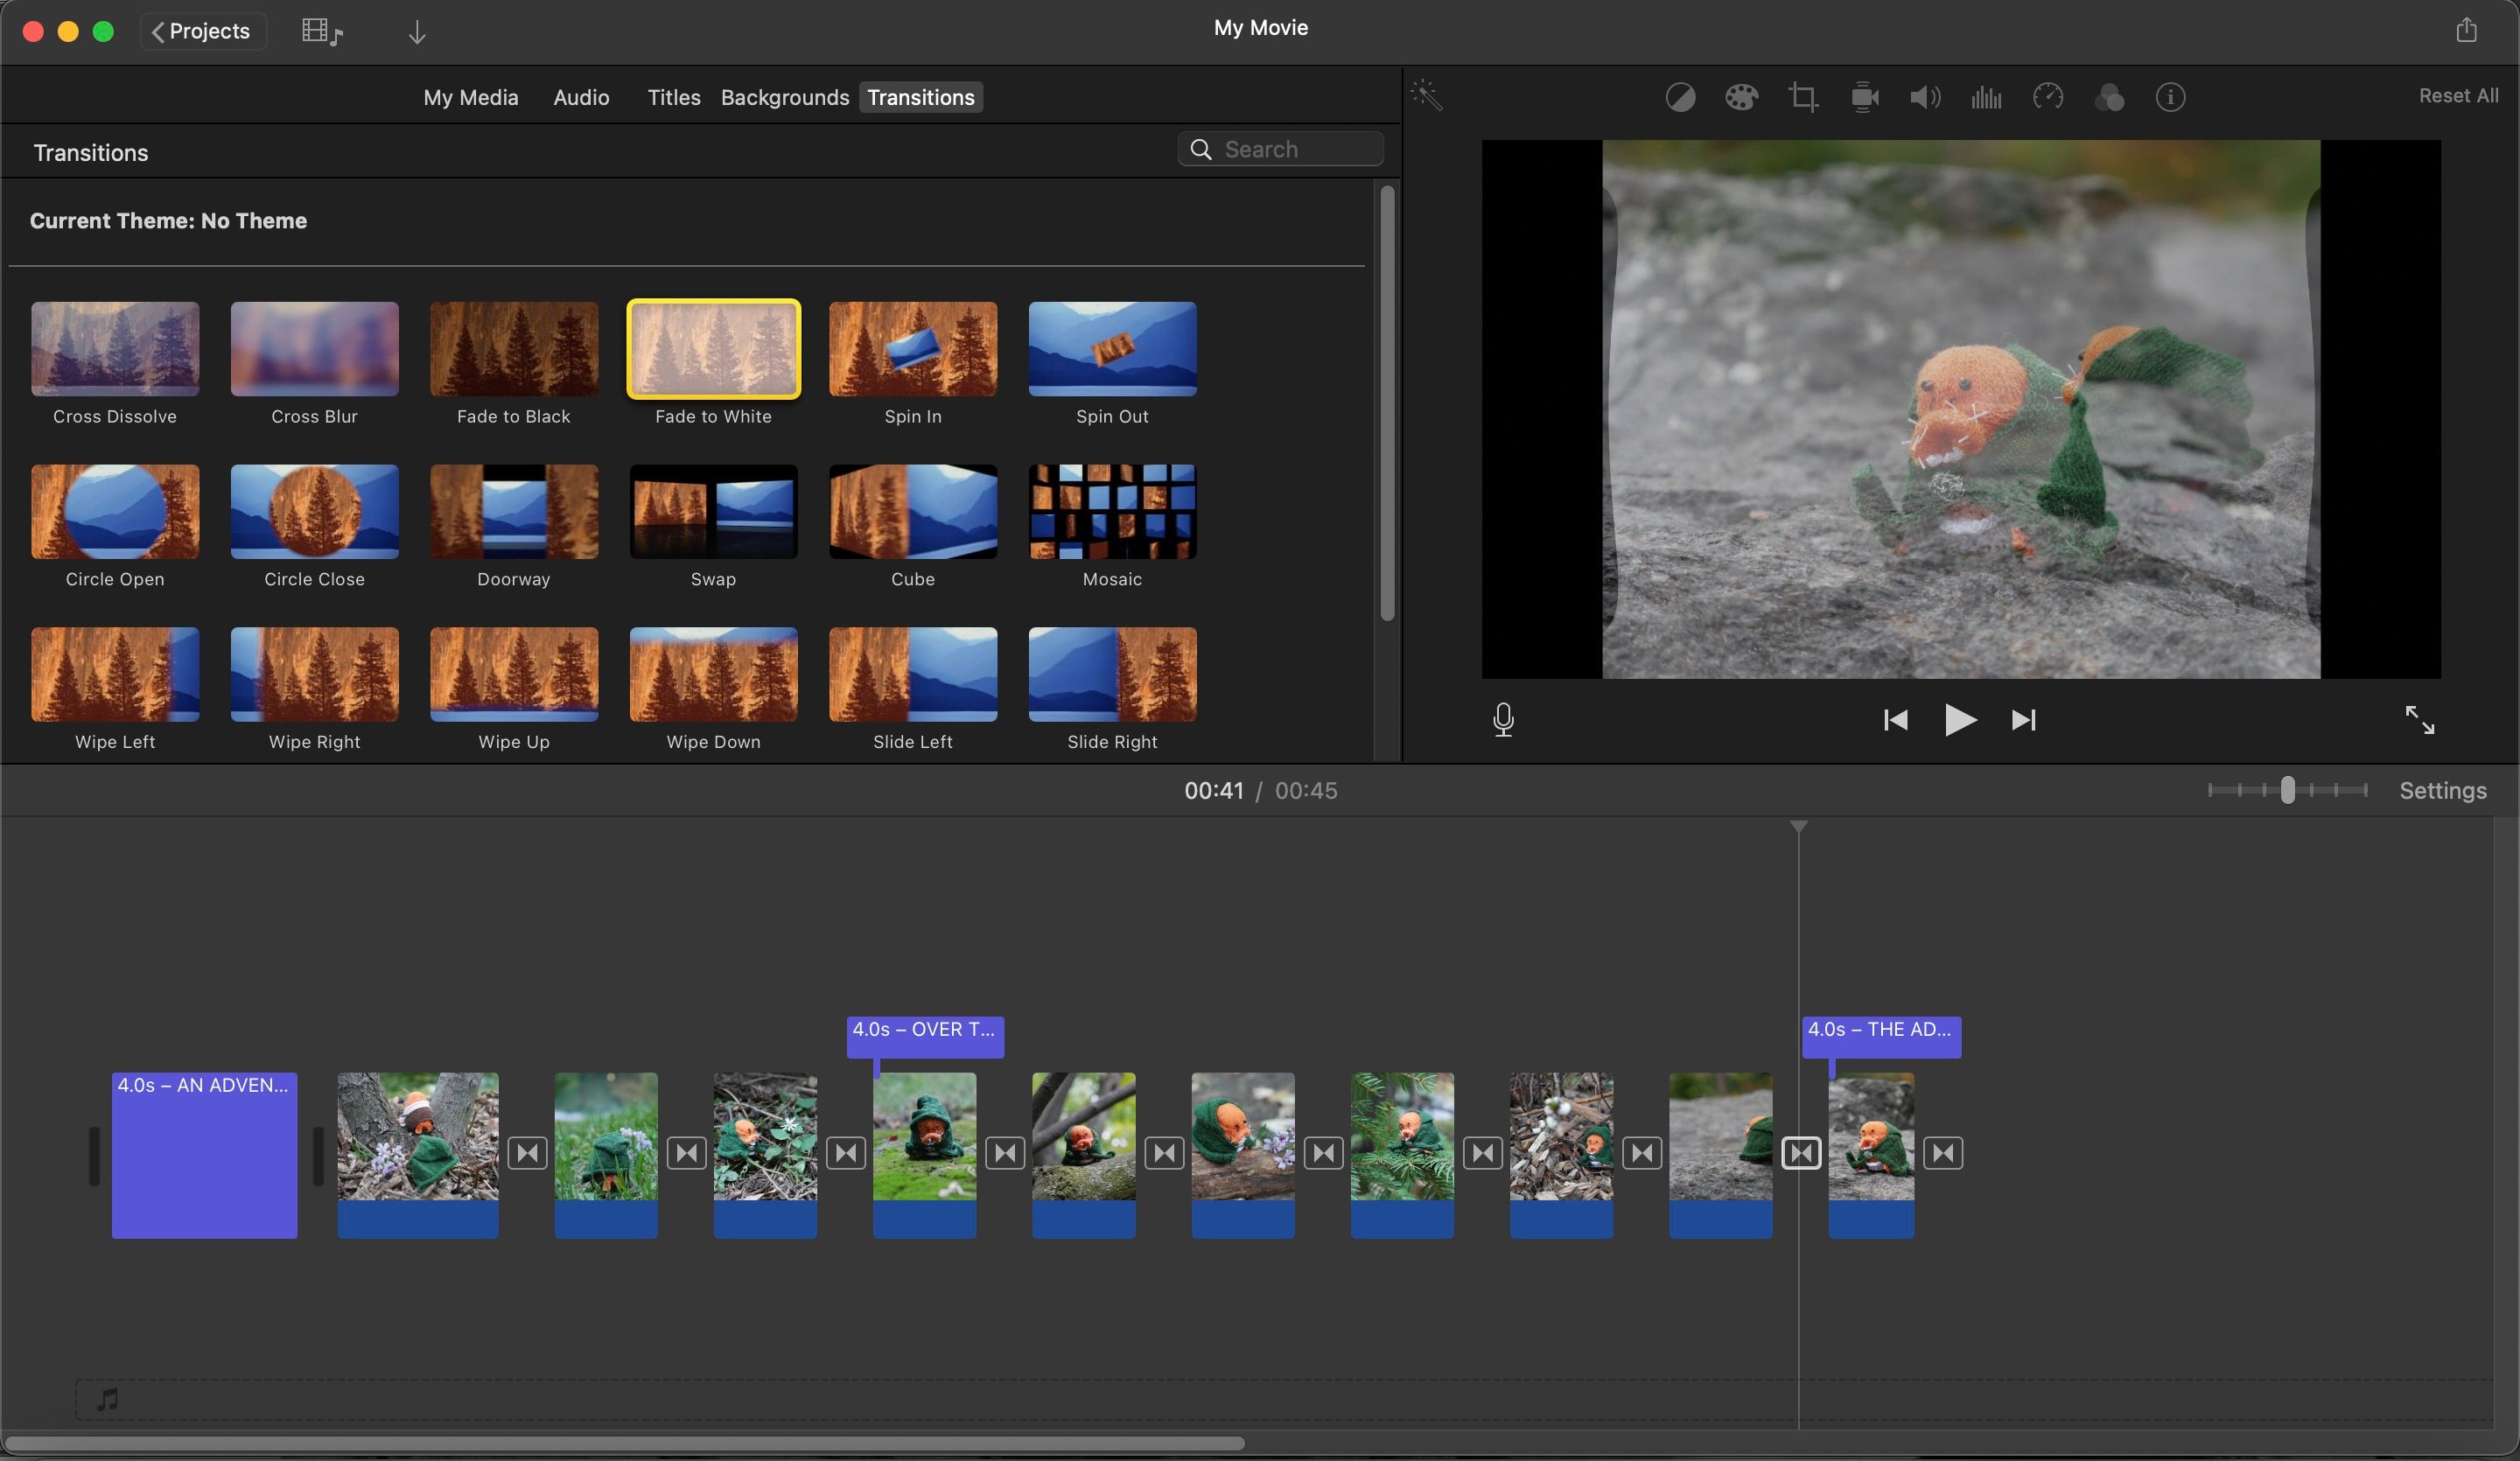
Adding transitions between your photos and titles is just as easy. Click on the Transitions tab to see all of iMovie’s options, and click and drag them in between clips to let photo and title clips have animations and flow between each other.
Need help deciding when to add transitions? Check out our tips for making good video edits for some ideas.
Step 5. Polish Off Your Slideshow Presentation With Some Music
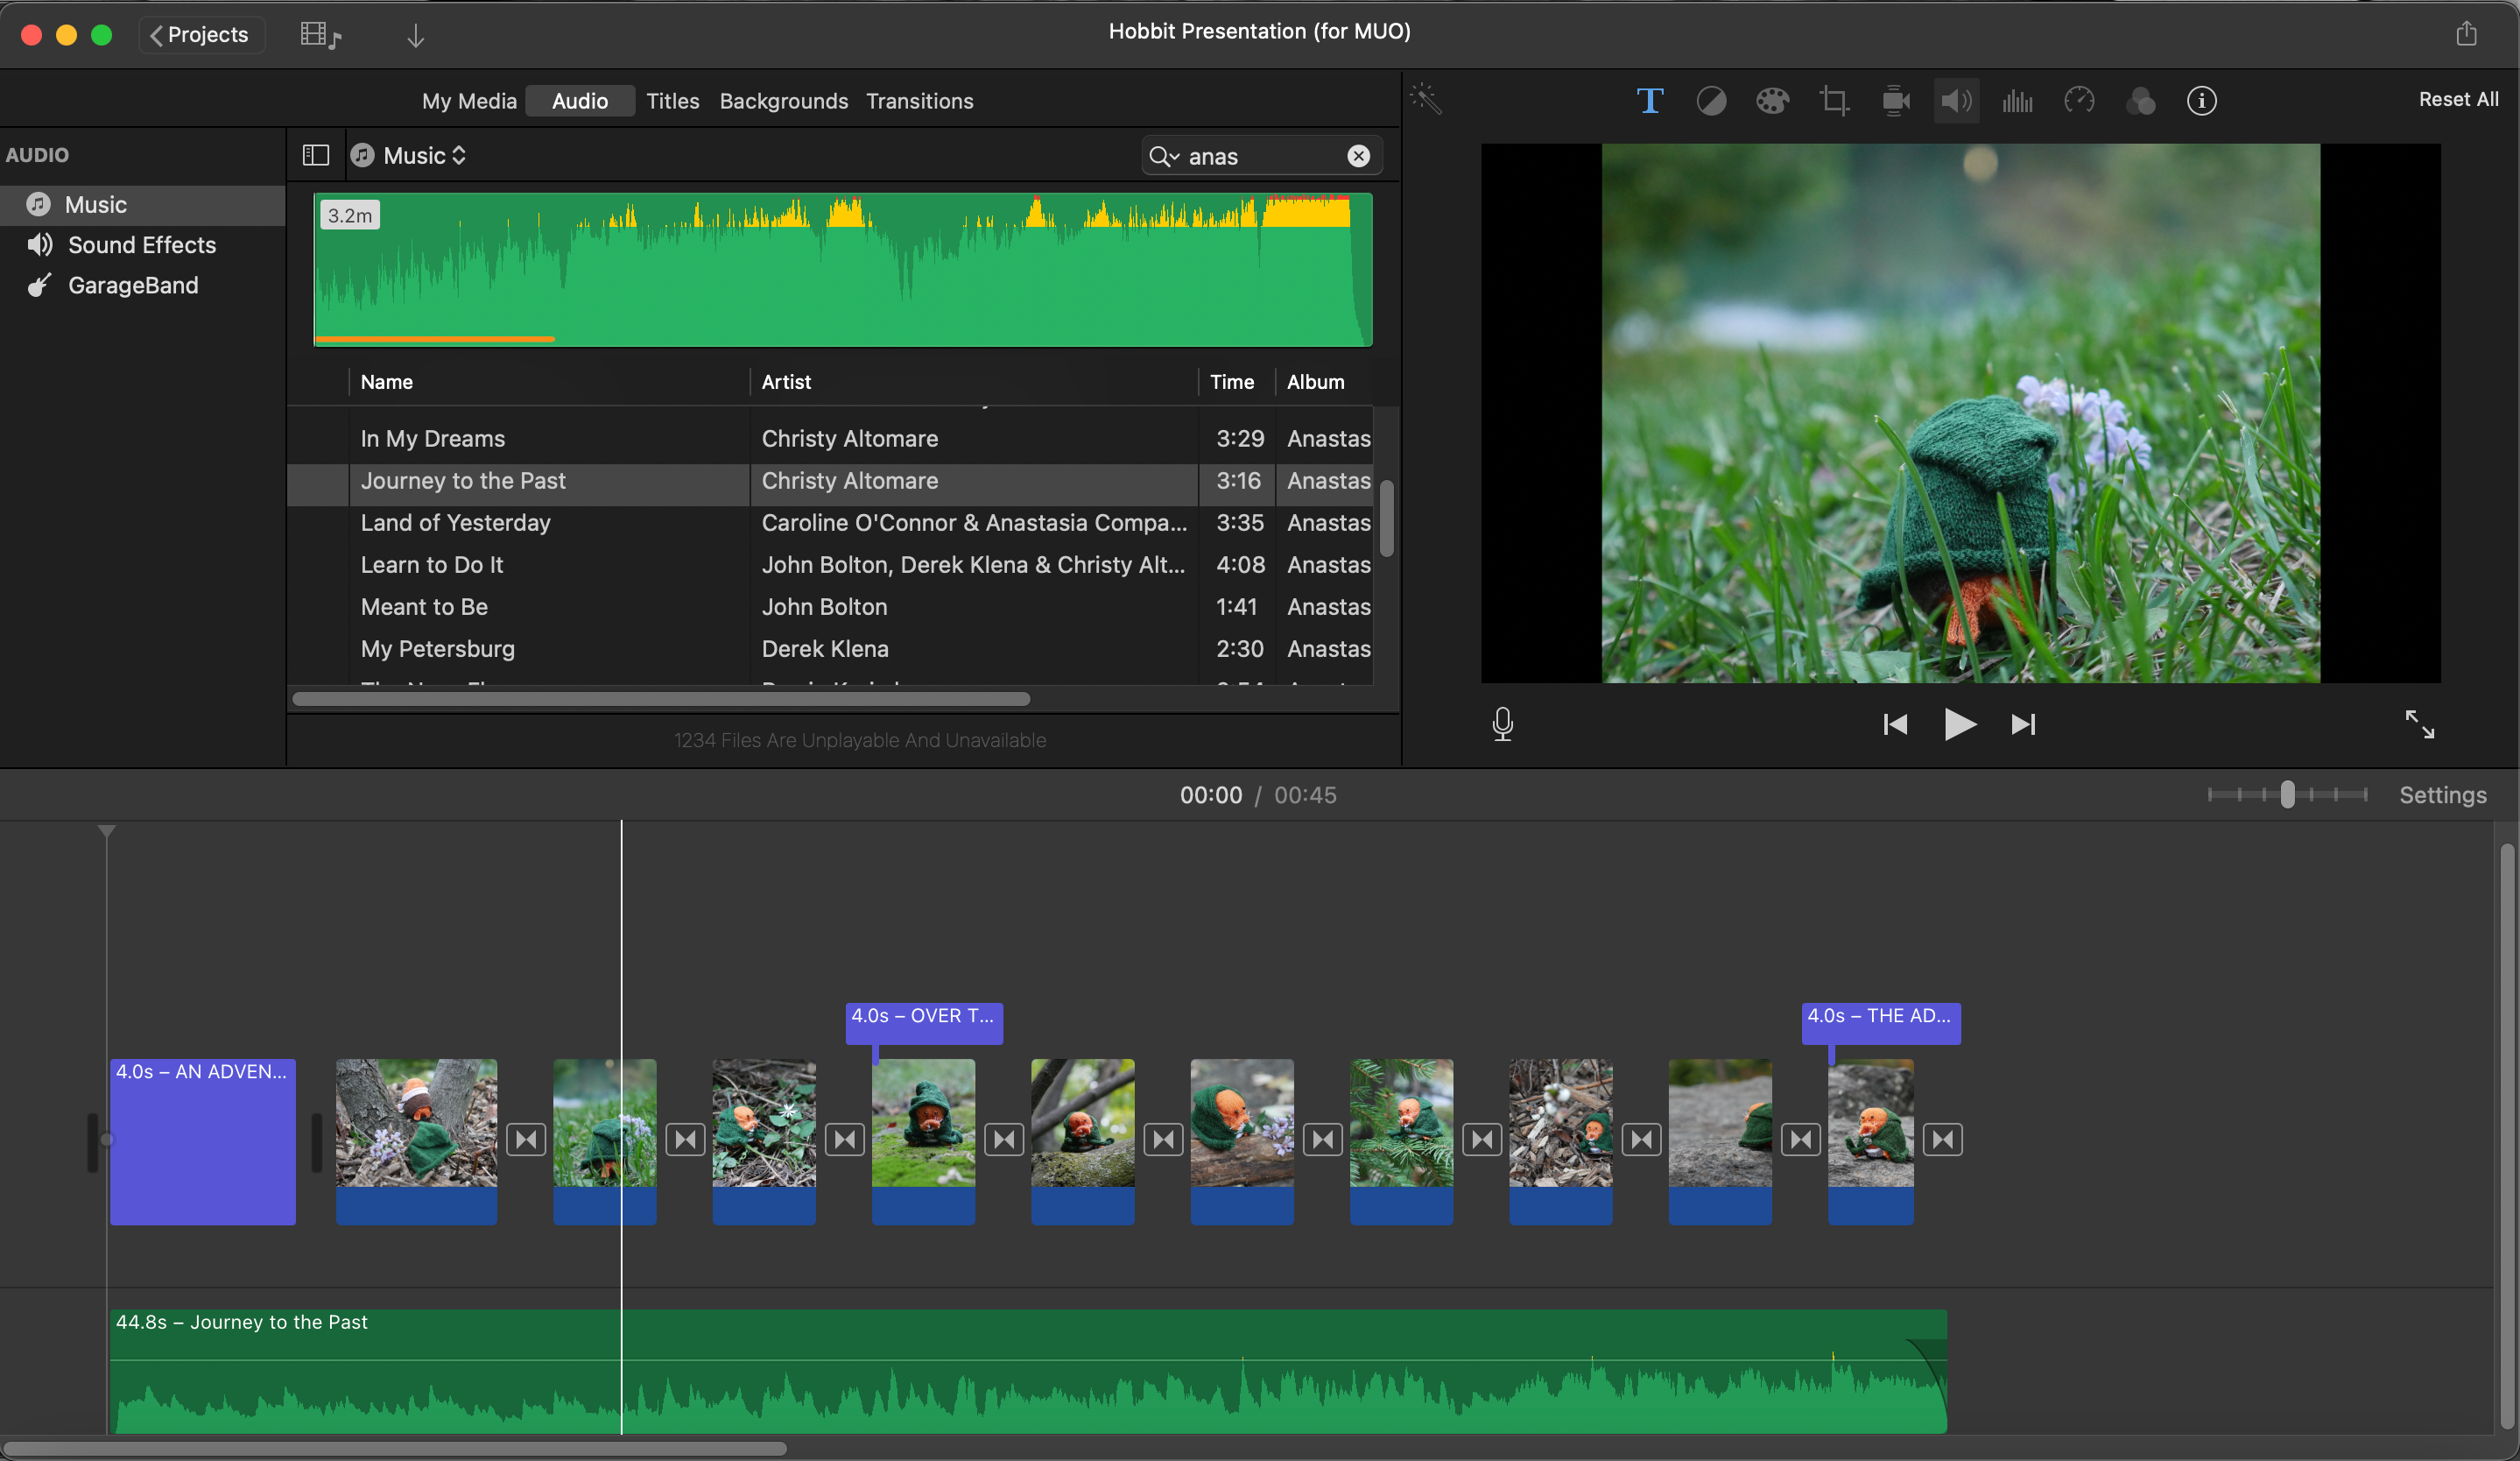
To add music to your iMovie slideshow, click on the Audio tab. You’ll be shown your Apple Music library, and you can click and drag songs from here into your timeline to have them play under your presentation.
Audio clips can be shortened and lengthened the way we showed you how to do with photo clips above.
You can add audio clips from iMovie’s Sound Effects library, and access GarageBand files you’ve made. Want more audio options? Find new songs in Apple Music or download new music files in Music or GarageBand to utilize in your slideshows.
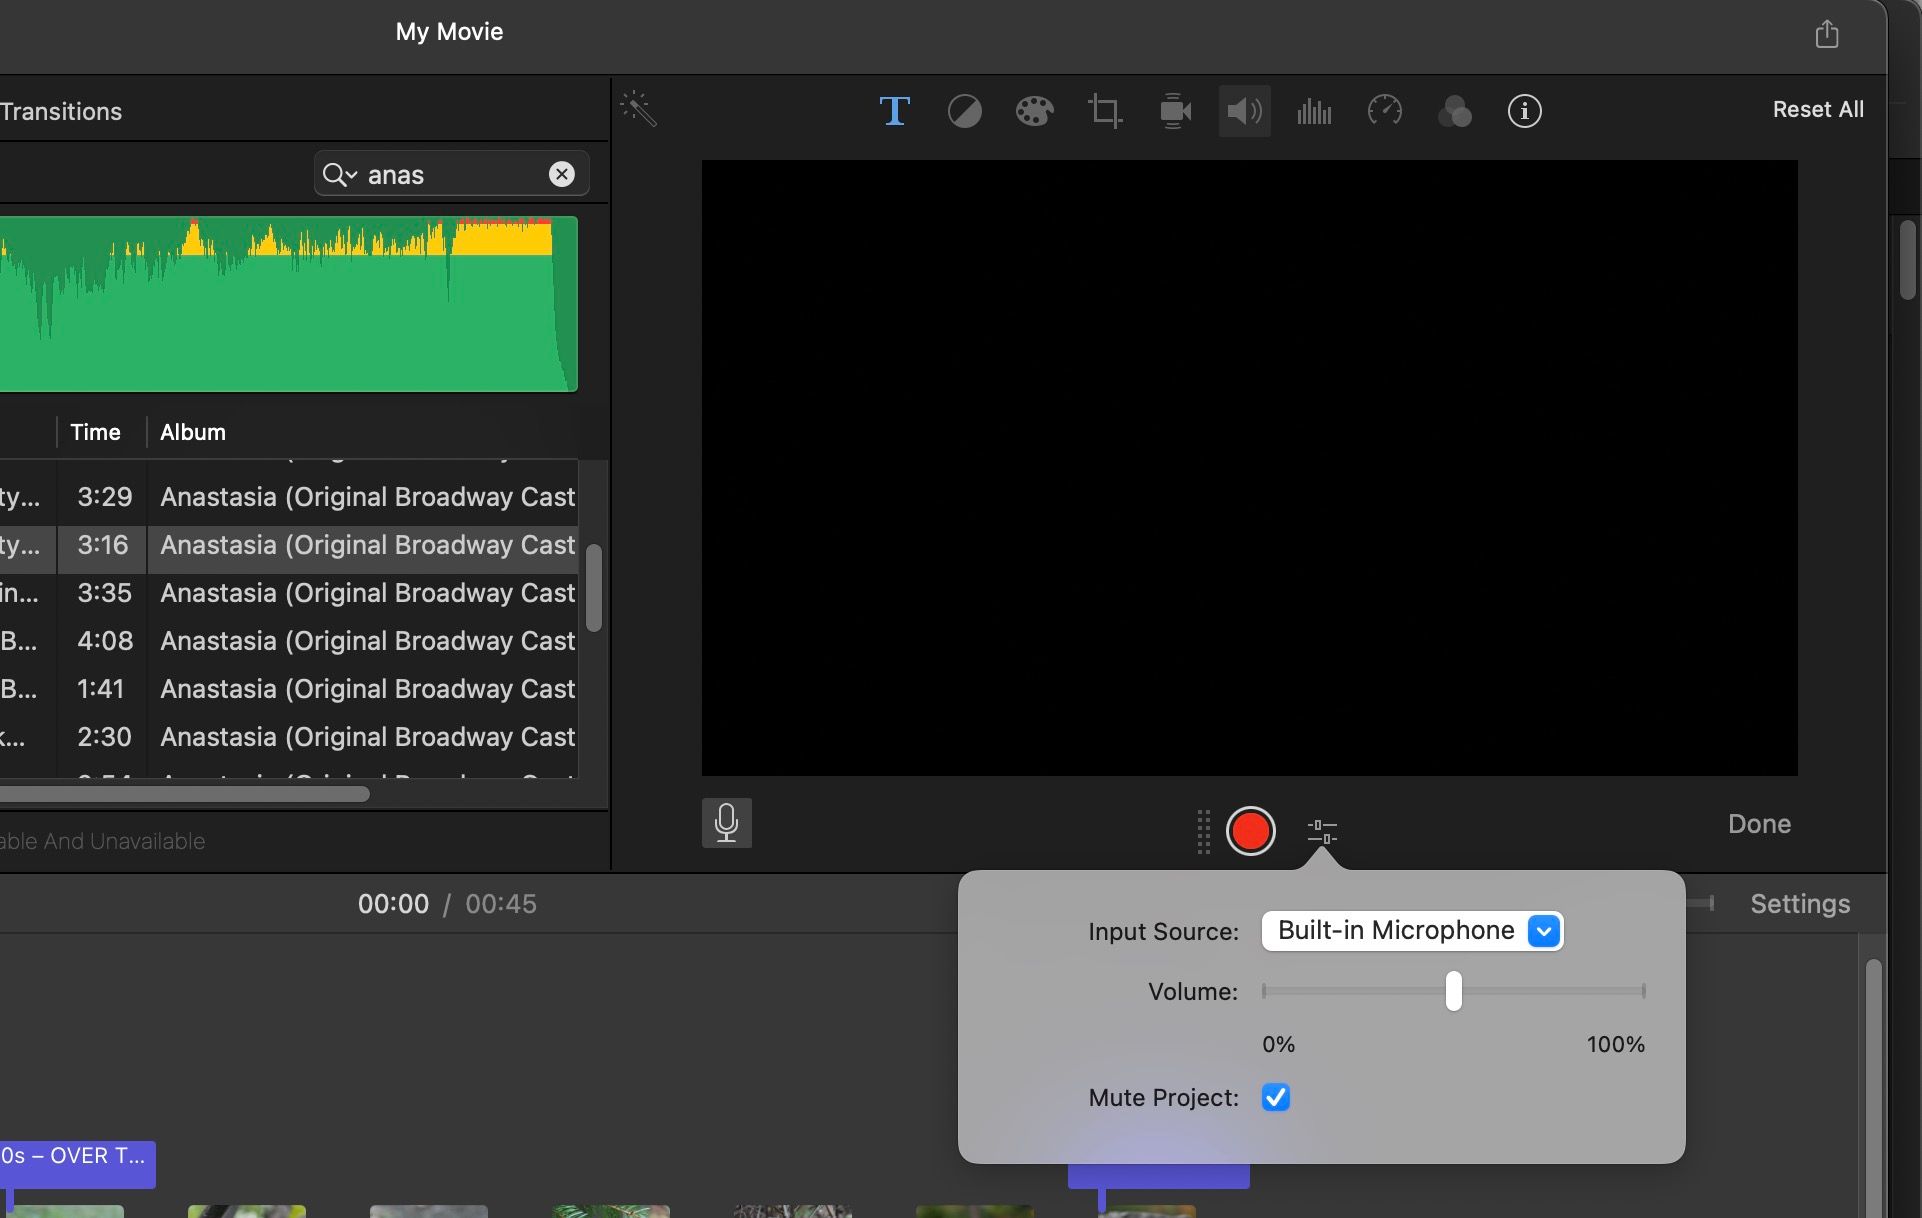
To record your own voice for a presentation, click the microphone icon below the media player, then hit the red Start Recording button to start recording your voice into your computer’s internal mic (or a mic you plug in). Hit Done when you’re done.
Step 6. Export and Play Your iMovie Slideshow
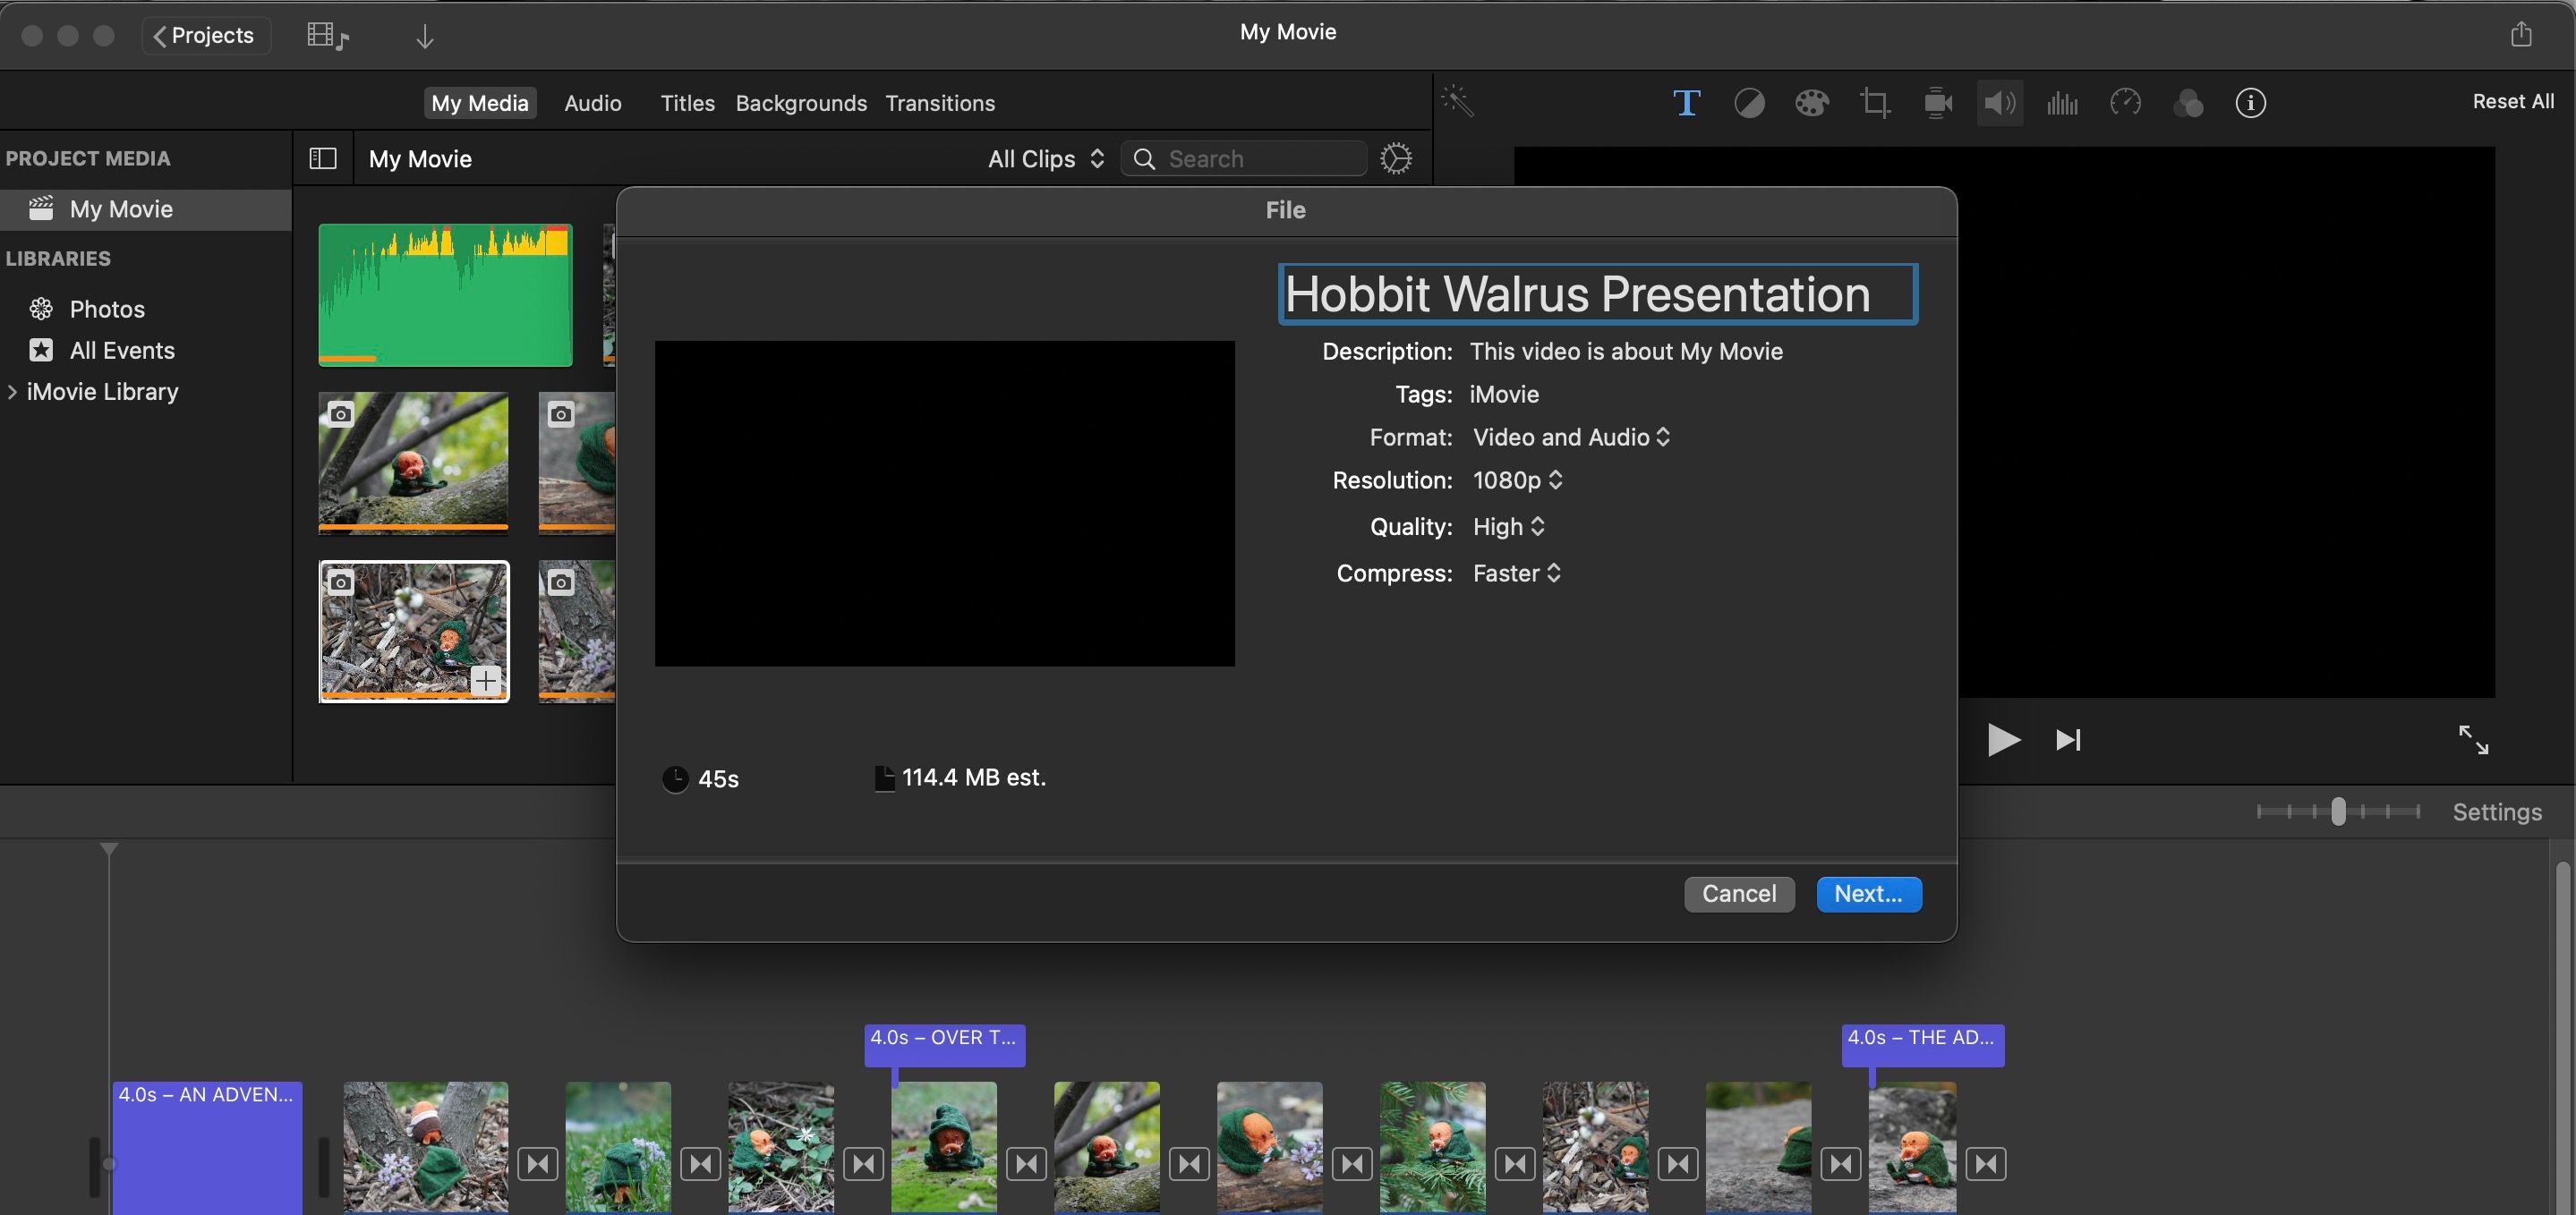
After you’ve played your slideshow and are happy with it, it’s time to export it! Go to File > Share > File, and name your project. Hit Next, and decide where to save your project on your computer.
Hit Save, and your slideshow will be exported as an MP4 file in just a few minutes. Don’t forget to save your iMovie project, too, in case you have to export again later!
Make Great Slideshow Presentations in iMovie
iMovie is a great program to make slideshow presentations with on your Mac. It lets you make presentations like videos, instead of regular slides. This can give you some creative freedom with your presentations, as well as giving you more audio options.
We hope our guide helps you make your next slideshow a lot more interesting. Keep playing in iMovie for other projects as well—it’s a great program for much more than presentations.


