If you've been on the geeky parts of the Internet lately, you may have noticed some very strange images popping up, connected somehow to Google.
They look a little like someone took a lighter to the film stock of time and space. Or like playing "Where's Waldo" on acid. Or maybe like someone turned John Carpenter's The Thing loose in a pet store.
Regardless, they're pretty trippy.

The network, due to quirks of its training data, has a fixation with dogs, eyes, and tendrils, leading to a unique visual style that almost looks like art.
Recently, Google released DeepDream to the public. It's a research tool, so setup is a little complicated, but it's perfectly doable for anyone -- even if you have no programming knowledge.
Today, I'm going to talk you through how to install it and use it to generate crazy pictures of your own. Let's get started.
The Tools You'll Need
First off, this tutorial is for Windows only. Linux users without access to a Windows machine are welcome to try this tutorial, which people seem to like but I haven't personally tried.
To get started, you'll need to download and install the following tools before you do anything else. The rest of the tutorial won't work without these components installed.
- Vagrant [No Longer Available] -- Vagrant is a tool for setting up standardized development environments. It'll greatly simplify setup.
- Virtualbox -- Virtualbox allows you to run other operating systems from within Windows. In this case, we'll be simulating a Linux machine.
- OpenSSH -- OpenSSH is a tool for connecting via command line to specific Linux machines. In this case, we'll be using it to talk to our virtual Linux machine.

Note that OpenSSH will throw a big, scary warning during installation that you must set up the passwd file or else hell and brimstone will rain down around your ears.
Ignore this. Vagrant will take care of it for you.
Installing the Dreamer
Now that we've got the setup out of the way, let's get down to brass tacks. Download the image-dreamer module from GitHub as a zip file, and extract it into your Vagrant setup at "
C:\HashiCorp\Vagrant\bin\
".
That's pretty much it in terms of setup. Now we just have to turn the thing on.
Open Windows PowerShell (you can find it by typing "powershell" into the start menu). It's a much-need replacement for the old Windows command prompt, and it'll serve us well here.
When PowerShell opens, type "
cd C:\HashiCorp\Vagrant\bin\image-dreamer
". That puts you into the same directory you just unzipped the module into. Now it's time to activate our Vagrant install. Type "
vagrant up
" and hit enter.

At this point, the system will start to do a bunch of first time setup. At this point, you might want to tab over to Netflix for a bit, because this step could take over an hour, depending on the speed of your machine.
If you get an error saying that the virtual machine failed to boot, you might have the same problem I initially had, which is that virtual machines are disabled by default in your BIOS. You'll need to reboot your computer, go into the BIOS setup, and see if you can find an option to "Disable virtualization". Check under the security settings. If you do find it, turn it off and try the powershell again.
Once the install is finished, type
vagrant ssh
into the command line. It'll prompt you for a passphrase. Hit Enter without typing anything. It'll then prompt you for the password. Type "
vagrant
" and hit Enter. At this point, it'll give you a terminal to the virtual Linux machine, and we're ready to use DeepDream.
Type "cd
/vagrant
", then "
ls
" (the linux command to list the contents of the directory). You should see the files in the image-dreamer directory. You can now interact with those files as though you were using a Linux machine.
At this point, you're going to need to take all the images you want to convert, make sure they're in .jpg format, and dump them into "
C:/HashiCorp/Vagrant/bin/image-dreamer/
". If you type "
ls
" again, you should see them.
Using DeepDream
The most basic use of DeepDream is to apply the default analysis by typing
python dreamify.py yourfilename.jpg dream_yourfilename.jpg
Obviously, you'll need to substitute the name of your file for "yourfilename". This will apply the default analysis option ('inception_4c/output') to whatever output name you specify. This is how most images are generated. This function basically turns this:

Into this:

Be patient while it's running! Large images can take a VERY long time, even on relatively fast hardware. Downscale your images when possible. If you get a crash because you're out of memory, edit the "vagrantfile" file through the powershell linux command line, and increase v.memory to something reasonable like 10000. If you get an effect that's less dramatic than you hoped, try running the program again on the output image. This should lead to a stronger distortion.
This is already very cool. However, just using the software this way is missing out on some extremely cool command line options that can alter the behavior of the software. For example, to use only the feature detector for lines, you just need to type:
python dreamify.py yourfilename.jpg dream_yourfilename.jpg "conv2/3x3"
This produces output that looks like this:

To use the feature detector for eyes, you just type:
python dreamify.py yourfilename.jpg dream_yourfilename.jpg "inception_4a/output"

There are a bunch of these command line options you can play with -- way too many for me to go into here. You can find a more comprehensive rundown here and here.
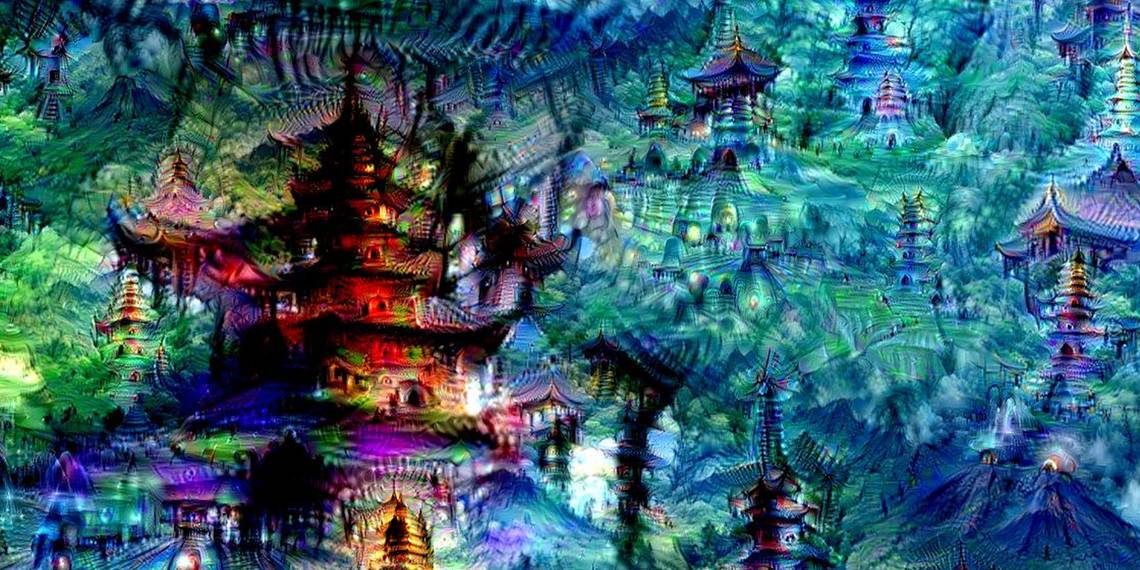
There are plenty of options here. You can also get compelling results by stacking these options. For example, here are some images I generated by running the default filter, followed by the line filter.


This is Cool, Right?
Once you install DeepDream, take some time and play with it. There's already a thriving Reddit community forming around creating these images. See what you can create! Post your most interesting results in the comments.
Image Credits: Van Gogh Portrait, Van Gogh Landscape, Dali - Persistence of Memory, Beetle, Chameleon, Fractal Broccoli,