Cloud-based data backup provider CrashPlan recently announced that they'll be closing the home user side of their business. If you have a subscription to back up your computer, the software will keep working until your plan runs out.
"CrashPlan for Home will no longer be available for use starting October 23, 2018."
Two highlights from their announcements are:
- We will honor your existing CrashPlan for Home subscription, keeping your data safe, as always.
- To allow you time to transition to a new backup solution, we've extended your subscription (at no cost to you) by 60 days.
After that, you'll have to come up with a new solution for backing up your files (unless you want to switch to the small business plan).
You have plenty of options for new backup services. That's not going to be a problem. But what if you've been using CrashPlan for years and have gigabytes of data stored on their servers? You don't want to lose that.
Here's what to do.
Save Your Files Today
Any decent backup software is going to have a monumental amount of data in storage if you've been using it for a while. Especially one like CrashPlan with essentially unlimited storage and automatic versioning.
I've been using CrashPlan for five years and I have almost 120GB in storage on the CrashPlan servers.
Many of you probably have many times more than that. Even if you only back up the folders you use most often, like documents and application files, you're going to have a lot of data.
So you have two options.
- You can download everything and keep it on an external hard drive or upload it to a new backup service.
- The quicker option is to just grab the important files that you know you should keep.
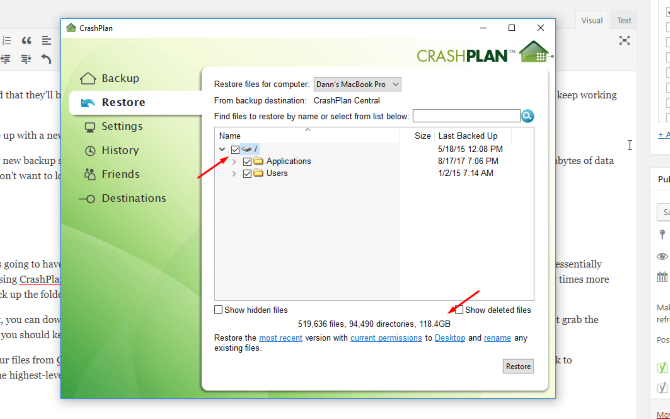
To start downloading all of your files from CrashPlan, open up the CrashPlan app (the web interface won't let you restore more than 500MB at a time). Click on the Restore tab and select the highest-level folder in the hierarchy:
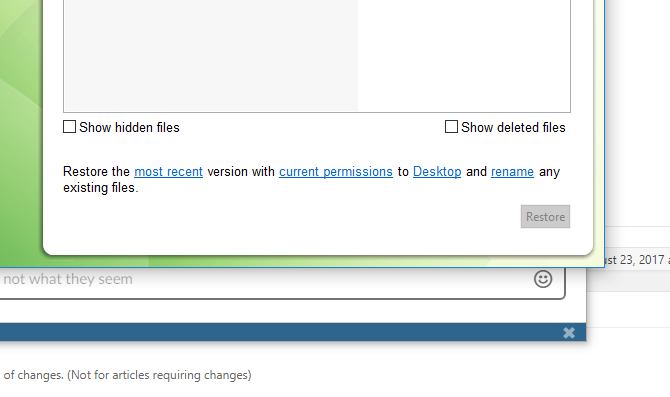
After a moment, the app will tell you how much space you'll need to restore those files. Before you click Restore, you'll want to check the details presented at the bottom of the window:
In my case, CrashPlan will restore the most recent versions of the files to my desktop. Unless you have enough room on your hard drive to store all the files, you'll want to change that location to an external hard drive.
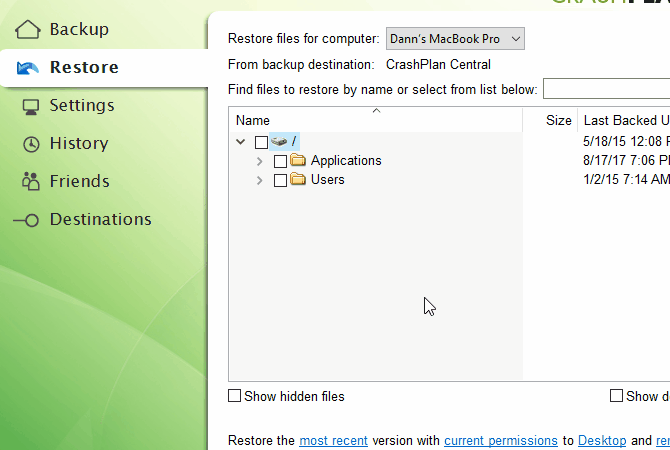
To restore only a selection of files, you'll need to use the interface to select the files you want. Click the arrows next to any folder to expand that folder, and click the checkbox next to a folder or file to select it for restoration.
Again, choose the location where you want to download the files, and click Restore.
Which files should you restore? I'd recommend your Documents and Photos folders. And if you're a home video enthusiast, your Movies folder as well. It's easy to re-download applications and any music you've purchased online, and they'll add to your download time.
If you're downloading more than a couple of gigabytes, this process could take several hours (I estimated about 3.5 hours for my own download assuming no other applications are using much bandwidth, but it could be much longer).
Now that you've got the files you need back from CrashPlan, it's time to figure out what to do with them next.
Back Up Your Backups
We recommend using the 3-2-1 backup strategy: three total copies of your data, two of which are on local drives, and one of which is in the cloud. Here's an example of how you might do that:
- Download all your CrashPlan files to an external hard drive (or network attached storage).
- Download your most important files to your computer's drive.
- Upload some or all your files to a new cloud backup.
This way, you're covered in case of just about any disaster.
Choose a New Backup Provider
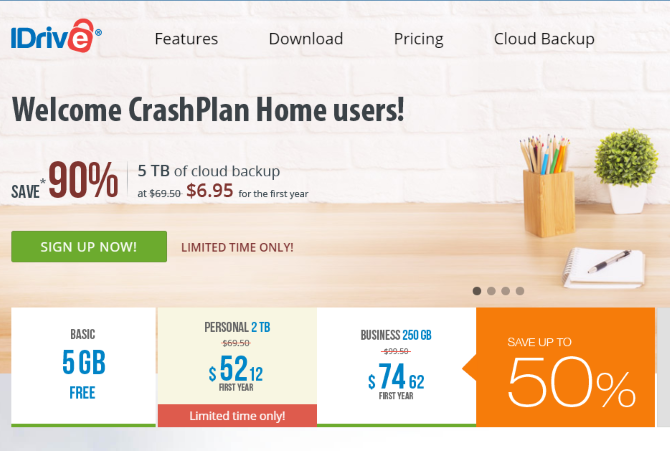
Now that CrashPlan is calling it quits, you need to choose a new provider. There are tons of options out there, and some are even offering great deals to CrashPlan subscribers.
CrashPlan has specifically recommended Carbonite as a good replacement for their services. It's consistently received high praise and is a solid option for storing your backups. There are plenty of other reputable services out there, but Carbonite and Backblaze stand out as two that have been frontrunners for a long time.
Some services support backing up to external hard drives, which you'll need if you're hoping to again back up everything from CrashPlan.
Upload Your Old Backups
Once you've decided on a new provider, you should upload your old backups immediately. The worst kind of an emergency is a hard drive failure. Bad things happen, and you don't want to lose all that precious data. The exact process you'll go through depends on which provider you use. But if you put your CrashPlan backup files in a folder that you have set to back up with your new service, they'll get transferred to the server.
If your files are small enough, you could also store them on Dropbox, Google Drive, or iCloud storage as well.
Make sure you properly back up those files. You might be tempted to just start anew with Carbonite or Backblaze, but you never know when you're going to need some of those old files.
Trust me: if you don't back them up again, you'll discover that you need something just after CrashPlan trashes it from their server.
Don't Get Lazy
When your CrashPlan subscription expires, it's going to be very easy to completely forget about backing up your computer. It's one of those things that you could easily put off forever.
But don't fall into that trap! Keep all your backups fresh and make sure they're available, even when your beloved and long-time provider of many years has decided to kick you to the curb (no, I'm not upset that CrashPlan is closing...).
What will you be switching to now that CrashPlan is going away? Have you downloaded all your backups yet? Share your thoughts in the comments below!
Image Credit: John Wollwerth via Shutterstock.com

