<firstimage="https://www.makeuseof.com/wp-content/uploads/2010/03/Photoshopicon.png" />
If you admire the professional type designs on the titles of books and magazine covers, gift cards, product packages, and posters, and you wanted to learn how it's done, well you might try learning some of the tools in the Character Panel of Photoshop (or Adobe InDesign). What you will learn in this article won't make you a pro designer, but I will show you how to go beyond the default settings for type styles in Photoshop.
Like other tools in Photoshop, text is put on its own layer. You can have several layers of text which can moved around, flipped, rotated, and scaled. You can add text on top of an image without destroying the original image itself. If you're totally new to Photoshop, you might want check out my introductory tips to Photoshop here on MUO.
Setting Up the Character Panel in Photoshop
To set up for this Character Panel tutorial, start off by creating a new document in Photoshop. We're going to be working with three tools: first there is the Type and Move tools in the tool palette. The Type tool of course is what you use to create text, while the Move tool enables you to select and move text layers around on an image or document.
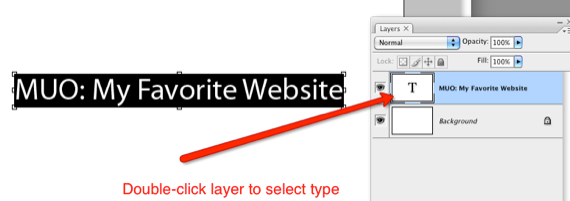
Next, we want to be familiar with the Layers palette. When you create text on a document, it automatically gets put in a layer. You can single-click a text layer to select and move it around on the document, and you double-click a layer to edit the font style as we are going to do below.
Finally, we're going to use the Character Panel in Photoshop, which enables you to go beyond the default settings for text. The Character Panel is found in Window>Character in the menu bar. So go ahead and click on that menu item and let's get started.
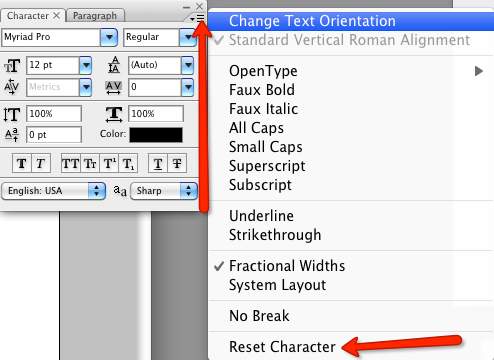
To make sure we start off on the same page, click on the upper right triangle of the Character Panel. In the drop-down menu select Reset Character. Notice also that this menu reflects many of the same tools you will find on the Panel itself.
Elements Of The Character Panel
Since this tutorial is not for design students, we're going to work with just a few basic elements of the Character Panel without getting too technical about each of their functions. I will basically share what can be done with these tools, and from there you can play around with them to your hearts content. There are entire books written on type design if want to learn more.
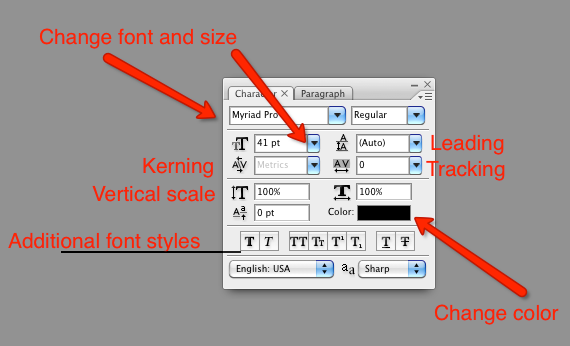
There are several ways you can change type settings in Photoshop, but the Character Panel has pretty much all the tools in one place. You can of course change the font type and size, the color, and the styles, e.g. bold, underline, all capitals. These tools are found in most word processing and image editors, but the Character Panel also has advanced tools such Leading, Tracking, Kerning, and Vertical scaling. When you put the cursor over these individual tools, their names will pop-up. But don't worry so much about remembering the names, just have fun with them.
Create Text
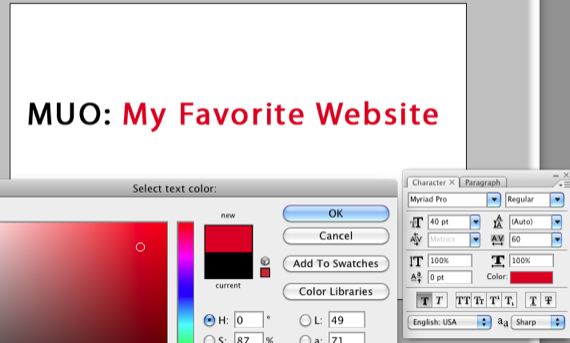
Okay, let's start off by creating some text. Select the Type tool in the toolbar of Photoshop. A blinking line will appear on your document and you should also see a new layer appear for the text. Type two lines of text and if you want to follow along with my example, you can use the font type and size that I"˜m using. With the text select, make the changes in either in the Character Panel or under the menu bar. I'm using Myriad Pro, 40pt size.
For all tools we use, you need to select the text to make changes. Notice in some of my screenshots, the black area around text indicates that the text is selected for editing.
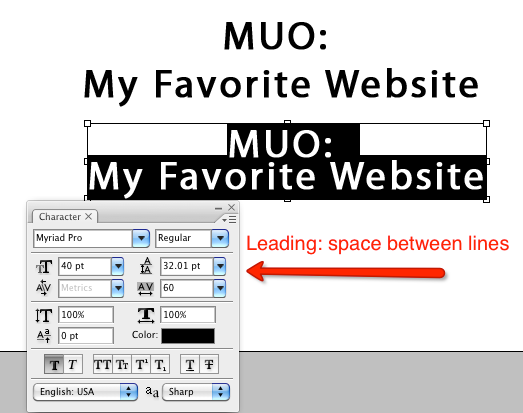
Leading
Leading is basically the amount of space between letters. This is useful if you have titles or paragraphs in which you want to go beyond the default single or double spacing between the lines. This tool gives you more control over spacing. You do so by selecting both lines of text and then clicking on the blue triangle and moving your cursor right and left, which will will change the spacing between the lines. Sometimes when you're working with titles, however, you might want to put each individual line of text on separate layers so you have even greater control.
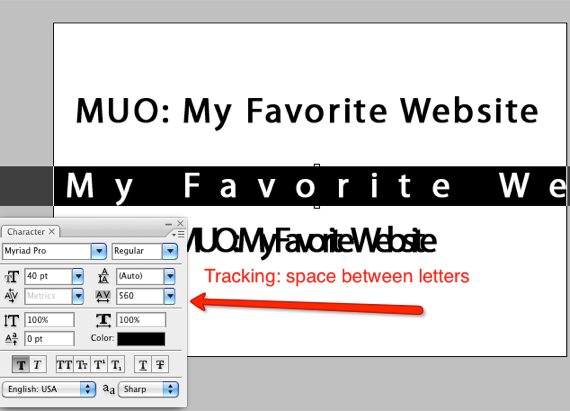
Tracking & Kerning
Tracking changes the space between individual letters; it's a tool that you won't find in most basic word processing programs. Pulling individual letters apart or closer to one another may make them more readable or aesthetically appealing. Kerning works in a similar fashion, but it's a little more advanced for this tutorial. It works differently for different font types.
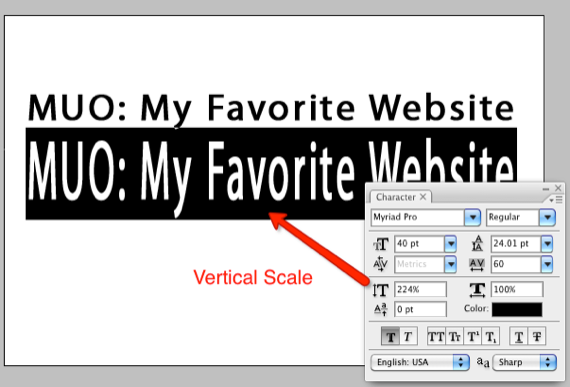
Vertical Scale
Vertical scaling can be a fun way to stretch or scrunch fonts for a funky kind of style. But be careful with this tool, for sometimes it can destroy the original style of a font and make your type style look very unappealing. Again, select the tool and move your cursor right and left for changes.
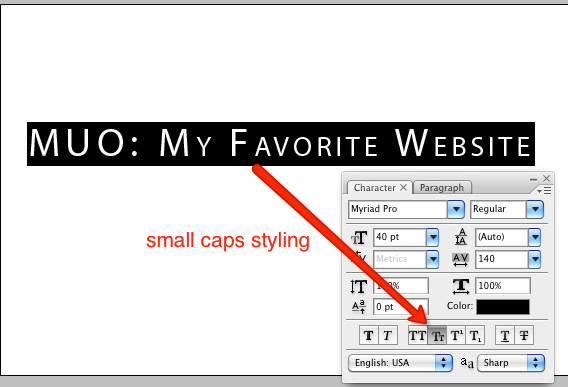
Font Styles
On the button of the Character Panel, there are various buttons for styling fonts, e.g. bold lettering, capitalized text, small and large caps, underlining and strikethroughs.
Select Colors
You can select any part of a type, from a single letter to a group of words and change the color of the selected text. Simply click on the color tool and choose the color from the color palette.
Warp Text
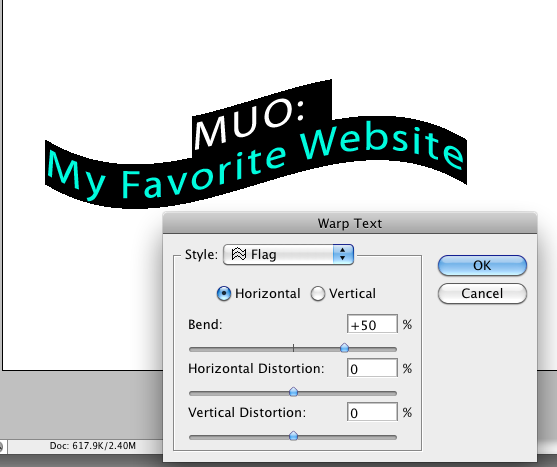
Finally, as an added bonus to this tutorial, you will want to check out the Warp Text tool. You access it by selecting the Text tool in the Toolbar. At the top under the Photoshop menu bar, the Warp Text tool is towards the middle. You can select individual tools and play around with these shapes for a more playful look in your text design.
As with everything you do in Photoshop, you can always undo changes you make by clicking on Edit>Step forward or Step backward. With each character tool, you can select it and reset back to the original number. Or you can reset the entire changes you made as described above.
If you have never used the Character Panel in Photoshop, let us know how you like it. If you have any questions, please leave them in the comment section below.

