Your computer has a name, even if you've never seen or noticed it before. It's primarily used to identify your machine on a network. Because of this, you might want to make your PC's name more personal so it's easier to use with other devices.
Let's look at how to change the computer name on a Windows PC in just a few moments.
How to Change Your PC's Name in Windows 10
In modern versions of Windows 10, the Settings panel is the best place to change your computer's name. Open Settings by clicking the gear icon on the Start menu, or using the shortcut Win + I.
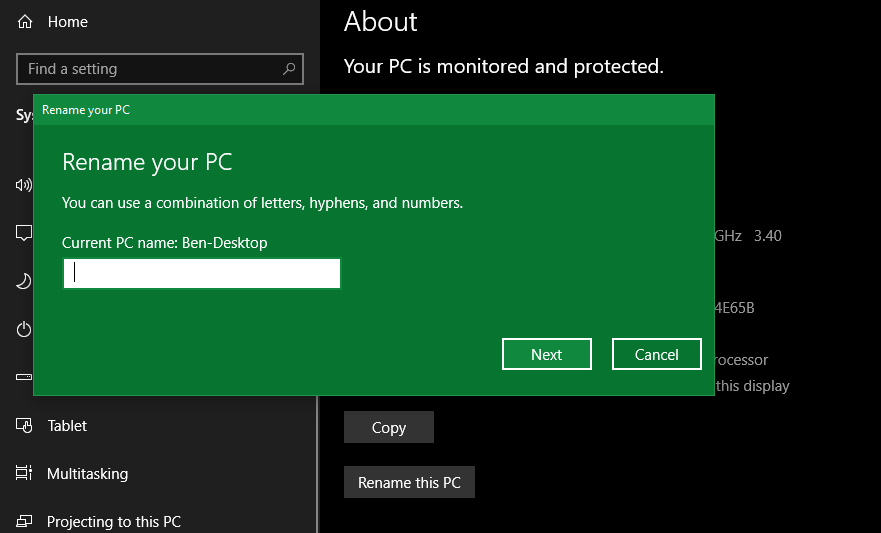
In Settings, select System, followed by the About tab on the left. You'll see some basic information about your PC here, including the current Device name and installed hardware.
Click the Rename this PC button to choose a new name for your computer. The name can't contain spaces or special characters, so use only letters, numbers, and hyphens. Follow our recommended device naming conventions to choose something that makes sense. For best results, create a name that's unique, short, and clear.
Once you've made the tweak, you'll have to restart your computer for the name change to take effect. Upon rebooting, open the same Settings > System > About panel and you should see the Device name field updated. There are other ways to see your PC's name, as well.
Now you'll see this name used when you connect other devices to your PC using Bluetooth, when browsing the list of connected devices in your router's admin panel, and similar. No longer will you have to wonder what computer "HP-R41PQ86Z" actually is.
Make Your PC Stand Out With a Fresh Name
Renaming your PC isn't the most exciting computer task, but it's still worth doing for proper organization. Whether you never changed the default name or need to rename your PC for a new owner, now you know how to easily adjust your computer name in Windows 10.
While you're making tweaks like this, there are other easy ways to make your computer more efficient, too.


