If there is one thing that really annoys me about working with a remote web server is the fact that it is still a bit inconvenient to explore and edit those files remotely. It's especially inconvenient when I have a home web server that I've built and control myself, but I still have to FTP into the server to browse website files, or to upload and download web pages and other files.
Sure, I could share out the directory over my home network and just transfer files that way, but that doesn't really help me when I'm away from home and connecting into the server elsewhere on the Internet.
If you've ever used a commercial web host before, then you know that many of them offer a much more user-friendly, graphical interface to remotely access your web files. In many ways, that interface feels basically like a file explorer that you'd use on your home PC. The only difference is that you're logged into your web server and accessing the files through a web-based interface on the online control panel.
Now, we've offered a lot of useful articles at MUO about setting up web servers quickly using software like XAMPP or Server2Go, but it's high time you start upgrading those servers with a few bells and whistles.
Setting Up Your Own Graphical File Explorer
The truth is that you can set up a similar file explorer on your own web browser. If you can access it via HTTP, then you can connect through this file explorer. The open source application that accomplishes this is called AjaXplorer.
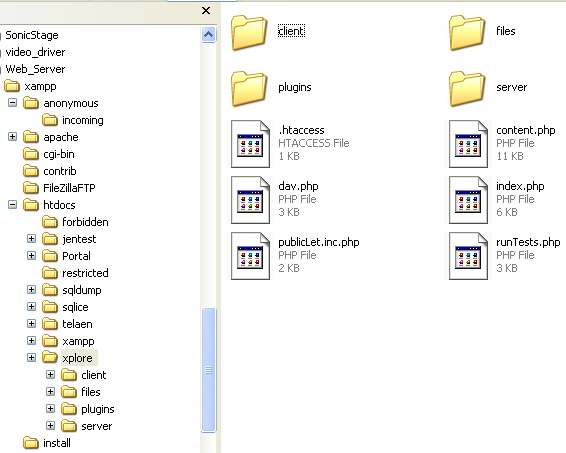
Installation is as easy as downloading the files and placing them into your public documents area on your web server. You can install it directly into whichever root folder where you would like the bottom root directory of your file explorer to be. For example, in my case I installed it into a subfolder called "xplore".
In that case, I'll never be able to get further down into htdocs. This is actually a good setup if you have multiple websites in different subdirectories and you want independent file explorers for each. Just put an install of AjaXplorer into each folder.
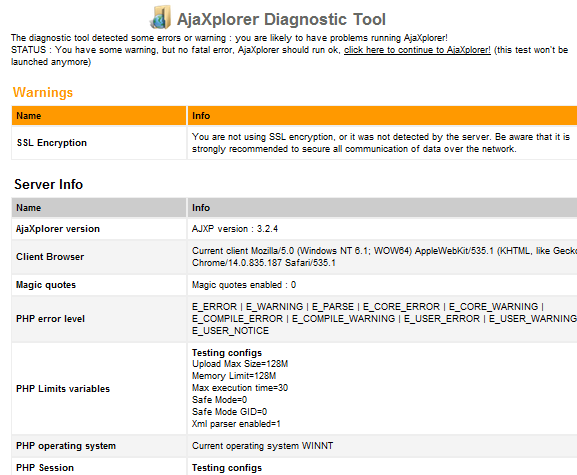
When you first access that folder on your website (in my case, http://192.168.x.xxx/xplore/), the script will check to make sure whether all of your server settings are okay. You may see the following error if you're not using SSL encryption. If you're concerned, enable encryption. Otherwise, you can blow right past this, AjaXplorer will still run fine.
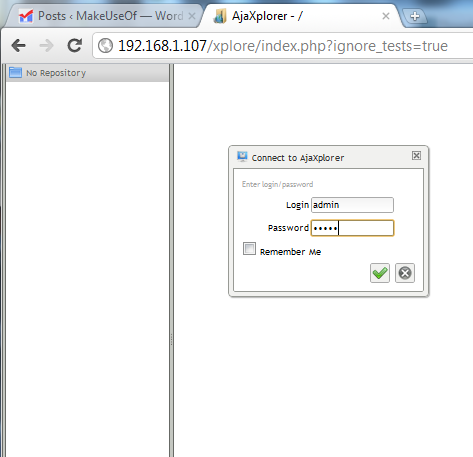
You'll notice that there's virtually no setup if everything goes smoothly. When the application first starts, you can initially log in using "admin" as both ID and password. Remember the change it after you log in under the "settings" section.
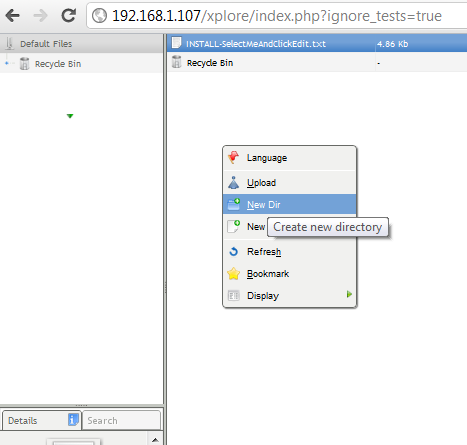
When you log in, you'll find yourself in an empty folder with only a "Recycle Bin" as company. You are looking at the root folder where you installed the application. If you had installed this in the root of your web server, you'd see all of your web files listed here.
Manipulating the directory is as simple as right clicking on any of the white space and using the menu that pops up. For example, if you want to start creating new directories, just select "New Dir".
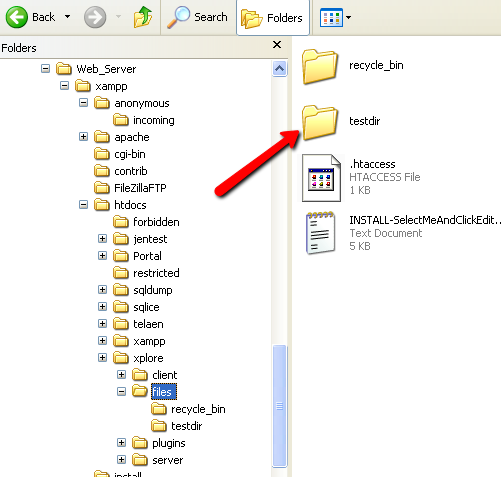
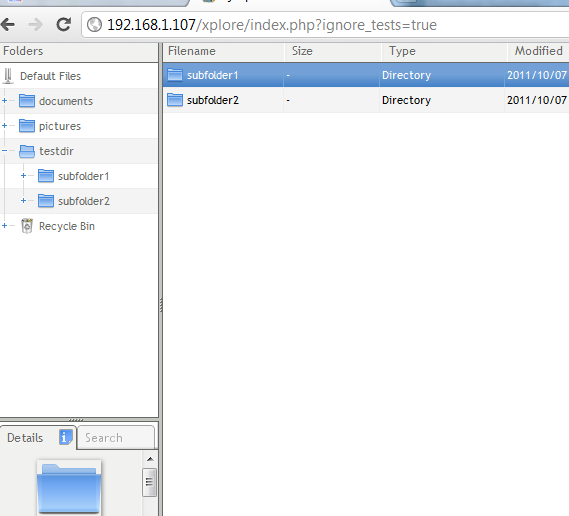
In my test case, I created a folder called "testdir" using AjaXplorer and saw it show up in the directory. Just to confirm, I went to the web server and browsed over to the actual folder under /htdocs/xplore/ and sure enough, there was the "testdir" folder I created.
Along the right pane, you'll find a directory navigation window that is just as easy to navigate as any file explorer software. I found that browsing on AjaXplorer was far easier than the standard online file browser that came with my own commercial web host account.
My favorite part of AjaXplorer is the fast editing feature. Once you've created files on your web server, all you have to do to edit them on-the-fly is right click on the file and click to Download once. Once the application establishes a local downloaded copy, you can then right-click on the file that's listed on the server and make edits. There is no need to worry about uploading or downloading - all file syncing is done behind the scenes.
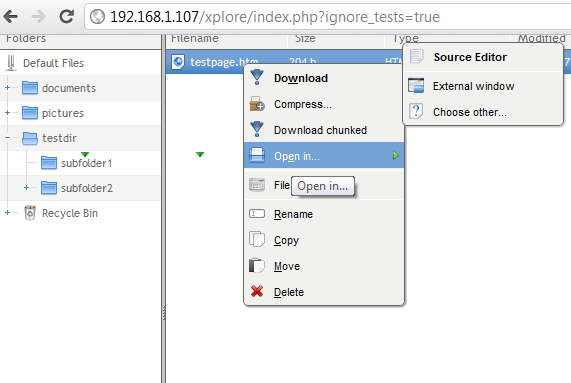
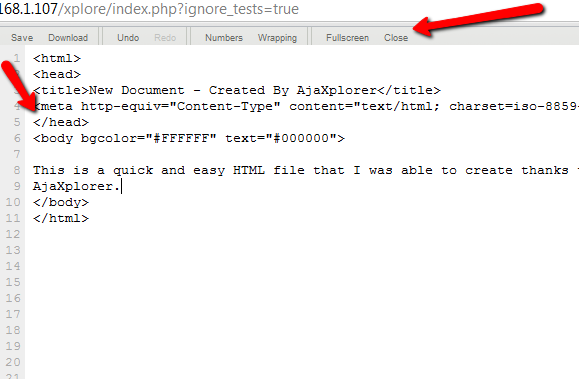
When you right click an HTML file, you'll also notice that you have a "Source Editor" option. In Source Editor view, you get a built-in coding editor. If you create an HTML file with AjaXplorer, it'll automatically fill in the basic structure of an HTML page for you. All you have to do is fill in the content.
When you're done, click "Save" at the top menu, and your changes are instantly live on the server. If you choose to view the file in an "External Window", it'll open up a new window (or tab) that displays your page in html view.
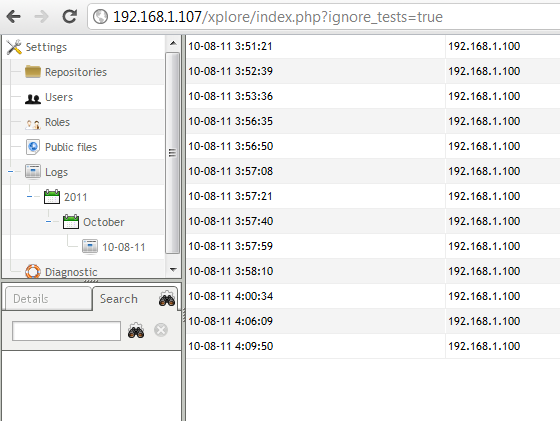
Toward the lower left corner of the explorer window, you'll find the settings. Here, you can browser users, monitor diagnostics, and best of all there are logs of every change that's made.
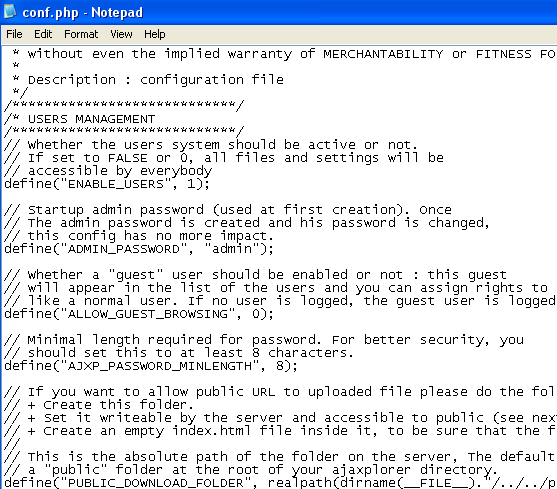
The standard setup and security settings may not suit your needs, so make sure to review the instructions on the help page on how to configure the config.php file. You'll find that file under the /server/conf/ directory of your AjaXplorer install.
If you want to get away from constantly uploading and downloading files every time you want to make changes on your web server, download and install AjaXplorer and see how much time it saves you during your web development. You may be surprised!
Give AjaXplorer a try and let us know how you liked it. Was it easy enough to use and flexible for what you need to do? Share your experiences with it in the comments section below.
Image Credit: ShutterStock

