<firstimage="https://www.makeuseof.com/wp-content/uploads/2011/06/tm-featured.jpg">
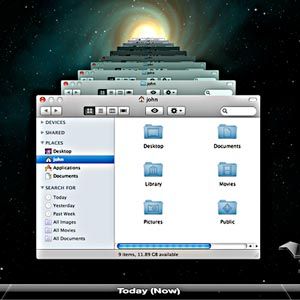
After losing some fairly important accounting files recently, I realised that my backup strategy is quite flawed. Although I take a weekly bootable backup of my Mac, that doesn't really help when I deleted the file I want a few weeks ago. To do that, I would need to make use of Apple's built-in Time Machine functionality, but I don't really want another drive attached on my beautiful zen desk space - and I'm certainly going to pay Apple £200-300 for a glorified router with built-in hard drive.
No, instead I'd like to just throw another 1TB into my home server and be done with it. Unfortunately, this isn’t entirely supported by Apple, so it’s going to need a little hacking together.
What You’ll Need
- A spare hard disk, obviously. At least as large as your Mac primary hard disk.
- A network file server of some sort that you can add the drive to.
I’ll be showing you specifically how to set this up for Windows Home Server or any regular Windows 7 machine that you use to share files on, but you should be able to do this using any form of networked file system. If you have no idea what Time Machine or a Time Capsule is, read this first.
On the Mac
This is the trickiest bit, so we’ll start with that. Open a new Terminal window (you can find this in your Applications -> Utilities folder) and follow the steps outlined below.
Copy and paste the following command into your Terminal window and hit enter. This is a quick little hack that tells your system “I want you to show me unsupported Time Machine volumes”.
>defaults write com.apple.systempreferences TMShowUnsupportedNetworkVolumes 1
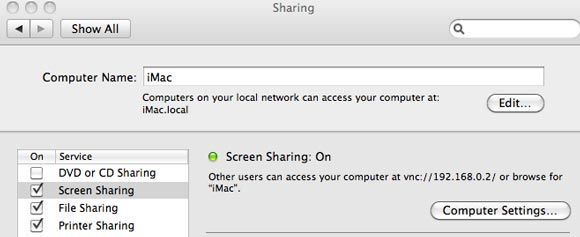
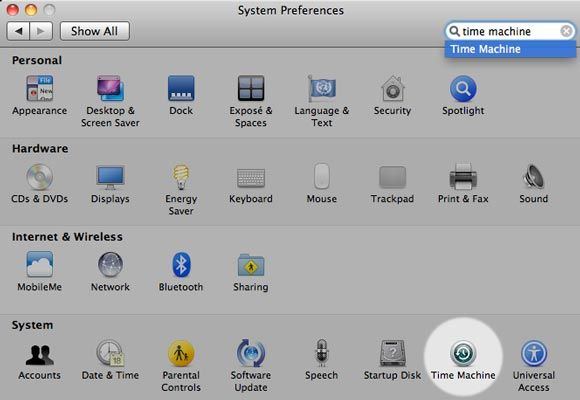
Next, you need to note some information about both your machine name and your network ID. Your machine name is easy - just open System Preferences -> Sharing, and your Computer Name will be listed at the top. I suggest you change this to be something without spaces to avoid random errors later on, then note this down somewhere.
Go back to the terminal Window and type:
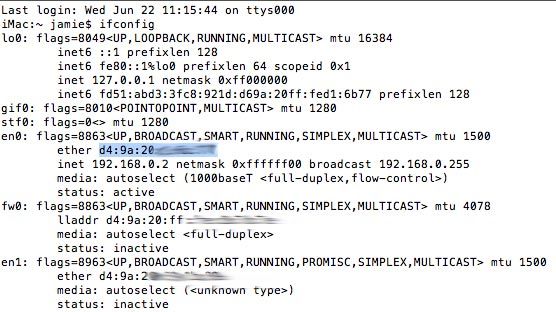
ifconfig
You need to find the ETHER hardware address associated with the en0 network device (the network port on your mac). This is used as a unique identifier, and must be the address from en0 if you actually connect to the Internet using your wireless device. Find the section that details the en0 device, and write down or copy the 6 hexadecimal digit number that’s next to the word ether. Delete all the :’s to obtain your machines unique 16 alphanumeric code. You’ll need it for the next step.
The following command will create what is called a SparseBundle. This is a single file that acts as a kind of disk image for your machine's backups. When you use TimeMachine, it writes everything inside of this file. Remember to replace the appropriate parts of the command with your machine name, ethernet ID and hard disk size (don’t write the square bracket - look at my example below first).
sudo hdiutil create -size [Your hard disk size here]G -fs HFS+J -volname “[Your Machine Name here] Backup" [Your machine name here]_[Your 16 digit alphanumeric hardware ID here].sparsebundle
Here’s the example command that I used for my iMac which has a hard disk size of about 950GB and is creatively named "iMac".
sudo hdiutil create -size 950G -fs HFS+J -volname "iMac Backup" iMac_d49a20d16b79.sparsebundle
A word of warning: Make sure your TYPE THE COMMAND on your own machine - if you try to copy and paste from this site, the character encoding will result in some kind of error, similar to the following:
On Your Network Server
Installing the hard disk in your machine is a little out of the scope of this article, so I suggest you check out my previous article on how to add a second hard drive. As many drives come pre-formatted in FAT32 format, you'll also want to reformat or partition your drive to NTFS. Next we'll set up the network share itself.
Windows 7
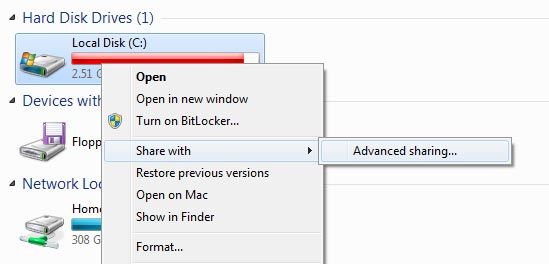
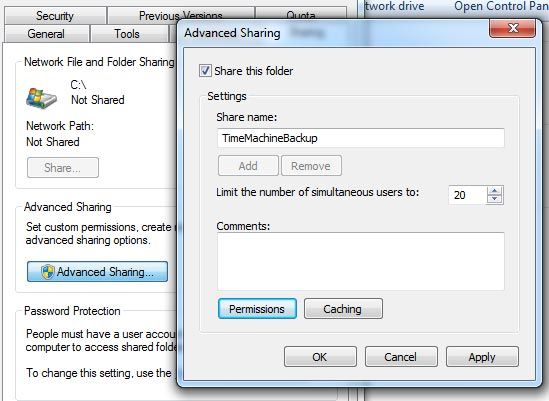
To share a drive or folder in Windows 7, right click and select Share With -> Advanced Sharing.
Click Advanced Sharing again, and in the following dialog check Share this Folder, and give it a name you’ll remember (like TimeMachineBackup).
It’s also essential you set the permissions, as by default users can only READ from the share. Select the user or group you wish to give access to - EVERYONE is the easiest option here - and change the permission at the bottom of the dialog to FULL CONTROL.
Windows Home Server
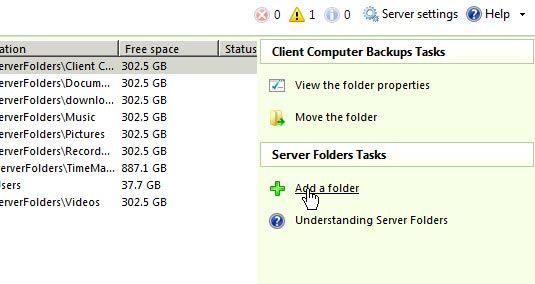
I already run a Windows Home Server for downloading and streaming videos, so it makes sense to add the Time Machine backup drive there. After adding the physical drive to the machine, restarting your server and formatting the drive as NTFS, open up your Home Server Dashboard. On the Server Folders and Hard Drives tab, click the button on the right sidebar that says “Add a Folder”.
Follow the Wizard to create your TimeMachineBackup folder. Make sure you choose to place the folder on your new drive, but if you forgot to do so then no worries as you can easily use the Move Folder function later. Set up permission as you wish, but skip the step about creating backups - you don’t really need a backup of your backup (technically, you probably should, but there’s a limit to how much backing up is humanely possible or worthwhile).
On Your Mac
Finally, head back to your Mac and find the SpareBundle file you created before. If you used the command I showed you, it should be located in the root of your user home directory.
Open up the network share you just created - I sometimes have trouble seeing my homeserver in the automatic network discovery, in which case you’ll need to press COMMAND-K and type in the address smb://HOMESERVER (or whatever your homeserver is called). You can also use the IP address of the machine if you know that instead.
Copy the SpareBundle file you created into your network Time Machine Backup shared folder, and open up the Time Machine system preferences screen.
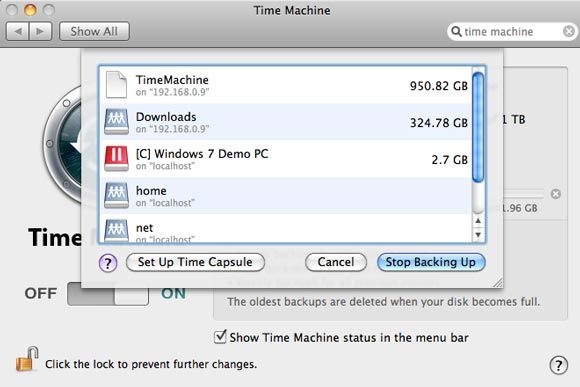
Turn on Time Machine, and click Select Disk. If everything’s gone right, you should now see your backup listed there with the name you gave it when creating the SparseBundle. Select it, and proceed to backup to your new homemade Time Capsule!
I can't tell you if having a Time Machine has saved my bacon yet, because it's still backing up - but I'm pretty confident it's going to be incredibly useful in the future when I least expect it.
Do you have a real Time Capsule, or managed to get your homemade one working? Share your experiences and problems in the comments, or head over to our tech support community site.

