<firstimage="https://www.makeuseof.com/wp-content/uploads/2011/01/amahi.jpeg">

Last week, I introduced you to the Amahi home server and talked about why you might want to set up a home server at all and all the great things it could do on your network. Unfortunately, we didn't have time to go into some of the advanced setup and additional features, so let's take a look at those today.
Specifically, we'll be adding a drive or two into the server, and changing the horrible default theme. Warning: There is a tiny bit of command line work involved, but I've simplified things and found a GUI alternative wherever possible.
Changing Your Home Server Theme With The App Gallery
Let's face it - the basic theme built into your Amahi install is pretty ugly. Like all great things (read: the iPhone) - there's an app for that. Take a look at the app gallery by opening up your HDA through the web interface (http://hda), or by clicking the Amahi dashboard icon on your server desktop. Click on the Apps link in the top right, and you'll be taken straight to the app tab of the setup page. Unless you've already explored the app directory and had a go yourself, you'll probably be greeted by this message:

You can either click on the Available link or the blue + icon to browse the apps. For now, let's choose the Agedashi Theme, click to expand it, and click on the big install button:

After installing, a large link to Manage Themes should appear - click that to take you directly to the appropriate setup tab. You should see two thumbnails now, so click on the second one for Agedashi and your dashboard will instantly transform into something a little nicer, like so:

I'll show you some of the more interesting apps in a future article, but let's move on to more important things.
Adding An Additional Hard Drive
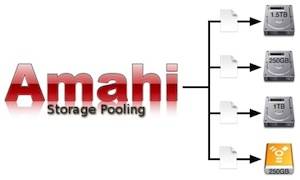
The first thing I wanted to do was to add some of the mountains of spare drives I have into the server and make them useful. Unfortunately, the process is far from plug-and-play level of easy. Take note Amahi developers - you really need to sort this out. The average user might have made it this far, but given how important the simple function of managing drives is in a server, you would really hope it was easier. Anyway, here's how I managed it:
-
- Shut down and physically install the drive into your system. Getting it correctly plugged in is beyond the scope of this article, so I'm going to assume you know how to do this.
- Turn your system back on, make sure the drive is recognized, then log into your Amahi server (not remotely - use the keyboard and monitor actually attached to the server). On the desktop, click on Applications -> System Tools -> Disk Utility.
- On the left hand side, you should see all the drives in your system. Click on the drive you will be adding, and as the screenshot shows, the small erase icon on the right end of the toolbar. You'll need to authenticate with your root password.

-
- Next, click on the xxGB Unrecognized smaller drive icon beneath the main drive that now reads Unknown or Unused. You should see the following screen:

-
- At the bottom, where it says Create Partition Table, select the type Master Boot Record and click the Create button directly beneath.
- The main drive icon should now indicate "MBR Partition Table", but beneath it will say xxGB Free. Click on the smaller icon beneath again, and the Create Partition screen should appear as the screenshot below shows. Label it whatever you want, select the Type to be Linux Ext4, make sure Take ownership of filesystem is ticked, then click Create

-
- At this point, it might look like nothing happened, but it's currently working. If you click on that small partition icon again, you will see it is in the process of formatting your drive as you requested. Leave it to do its work.

-
- Next we will need to get our hands dirty in the terminal. Launch it from the Applications -> System Tools -> Terminal menu.
- Type su - (s u space dash), Enter, and type in your password. Next, type hda-diskmount (hda dash diskmount, no spaces), and hit Enter again. You will see something similar to the following:

-
- Don't close the window, as we need to edit a little file first. Copy the line I highlighted above, the one beginning with UUID. (Right click -> copy). Don't forget the line continues onto the next line and ends with "defaults 1 2". You must copy the whole thing.
- From the terminal, type gedit and hit Enter. This will bring up a standard gedit window, which is basically a text editor. Use the Open button, select Filesystem from the left hand side, then open the folder "etc", and the file named "fstab".
- Paste the line you copied onto the last line of the file. You can see in the screenshot below I already did one earlier, so now I have two.

- Save the file, close gedit, and restart your system from System -> Shutdown -> Restart.
That's it - if you go to the storage tab of the Amahi Setup page, you should see your total storage has now increased.