I'm an Arduino novice. I've used my starter kit for a few simplistic projects with my 12-year-old, but outside of that I haven't ventured further due to my fear of code. Sure, I can knock out some HTML and CSS with the best of them, but when it comes to actual programming, I'm pretty useless.
Scratch 4 Arduino could just change that. It's not coding; but it allows novices like me to build exciting Arduino projects with a visual interface. It's not going to teach you how to how to program, but it does teach fundamental principles that are useful should you decide to progress to "real" programming. It's simple, it's fun, and my son made me look like the world's biggest moron by picking up the syntax and usage of each block while I was still watching documentation videos, in Spanish (later I found some English tutorials that I'll link up as we go).
In short, he was well on his way to building something useful while I was still fumbling through the instructions trying to make sense of it all.
What is Scratch 4 Arduino?
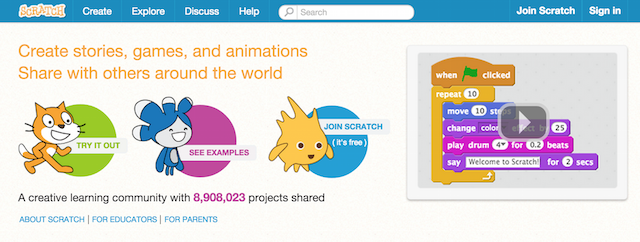
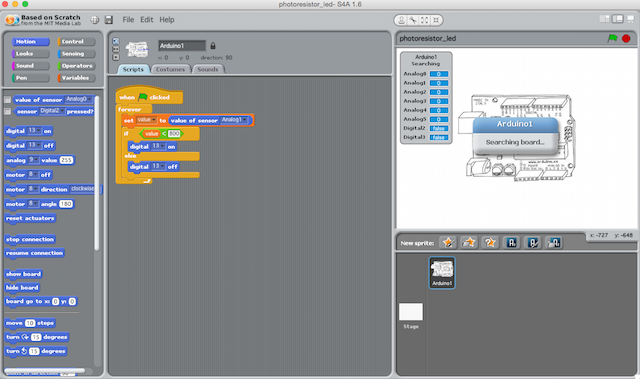
Scratch 4 Arduino - or S4A - is a modification of a visual code builder built by the Lifelong Kindergarten Group at MIT Media Lab. It's a free interactive development environment that features visual blocks that you can drag and drop onto the script area to execute without ever having written a single line of code.
S4A allows you to use these blocks to handle just about any of the tasks the Arduino board can handle, such as managing sensors, actuators, servo motors, and the like. While it does have its limitations, if you're a novice - like me - there isn't much you'll run into that S4A can't handle.
What Makes it Different From Learning to Code?
One of the main problems when coding is the idea that you're looking at a foreign language that doesn't have any contextual meaning. Using the block format as opposed to writing code by hand accelerates learning immensely. My 12-year-old picked it up just by playing around with it while I was still watching the instructional videos.
Once you have S4A installed, and connected to your Arduino, changes you make are reflected on the Arduino immediately, as long as it remains connected to your laptop. Technically speaking, the code is not compiled and "uploaded" to the Arduino, rather it remains running on your machine with only the sensor data being pulled from and outputs going to the Arduino.
A Stepping Stone to Programming?
If you're serious about creating amazing Arduino projects (like an Arduino laser turret), you should definitely learn the intricacies of code at some point. In the mean time, S4A gives you an easy segue into programming by teaching you fundamentals that will transfer over, such as thinking creatively, systematically, and learning reasoning skills that are essential to programming.
In fact, schools all over the world are now integrating Scratch into their curriculum to teach children the fundamentals of programming.
Getting to Know S4A
Scratch currently works on Windows, Mac, Linux (Debian and Fedora 1.5) and Raspbian (Debian for RaspberryPi), so no matter how you intend to use it, chances are there's a version for you. After downloading the Arduino environment and S4A, you'll simply plug your Arduino in to the USB port on your computer, open the firmware file and select your board and firmware through the tools menu of the S4A interface.
From there, you can start dragging and dropping blocks into place and programming your Arduino.
Edit: It's worth noting that while S4A worked admirably the first time I used it, the program was rather glitchy in subsequent attempts. At times it would just close itself, or was frustratingly laggy. I haven't tested the platform on Windows or Linux, but on OS X, it was hit or miss. Let us know in the comments if you experience similar issues.
Where to Start
The S4A website has several beginners projects, and while they're not all that sexy to look at, they'll certainly get your feet wet when it comes to creating code using Scratch. Once you're finished with the on-page examples, the workshop materials download features several more projects as well as additional information on how to use Scratch to create code for your Arduino.
Simple projects, such as building a traffic light and toying with the code to adjust timing of a blinking LED will have you well on your way to learning the interface.
Where to Go From Here
From here, it's all about putting the program to work for you. There are no right or wrong ways to use S4A and you're really only limited by your imagination. If you want to learn more, the following video series does a great job of introducing S4A and showing you just what goes into creating usable code for your next Arduino project. Have fun!
Have you used S4A? What did you like or dislike about it? Do you think it's a good alternative for the code-challenged techies out there (like me)? Let me know what you think in the comments below.
Image Credit: Script on Computer via Shutterstock


