Turn a cheap Raspberry Pi into a network-wide ad blocker. If you're tired of AdBlock Plus slowing your browser down, this DNS-based option is a great alternative that works on any device. Unlike other solutions, this filters the web before it gets to your device, meaning you can block ads on your iPad or Android without the need for jailbreaking or rooting.
A company called AdTrap sells a little white box that blocks ads for $129, but you shouldn't buy it – a $35 Raspberry Pi and an SD card are all you need to make your own hardware ad blocker for every device on your network. Here's why Pi-Hole is a better idea than browser extensions, and how to set it up.
To quickly summarize, you need to do three things:
- Install a fresh version of Raspbian on your Raspberry Pi.
-
Run the following script:
curl -s https://raw.githubusercontent.com/jacobsalmela/pi-hole/master/automated%20install/basic-install.sh" | bash - Set up your devices to use your Raspberry Pi's IP address as their DNS server.
Don't know what any of this means, or why you'd want to use PiHole in the first place? Keep reading – I can explain.
Why Not Just Use AdBlock? Or The Hosts File?
It's unintuitive, but AdBlock Plus and similar tools actually slow your browser down. These extensions use custom style sheets to strip ads, meaning that every site you look at is edited on the fly. This comes at a cost.
"Adblock, noscript, ghostery, and other addons like them cause 90% of the issues we see in the forums," said one Chrome developer on Reddit, adding that such extensions increase memory usage anywhere from 10 to 30 per cent, and page load times by between 15 and 50 per cent.
This adds up quickly, which is why some power users use the hosts file to block ads instead. This approach is better because it prevents known ad servers from ever being loaded on your computer, meaning your browser doesn't have to strip ads out. The downside: there are literally thousands of ad servers out there, and these lists need to be maintained and updated on all of your devices. And then there are mobile devices, on which you can't easily edit the hosts file without rooting or jailbreaking.
Pi-Hole runs on a dedicated Raspberry Pi, meaning you only need to set it up once. It's easy to install, and can update itself using several of the best known lists of ad and malware servers on the web. Let's set it up.
1. Install a Fresh Copy of Raspian
Jacob Salmela, the man behind PiHole, recommends a clean install of Raspbian before setting up. If you've never installed an OS for the Pi before, don't worry: the process is easy.
First, download Raspbian from RaspberryPi.org. Next you need to write the IMG file to your SD card (this will delete whatever is on your SD, so be sure to back up anything important first). How to do this depends on your computer's operating system:
- Windows Users: Use Win32 Disk Imager
- Mac Users: Use Pi Filler
- Linux Users: Use the command prompt instructions offered by RaspberryPi.org.
Use the appropriate tool to write Raspbian to your SD card, then insert your SD card into your Pi. Use an Ethernet cable to directly connect your Pi to your router, and then plug in your Pi's power adapter. Raspbian will boot.
This is a good time to open your router's settings and assign the Raspberry Pi a static IP. How to do this will vary depending on your router, so check its documentation for more information (look for "static DHCP reservation").
2. Run The Pi-Hole Script
Now it's time to set up Pi-Hole itself. If you've got a monitor for your Raspberry Pi, you can use that to set everything up; otherwise, you'll need to use SSH to connect (this is probably simpler).
The default username and password for your Raspian setup are:
- Username: pi
- Password: raspberry
You'll see instructions for changing this password after logging in for the first time, if you're interested.
There are easy ways to use SSH in Windows; Mac and Linux users need only to fire up the terminal/command prompt, then use this command:
ssh pi@IP.address
"IP.address", of course, is replaced with the static IP you assigned earlier.
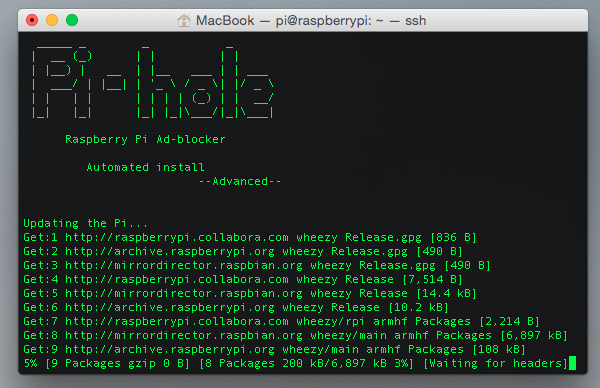
Once you've logged in, all you need to do is run this command:
curl -s "https://raw.githubusercontent.com/jacobsalmela/pi-hole/master/automated%20install/basic-install.sh" | bash
This will download the automated Pi-Hole installer and run it. To summarize, this script will:
- Update your Pi's software to the latest version.
- Install a DNS service and a web server
- Change the settings for these two programs
- Download lists of known adware servers from 7 different sites.
Lean back and watch the process – it explains each step as it goes along. Once it's done, we're almost ready.
3. Set Up Your Devices To Use PiHole
Now that your PiHole is set up, there's only one thing left to do: point your devices to it. We've shown you how to change your DNS settings, but here's a quick rundown of the method for each major platform. Note that these settings are all specific to your local network, meaning if you sometimes switch between a wireless and wired connection you may need to set it up twice.
Changing Your Windows DNS Server
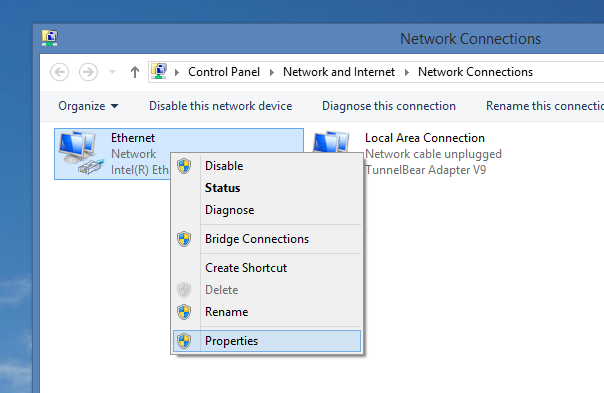
Head to the Control Panel and find "Change Adapter Settings". Right click whatever connection you're currently using, then click "Properties".
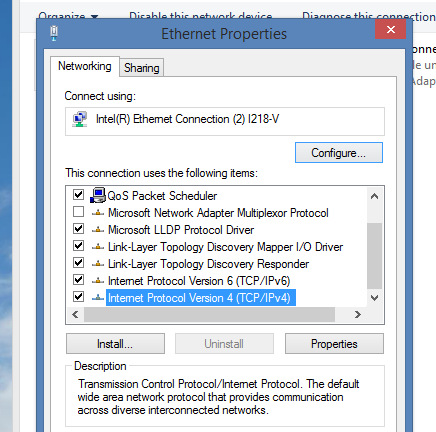
Click "Internet Protocol Version 4", then click "Properties" again.
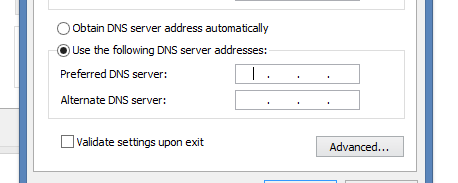
Now, click "Use The Following DNS Servers".
Give your Pi's IP address as the primary (first) DNS server, and 8.8.8.8 (Google's DNS service, in case something goes wrong) as the secondary server.
Changing Your Mac DNS Server
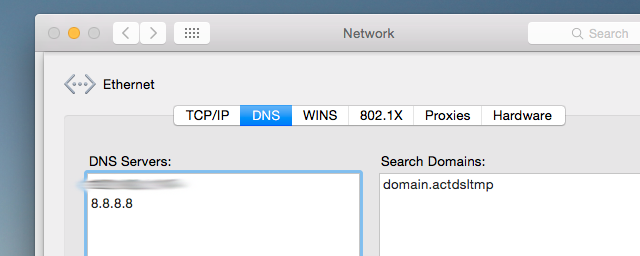
Head to your Mac's Preferences panel, then click "Network". Click your current connection in the left panel, then click the "Advanced" button at bottom-right. Click "DNS" and you'll see the following screen:
Give your Pi's IP address as the primary (top) DNS server, and 8.8.8.8 (Google's DNS service, in case something goes wrong) as the backup.
Changing Your Android DNS Server
Head to your Android's settings screen, then tap and hold your current WiFi network. Tap "Modify network" when the option comes up, then tap "Show advanced options". You'll see a screen like this:
At the bottom of the screen you can set two DNS servers. Give your Pi's IP address as DNS 1, and 8.8.8.8 (Google's DNS service, in case something goes wrong) as DNS 2.
Changing Your iPhone or iPad DNS Server
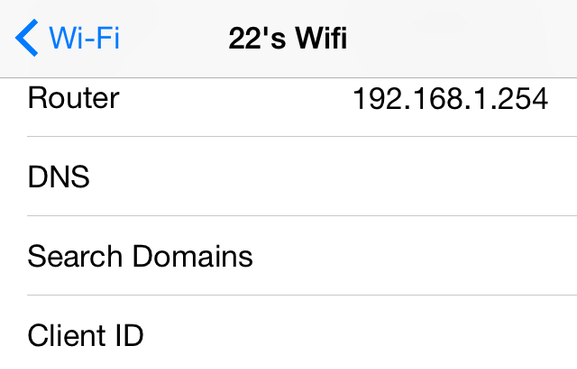
Head to your device's preferences, then head to the WiFi. Next to your home network, click the "i" button to bring up more options. Here you'll see the
Give your Pi's IP address, followed by a comma, followed by 8.8.8.8 (Google's DNS service, in case something goes wrong).
(Linux users: there are just too many distros and desktop environments for me to cover you guys well, and I bet you all know how to change DNS settings anyway).
How Well Does It Work?
In our testing, this setup doesn't let a lot of text or image ads get through. Even major video sites like YouTube stop showing ads altogether once this is set up.
That's not to say no ads get through whatsoever: streaming music services like Pandora, Spotify and Rdio all kept playing ads in our tests. Jacob Salmela himself struggled when he attempted to block Hulu ads with this setup, so it seems like media ads are a different beast entirely. But work is ongoing.
Still, the web is a very pleasant place with this set up, and browser performance is snappy when compared to AdBlock.
Isn't Ad Blocking Evil or Something?
Blocking ads is something reasonable people can disagree on. My friend Mihir thinks publishers need to stop whining about AdBlock; another friend, Matt, thinks AdBlock needs to die to save journalism as we know it. As a journalist the ethical implications of blocking ads obviously trouble me, but as a technologist I just think the technology behind Pi-Hole is fascinating.
This article is more about the cool technology that makes blocking ads possible than the ethical implications of that, and I understand there's a ton of hypocrisy there. But Pi-Hole is so cool, and I couldn't help but share it with you. Seriously: read more about how PiHole works [Broken URL Removed], and you'll see why I think it's brilliant – even if the ethics of blocking ads are murky at best. I hope, if nothing else, getting this working teaches you a bit about how DNS works.
Image Credits: cannon firing a shot Via Shutterstock


