Microsoft Office 2013 takes itself too seriously.
Relly. Earlier versions of the productivity suite had Easter eggs galore and no boss in the world could prevent you from wiling away for a few minutes. The Trustworthy Computing [Broken URL Removed] initiative sucked the fun out.
Microsoft has sobered up. It's time to get back to work and use the Office suite to supercharge our productivity. We have already taken a look at some weird things Excel can do but those wonderful "hacks" could be beyond the everyday user.
So, let's do some everyday things we have never thought of doing.
Maybe, you haven't thought of using Microsoft Office without paying or tried any of its many hidden features. These eight nuggets below can only make our lives easier.
Change Default Search Engine to Google
Since you have mustered the courage, let's dive under the hood and change the default search engine in Office from Bing to Google. Because, though Bing is great, Google Search is just a habit. As Microsoft doesn't give us an easy way to toggle the search preference, we have to hack the Windows registry. It's an easy 5-step process.
Go to the Start menu or press Windows key + Q, type Regedit and press Enter to open the double-paned Windows Registry. The UAC alert screen might pop-up. Click Yes to go ahead.
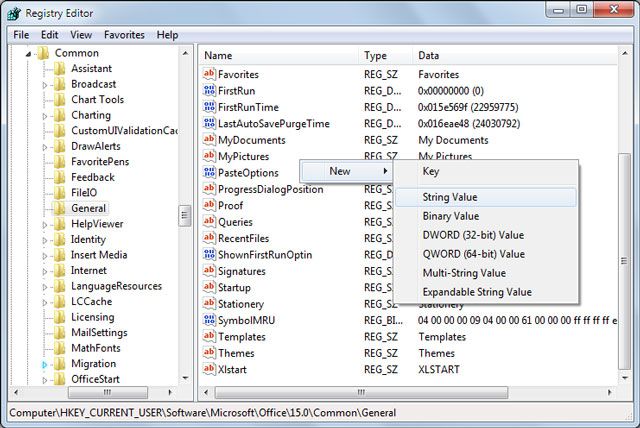
In the Registry Editor, drill down the hierarchy on the left pane to the following key:
HKEY_CURRENT_USER\Software\Microsoft\Office\15.0\Common\General
We have to enter a new value to introduce Google. On an empty area in the right pane: Do a right-click > Click New > Click String Value and name it SearchProviderName.
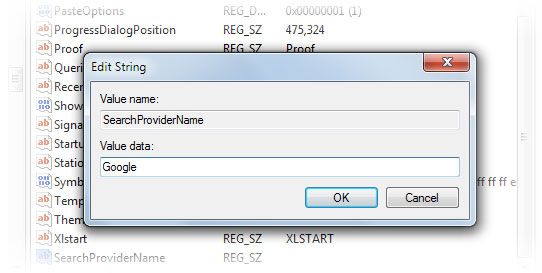
Double-click SearchProviderName. Enter Google in the value data box.
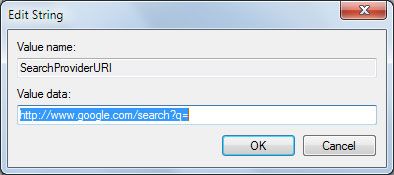
Next, we have to specify the URL. Click New > String Value and name it SearchProviderURI (capital i, not URL). Enter the following URL in the box and then click OK.
http://www.google.com/search?q=
Close Registry Editor and restart Office 2013 to apply the changes. Check with a search.
To revert to Bing, simply delete the string values mentioned above.
Microsoft has detailed the entire process (with Office.com as an example) in a support article. So, if you like DuckDuckGo, then you can change the same registry entries to specify your choice.
Do a Contextual Search with Insights for Office Online
Context. That's what all understanding is all about isn't it! Search engines are also attempting to up their game by trying to understand the user's intent. Is she searching for information on Mars the red planet or Mars the dark brown chocolate?
This feature becomes available for desktop users with the upcoming Office 2016. For now, you can try it on Microsoft Office Online.
Insights seamlessly gives you the information within the Office app without having to open a new tab in your browser to do a search. You can bring the information into the document you are working for without getting distracted by distracting search results on a browser page.
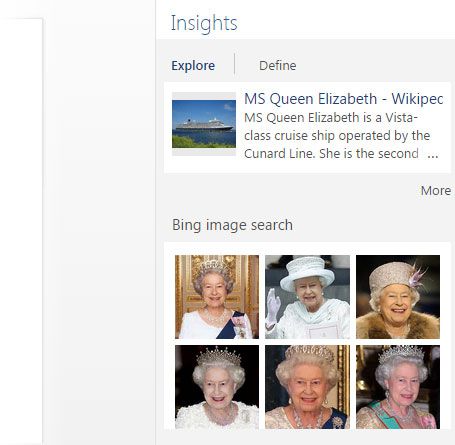
Also, Office Online taps into the power of Bing to bring in relevant information from sources like Bing Snapshot, Wikipedia, Bing Image Search, Oxford English Dictionary and the web right alongside your document. You can do a quick lookup or a more thorough check of facts and figures with the help.
Try Insights. Insights for Office is available in Word Online in the Editing View (View > Editing View).
Right-click on a word or group of words you want to know more about. Select Insights from the menu (or the Review tab > Insights).
You can also use the Tell Me box to type the topic that you want Insights to search for.
The information is neatly displayed on a pane to the right of the document. You can bring any information you want into the document you are working on.
The Microsoft Blog goes behind the scenes and tells you more about the Insight experience.
Disable the Mini Toolbar (If It's an Annoyance)
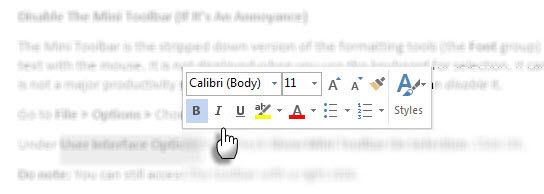
The Mini Toolbar is the stripped down version of the formatting tools (the Font group) available from the Ribbon. The Mini Toolbar makes an appearance in Word, Excel, and PowerPoint when you select text with the mouse. It is not displayed when you use the keyboard for selection. It can be a handy shortcut or a nagging annoyance.
I find it an annoyance just sometimes when it obscures an Excel cell. Though it is not a major productivity speed bump, it is nice to know that you can disable it.
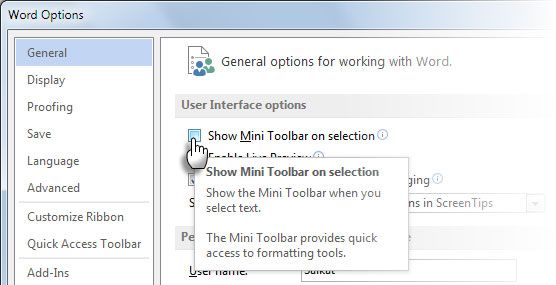
Go to File > Options > Choose the General tab.
Under User Interface Options > Uncheck Show Mini Toolbar On Selection. Click OK.
Do note: You can still access the toolbar with a right click. Do you find it an annoyance or a help because it saves you a few trip to the Ribbon?
Make Microsoft Office Talk (Or Speak)
With the Speak text-to-speech feature, you can make Word 2013 play back your content as speech. The applications use the installed TTS engines to generate the speech. If you are using the English version of Office, the English TTS engine is automatically installed. Speak works with Word, Outlook, PowerPoint, and OneNote.
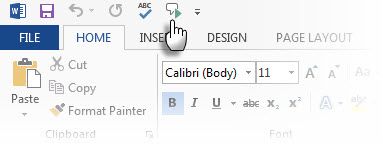
Add the Speak command to your Quick Access Toolbar for speedy access.
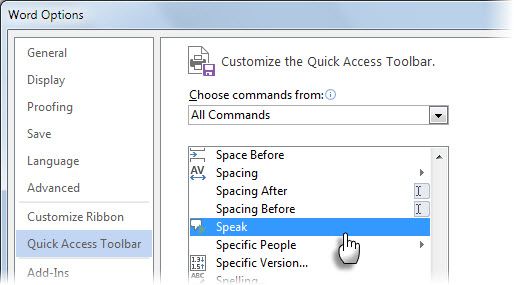
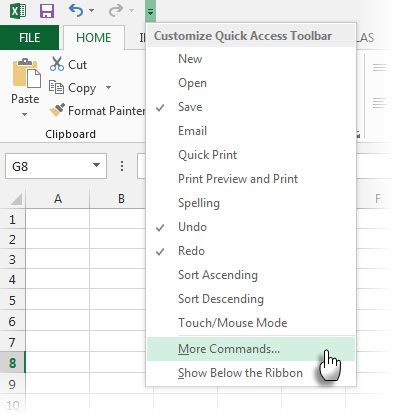
Customize the Quick Access Toolbar by clicking the little arrow next to it.
Click More Commands. From the Choose commands list, select All Commands. Scroll down to the Speak command and add it to the Quick Access commands list on the right.
To start the Speak command for single words or blocks of text, highlight the text you want to hear, and then click the Speak command.
It could be a good way to multi-task while listening to your Outlook Inbox, revising your study notes in OneNote, or "aurally" editing a document in Word.
Discover the Microsoft Word Calculator for Quick Math
If Google can be used for scientific calculations, why should Microsoft Word be left behind.
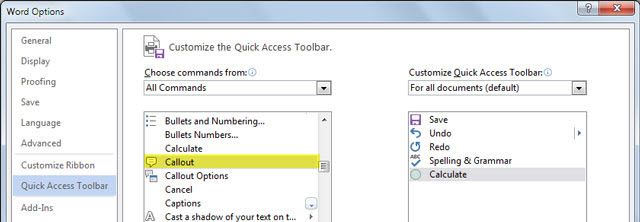
Go to File > Options > Quick Access Toolbar. Choose All Commands and click on the Calculate Command and Add to the Quick Access Toolbar. Click OK.
A grey circle (Formula) appears on the Quick Access Toolbar.
The calculator handles the basic functions addition, subtraction, multiplication, division, percentages, exponentiation, and roots. A small advantage of the calculator is that you can use it anywhere in the Word document. Type your arithmetic expression. Select it and click the Calculate button. The answer is displayed in the status bar below.
It is useful for totaling:
- Numbers in Word table columns or rows.
- Numbers in sentences. For example "The entourage includes 5 assistants 2 stylists and 12 bodyguards." When the operator is not mentioned, the calculator ignores the text. Including characters like =, – or * leads to a syntax error so I excluded it from the above example.
The Calculate command has existed since Microsoft Word 2003. It is useful for little everyday uses. Heavy duty users will be happy with the arrival of Math Input Microsoft Office 2016.
Change the Shape of a Comment Box in Excel
Give the boring comment box any shape you want. It can be surprisingly useful for doing things out of the ordinary. You have to dive into one of the hidden commands and add it to the Quick Access Toolbar.
On the Quick Access Toolbar, click the tiny dropdown arrow to open the menu.
Click on More Commands to go to Excel Options and the Quick Access Toolbar tab.
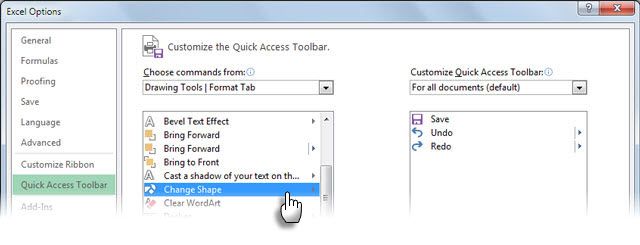
From the Choose commands from dropdown list, select Drawing Tools | Format Tab.
From the list, select Change Shape and add it to the Quick Toolbar options on the right.
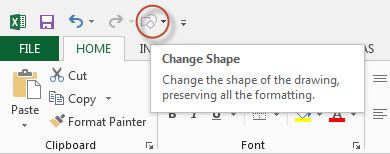
Click OK. The new Change Shape icon is displayed in the toolbar.
To change the shape of a comment, follow these three quick steps:
- Show comments. Right-click the cell and select Show/Hide Comments.
- Click the comment's border to select it as a Shape (Keyboard shortcut: Ctrl-click the comment).
- Click the Change Shape button on the Quick Access toolbar and choose a new shape for the comment. You can format the comment box (Right Click > Format Comment) to make it more striking.
Use Microsoft OneNote for Presentations
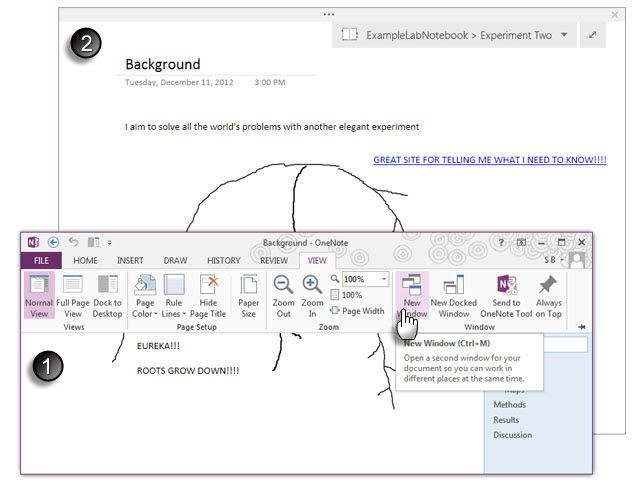
Yes, you probably didn't see this one coming. OneNote is the digital notetaking Jarvis in your hectic life. The ability to open multiple OneNote windows simultaneously is just one of the ways to take advantage of OneNote. Use it for collaborative brainstorming or as a presentation medium via an office projector.
Open OneNote and the page you want to display. Click View > New Window to open a mirror page.
Turn the mirror page into a Full Page View by clicking on the double headed arrow on the right. The Full Page View removes the distraction of the menu. Display the full page with a projector for the team to view.
Continue to manage the page with the normal OneNote window you have open on your computer. For instance, you can use OneNote's Use Pen as Pointer feature like a laser pointer to highlight key points on the note. You can scribble to annotate any point on the page. Any scribbles automatically disappear after a few seconds, so your notes stay neat.
PowerPoint in High-Definition (HD)
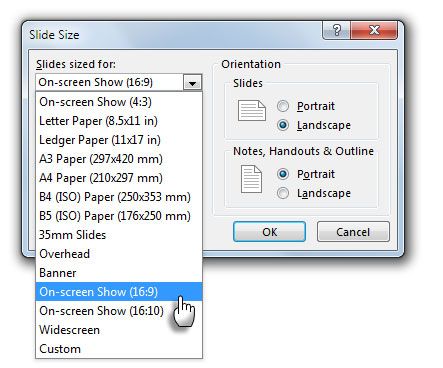
The default PowerPoint aspect ratio is 4:3. Wide screen high-definition monitors (Plasma, LED TVs) and new projectors typically have aspect ratio of 16:9. 1280×720 and 1920×1080 are common resolutions for these screens. If you take a default PowerPoint slide and display it in a wider screen, you will notice black space on the side. Design your slide according to the aspect ratio of the display.
Here's how you can set up your presentation or a PowerPoint video for a high-definition display before you start designing the slides.
Go to Ribbon > Design > Slide Size > Custom Slide Size.
Set the slide size as On-screen Show (16:9). Of course, this depends on the resolution you are aiming for in your presentation.
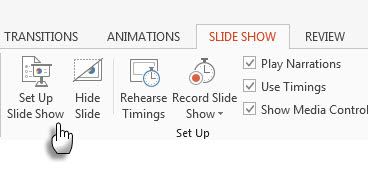
After creating your slides, set up PowerPoint for display. Go to Slideshow > Set Up Slideshow.
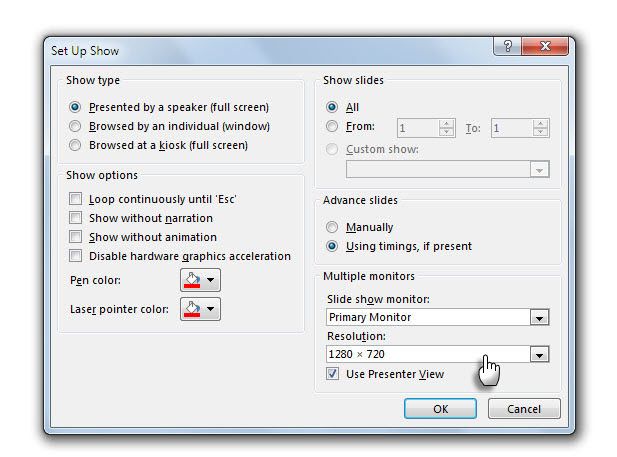
In the Set up Show dialog window, select Primary Monitors from the dropdown in the Multiple monitors group.
Select the Resolution from the next dropdown. Click the OK button and apply the new resolution to the slides.
PowerPoint includes many packaging options, from the simple slideshow to a very high quality video format for display in high-definition monitors. Here's how you can save your presentation as a video.
What Other Cool Tricks Did You Discover?
Microsoft Office turns the Pareto Principle on its head. 80% of users only use 20% of the features. If that's true then there is a lot of discovery to be done, yet. We will continue to bring you more tips and tricks hidden inside the Office tools. But your own favorite tips and tricks could be a huge trigger.
Tell us about the coolest or the more unique things you have discovered while using Microsoft Office. Let's go over to the fraction of users who can call themselves experts one tip at a time.
Image Credit: looking over a wall by Rob Hyrons via Shutterstock


