Digital photography has essentially replaced traditional film for the average person. The advantages of digital cameras for most users are enormous. Digital cameras are easier to use and the photos are easier to share. A photo can be sent to your family and friends with just a few keystrokes.
One common issue, however, is the creation of physical copies of your photos. Attempting to quickly print a few digital photos usually results in grainy images on paper soggy with ink. This can be avoided by making a few adjustments to your photos and printing process. Here's 4 things you should be watching out for when printing out your snaps.
Adjust The Pixels Per Inch
Resolution is important for photos that you'd like to print out. The number of pixels that are packed into each inch of an image will determine how crisp the image looks. Unfortunately, computer monitors do not provide a good idea of how an image will look when it is printed. The resolution which a monitor can display is actually quite small compared to the resolution a printer can handle.
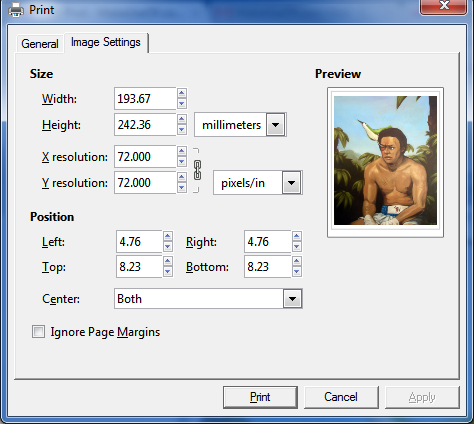
Most low-resolution photographs obtained online will pack in under 100 pixels per inch (PPI). A sample of photos I downloaded at random from Facebook, for example, had between 70 and 95 PPI. You'll want around 300 PPI on any photo that you'd like to print out and frame. You can adjust the pixels per inch in the print options (the example image above is from GIMP), but be warned that doing so will shrink the physical size of an image.
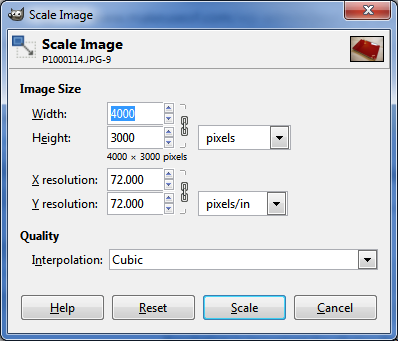
For example, a 640x480 image at 72 PPI will be about 8.9 inches wide and 6.7 inches tall. At 300 PPI, however, the image will be 2.1 inches wide and 1.6 inches tall. Which, of course, isn't very useful - and brings up to our next tip.
Use High-Resolution Source Images
Since PPI is important, and it has an impact on the physical size of an image, you'll need to use high-resolution images if you want to be able to print a clear picture of usable size. Let's take a standard 8x10 photo as an example. At 300 PPI you'd want a resolution of 2400x3000. That's nothing to sneeze at, and because images are usually shot in a 4:3 or 16:9 format, you'd actually need a source image with an even larger resolution which could then be cropped down.
Fortunately, most digital cameras on the market can provide an original source image with a resolution more than adequate for most home users. Finding a camera that's up to the task becomes more difficult when printing very large photos, but most home users won't have a printer suited to anything larger than an 11x14, so this a worry that is usually limited to photography professionals.
Buy Glossy Photo Paper
Paper is perhaps the largest hurdle when attempting to translate an image from a digital format into a physical photograph. A digital photo is always displayed on a monitor or other device that has its own light with which to display images. Photos don't - they rely on ambient light - and as a result digital photos look dull when printed. Standard paper often can't handle the motherload of ink required to print a nice photo, either.
You'll want to find a nice, high-gloss paper for most photographs. The gloss finish helps ensure that photos have a vibrant appearance, and such paper is non-porous, which means it doesn't absorb ink and become warped. Given the wide variety of papers available, the easiest path is usually to find a type of paper recommended by the manufacturer of your printer. You don't have to, however, and there is fine paper to be had from other brands. Be sure to check the maximum paper thickness your printer can handle, however, because high-gloss photo papers are too thick for use by some printers.
Adjust Your Printer's Settings
All printers have various settings that determine how they behave. Most home printers have default settings that maximize speed when printing black-and-white documents, as this is the most common usage. Ideally, the default settings will improve the speed at which your printer can operate and should reduce ink usage.
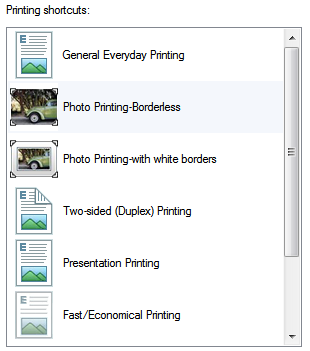
These settings are often not the best for printing photos, however. By going to the Devices and Printers section of your Windows Control Panel you can find your printer. Right-click on it and then navigate to Printer Preferences. In the Printing Shortcuts section you will find a number of pre-sets that can improve photo quality. The options available depend on your printer.
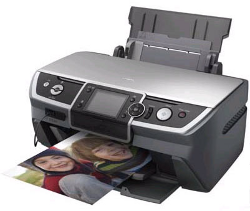
These may not be the only settings you can adjust, however. You may have installed additional software when you bought your printer that will offer more options and pre-sets. The printer itself may also have settings - most modern printers come with a tiny LCD display, through which you can access a number of options.
Conclusion
These simple tips may leap your printing know-how into the company of professionals, but it will significantly improve the quality of photos you print. Without making these adjustments it is likely that your print photos will look dull, lifeless and blurry. Once you've used these tips, however, you should be able to print out photos that are will look great once placed on your mantle or in your wallet.


