Adobe Photoshop brushes are a handy way to add interest to your designs. With the sheer variety of Photoshop brushes available, there's really no limit to how you can use them in your creative ventures. And best of all, just as you can create your own custom patterns, you can just as easily design and create your own brushes.
The first step to creating a brush in Photoshop is choosing your shapes. There's a variety of ways you can make shapes in Photoshop that would be suitable for a brush.
You can use the basic Shapes panel if you want to create a brush made up of squares, circles, stars, etc. You can freehand draw the shapes, made easier if you have a Wacom tablet or other kind of tablet that allows you to draw directly in Photoshop. You can use existing, basic brushes to create more robust brushes. You can also use text, and you can even use any shape or icon online (provided its copyright allows it) to create a brush.
I'm going to walk you through each of these scenarios, to give you a better idea of which method to use depending on what kind of brush you want to create.
Create Brushes With Other Brushes
The easiest way to create a custom brush is by using the brushes that ship with Photoshop. For example, the basic round Photoshop brush can be used to create a confetti brush. Here's how.
Create a new document in Photoshop. I went with 500 by 500 pixels for my canvas, but you can make yours larger if you want. It's recommended not to go over 1,000 pixels though, as this can slow down Photoshop.
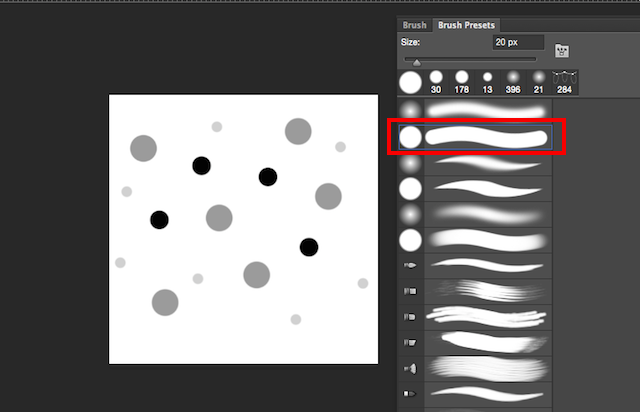
Select your Brush tool (keyboard shortcut: B) and choose one of the first brush presets available. You can either choose these from the menu at the top of the page, or by going to Window > Brush Presets to pull up the full brush panel.
Make sure to choose a hard round brush. Hard brushes are a full, evenly color circle, whereas soft brushes have a haze around them. You can see the brush I selected in the screenshot below.
After you've selected your brush, you can adjust the size by using the open bracket to make it smaller or the close bracket to make it bigger. Using shades of gray and black, create a pattern of various sized and toned circles on your canvas.
Using these shades, along with few extra settings, you can have a variety of colors come out of one brush, which is particularly useful for confetti brushes.
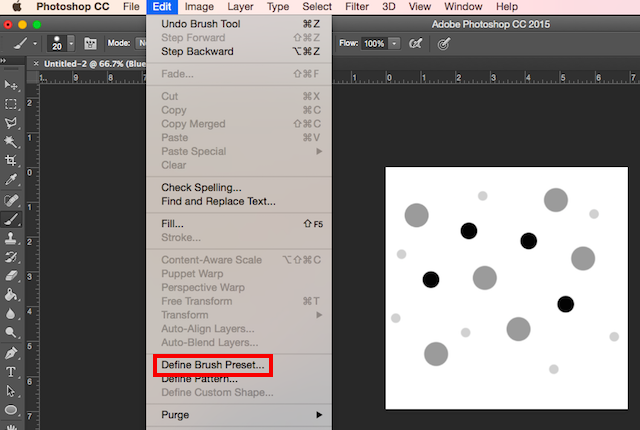
Once you like the look of your pattern, go to Edit > Define Brush Preset. You can choose a custom name for your brush and hit enter.
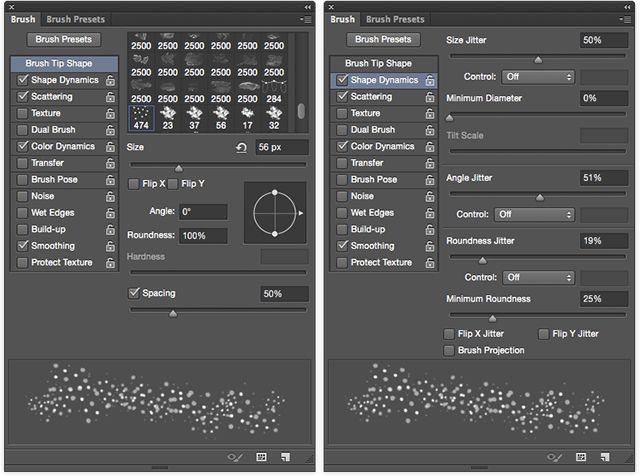
If you try to use your brush now, it won't get the desired results, as there are a few settings to tweak before it really behaves like a confetti brush. Go to Window > Brush to open up the advanced brush settings. Scroll to the end of the brushes where you should find your new brush. Make sure it is selected and then go to the Brush tab.
Here you'll find a bunch of settings that you can tweak. A lot of these settings will give your brush a much more random feel to it. These settings are suggested, but feel free to make your own tweaks to really make this brush your own.
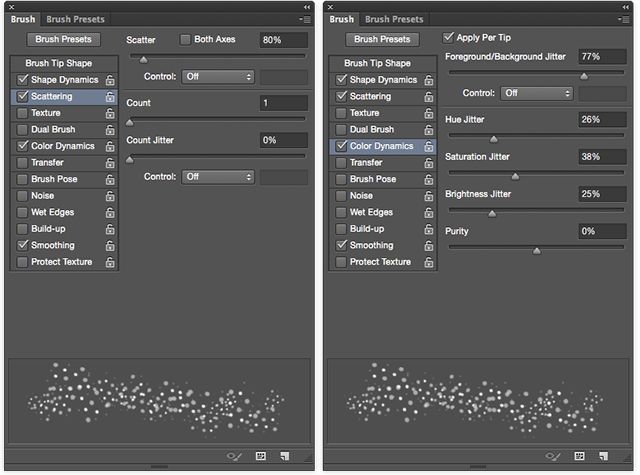
As you make these changes, you should see the preview of the brush change which will help you make your tweaks. For Brush Tip Shape push the spacing up to around 50%. Check Shape Dynamics and scroll the Size Jitter to about 50% - this will ensure that there is a variety in the size of the circles. To give it a less repetitive look, also adjust the Angle Jitter. I went with around 50%. If you don't want perfectly round circles, you can also adjust the roundness jitter. I went with around 25%.
Check Scattering and scroll the Scatter until you get a nice spacing between the shapes - I went with around 80%. Check Color Dynamics and slide the Foreground/Background jitter to around 50%. This will allow you to get a variety in your colors by selecting both your foreground and background colors in the tools panel. You can also play around with the Hue, Saturation, and Brightness, and just get a sense for what you like.
Using the brush at two different sizes, with a bright pink as my foreground color and green as my background color, resulted in the following:
Create Brushes With Shapes Created in Photoshop
You can also create brushes using shapes you've created in Photoshop (or if you have access to it, in Illustrator.) For example, if you want to create a snowflake brush, you could create the snowflake in Photoshop and then go through similar steps as above. You can also use this method with other shapes like leaves.
To find out how to make a snowflake in Photoshop, check out the tutorial below:
Once you've created just the one snowflake, the same advanced settings used above can get you a very randomized look. These are the settings I used:
Under Brush Tip Shape, I just adjusted the Spacing. For my purposes, I went to about 120%. For Shape Dynamics, I set the Size Jitter at 100%, the Minimum Diameter at 0% and the Angle Jitter at 100%. You can also adjust the Roundness Jitter if you want, so that the snowflakes look like they're at an angle. I personally don't use this method, but if you choose to, you could try around 50%.For
For Scatter, I made sure Both Axes was checked and pushed the Scatter slider all the way up to the to 1000%. Other optional adjustments you can make include the Color Dynamics and under Transfer, the Opacity Jitter. For snowflakes in particular, the Opacity Jitter can have an interesting effect so you can set it at anywhere around 20% to 50%. And by default Smoothing should already be checked.
Watch the following video for some good tips on how to use your snowflake brushes:
Create Brushes With Images or Icons
If you're going to create a brush using an image or icon you found online, make sure that the copyright allows you to use the image in the way that you plan to. There are lots of places you can find free images that can be used as brushes. Sites where you can download free vectors like Vecteezy and Pixabay are particularly useful for these kinds of exercises.
So if you want to add flourishes to your design or want to create a splatter or watercolor brush, this is probably the best way to do that.
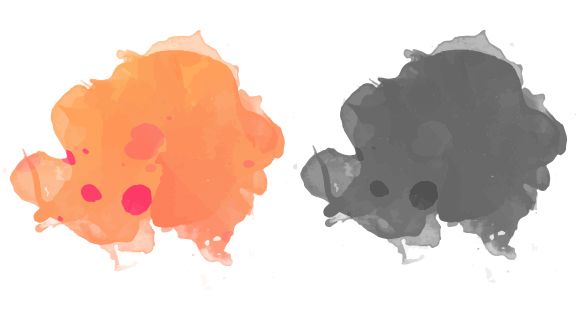
With watercolor brushes, for example, you could use a photo of a watercolor stroke. If you want it to be completely original, you could take a photo of your own watercolor strokes and use them. If not, you could use a photo online, like this one that I am using which I downloaded here, opened in Illustrator, and just copied and pasted the orange watercolor splotch to Photoshop. (When choosing your image, make sure there is white space surrounding the entire paint stroke, otherwise you'll end up with hard edges on your brush.)
Once you have your watercolor stroke, you're going to want to tweak the image slightly. Change it to black and white (keyboard shortcut: Command/Control-Shift-U). Play around with the brightness, contrast, and levels to bring out more variety in the gray shades.
In the same way that you created the brushes above, just hit Edit > Define Brush Preset.
To make it look even more like a watercolor brush there are a few extra adjustments you can make in the advanced settings. The first step, under Brush Tip Shape is to set the spacing to 1. Under Shape Dynamics, I set my Size Jitter to 15%, and my Angle Jitter to 50%. Under Scattering, I set my Scatter to 45% . Under Transfer, if you're using a Wacom tablet or pressure sensitive tablet like the iPad Pro, you can also make sure that Pen Pressure is selected for the control of the Opacity Jitter and Flow Jitter.
Depending on the shape of your brush, you can experiment with various Opacity and Flow settings. (And even if you don't have a tablet, you will see a difference in the final result with this setting turned on.) I went with around 45% for each. I also made sure that Wet Edges was checked. (You can also adjust these settings on Photoshop's default watercolor brushes to get a slightly more realistic watercolor effect.)
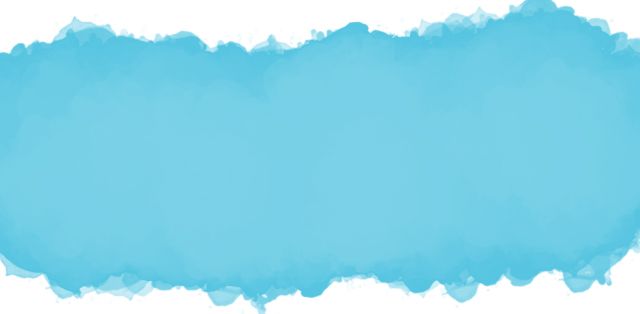
This was the final product with the brush I created:
How to Share Your Brushes With Others
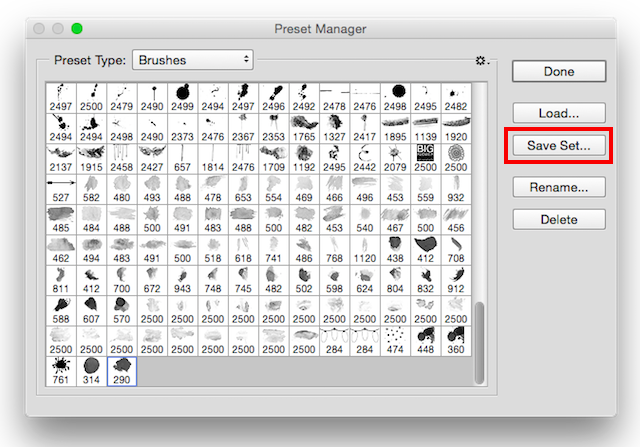
If you would like to share your creations with other people, you can export your brushes to be used by anyone with Photoshop. To save your new brush, go to the Brush panel, and click the menu button, and select Preset Manager.
From here you can scroll down to your new brush, click on it, hit the Save set button, and navigate to where you want to save the brush on your computer. It will be saved as an ABR file, which you can then share with anyone online.
If you'd prefer not create the brushes yourself, there are lots of great sites offering Photoshop brushes and most of them offer free brush downloads.
Do you have any tips or tricks for creating brushes in Photoshop? Share them with us in the comments.

