Retro gaming is surprisingly popular. Like a penchant for classic rock music and 80s TV, it is a nostalgia that we can attribute to the longevity of recorded media, and like old music and TV, retro gaming has been given a good shot in the arm by digital technology. But while it's fun to play with emulators on your desktop PC, you'll get even more out of the experience if you're using a Raspberry Pi.
It's easy enough to build an arcade-style case for a full PC… but it's far easier with the compact and lightweight Raspberry Pi.
We've previously looked at how you can configure a Raspberry Pi to play retro games, using disk images and emulators, as well as demonstrating how to setup game controllers.
These days, you can buy a Picade kit, a well-produced table top arcade box for your Raspberry Pi. It's a small piece of kit, with an 8-inch LCD display, but it's not the only way to build an arcade cabinet for your Raspberry Pi.
What Should You Use for a Retro Gaming Project?
Our previous retro gaming projects for the Raspberry Pi all use the RetroPie system, but in fact we now have several alternatives that DIYers can choose from. Along with RetroPie, you can also try:
PiPlay – formerly known as PiMAME, this is another dedicated Raspberry Pi image, with 13 emulation systems included. Here's a taste:
Lakka.tv – primarily for desktop platforms, Lakka also has versions for the original Raspberry Pi and the Raspberry Pi 2.
Ignition.io – currently in beta, focuses on all games for the Pi (retro and online) and adds modern features like friends lists, and achievement logging.
The following DIY arcade machine projects for the Raspberry Pi can use any of the above operating system images. Will you find a project to copy or inspire you here? Let's find out.
A Full Size Raspberry Pi Arcade Machine
While you'll probably decide that a cocktail arcade or bartop solution is more achievable, you probably want to see how to build a full size arcade cabinet for your Raspberry Pi first.
Portable Raspberry Pi Arcades
The Raspberry Pi is so compact and portable; it makes sense that you should be able to take a portable PiCade-style project with you. The following four DIY Raspberry Pi arcade cabinets should give you some good ideas in this area.
The Porta-Pi Arcade
A portable Raspberry Pi arcade machine that comes in kit form (from $75), the Porta-Pi Arcade is a good option if you want an arcade machine that doesn't take up vast amounts of space in your home.
The problem is -- portability aside -- once you've got into gaming on this little device, you're probably going to want a full sized replica!
Go Portable with the Solar Powered NaCade
The "naked" NaCade is a similar device, this time built with 3mm acrylic sheet, rather than wood. This Instructable also uses a Pi Cobbler breakout board, but the entire build cost over $300. This might not be the route you want to take your build!
Micro Pi Desktop Coke Can-Sized Cabinet
With a 2.5-inch LCD and a mini joystick, you've probably already guessed that this project is a bit on the small size. Employing 3D printed parts, the designer observers "I always wanted a tiny arcade machine for my desk, I decided to build it as small as possible."
As it's around the same size as a can of soda, it's fair to say that if it had been any smaller, this mini Raspberry Pi gaming cabinet would have been unplayable.
Mini Galaga Arcade
Unusually for a Raspberry Pi arcade build, this project uses a CRT display for the full retro effect. In the spirit of this section, however, it is a very small CRT! This video outlines all of the steps required for building a similar project, and the end results are certainly impressive.
Theming the arcade machine is a good idea, something that we take a look at below.
Cocktail Arcade Tables Become Coffee Tables
Back in the retro days, for many gaming was something that happened in a bar or in an arcade, rather than at home. Cocktail arcade tables were quite popular in clubs and bars in the 1980s, but these days they're less common in these places.
While still built by specialist manufacturers, the focus now is on homes, with the cocktail arcade tables now styled as coffee arcade tables.
Here's an original.
Meanwhile, this Instructable video demonstrates how to build a similar cocktail arcade table using a Raspberry Pi and an LCD TV, plus some parts cut to the design of a 3D model.
You don't have to have everything cut to your own specifications, however. Coffee tables make good alternatives!
PiK3A – an IKEA Coffee Table
Your Raspberry Pi-powered arcade machine will look superb in an IKEA coffee table. This low-budget conversion defies all logic by looking far more expensive than it really is, and uses an Arduino to manage the joystick controller, and teams up the Raspberry Pi with a 17-inch LCD TV. You can find out more at the Element 14 website (free signup required).
The Coffee Table Pi
An alternative is the Coffee Table Pi, as demonstrated in this Instructable. In this build, recycled or reclaimed wood can be employed to build a coffee table (or perhaps, just an old coffee table) but to dimensions larger than the IKEA option allows. There's space here for a 24-inch LCD, and the bigger the table, the larger more space you have for your joystick and buttons. The Coffee Table Pi is finished in black stain and French polished with shellac.
The MakeUseOf RetroPie Arcade Cabinet
Finally, we should give a mention to our own RetroPie Arcade Cabinet, produced by Tyler Gentry.
While it might appear from the video intro that Tyler is playing the arcade machine in the nude, he then goes into full details as to the hardware used for the build, and illustrates the process for the entire cabinet build.
Most notable about this project is the removable screen; essentially, the build assumes that you don't want to dedicate a TV to your RetroPie Arcade Cabinet, but rather have the option to add and remove the monitor as required.
Decorating Your Finished Raspberry Pi Arcade Machine
Decorating an arcade machine requires decals, which can either be custom designed (various businesses offer this, such as www.stickeryou.com) or ordered from a company like GameOnGrafix.com. Want some ideas on how these decorations might improve your Raspberry Pi arcade machine?
Galactic Starcade
This build calls itself the Galactic Starcade, and employs a handsome decal to add that final, professional touch. Additionally, the name "Galactic Starcade" suits pretty much any game you can think of!
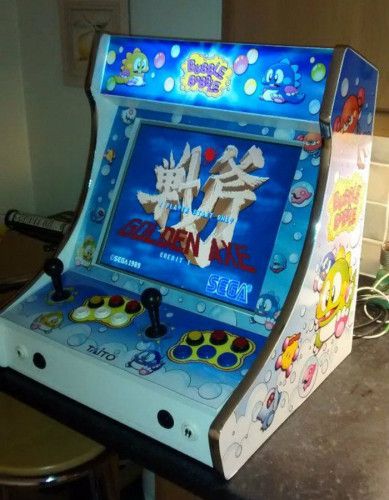
Bubble Bobble Bartop
On the other hand, Bubble Bobble design on this bartop build suggests that only one game can be played. Of course, this isn't the case with PiCade projects at all, and given how good the decals look, we think you'll agree that it probably doesn't really matter anyway!
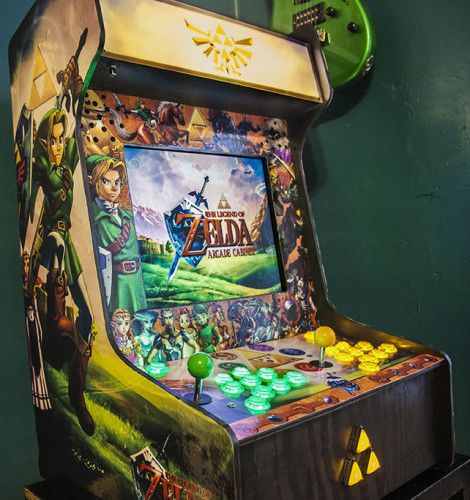
Legend of Zelda Bartop
This bartop instructable is probably the best build of such a design (essentially a half-sized arcade machine that is secured to a bartop) and comes with the added bonus of a stunning Legend of Zelda-themed decal.
While all of these decal examples are stunning, we’re particularly impressed with this Zelda-themed decoration.
The Wine Barrel Arcade
Finally, a custom build that doesn't use decals but does employ some particularly unusual reclaimed wood. Developed by Matt Shaw, the Wine Barrel Arcade project uses an old oak wine barrel as a base, with a cleverly designed MDF box sitting on the side to house the joysticks and buttons.
http://imgur.com/a/wzua5
Chatting to Kotaku, Shaw revealed the build took a total of 6 months, at 3-4 hours a week, taking place between work assignments and fatherly duties. It wasn't too expensive, either.
"I reckon it's cost me $200 as I’ve only had to pay for the [Raspberry] Pi, buttons/sticks, paint, cables and I did recently grab a wireless keyboard that works with it."
The chances are that you don't have access to an old oak wine barrel. But this is a good example of how to repurpose pretty much anything you can find for a DIY project.
Raspberry Pi 3 or Pi Zero?
Which Raspberry Pi do you plan to use with your PiCade-style project? You might use the original, although these are difficult to come by. For power and stability, the Raspberry Pi 3 is your best option. Alternatively, and to keep prices down, you might opt for the Raspberry Pi Zero, which is compact enough to slot into some very small retro gaming projects.
Of course, you don't have to have a Raspberry Pi if you want some retro gaming action. You might employ an older PC for your arcade cabinet build, or an old games console (most of which can be persuaded to work with modern TVs) or even an Android device.
Have you built a retro gaming cabinet for your Raspberry Pi? Got some good inspiration from any of these? Tell us about it in the comments!
Image Credit: arcade game machine by archy13 via Shutterstock


