Thinking of switching from your Windows-based PC to a Mac? Learn everything you need to know in order to make that transition painless. Read "Switched: The Convert's Guide to the Mac and OS X". From MakeUseOf staff writer Tim Brookes, our latest guide explains how to use a Mac from the perspective of a lifelong Windows user.
A Guide to the Mac - Table of Contents
1. Which Mac & Why?
1.1 Why choose a Mac?
The reasons for deciding to buy a Mac over a PC are entirely personal, and your own pro-Mac arguments might not align with someone else’s. That said, there are a few things that Mac users generally enjoy that users of other operating systems might not, including unique features and a perceived superior user experience. Over the past few years the gap between the PC world and Mac world has narrowed, as Apple’s steady growth in the home computer market is bolstered by their success with devices such as the iPhone, iPad and iPod.
Mac OS X is the operating system that powers all Apple computers, and it’s currently in its eighth major update, version 10.8 codenamed ‘Mountain Lion’. According to the terms of agreement that come with the OS, Mac OS X cannot legally be installed on a non-Mac computer. More to the point, users who often try to do so have a less-than-satisfactory experience as they run into problems when the OS encounters unfamiliar hardware. Access to Mac OS X is what convinces many that a Mac is the right choice for them, but quality hardware is also important.
In addition to designing the software, Apple is also very picky about the hardware it uses in its machines. What are for most computers two separate entities – hardware (processors, RAM and other components) and software (the operating system) – for Macs are designed in unison. This means that most Mac users enjoy a smoother ride than the average Windows user, as the operating system they are using has been designed solely for use on a handful of hardware configurations (one of which they own).
This design principle has led to a culture of Apple hardware and software that “just works”, though this is due to the control Apple has over the ecosystem – something some people see as a drawback. For the consumer, however, choosing to buy a Mac removes most (if not all) driver problems and hardware compatibilities that Windows or Linux users might encounter. Many also choose to believe that OS X is a more stable operating system with less crashes, though this does not necessarily include all software which is the responsibility of other (non-Apple) developers.
Windows and OS X both do things very differently, and that’s partly because they’re built on entirely different code. OS X is built on UNIX, and many believe it to be a more secure OS. Apple zealots have in the past touted OS X as being virus- and malware-free, though this is no longer the case; today more malware appears as the OS grows in popularity. We’ll examine the main differences between Windows and OS X in greater detail at the end of this chapter.
User experience (UX) and build quality is something else that Apple is hot on, with UX design that many other operating systems and OEMs (original equipment manufacturers) cannot match. Aluminium unibody designs, high-resolution crisp Retina displays and extra-large smooth trackpads are some of the hallmarks of an Apple laptop - but don’t take my word for it, head down to your local Apple store or reseller and try out the machines for yourself.
Support might be something you require from time to time. If you are lucky enough to live near an Apple Store, Apple’s customer care is generally regarded as some of the best in the industry. The now-famous ‘Genius Bar’ is designed to deal with problems that range from software issues, teething troubles and rookie errors to hardware faults and more serious issues. There’s no hanging around on the phone to tech support (though you do have that option), simply book an appointment and get your problem sorted out in person.
In summary, the reasons people prefer Macs are:
• Exclusive access to the OS X operating system.
• Hardware and software integration from the ground up.
• Perceived increased stability and reliability.
• Security, lack of malware and a reliable UNIX foundation.
• Apple design providing a better user experience, both from hardware and software perspectives.
• Customer support readily available in retail outlets.
• Your reasons may vary from mine, but these are just a few of those which convince many people that a Mac is the way to go.
1.2 Apple Laptops - MacBook Air & MacBook Pro
Like most OEMs, Apple now sells more laptops than it does desktops – so if you’re considering purchasing a MacBook you’re most definitely in the majority of would-be Mac owners. This is clear not only from market analysis but also in the design of OS X itself: multi-touch gestures like basic scrolling and navigating the desktop are a highly celebrated OS X feature that require a trackpad like that found on the MacBook range (though these days desktop users can also buy Mac trackpads).
Apple’s first foray into high-resolution “high-DPI” displays (marketed as the Retina display) made its debut on the Mac- Book Pro 15”, and months later on the 13” model. Evolutionary shifts like the loss of an optical drive and new ports like Thunderbolt also made their debut on the MacBook series, and the unibody aluminium design was a world-first for mobile computing too.
There are two main categories within Apple’s range of laptops, and we’ll take a look at them below:
MacBook Air
The lightest, and cheapest portable Mac available, the MacBook Air is not just a budget laptop for the style-conscious – it’s a highly capable machine that will suit most home users. It is not a powerhouse, but first and foremost the most portable notebook computer in Apple’s range, available in 11” and 13” screen sizes.
Every unit is fitted with solid-state drives (SSDs) which are not only considerably faster than traditional hard disc drives (HDDs) but also more reliable in the sense that they do not contain any moving parts. The current generation of MacBook Air laptops feature a tapered design which is incredibly thin, a thunderbolt port, two USB ports, a card reader and an audio-out. Connections to monitors and Ethernet (wired network) will require adapters which use the Thunderbolt port, Apple’s new standard for high-speed transfer and interfacing.
The MacBook Air is great for travellers who need a long battery life, are comfortable typing on a smaller keyboard and viewing a smaller screen, as well as those who don’t particularly mind the lack of a dedicated graphics chip.
MacBook Pro
The MacBook Pro is Apple’s mobile computing powerhouse, making it more suited to complex tasks like video editing, running virtual machines and even gaming. These machines come in two sizes – 13” and 15” – and there are a variety of hardware setups to choose from.
Apple’s flagship model, the MacBook Pro with Retina display, packs a high-DPI screen with an actual resolution that is double that of its predecessor. This resolution is in reality 2880x1800, though the optimal display setting outputs a resolution that looks like a highly smoothed and anti-aliasing 1440x900 - resulting in no gains in space but an overall richer viewing experience. The Retina models are also thinner and lighter, with improved cooling and no optical drive.
The MacBook Pro range comes with a dedicated graphics chip that makes it ideal for more graphically intensive tasks, as well as two USB ports, an HDMI out, card reader and audio out. The battery life is still impressive on the whole, though the improved internals make this less suited to travels than the MacBook Air.
Article: Is The Retina Display MacBook Pro for You?
1.3 iMac
The iMac is Apple’s flagship desktop computer and is ideal for those who want a capable bit of hardware to sit on their desks with all the bells and whistles one might expect from a stationary device. Apple didn’t necessarily pioneer the all-in-one design, but it could be argued that they have refined it beautifully in this particular model which features a screen and desktop PC in one neat package.
The iMac comes in 21.5” and 27” varieties, running screen resolutions of 1920x1080 and 2560x1440 respectively. There are at present no Retina models available, though the hardware is as impressive as can be expected from a high-end desktop PC. The iMac range is far more configurable than Apple’s range of laptops, many coming with both high-capacity hard drives for storage purposes and fast SSD drives on which the operating system and other software resides.
It should go without saying that the iMac requires an external keyboard and mouse, with the option of Apple’s Magic Trackpad to enable the multi-touch gestures that now dominate the OS X user experience. This is not required though, and some might find they get on just fine with Apple’s Magic Mouse and standard keyboard instead.
The current-generation iMac features a plethora of ports including four USB 3.0 ports, two Thunderbolt ports and an Ethernet adapter, as well as an in-built webcam, microphone and speakers. It is an ideal machine for home or office use, packing enough punch for most tasks.
1.4 Standalone Mac Computers
Apple produces two “standalone” computers that ship in the traditional form factors, rather than an all-in-one design or laptop. These do not come with a monitor or external sound sources, something that should be remembered and factored in when considering a purchase.
Mac Mini
Introduced in January 2005 as a way of enticing Windows users and other potential switchers, the Mac Mini is a small and affordable fully functioning Mac computer that can slot into an existing setup. Housed in a small square box, the Mac Mini is designed to fit into cramped spaces or limited budgets while providing all the features and functionality expected from a machine running OS X.
Of particular interest is the machine’s upgradeability, something that has decreased with time on other Mac models. The Mini features a rotating removable panel on the bottom of the case designed so that the user can easily access RAM and storage bays. The machines are customisable from the outset too, and offer similar performance to the iMac range.
The Mac Mini requires an external keyboard, pointing device and monitor in order to be used, so if you’re thinking of purchasing one you should remember to factor this into the cost – especially if you don’t have them already. Many users prefer the Mac Mini to the Apple TV for streaming purposes, noting its compact size and full-sized processor are capable of doing a lot more than the $99 video-streaming device.
Mac Pro
The Mac Pro is similar to the Mac Mini in that it lacks a monitor and peripherals, but it comes in far more advanced configurations with a lot more power. These machines are designed for users who spend much of their time rendering 3D modelling work, editing 4K video or running a lot of virtual machines.
Equipped with Intel Xeon processors and full-sized high-end graphics cards, the Mac Pro range contains some of Apple’s most expensive products, and for a lot of users are simply too powerful. That’s not to say they’re not excellent machines, but saving money and going for a high-end iMac or MacBook Pro will probably be more appealing to most home users.
The Mac Pro is not compact, and comes in a large tower case which looks the part. This means it isn’t necessarily easy to hide.
1.5 The Pros and Cons of Mac OS X
Mac OS X is Apple’s flagship desktop operating system and shares a number of similarities with Windows - as well as being fundamentally different in other areas. Many believe OS X to be better than Windows, but the truth is there are definitely sacrifices to be made. While it’s a contentious and entirely subjective issue, the gap appears to be closing as OS X becomes a more prevalent operating system around the world.
Pros
• Perceived increased stability over Windows systems: While this was almost certainly once true in the days of XP and Vista, the truth is OS X and Windows co-exist today as two very stable operating systems. Regardless of which is the better OS, Mac systems enjoy a stable UNIX foundation as well as arguably better sleep/wake functions than Windows PCs.
• “It Just Works”: A common belief stemming from the fact that Apple builds both the hardware and software, which means that Mac users do not experience many of the issues associated with hardware that occur on Windows systems. This is due to a fundamental difference in the way Microsoft and Apple approach their computers.
• Simple to operate, hard to break: Many believe that OS X is simply a nicer and less-complicated operating system to use than Windows.
• (Mostly) Virus and malware free: Due to the massive popularity in Windows systems in the 90s and throughout the following decade, malware and viruses were rife. This bred a culture of virus scanners and malware removal that Mac users have never had to worry about. That’s not to say viruses and malware don’t exist, but it is noticeably harder to infect OS X than a Windows machine.
• The price: Certain Mac models, like the MacBook Air, are now fairly competitive in terms of specs compared to similar Windows laptops.
• Build quality and service: Macs are often perceived to be of a higher build quality, and regardless of whether this is true or not, there is an incredible support network thanks to Apple Care and Apple retail stores which facilitate the fixing of problems face-to-face with a human being.
• Cheap, regular OS X upgrades: OS X gets a new release every year, and the price has been slowly dropping over the past few releases. A copy of Mountain Lion is $19.99 full price, whereas Windows 8 costs $199.99 (the limited upgrade price was set at $39.99).
Cons
• Limitations and freedom: You can’t simply build your own Mac computer or install OS X on a Windows PC (at least, not without a lot of hassle and violation of Apple’s terms of service). This means if you want a Mac you have to buy it from Apple, and you have to pay the price they set.
• “The Walled Garden”: Certain users believe that Apple exercises too much control over OS X, locking down certain features and increasingly limiting what users can do. While this is partly true, and is in fact a signature move for the company, OS X is still a desktop OS that allows for a lot of user customisation. Unlike the iPhone, you can install whatever third party software you want.
• Upgradeability: Certain systems are more upgradeable than others, but for many it’s impossible to upgrade RAM, storage and even replace the battery without getting Apple involved. This also involves the price Apple sets.
• Compatibility and gaming: Many Mac computers might have the specifications to match PCs built with gaming in mind, but OS X is not an operating system built with gamers in mind. Steam exists for the platform, albeit with limited titles, and there are an increasing number of games on the Mac App Store. On the whole though, Windows is the gamer’s choice – that’s where you’ll find the latest and greatest games.
• The price: Despite certain machines being competitively priced compared to similar Windows laptops, some aren’t, and for those you will need to pay Apple’s premium pricing.
2. The Process of Switching
2.1 Introducing OS X
OS X is Apple’s proprietary operating system, designed specifically for Mac computers. The hardware and software are built to work together, resulting in what many believe to be a superior experience. Unlike Windows, OS X is built on top of UNIX which means it shares more in common with Linux than it does with Microsoft’s operating system.
The OS still uses “windows” to display folders, browsers and other software. It also still uses files with file extensions, and much of the same software is available for OS X as it is for Windows - albeit versioned differently. The core differences reside in the kernel and inner workings of the OS, as well as a number of user interface (UI) differences.
OS X does not have a Start Menu or Taskbar, instead opting for a dock. The dock lives on the screen and can be either hidden or visible at all times. When software is running on OS X, it is represented by an icon in the dock. Similarly, minimised windows will reside on the right-hand side of the dock.
The operating system handles permissions differently to Windows, and it also does not have a registry. Networking between Macs for the home user is a lot less complicated than past Windows network techniques, though the OS does not necessarily play well with Windows machines.
2.2 Starting Up and Shutting Down
It always helps to know how to turn your new computer on and off, and all Mac notebook computers sold these days can be powered up using a button on the keyboard; in the top row on the far right. Tap it and your computer will start, signified by the trademark Mac chord hit.
On iMacs the machine is turned on using a button on the back, to the left of the screen. Once you’ve turned it on a few times you’ll have little difficulty finding the button again, which is indented slightly. Mac Pro tower models have a button on the face of the tower, much like any desktop PC.
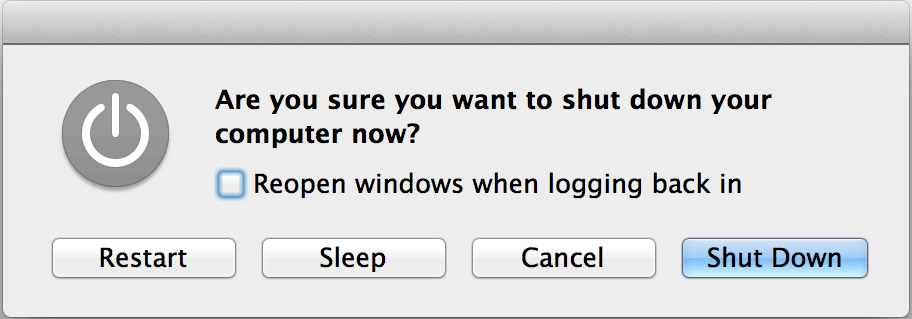
Shutting down can either be done by tapping the power button again, which should bring up a screen similar to the screenshot above asking for your input. This button might require a “good press” in that it’s designed to not react to what the system interprets as accidental hits. (This is also true for the Caps Lock key).
You can also shutdown your machine on any model by clicking on the Apple logo in the top left and choosing Shut Down, Restart or Sleep. All Mac notebooks will sleep by default when the lid is closed, which isn’t the same as shutting down the PC but provides a quick way to stop and resume work.
2.3 Dock, Top Menu & Tray Area
Where Windows has the Start Menu and the System Tray, OS X has a dock and a permanent menu at the top of the screen. The dock is where you can have quick access to oft-used software as well as open applications and minimised windows. By default Apple populates the dock with core applications, many of which you probably won’t want pinned at all times. To remove a pinned item from the dock: click, hold and drag the item out of the dock. Release the mouse button and an animation resembling a cloud of smoke should play. If you have the program open while trying to remove it, it will stay in the dock until it is quit. To add items to the dock, open the Applications folder and drag it into the dock. You can also reorder icons by dragging and clicking.
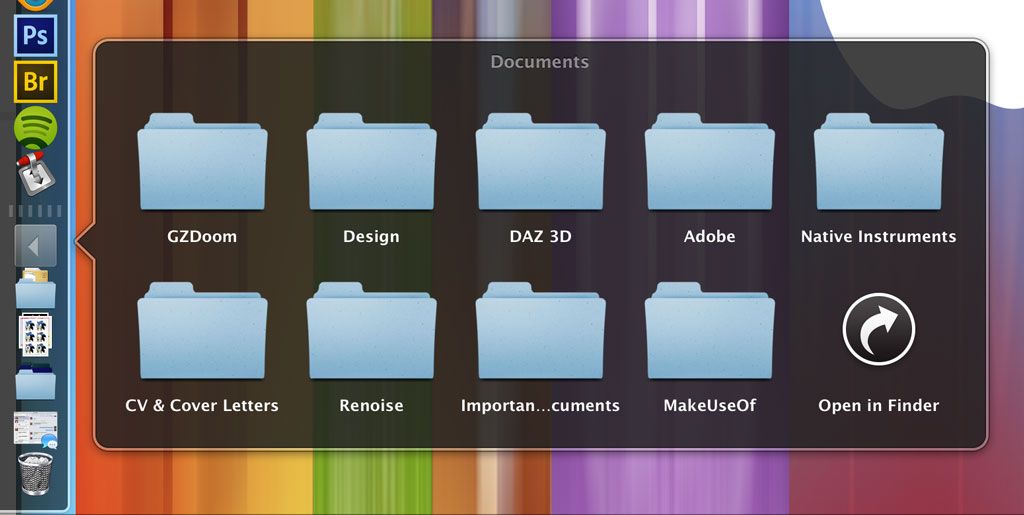
The dock can be placed on the left, bottom and right side of the screen – this can be set from the Apple menu at the top of the screen. It can also be auto-hidden and the old OS X magnification effect can be used as well. The left (or top area, if you’re aligning it vertically) shows pinned applications, the right (separated by a divider) is where minimized windows go, as well as a few folders. Folders can act as simple shortcuts which open a window, or used as Stacks which display the contents without interrupting workflow, as per the screenshot below. You can change this behaviour using the two-finger click menu.
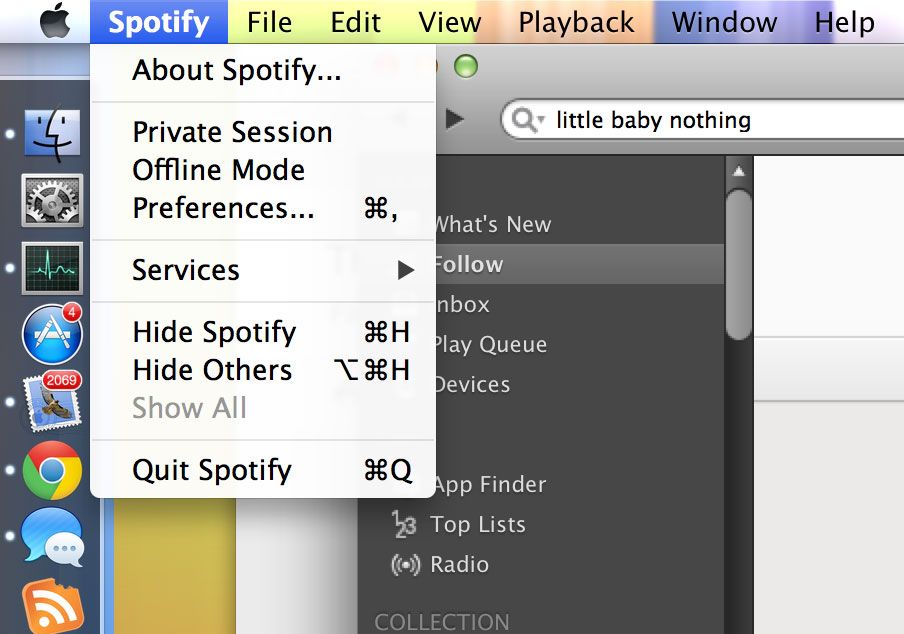
The context menu at the top of the screen will change depending on the application you are using, but it functions in much the same way as Windows does, except the bar is permanently at the top of the screen. The File entry still performs operations like Load and Save, and clicking the application’s name will bring up options specific to that app, including the Quit and, more often than not, Preferences options.
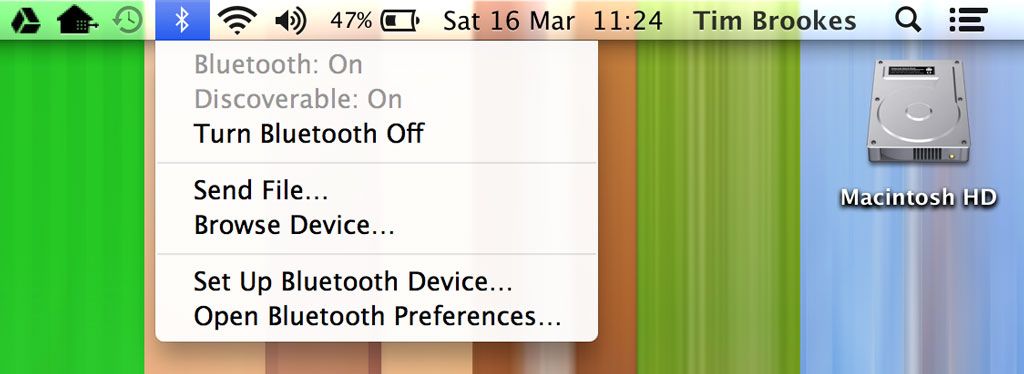
In the top-right hand corner of the screen lives the tray area, providing quick access to running services and a few core OS X features. Here you can quickly enable and disable Wi-Fi, connect to new networks, check on battery status and enable or disable bluetooth. Any apps you have installed can use this area, such as backup tools or software updaters.
2.4 Migrating Data
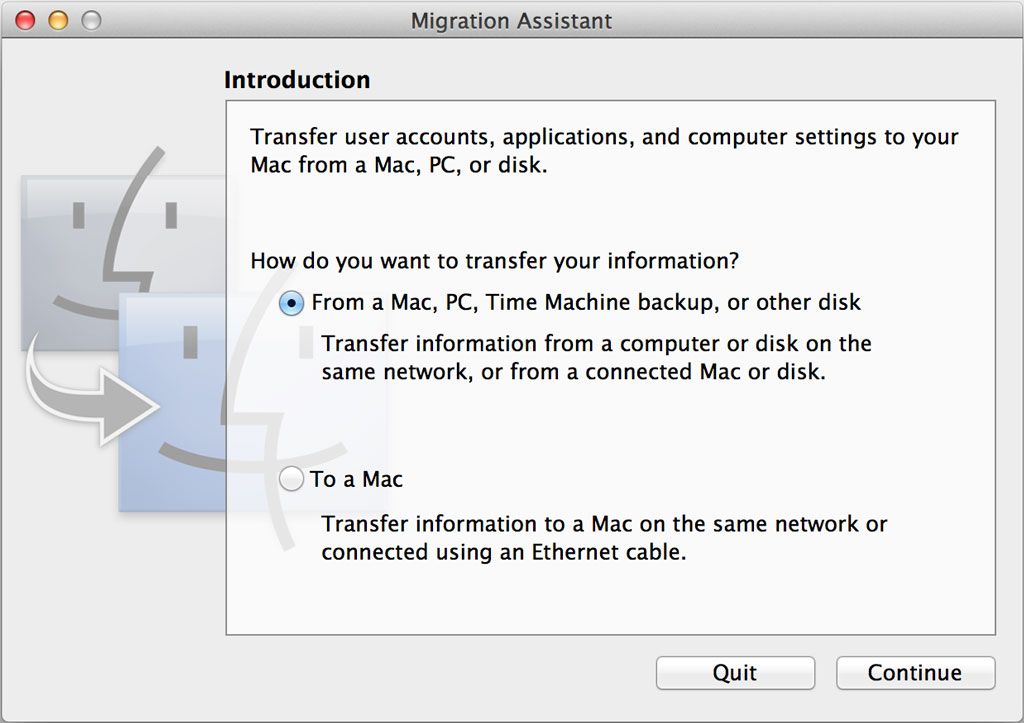
When you first turn on your new Mac you will be asked if you want to migrate old data across from Windows using the Migration Assistant. If you are not asked this (or your Mac was set up in store, and the machine boots straight into the desktop) then you can find the option again in the Utilities menu in Launchpad (accessed by pressing the F4 button, or with a 4-finger pinch gesture), or by clicking the Finder icon in the dock, going to Applications, then Utilities, then Migration Assistant.
You will be asked whether you want to transfer from a Mac, PC or backup or to a new Mac. The tool supports the creation of a backup for use on another Mac, so when it comes to replacing your new machine for another Mac this is where you can create the necessary backup.
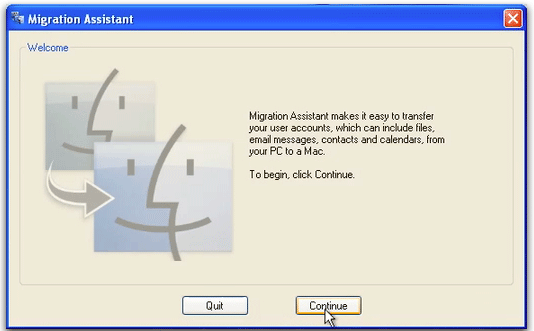
If you are transferring from a Windows PC then you will need to download the Windows Migration Assistant direct from Apple; run it and follow the instructions.
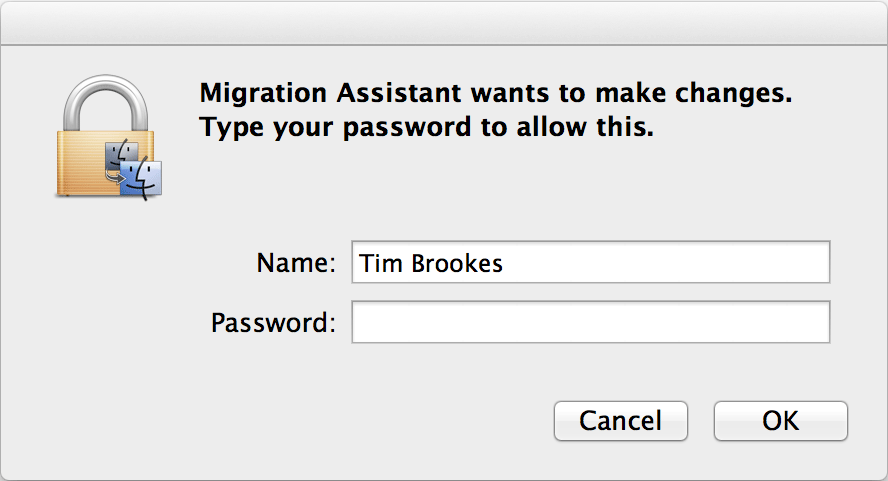
On the Mac, after choosing the first option and clicking Continue, the operating system will ask you for permission to make changes. This is a common occurrence with Mac OS X, which requires confirmation of changes that are made to important parts of the drive associated with the normal operation of your computer, similar to Windows own User Account Control (UAC) warnings.
Enter your password and allow the change for now. You will be prompted to close all programs by clicking Continue. Next you will be asked where you want to transfer from (a Windows PC) and then asked to input a code from your Windows PC, before data is pulled across the network.
Note: There is no need to use the Migration Assistance if you don’t want to, and if you feel comfortable you can copy your files and folders manually to a hard drive or flash drive before plugging it into your Mac and copying the files to the correct location within Finder. Your Mac will be able to read Windows-formatted NTFS drives, but not write to them.
2.5 Keyboard Layout
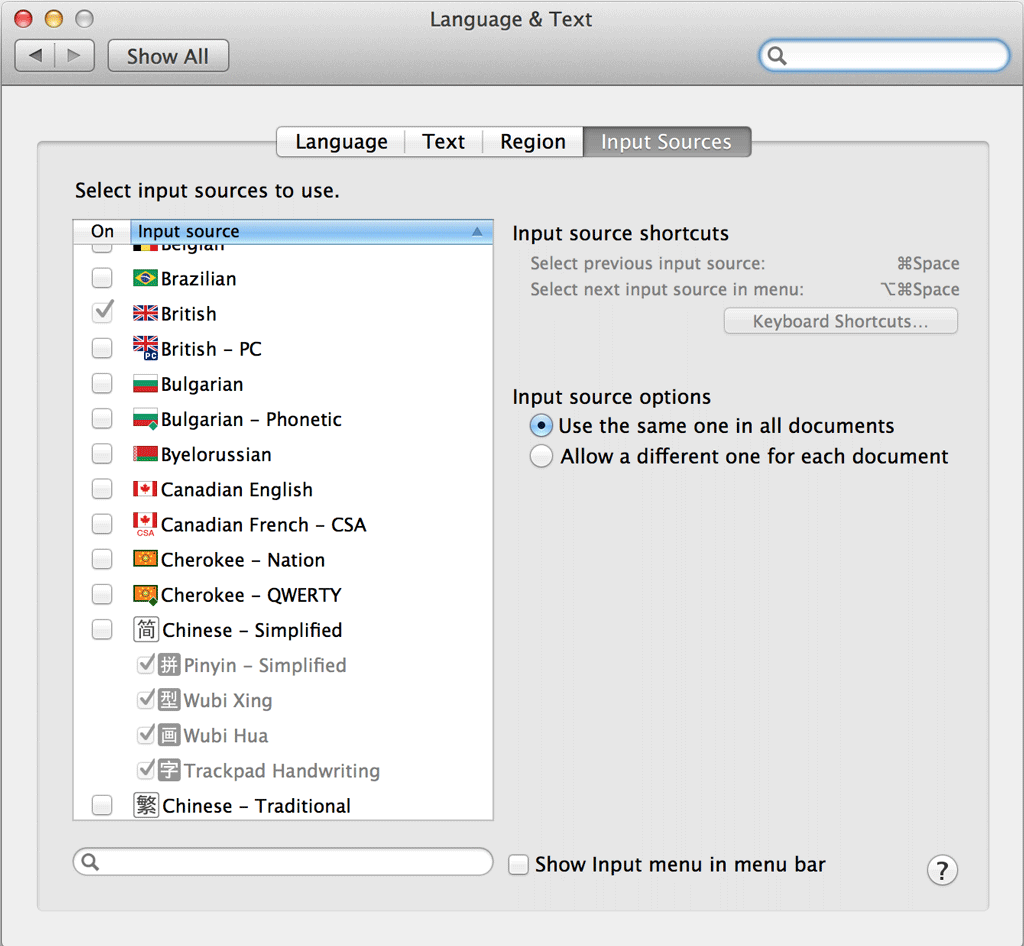
Apple’s computers use a fairly standard layout with subtle differences depending on the user’s locale. Regardless of the physical keyboard provided with the machine, the keyboard can be adapted under System Preferences > Language & Text > Input Sources.
Here you can choose from a number of layouts to suit your setup, and though most Mac computers come with the same keyboard there are subtle differences. For example many models omit the “£” character from the keyboard, but by simply enabling a British layout that symbol is available by pressing Shift+3.
You will probably have set up your keyboard during the initial setup of your computer, but if you need to change it at any point, or if you’re bilingual, then this is the area in which to do it. The Language tab refers to the language of the operating system, rather than the language of your keyboard.
In addition to this there are a few key differences between a Mac keyboard and a Windows keyboard. Aside from no longer having a Windows key, Mac computers have Command and Option (Alt) keys, in addition to Control (like Windows Ctrl, but again different).
Command takes over from where Ctrl left off in Windows. It is the new hotkey for saving documents (Command+S), copying and pasting (Command+C, Command+V), as well as italicized text (Command+I), among others. It is also used in conjunction with tab to switch between desktop items, just like Ctrl+Tab would on a Windows PC.
The Option (alt) key is essentially Alt from the Windows keyboard, and it is labelled as both alt and option on some Mac models. It is used as a modifier often in the same way Alt is on Windows, though its use is often limited to the software currently being used.
Option is also used to specify alternative keyboard inputs, so ?+P types the ? symbol, ?+Z types the ? symbol, and so on.
Download: OS X Keyboard Shortcut Cheat Sheet
There are a few other key differences for many switchers:
• The @ symbol is now under Shift+2, rather than Shift+’ (uncommon on a lot of non-US keyboards).
• There are no longer two keys for deleting, just a backspace button (which on many Mac keyboards is labeled delete, and others signified by a leftward pointing arrow with a cross).
• The function keys (the top row of keys on the keyboard) no longer perform F1, F2 (and so on) functions and instead refer to the symbol on the key instead. So F12 increases the volume, F8 plays/pauses currently playing media. To access the old-fashioned F1 key you would need to press Fn+F1 (Fn is found in the bottom-left corner).
2.6 Pointer Input
Apple is often credited with the invention of the humble computer mouse, but in actual fact it was simply an evolution of a concept finely honed by Xerox. Apple has returned to innovating in this department over the last few generations of computers, and there are now more Apple pointing devices to choose from than ever before.
Trackpads
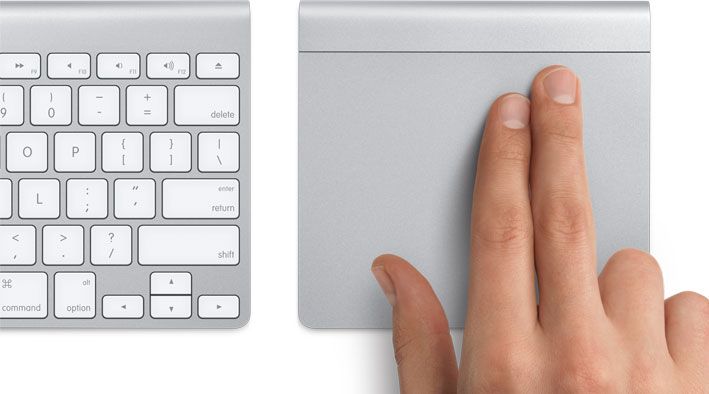
If you’re the owner of a MacBook, you will have Apple’s large trackpad at your command, and the click-pad design is simple to operate once you know how. Desktop Mac users can even buy an Apple Magic Trackpad, which is essentially a laptop touchpad that connects to a desktop PC. There is a good reason for this: gestures.
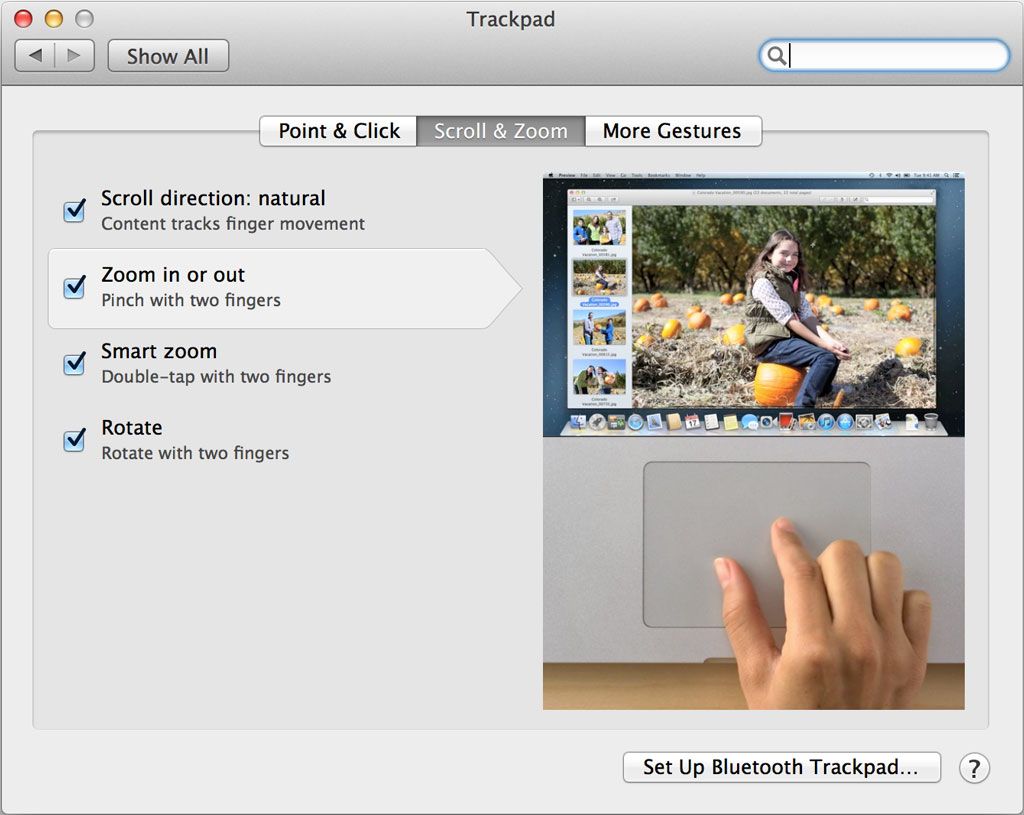
Apple’s desktop operating system makes heavy use of gestures in order to get around. Scrolling is done by “dragging” the screen with two fingers, rather than scrolling “down” the screen with one finger, like on many Windows laptops.
This change takes a short while to get used to but once you’ve adapted navigating a webpage becomes a lot more tactile than using a mouse wheel or dragging a slider.
There are a lot more gestures to make use of within OS X; pinch to zoom, three-finger swipes - they’re all there, but there’s no point reading about them. Apple was clever enough to include example videos in the System Preferences > Trackpad menu item, so head over there and enable the ones you do want to use if you’re using a trackpad.
One common misconception is that Mac users cannot right-click. While it’s true that there’s technically no button for a second click, a two finger click reveals a context menu that’s identical to the Windows right-click menu. This is accessed by having two fingers touching the trackpad and clicking with one (try it). The trackpad is highly sensitive, and thus knows when you have two fingers resting on it, changing a normal click into a secondary click.
If this is proving too tough you can also hold the control button and click as normal, or head to the trackpad settings to make clicks in the bottom-right of the trackpad register as PC-style right-clicks.
Mice
Many new Mac owners are delighted to hear that there’s a very good chance that their existing peripherals - i.e. Windows-compatible, two-button mice - will work just fine on their Mac. This removes the need to go out and buy an expensive Apple mouse, though if you do you’ll have a nice touch-enabled surface which better suits the scrolling style of a Mac.
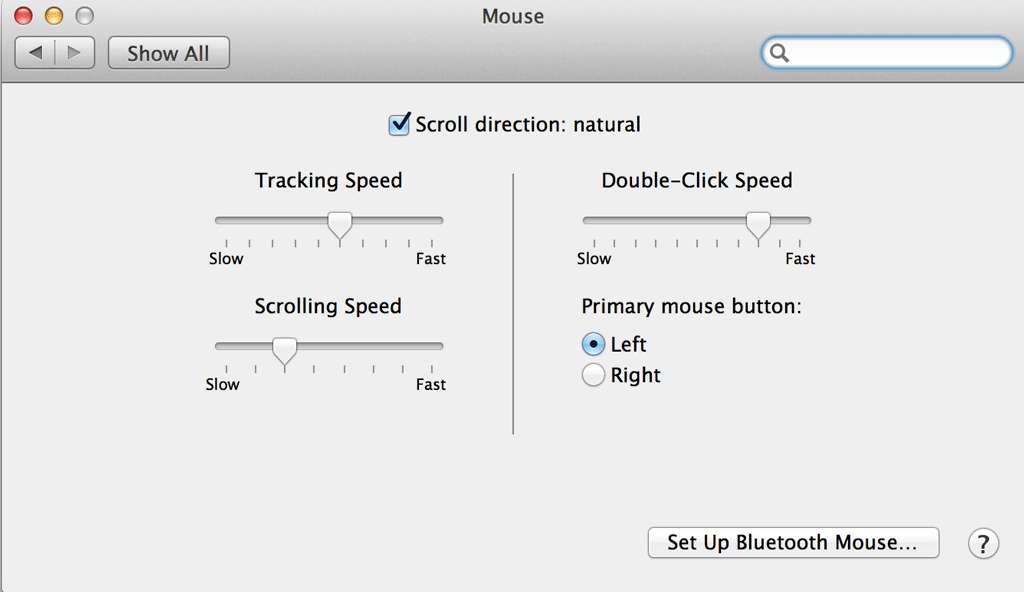
Mouse wheels will work, though mice with more than the basic amount of buttons might not. There are no drivers needed, and you can adjust mice settings (i.e. sensitivity) in the System Preferences > Mouse menu.
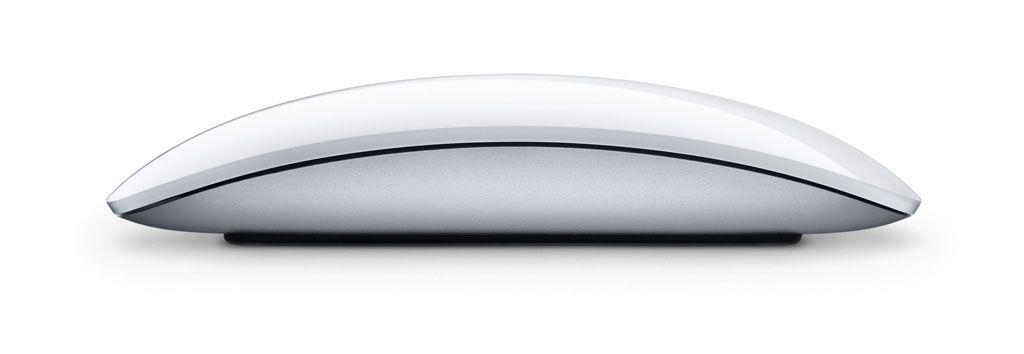
Apple’s own Magic Mouse is a multi-touch mouse, and that means the same rules apply with regards to right-clicking. With two fingers resting on the mouse, clicking will result in a context menu. This also applies for scrolling, which uses the upper surface of the mouse.
3. Software
3.1 Installing & Removing Software
There is quite a difference in the way Mac OS X manages software compared to Windows. For a starter, there is no registry on OS X – which means that lengthy install programs that adjust registry keys and install deep within the OS are less common. Installers still exist, particularly for software which impacts the core operation of the machine, but most software is installed using one of two methods: using a .DMG or .PKG file and via the Mac App Store, detailed in the next section.
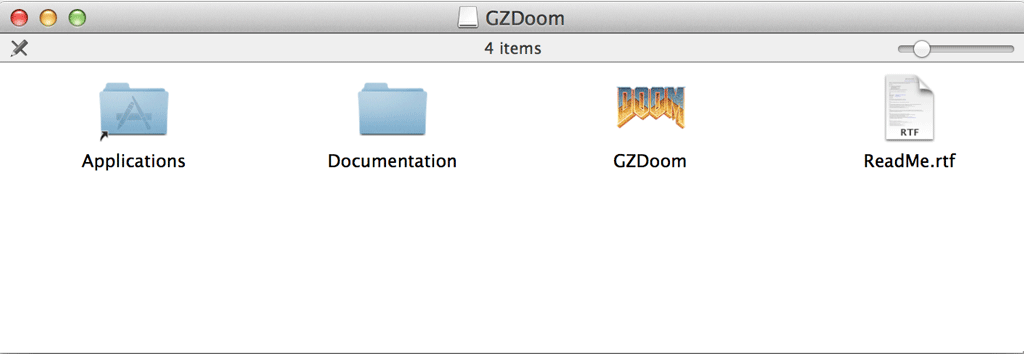
.DMG stands for Disc Image and it refers to a mountable, compressed archive which contains files to be installed. When you download software a lot of the time it will be in .DMG format. In order to install it you must double-click in order to “mount” the volume as if it were a separate disk.
This should open the image in a Finder window as per the screenshot above. This .DMG is for a freeware Doom emulator called GZDoom. It contains an application, “GZDoom”, a readme file and some documentation. There is also a link to the Applications folder on your local machine. This makes installing software easier, though the principle is the same. In order to install GZDoom here (or any software packaged in such a manner) simply drag the GZDoom icon into your Applications folder.
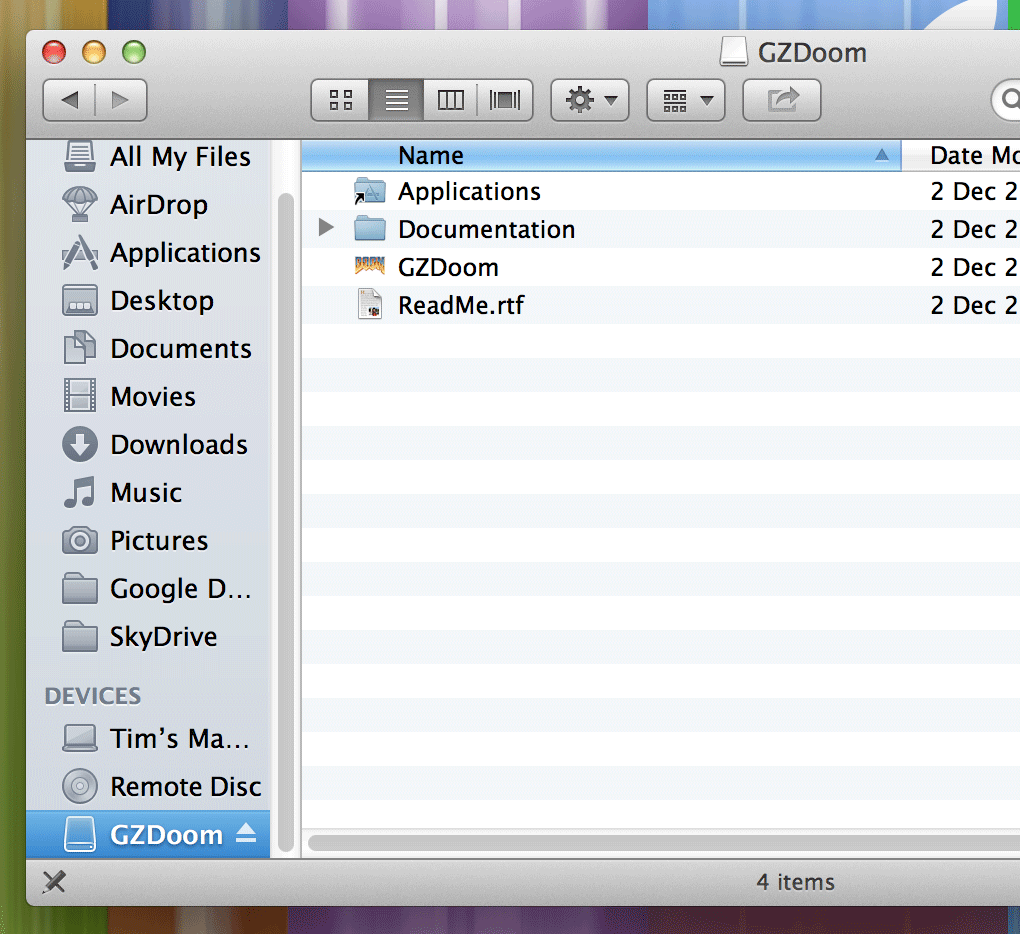
This can be done via the Finder (using the entry on the left-hand side) or using the shortcut provided. There won’t always be a shortcut, but for a lot of big-name software there is. This will literally copy the application to your Applications folder, where it will reside as a .APP file. You can then run the application.
If for some reason you lose the .DMG (i.e. you can’t find it, though it’s still mounted) then you can open a Finder window and in the bottom-right hand corner under “Devices” should be your recently mounted .DMG. You can see an example of this in the screenshot below.
Installing from .PKG
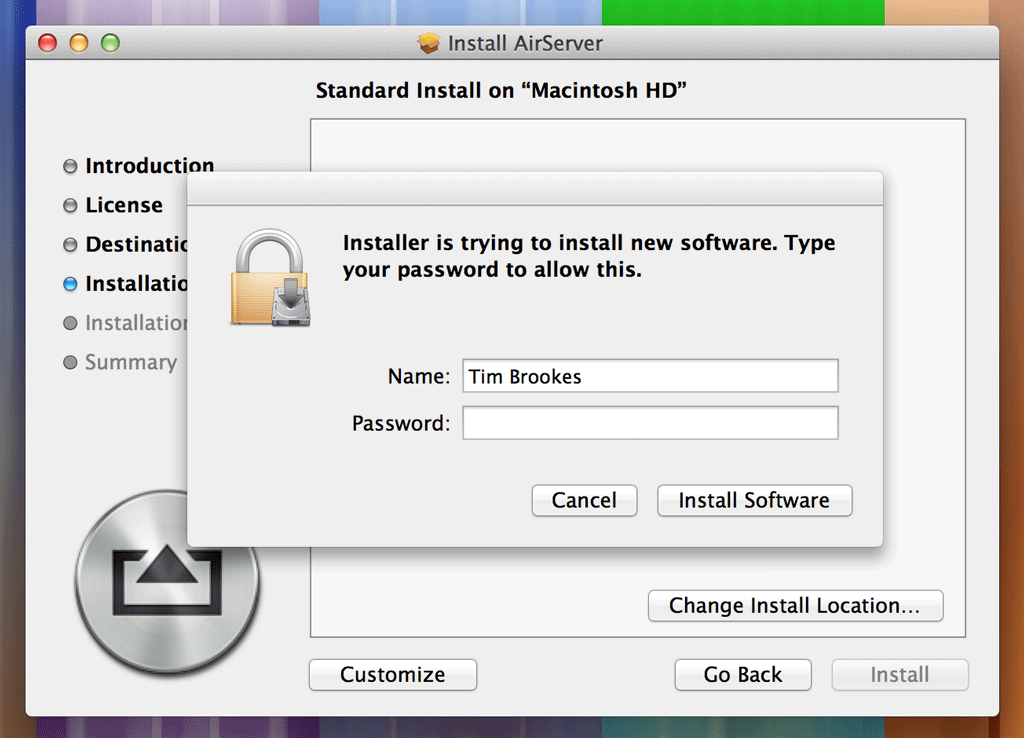
Sometimes software requires more permissions to run, such as system utilities designed to add further functionality to your Mac – NTFS drivers, tweaks and so on. In these instances you won’t drag the software to the Applications folder but instead run an installer in much the same way as software is installed in Windows. These files often have the extension .PKG, and may be stored on .DMG images or within .ZIP archives.
To install from .PKG double-click the file to launch the installer. Click Continue until you are prompted for your password, which you must enter to allow changes. This is the only software that poses any threat your computer, as it can change the way the operating system functions. Provided it is from a reputable source, there should be no problems. That said, be aware of software that does ask for such permissions.
Removing Software
Removing applications installed to the Applications folder is a simple matter of dragging the application to the Trash (in the dock), two-finger clicking (or control-clicking) the trash can and choosing Empty Trash. The item is now removed entirely from your machine, and the disk space it occupied has been freed up.
.PKG files are not very straightforward, and for this reason a lot of software that is installed using this method comes with its own uninstaller – this is bundled with the initial install file, either on a .DMG or in an archive. You will need to follow the exact same method you used to install the software, including supplying a password in order to perform changes.
3.2 Mac App Store & Gatekeeper
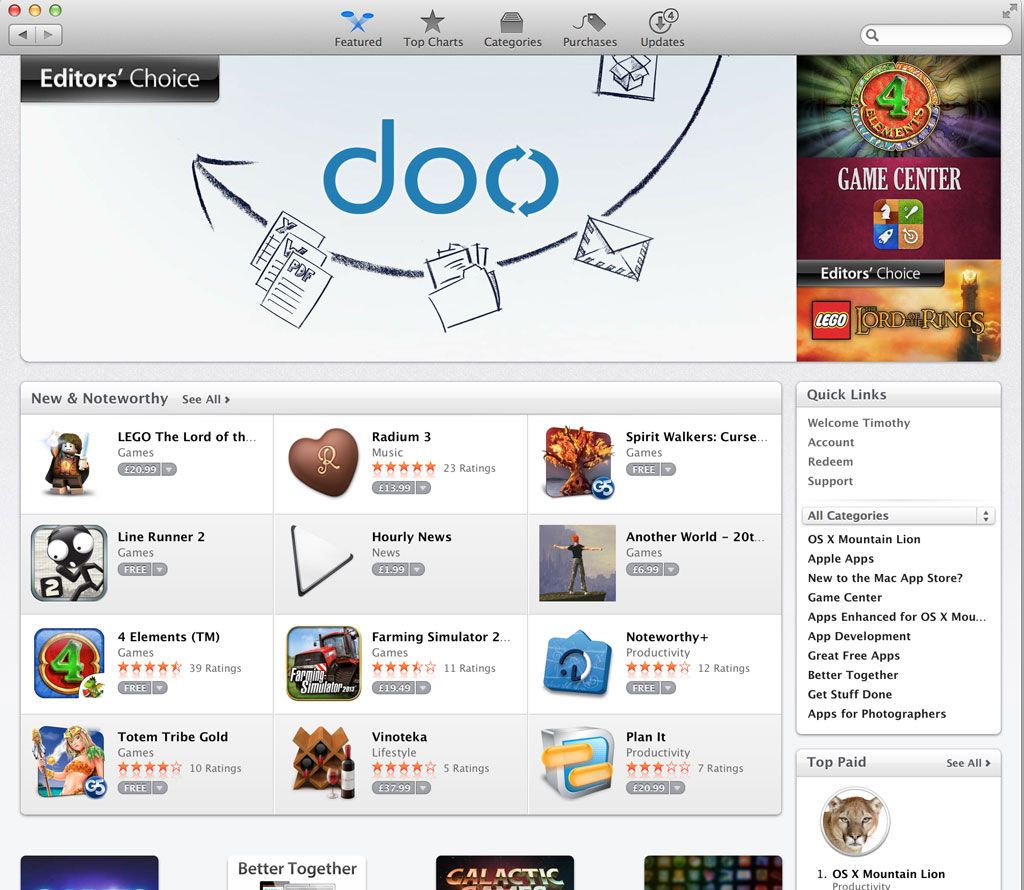
Apple introduced the Mac App Store as a free download for OS X 10.6.6 users. It is run, maintained and regulated by Apple themselves, and contains software that will always work on the currently shipping version of OS X (i.e. the latest version consumers can purchase).
In order to use the store you will need to log in using your Apple ID. Open the App Store, click Store at the top of the screen followed by Sign In… and enter your credentials. You can create an Apple ID at AppleID.Apple.com.
Mac App Store Software
Because it is run by Apple, there are strict guidelines which App Store developers must adhere to in order to get their software accepted into the store. These guidelines include no software that changes the behaviour or interface of the operating system, and all software must comply to Apple’s regulations for human interfacing. This means that not all software that you, as an end user, might want will be on the Mac App Store.
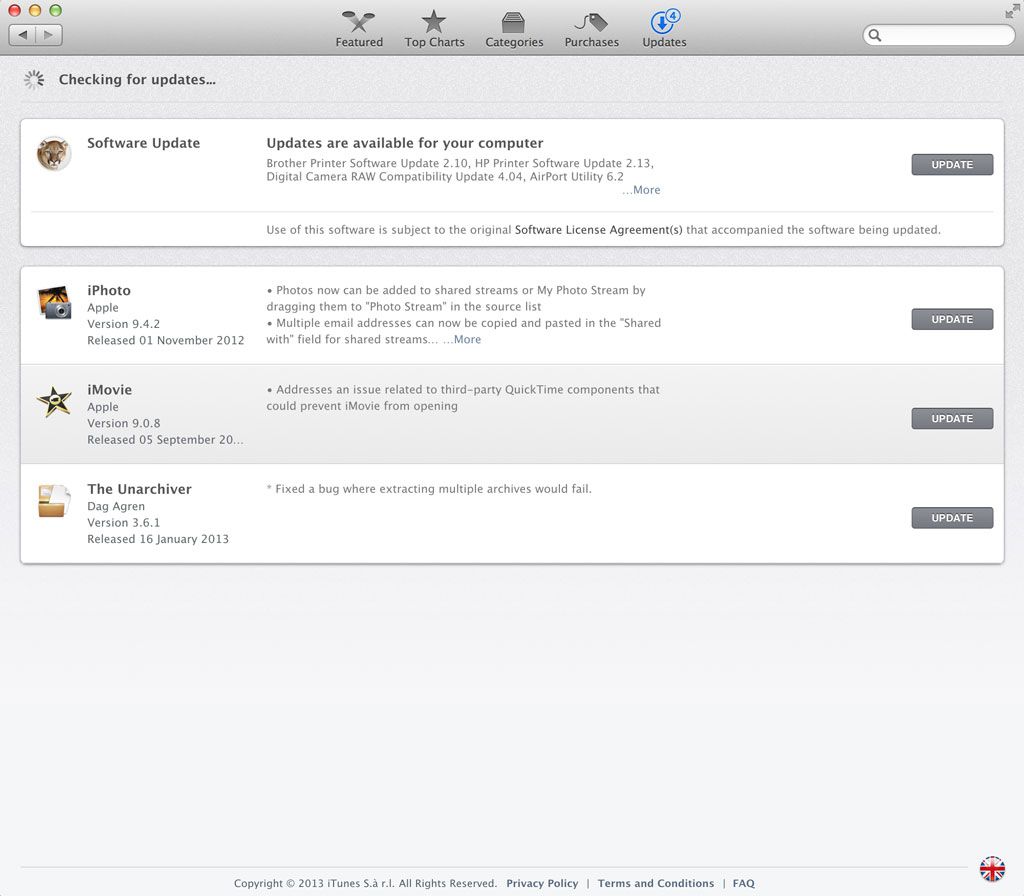
That said, it’s still a good resource that contains paid and free software, and it serves a more important purpose - to update software you have installed.
All software updates for the operating system, iLife (Apple’s pre-installed media creation software), as well as any apps you have downloaded from the Mac App Store, will receive updates this way. Updates can be found in the Updates tab, as you can see in the screenshot below.
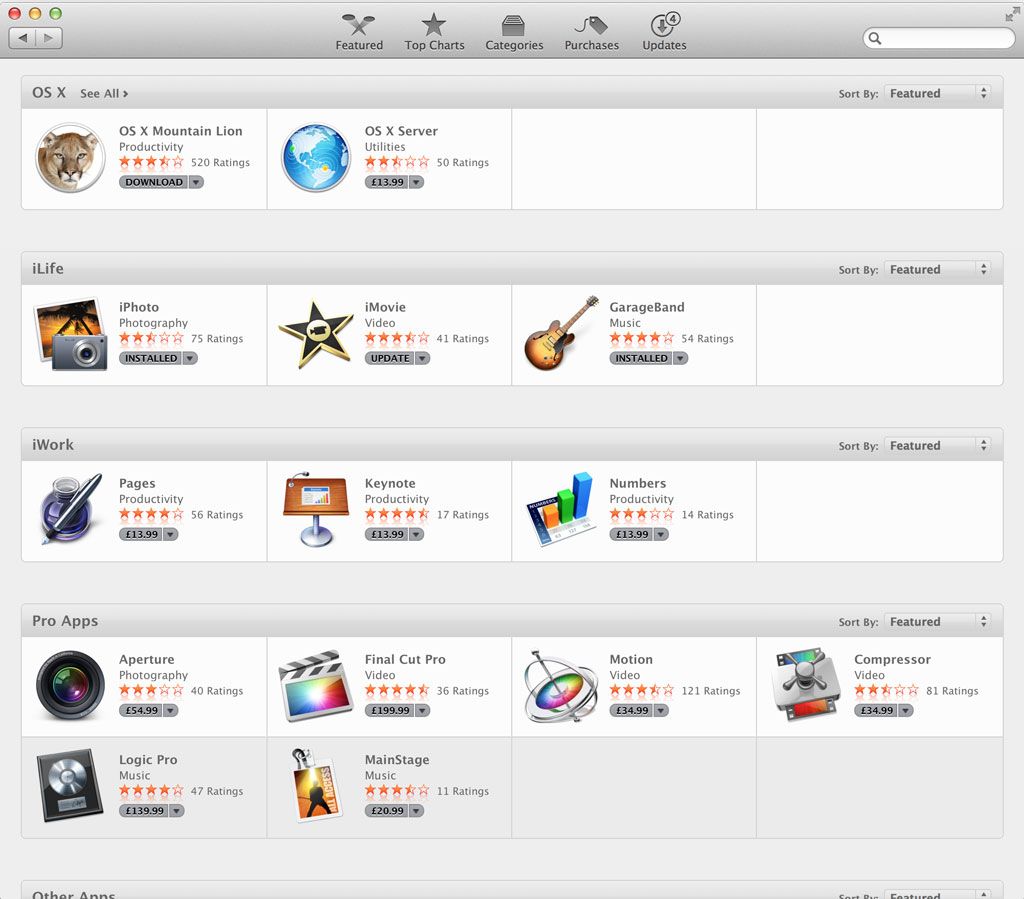
Apple uses the Mac App Store as a primary distribution point for their own software, including operating system upgrades (new versions). You can also find their desktop publishing software, as well as professional apps like Final Cut Pro and Logic Pro, in the Mac App Store.
Other areas of note are:
• Featured tab: A showcase for the latest and greatest, the “front page” of the store with the latest offers, new apps and those optimised for the latest release.
• Top Charts: The top downloaded free, paid and top-grossing apps on the store.
• Categories: Browsable index of applications by their primary usage.
• Purchases: All past purchases tied to your Apple ID.
Gatekeeper
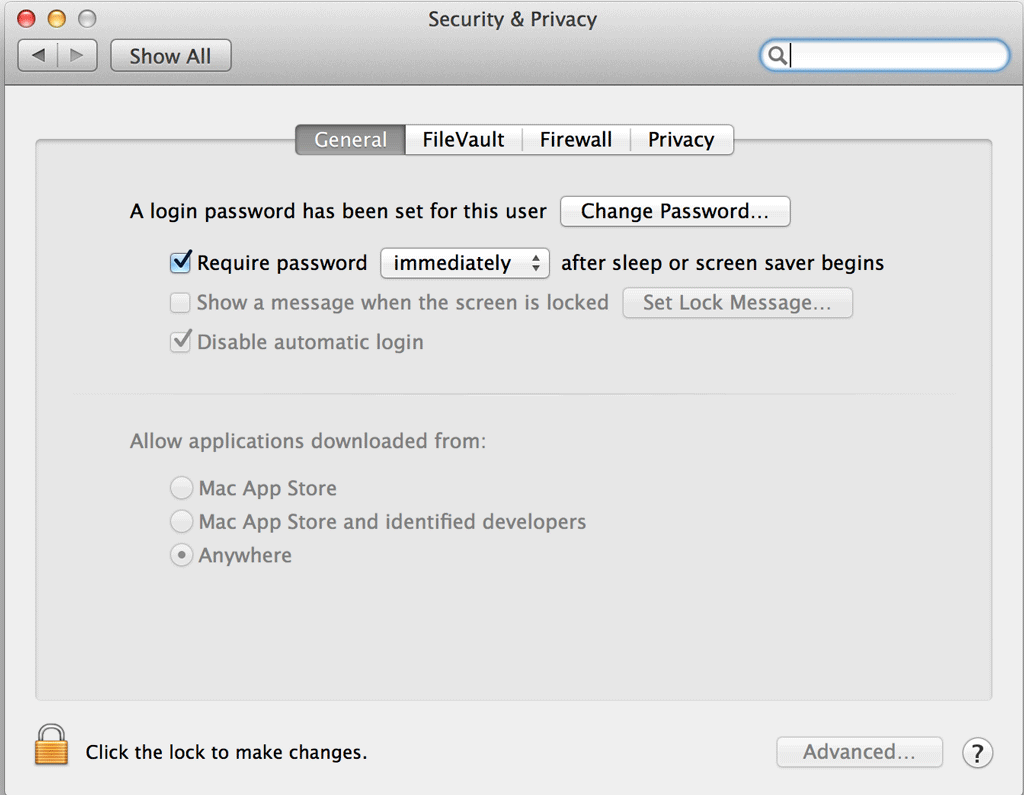
Gatekeeper is a new addition that came with OS X 10.8 Mountain Lion, and changes the way that software can be installed on your Mac. By default Gatekeeper only allows you to install software from the Mac App Store, but the truth of the matter is that you will probably encounter a situation where you want to install external software. This can easily be achieved.
The setting can be found under System Preferences > Security & Privacy on the General tab. In order to make changes you will need to click the lock in the bottom-left corner of the screen, and enter your password. Much like the password required when you install software to certain parts of the disk, this is another of the security measures found in OS X.
In order to install software from known developers, choose the second option. Or if you’d like to allow software from anywhere (as was the case in the previous version of OS X) then choose Everywhere.
View: Looking for great Mac software? Check out our Best Mac Software page.
3.3 Launchpad, Mission Control & Dashboard
Mac OS X has a few extra desktop features which, though not immediately obvious, make navigating your computer easier. Many of these shortcuts can be tweaked from the multi-touch gestures settings menu found in System Preferences > Trackpad, but there are also dedicated buttons for these features.
Launchpad
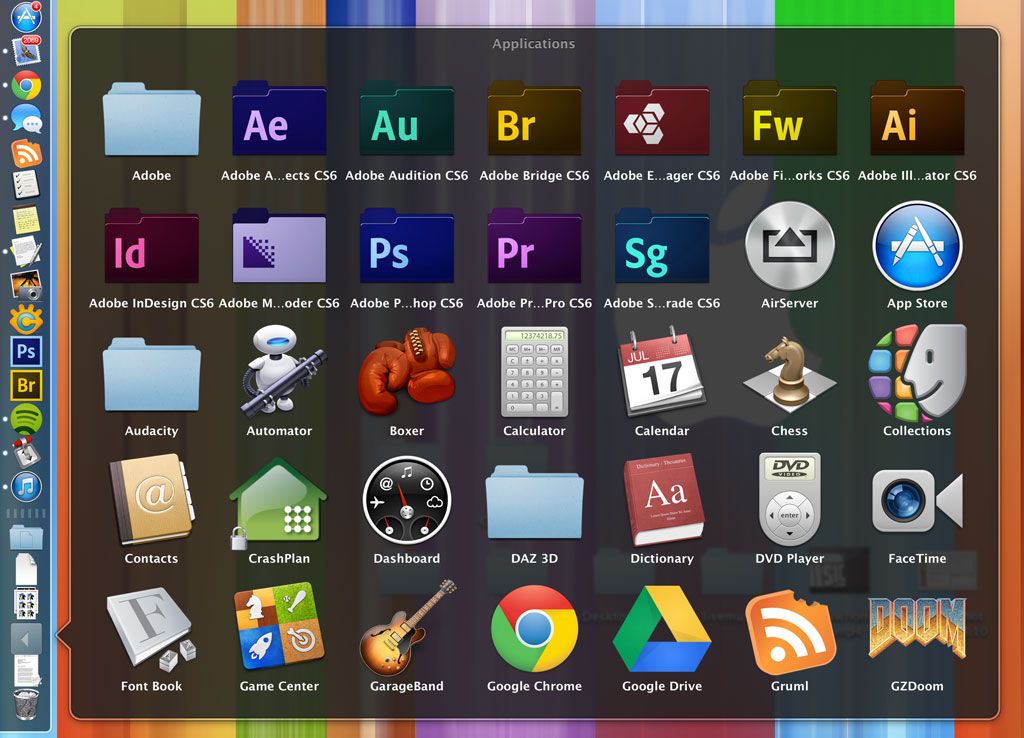
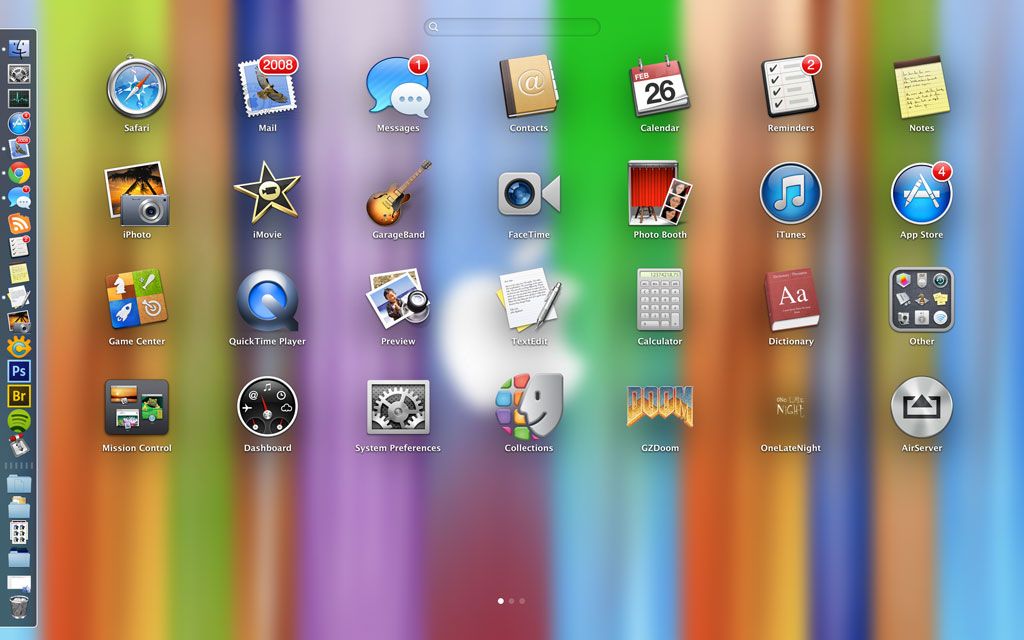
Launchpad was dubbed part of the “iOSification” of OS X, providing a similar interface to the iPhone and iPad from which to launch installed software. Really, all Launchpad does is display your Applications folder, albeit with a few extra tweaks.
To display Launchpad you can simply press the F4 key (without holding fn down); the icon looks like six squares. It is also possible to “pinch” with three fingers and your thumb using the default trackpad shortcut. You will notice a new screen appear, with your apps spread across a number of pages which resembles iOS more than OS X. This screen operates in the same way as the iOS springboard, allowing you to click and hold to move icons around, and drag one icon on top of another in order to create a folder.
You can scroll between pages, create new ones by dragging an icon to the edge of the screen and generally organise your Launchpad the way you want it. The folders you create here will not affect how your Applications folder is organised, which will remain as it was.
Mission Control & Desktops
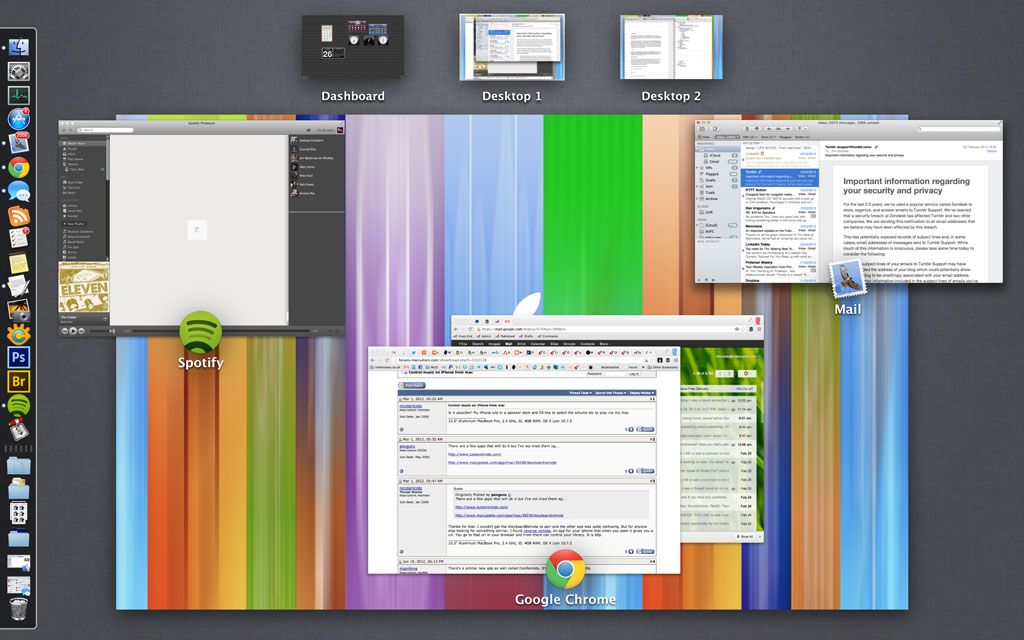
This is one of OS X’s most useful features; once you’ve discovered it you’ll be using it all the time. By default you can press the F3 key (the icon looks like three rectangles of different sizes) or swipe with three fingers up on the trackpad in order to launch the feature. Mission Control is basically a useful way of seeing what you have open on your current desktop, by scattering and collating windows together in an organised manner.
From here you can then click one of the available applications to bring it to the front of your open windows and apps. The feature does not display all open applications, but instead only those which aren’t hidden or minimised and are running on the currently active desktop. If you look at the top of mission control you will see Dashboard and Desktop 1, then if you hover your mouse in the top right corner and click the plus “+” button you will create a new desktop.
From here you can create as many desktops as you would like, to keep apps organised and not cluttered. Any fullscreen applications will appear as separate desktops in this view. If you would like to move an application from one desktop to the other, click and drag it to the appropriate desktop from this view. To remove a desktop, hover over it with your mouse and click the “X”. Open applications will be migrated to your other active desktops, of which you will always have one. To reorganise your desktops, simply click and drag them.
By default you can swipe between desktops with a three or four finger horizontal swiping gesture. This can be configured and disabled from the System Settings > Trackpad menu, and once you get used to it workflow speeds up considerably.
Dashboard
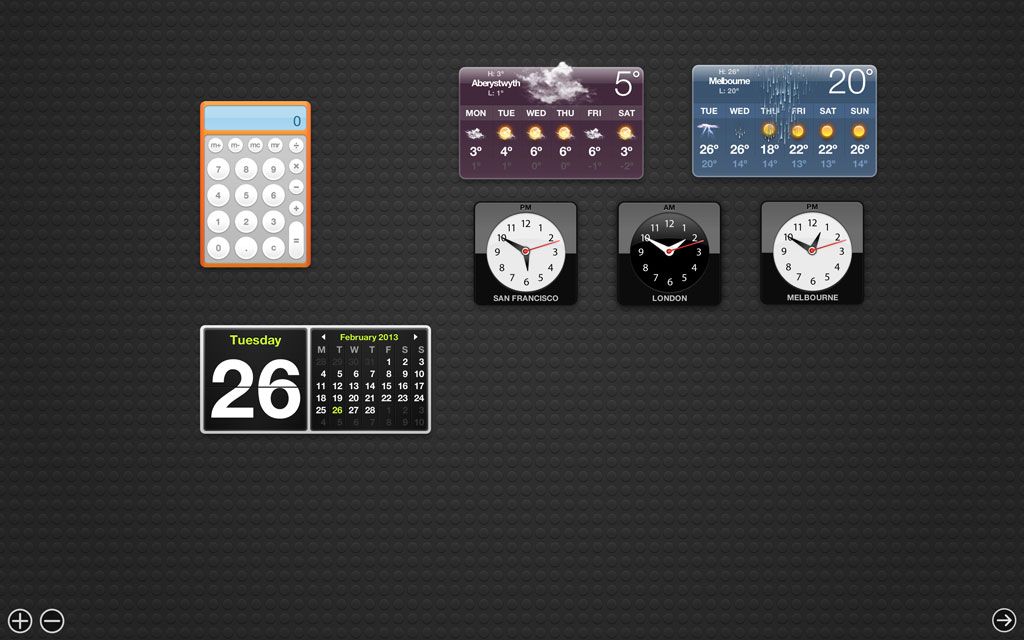
The OS X Dashboard is merely a place for widgets, such as clocks, calendars and so on. You can drag widgets around and arrange them as you would like, though there is no way of automatically arranging things in a tidy manner.
Access the Dashboard by three or four finger swiping right-to-left, selecting Dashboard from the Launchpad or clicking Dashboard from Mission Control. You can also use the keyboard shortcut F12, accessed by holding fn+F12.
Click the plus (“+”) button to choose from installed widgets, or click Get More Widgets to be taken to Apple’s website to download more. Similarly, the minus (“-”) button allows for the removal of existing widgets.
3.4 Dock & Spotlight
Together, the dock and search feature known as Spotlight are the “Start Menu” equivalent for Mac OS X. Both features are quite different, but both are powerful and work well together.
Dock
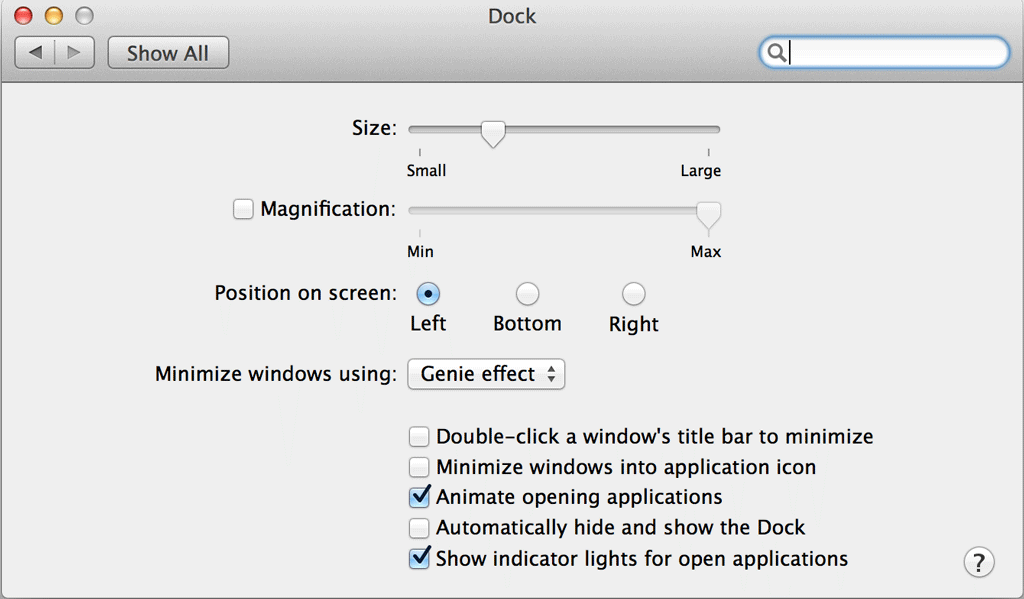
The dock displays currently running software, as well as shortcuts to oft-used software. The dock can be aligned on the bottom, left or right of your screen, and features such as auto-hiding and magnification can be enabled from the Dock preferences, found in System Preferences > Dock.
To pin a program to the dock, two-finger click its icon, choose Options then Keep in Dock. To remove a program from the dock you can use the same menu, or grab it and pull it onto the desktop. If the program is still open, it will remain there until it is closed. You should keep your most-used programs in the dock, and ensure to not overcrowd it to enable currently open programs to fit there too.
The far right-hand side of the dock (or the bottom, if aligned vertically) is a separate area for folders, the Trash and currently minimised windows. If you minimise a window using the yellow button at the top of a window, it will stay here. Folders can be pinned here; simply drag the folder into the dock. If you would like to see the contents directly from the dock, two-finger click and choose Display as Stack, which will show something similar to the screenshot below.
You can access the Trash as a folder from here, or empty it by two-finger clicking and choosing Empty Trash.
Spotlight
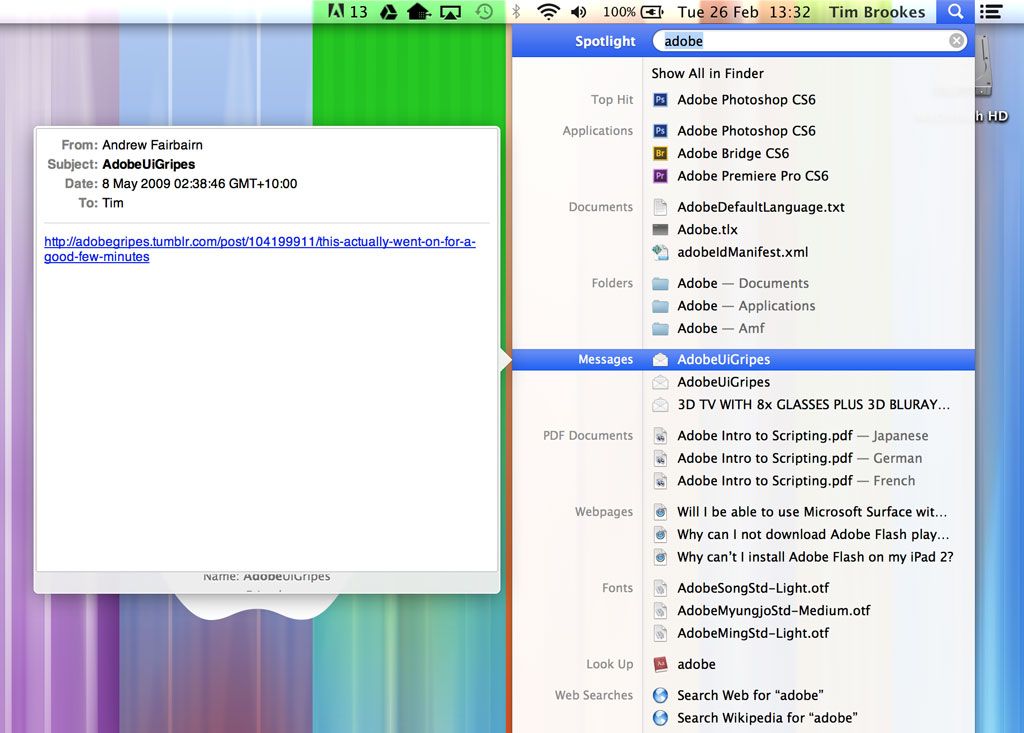
The Mac OS X search feature is called Spotlight, and has long been the envy of Windows users (though Windows 8’s own in-built search feature mimics much of Spotlight’s functionality). The search interface is available at all times from your Mac desktop using the magnifying glass icon in the very top-right of your screen. A far more useful shortcut is Command+Space; simply hit it and type your query.
The second you start typing, your Mac will return indexed results. You can search for almost anything – emails, files, and even applications. In fact, one of the quickest ways of launching an application on your Mac is by hitting ?+Space then typing the first few letters of its name and hitting Enter. You don’t even have to take your fingers off the keyboard.
Another useful Spotlight feature is the ability to search within email messages, chats and other areas like contacts, webpage history and documents. Hover over a document either by selecting it with your mouse or using the arrow keys to be given a preview of the document, as you can see in the screenshot below.
You can change what is searchable within the Spotlight preferences, found in System Preferences > Spotlight. You can choose between types of documents, as well as omit certain locations from Spotlight using the Privacy tab. If you would like to change the shortcut, then you can do so as well - though the default ?+Space is very effective once you get used to it.
3.5 Core Software & iLife
Mac OS X comes with a suite of software designed to make simple tasks easier, including some well-known and wellregarded multimedia solutions. This suite is known as iLife, and it receives all its updates using the Mac App Store.
Finder
Finder is the default file explorer, similar to Windows Explorer. It works in much the same way as its Windows equivalent, and is accessible from the dock using the quintessential OS X “smile” icon.
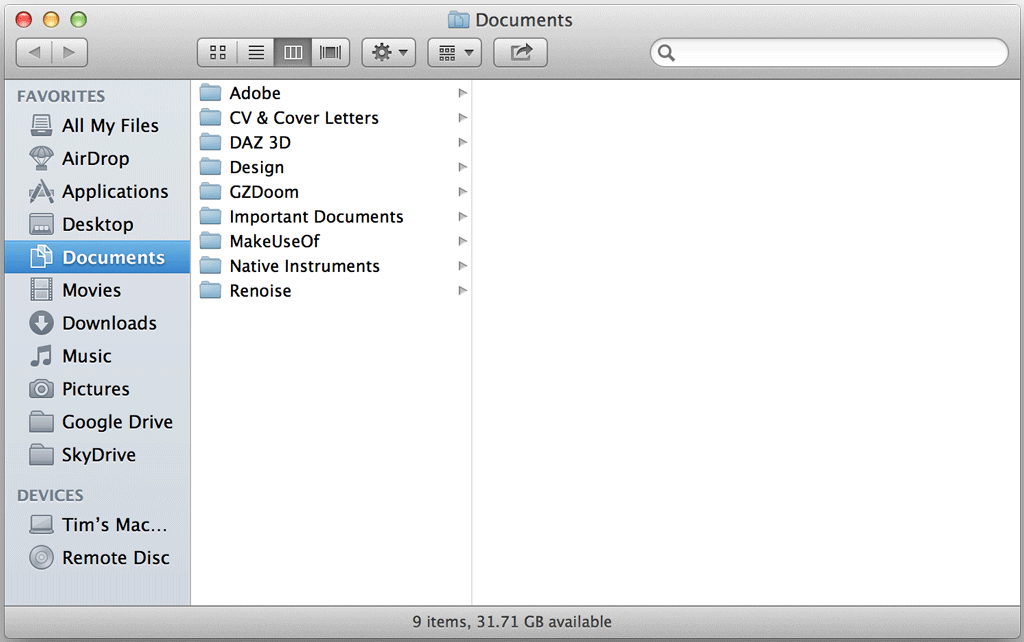
Favourites can be found on the left-hand side, and these include all the default locations for media and documents as well as any mounted disks (flash drives, external hard drives or optical devices) and mounted disk image (.DMG) files at the bottom. There are four buttons to change the display mode found roughly in the centre of the window, with a settings (context) menu alongside and an arrange window next to that.
To open a new Finder window when you already have one open, you can two-finger click on the icon in the dock and choose New Finder Window, especially handy for copying and moving from one location to the next. Note that the OS X Finder does not have a “cut” function, so that files and folders must be dragged in order to be moved. If you are dragging to a different drive (e.g. a USB flash drive or external hard drive) this action will default to a copy. You can still copy as you would in Windows with the context menu or by hitting ?+C to copy then ?+V to paste.
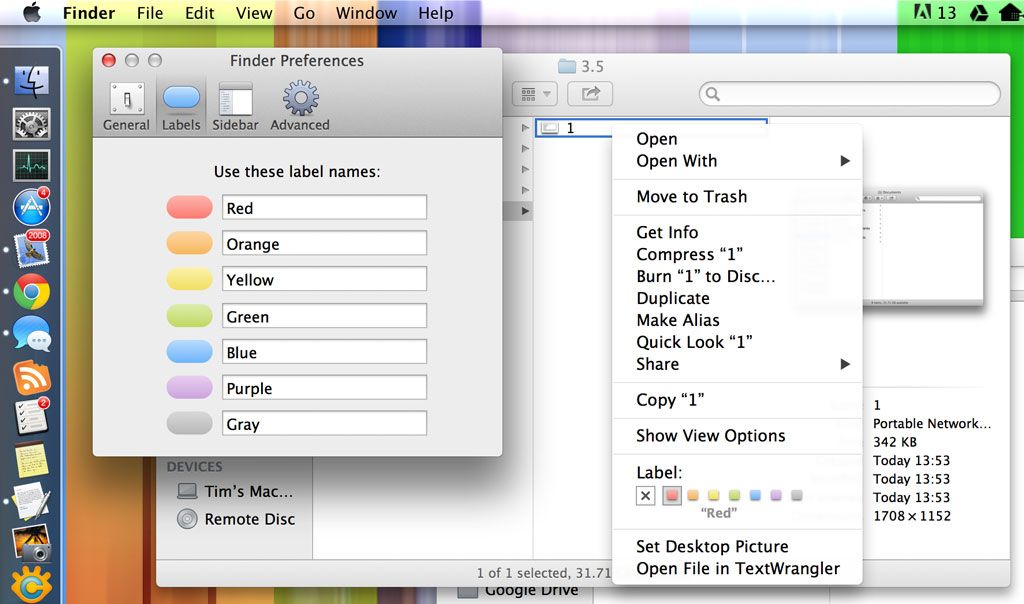
With a Finder window focused (active) you can click Finder in the top-left corner of the screen, then Preferences, to tweak certain aspects. Finder allows for labels for the quick identification and grouping of files, which you can apply from the two-finger click menu to folders or files of your choice. You can name these labels from the Preferences window, as well as choosing the default behaviours for search and other personal options.
Safari
Apple’s own Web browser, Safari is bundled with all Macs in the same way Internet Explorer is bundled with all copies of Windows. Unlike IE, Safari has not sullied its name with poor rendering, spyware and a lack of compliance with Web standards – and thus is generally regarded as a capable Web browser.
Safari uses the WebKit rendering engine, which is the same engine used by Google in its Chrome browser. The browser also shares the same omnibar-style search feature whereby there is only one field for inputting search queries and known URLs. Safari is compatible with extensions, which can be downloaded from Apple’s Safari Extensions library.
In addition to being an all-round easy to use and fast browser, Safari has a few other nifty features:
• iCloud Tabs: Syncs with other instances of Safari associated with your Apple ID, e.g. other Mac computers, iPhone, iPad and iPod Touch devices.
• Reader: Formatting for easy readability on compatible websites, indicated by a clickable Reader button to the right of the address bar.
• Share menu: Quickly email, Tweet or share via other methods while browsing by clicking the Share button (a box with an arrow coming out of it).
• Reading List: A shortlist of reading materials, iCloud-enabled which you can then read on other devices. Use the Share menu to add an article or webpage to your Reading List, then access the list using the icon which resembles a pair of reading glasses.
• Downloads: Currently active downloads accessible from the top-right hand corner button resembling a downward facing arrow.
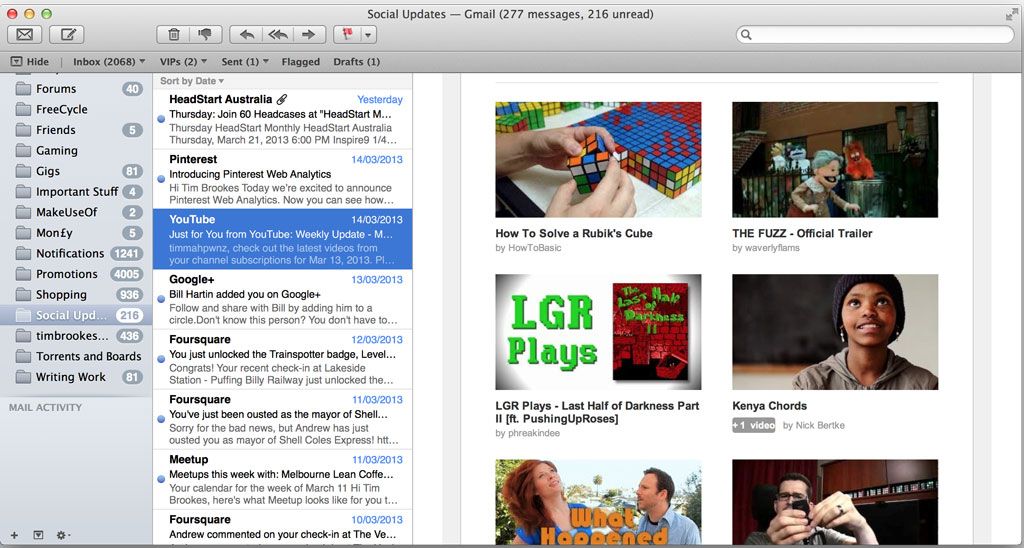
OS X also comes with a desktop email client, known simply as Mail. If you’ve connected an iCloud account there’s a good chance Mail will automatically set up your iCloud email address for use with the program. To add your own existing accounts launch mail and click File > Add Account. For popular webmail services like Gmail and Yahoo the process is very straightforward, with only the email address and password required. For other POP3 and IMAP mailboxes not listed you will need your server credentials when adding an account, as you would with any mail client.
The view is split with your various inboxes, folders and Gmail labels in the left-hand column, a list of email in the centre column, and the email body in the far-right column. The two main buttons in the top-left perform the two primary functions required from an email client - checking for new email and composing new email.
Be prepared to wait a while when setting up an email account you’ve had for a long time – Mail downloads all your messages, sometimes without any indication of what it is doing (the columns will just appear blank on occasion, though once you’re set up this isn’t the case). If you’ve used Outlook, Thunderbird or even Gmail’s Web front-end you will have no troubles understanding Mail.
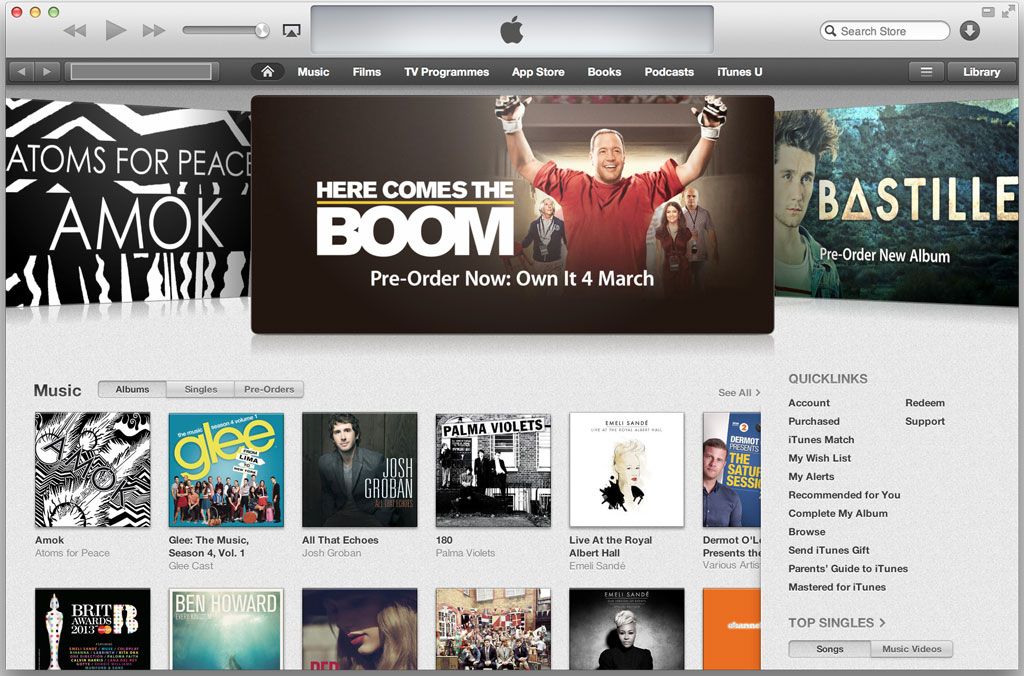
iTunes
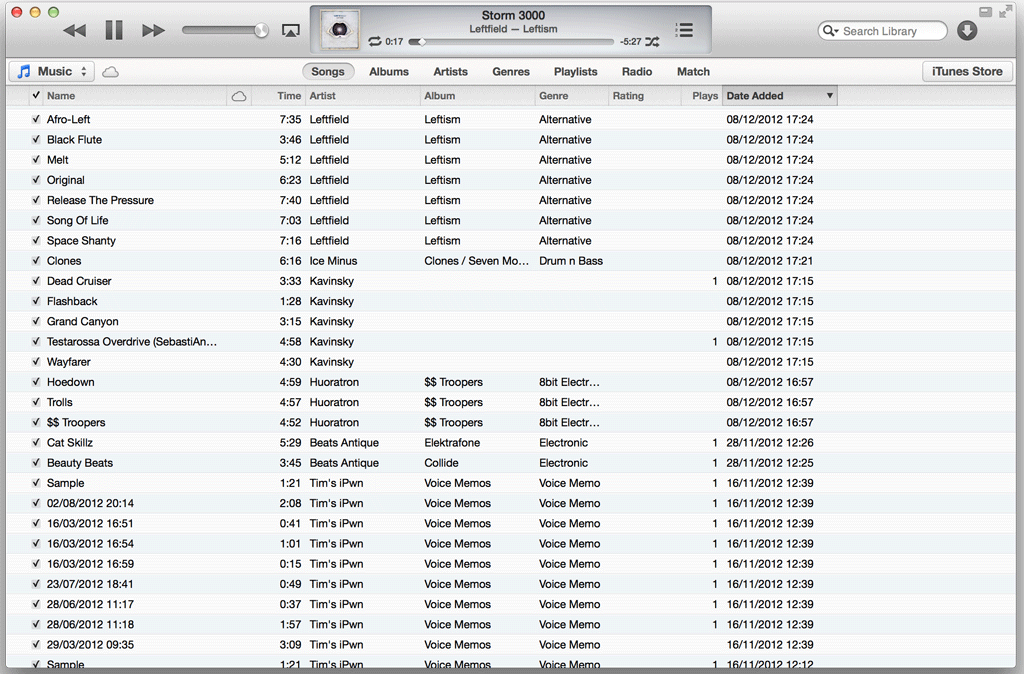
This is Apple’s well-known media management application, recently updated and overhauled with a new interface which looks identical on Windows as it does on OS X. If you have used iTunes on Windows, you will have no problems using it on OS X as the interfaces do not differ at all. If you are new to iTunes, know that it is the default music player on your Mac, as well as being a Library for music and other media, and as a manager for iOS devices.
There are two main interfaces in the latest incarnation of iTunes – the Library and the Store. You can switch between the two using the button in the upper-right hand corner, it will either say iTunes Store in Library mode or Library in store mode. In Library mode you can add music to your library by simply dragging the files into the main window, or using the File > Add to Library method.
You can switch between different methods of organisation using the horizontal bar beneath the status window, search your library using the upper-right hand corner search bar and transmit music to AirPlay devices using the AirPlay symbol (a box with a triangle in front of it).
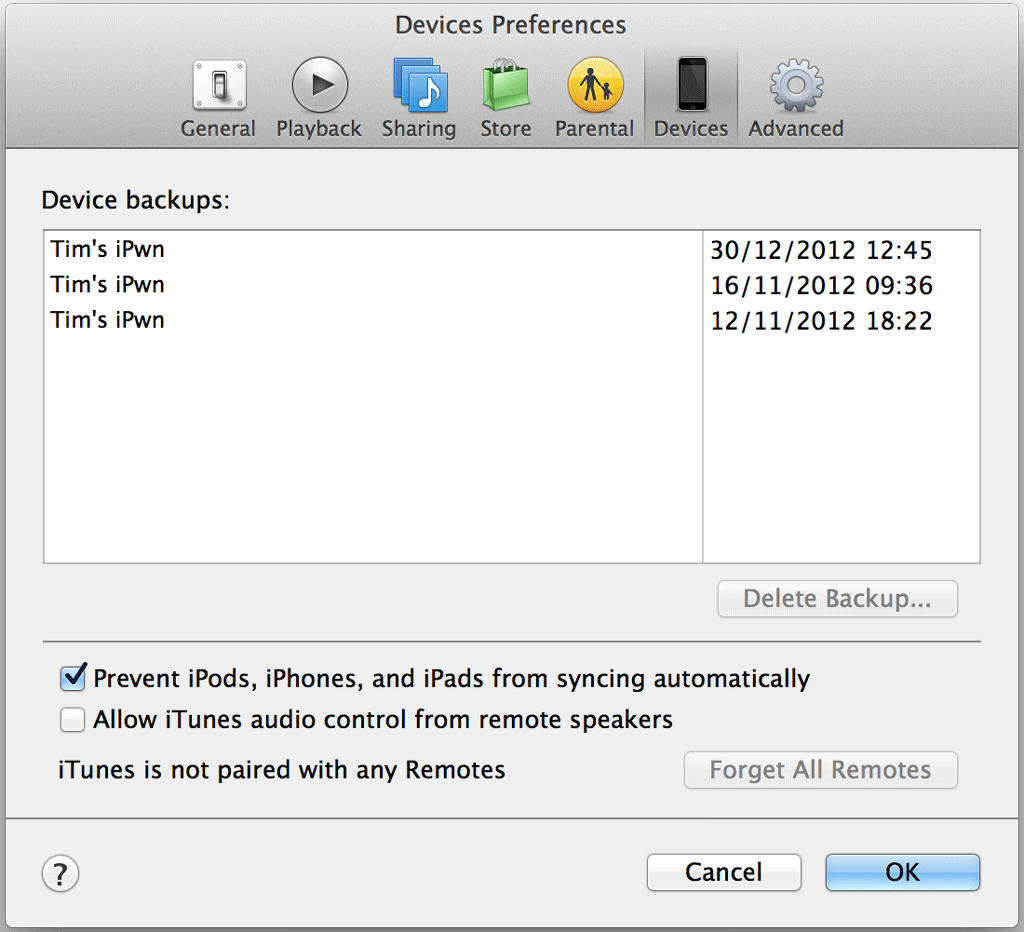
Connect an iPhone or similar iOS device to perform system updates, transfer music or restore a device that isn’t functioning correctly. Remember that connecting devices which aren’t paired to your Mac may lead to the loss of media on that device. One way to stop this happening accidentally is to access the devices menu by clicking Finder > Preferences at the top of the screen, choosing the Devices tab and checking the Prevent iPods, iPhones and iPads from syncing automatically option. There are naturally a lot more options, many of which are personal, and you should explore the menus to make sure you’re happy with the way iTunes is set up.
Remember: If you don’t use a lot of local media, don’t have an iPhone or similar device, and would rather listen to the odd MP3 file using a lighter application which doesn’t use a library, then you don’t have to use iTunes at all – we will approach changing default programs and alternative software later in this guide to the Mac.
The Store view lets you buy media and apps for devices you own, using a fairly straightforward interface. In order to make use of the store you will need to be signed in to your Apple ID, which you can do from the Store > Sign In menu at the top of the screen.
Download: iTunes for Mac Keyboard Shortcut Cheat Sheet
Article: Your Guide To The Great New Features in iTunes 11
Article: 10 Tips For Getting The Most Out Of iTunes 11
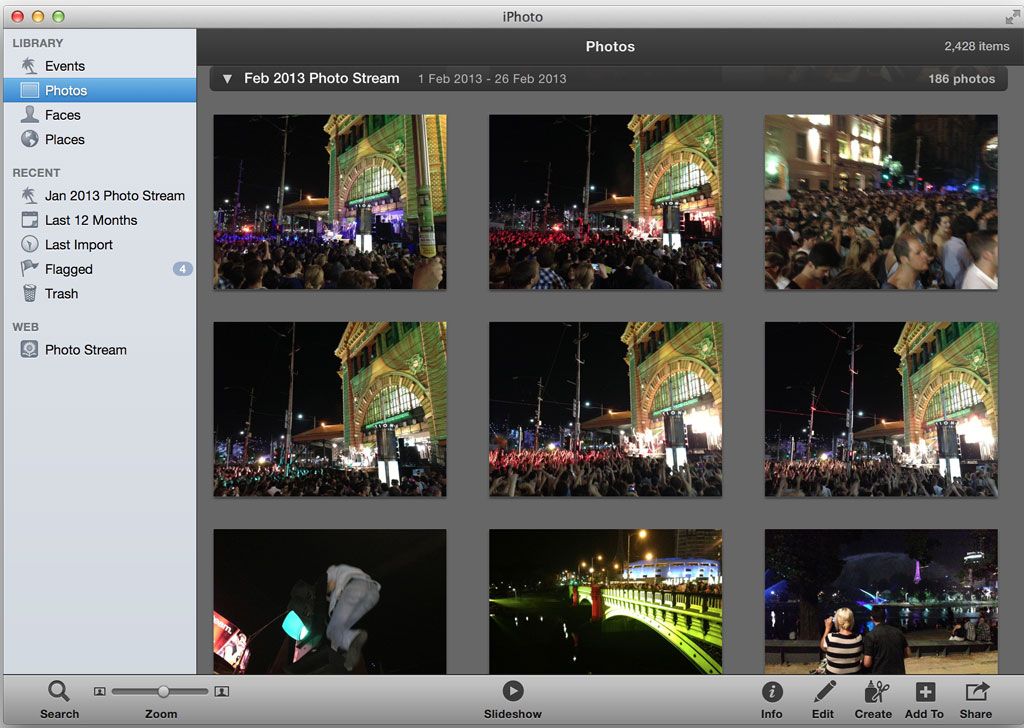
iPhoto
Much in the same way that iTunes is a media hub, iPhoto is the centre of your static images. If you own an iPhone or other iOS device, your pictures will automatically download and be added to your library using Apple’s Photo Stream service. You can change this and many options using the iPhoto > Preferences window accessible from the top of the screen. To import your own photos from a digital camera or memory card, connect the device to your computer and iPhoto should detect images and launch. If it does not, launch iPhoto and click your device on the left-hand side before choosing what you would like to import. iPhoto stores its content in a database located in your Pictures folder, and it’s important to back this up.
Just like Finder, the left-hand side is reserved for navigation. Photos are viewable as one long stream and split by Events. iPhoto can detect events and split accordingly using the data stored within photographs taken - dates, locations and so on. This also allows iPhoto to place your geo-tagged images on a map, accessible from the Places menu. The software is clever enough to be able to recognise faces, though you will need to set a few rules and help it recognise future photographs using the Faces menu item.
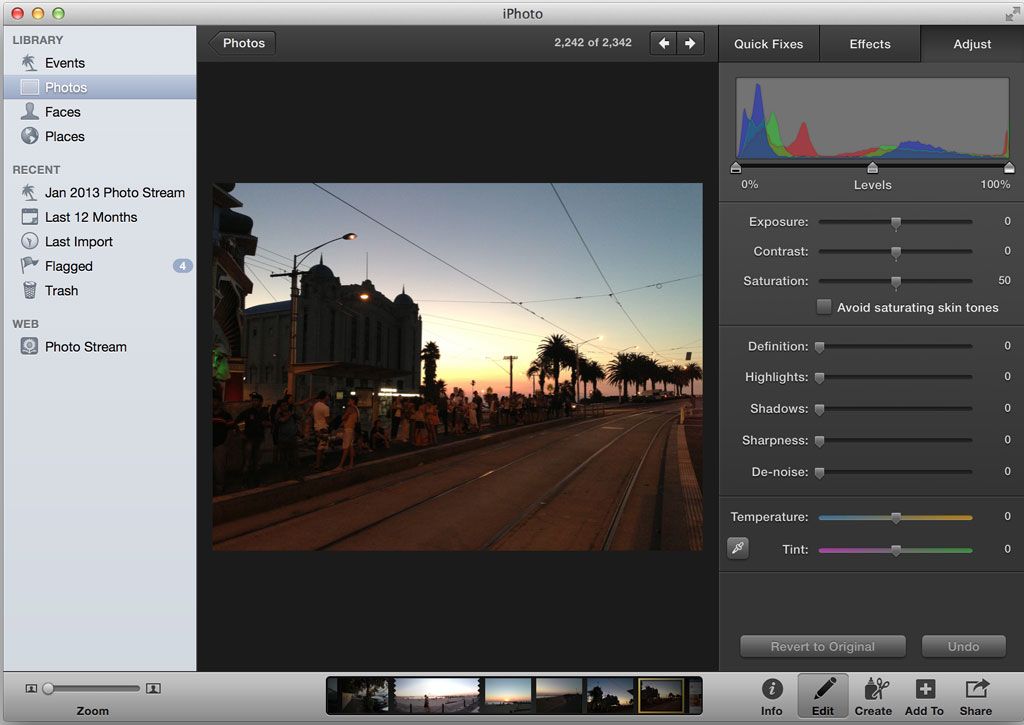
iPhoto is very simple but powerful. While viewing a photo click the Edit button to apply some quick fixes such as autoenhancement, red-eye correction and more advanced operations such as changing exposure and cropping. There are also a few canned effects to quickly add black and white, sepia, and so on to your photos. When you save, iPhoto merely creates a copy, and you can revert to your original photo at any time from the Edit menu, simply click Revert to Original. This is known as non-destructive editing.
Any photos you delete from within iPhoto go to the iPhoto Trash, which must be emptied from within the application using the Trash screen. You can also access any Photo Streams you are subscribed to from iPhoto, and create new ones to share with other iPhoto or iOS users by selecting your photos and choosing Share > New Photo Stream.
You can export photos from your iPhoto stream by selecting multiple images (?+Click, just like Windows Ctrl+Click) then dragging them to a location of your choice. You can also use the File > Export option at the top of the screen.
Messages
The Messages app is new to Mountain Lion and replaces the old iChat application, used for instant messaging. Users of Apple’s iMessage platform available to iPhone, iPad and iPod Touch users can access their message history, send messages and receive messages from this application. It can also be used as a Bonjour client for local chats between Mac computers, to connect a Jabber account (including Google Talk) and to send messages using AIM and Yahoo Messenger messaging services.
Click the Messages > Preferences menu at the top of the screen in order to sign in to your accounts and modify general settings. Once signed in to an iMessage account you can even send messages from your iPhone’s phone number. To send images and other files, drag them into the text box.
Calendar, Reminders & Notes
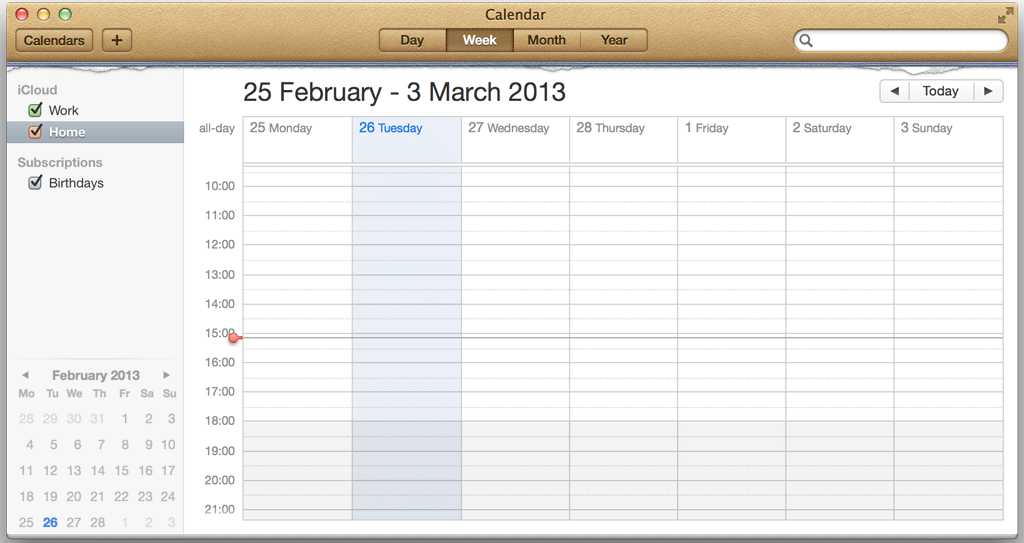
Three other applications which are also iCloud-enabled and designed to sync perfectly between iDevices and Mac computers are the Calendar, Reminders and Notes. Calendars use your iCloud (Apple ID) credentials by default, but by accessing the Preferences menu from the Calendar > Preferences option at the top of the screen you can add your own Exchange, Google or other calendar. This will download all events and automatically push new ones you create to your other devices as well as to the server.
Reminders and Notes are two similar apps, both of which use your Apple ID to push changes to iDevices. There is no way to use them with non-iOS or OS X devices, though they do integrate nicely into the desktop with alerts and notifications.
GarageBand & iMovie
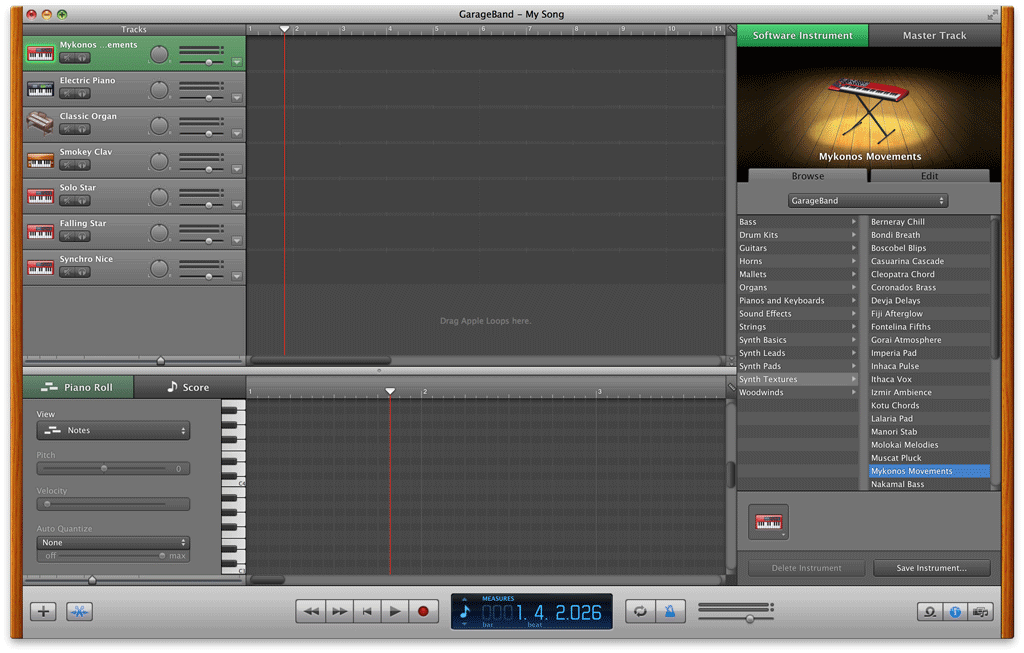
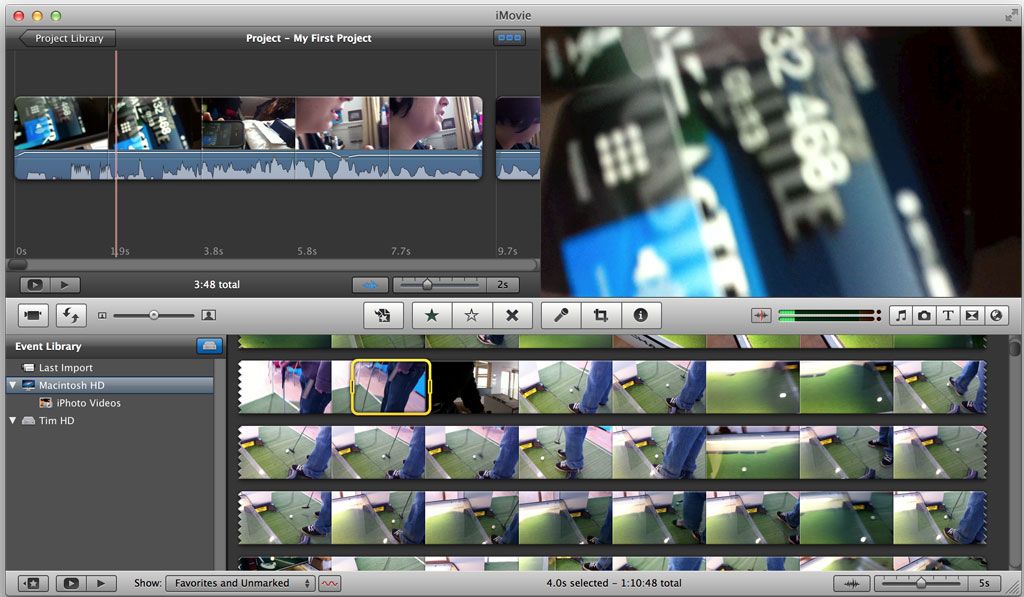
Two of OS X’s most popular and well-known included programs outside of the Mac circle, GarageBand and iMovie, are a media creator’s best friends. While they don’t quite match the power of fully professional programs like Final Cut or Logic Pro, they still provide an easy way to create music and edit video from the comfort of your desktop – and they’re included for free on most Macs.
GarageBand uses a variety of virtual instruments as well as Apple Loops, the company’s royalty free archive of sounds that are free to be used in any commercial projects. There is nothing quite like GarageBand for Windows, and it’s both fun to play and useful for creating backing music or sound effects for other media projects.
iMovie does have a Windows equivalent – Windows Movie Maker. However, iMovie is considerably more powerful than the Windows equivalent, and makes editing video really quite easy. The only snag is that the video must be in your iPhoto library, as this is the main location that iMovie uses as a source. Once you’ve imported your video you should see it in the bottom half of the iMovie project window, where you can click and drag out clip durations before dragging them into the timeline.
Both iMovie and GarageBand are designed to be easy to use, and are thus user-friendly at the expense of more advanced features usually found on professional packages. Both have excellent tutorials available through the Help menu at the top of the screen, though experimentation will serve most users well in exploring their full functionality.
Article: Learn and Have Fun With GarageBand OS X
The Rest
The rest of the iLife suite and other included software is as follows:
• Contacts: A simple contacts management app which syncs with iCloud, and pushes/receives updates from other Mac OS X computers and iOS devices associated with your Apple ID. Fill in your address book on your PC and have the changes automatically pushed to your iPhone.
• FaceTime: A webcam chat program which allows you to call other Mac, iPhone and iOS users from your PC, and receive calls from other FaceTime devices.
• GameCentre: Achievements, leaderboards, ranking and matchmaking for Mac and iOS games. New to Mountain Lion.
• Photo Booth: Take photos using your webcam, apply effects and edits with ease.
• QuickTime Player: A simple, bundled media player for video, though it can also play audio files.
• Preview: An app which opens PDF documents, images and so on quickly for preview purposes. Much like Windows Image & Fax Viewer, except with a few differences like the ability to make annotations on the image.
• TextEdit: The Mac OS X equivalent of Notepad, saves in .RTF format by default and integrates into iCloud. To save in plain text, hit Format > Make Plain Text then save.
• Calculator & Dictionary: Two self-explanatory apps, both of which are useful to have around.
3.6 Activity Monitor & Utilities
There are as many system utilities as there are bundled iLife apps on Mac OS X, and though many will be left untouched by non-power users, there are a few very handy tools; one of which is Activity Monitor.
Activity Monitor
There is no Ctrl+Alt+Delete on a Mac, so if your system completely freezes up you will have to press any key to restart (in the event of an error message) or hold down the power button to turn off the computer. If your Mac continues to freeze, take it back to where you bought it - there is probably something wrong.
Software, on the other hand, has a habit of crashing regardless of which platform you’re running. While OS X is more stable than Windows on the whole, this stability goes out of the window when it comes to software from third parties. In short, Mac app will crash - and you’ll need something to remedy the situation. The first thing you can do is twofinger click and application, hold the option button and click Force Quit. This should work 90% of the time in killing a rogue app, though you will lose all unsaved data.
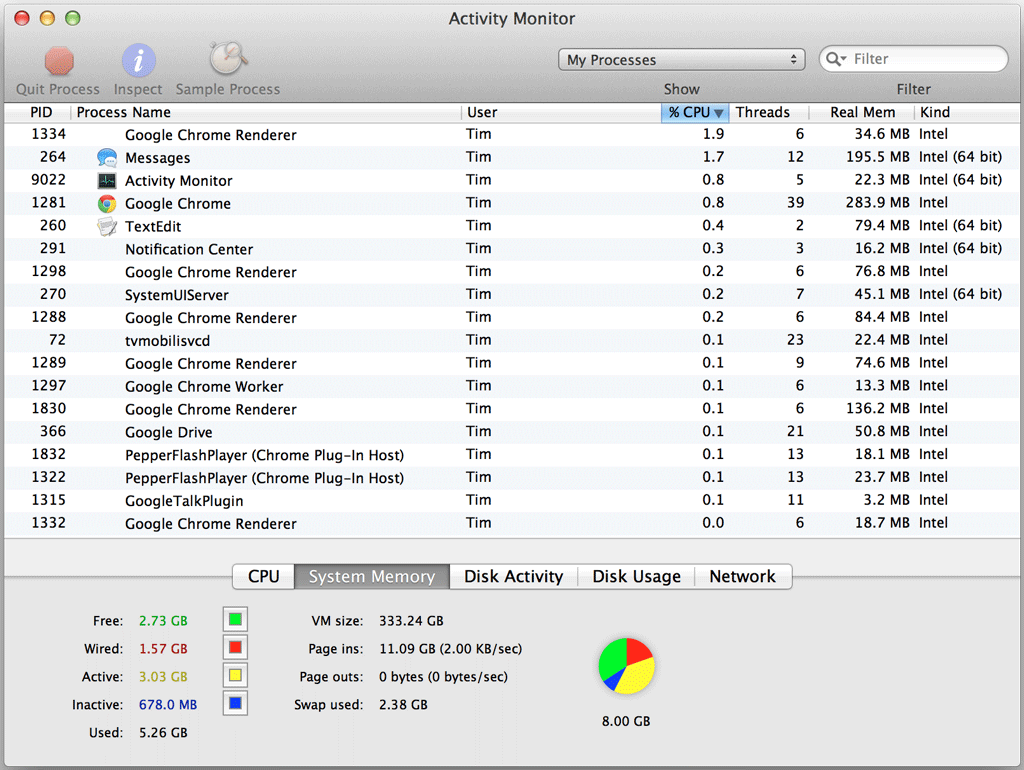
You can also kill apps from a Task Manager-style interface called Activity Monitor. The Activity Monitor gives you a system-wide overview of usage, including processor power, available memory and network usage. You can find it in the Utilities menu under Applications, or use Spotlight. It’s also handy to pin the app to your dock if you’re that way inclined.
If a program is using too much CPU processing power, is causing a memory leak, or otherwise needs to be shut, this is the screen from which to do it. By clicking each of the column titles (e.g. Process Name, User, %CPU) you can arrange processes and quickly spot a problem. Once you’ve found one, click the app and then click Quit Process to kill it. Clicking Inspect will give you a better idea of what that process is doing, though much of the menu is more useful to power users than home users.
Utilities
The Utilities folder lives in the Applications folder (accessible under “Other” in launchpad) and contains all sorts of advanced tools. These somewhat specialised applications perform tasks like importing media from cameras and memory cards (Image Capture), accessing the console (Terminal), troubleshooting wireless and wired networks (Airport Utility and Network Utility), and even the humble game of chess.
Also included is Automator, an advanced automation tool for performing all sorts of tasks on your PC. We have a guide specifically for mastering this powerful tool:
Download: The Awesome Automation Guide for Mac Users
3.7 Other Software & Default Programs
While Mac OS X provides a relatively complete software base from which to accomplish many tasks, you might want to install some different software to play media, open documents and so on. This is still possible, despite a common and untrue belief that you are “locked in” to Apple’s ecosystem and consequently to its own software.
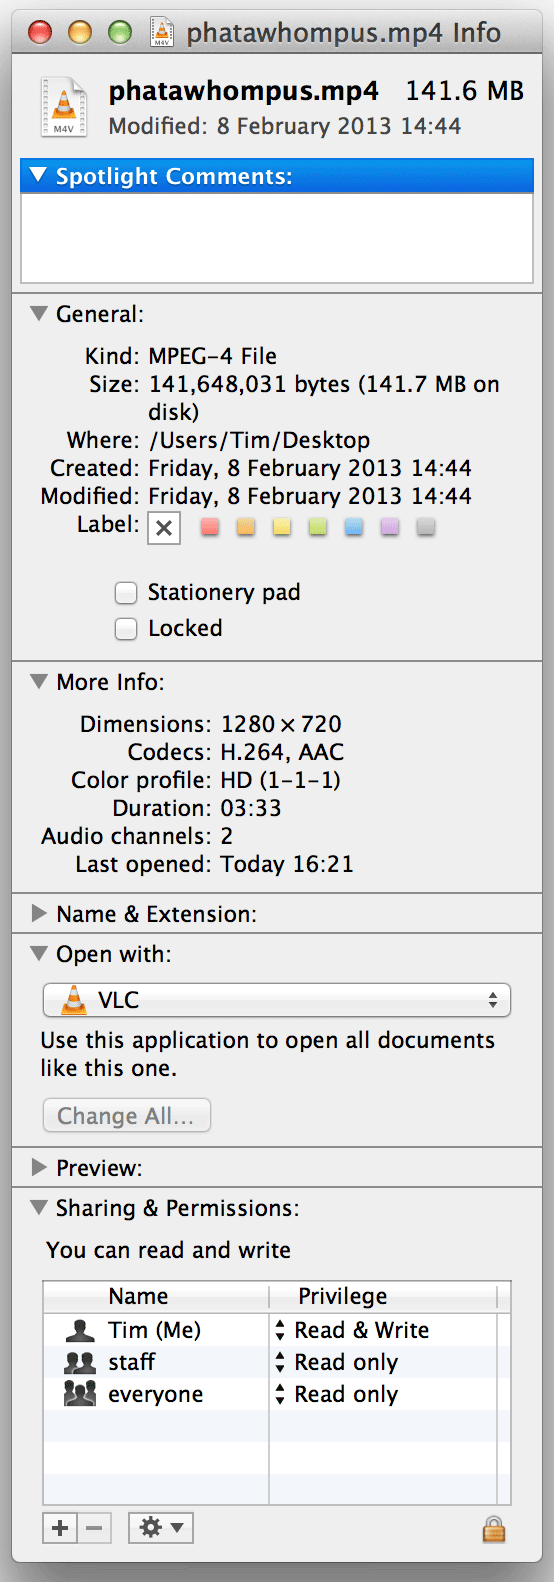
A media player such as VLC is excellent for playback of all media types - from videos using obscure codecs to lossless FLAC or compressed MP3s. Once installed, however, you will need to associate your choice of file with this software. To do this, two-finger click on your media (e.g. an MP3 file) and click Get Info. This displays all sorts of information about your chosen file, and can also be accessed using the keyboard shortcut ?+I while a file is selected. It is the closest thing to the Windows “Properties” feature.
In the window you will see an option toward the bottom which says “Open with” and then the program name. To change this default behaviour, select a program from the drop-down list and click Change All. All files of this type will now open in the application you have chosen in this window.
4. System & Settings
Where Windows users have Control Panel, Mac OS X users have a similar area called System Preferences, accessible from the dock or by clicking the Apple logo in the top-left corner and choosing it from the menu. These settings are divided by different areas, and most, if not all, are self-explanatory.
4.1 Personal & Notifications
These are all settings which affect the user experience of OS X. The General tab allows you to make changes to the operating system’s colour scheme, icon size and toggle scroll bars.
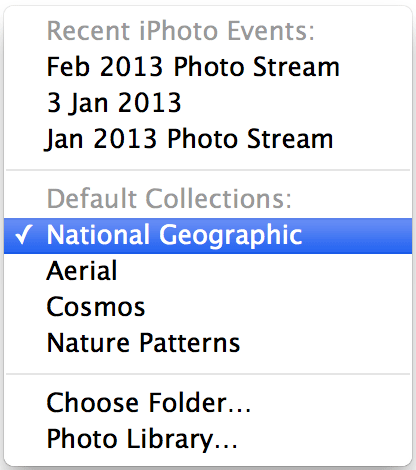
To change desktop wallpaper or set a screensaver, head to the Desktop & Screen Saver preferences where you can choose from Apple’s in-built images, your iPhoto library or simple solid colours. If you would like to change your desktop at regular intervals, there is an option to do so here. You can also set a screensaver on the second tab, with varying styles and sources to choose from.
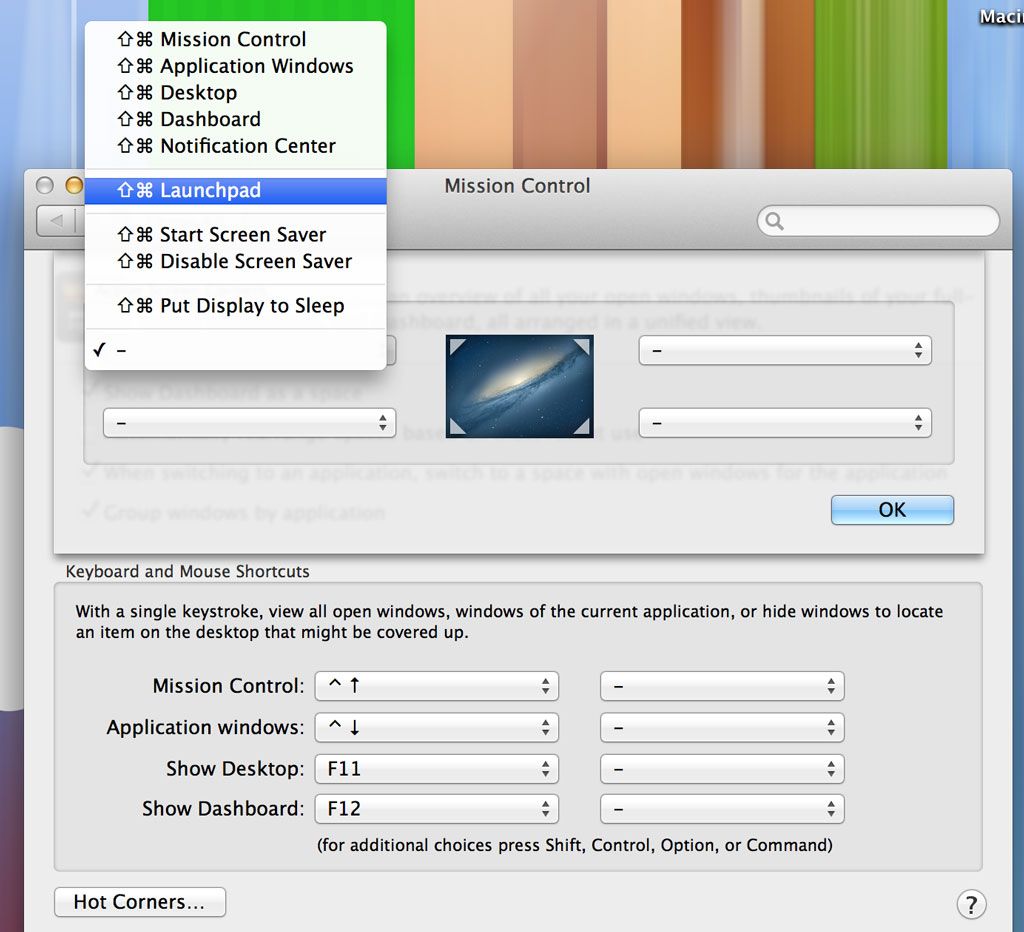
Dock is unsurprisingly an area to change dock preferences, including enabling magnification, position on screen and the overall size. Similarly, the Mission Control preferences let you specify keyboard shortcuts, whether Dashboard displays as a space and one particularly handy toggle – whether or not to arrange workspaces by the most recently used. This is handy if you want to “lock” your multiple desktops in place, rather than have them move around as you use them. Hot Corners can be configured from here, and when enabled will trigger an action when the pointer is held over the corner of your choosing. This is very useful for quick access or users who have limited mobility in their hands.
As we have previously touched upon, Language & Text includes the ability to change not only the region of your Mac but also the overall language of your operating system and on the Input Sources tab allows you to choose different keyboard layouts and input methods, handy for bilingual users or those adapting to a different territory.
The Security & Privacy tab is arguably one of the most important preference items on the list. Here you can enable and disable GateKeeper, whether or not your Mac always needs a password after waking and enable a feature called FileVault which encrypts your data with a username and key. It is important that if you enable FileVault that you know your data can potentially be lost if you forget the username or key, so for that reason it is turned off by default.
You can also enable the in-built OS X Firewall on the respective tab. Once active it’s possible to define rules using the Advanced button, and new applications will ask you if you want to let them through the firewall (i.e. “App X wants to receive incoming network connections”). The OS X firewall is generally a lot less needy than that built into Windows, and it’s also the only security software you really need to enable.
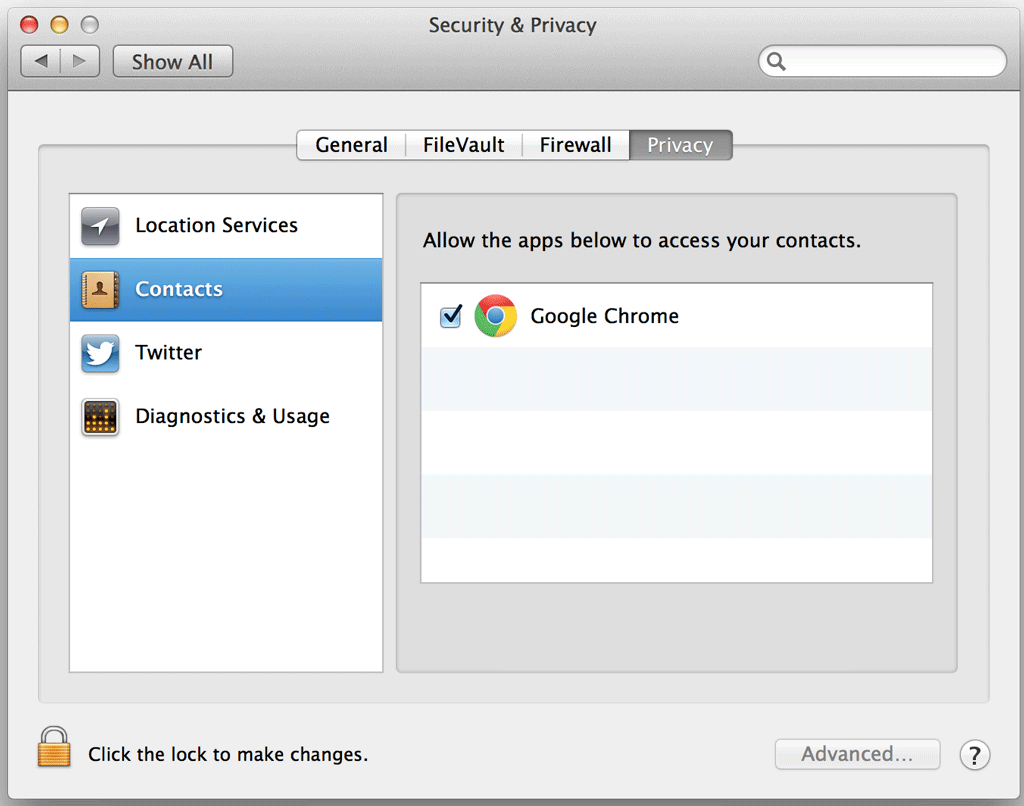
The Privacy tab will be familiar to iOS users as it is the one-stop control panel for applications that have requested access to Twitter credentials, location services and Contacts, among other personal data. You can revoke access here, as well as toggle whether or not you want to send anonymous usage statistics to Apple.
Spotlight preferences are fairly straightforward; here you can define what is searchable and how results are displayed. Notifications lists any apps you have granted access to Notification Centre, and much like iOS you can toggle the type of notification you receive as well as revoke access.
Notification Centre is accessed using the very top-right corner button on your screen, or by dragging with two fingers from the left-most edge of your laptop trackpad or Magic Trackpad.
If you have connected your Twitter account (more on this later) you can also tweet from this menu.
4.2 Hardware
Apple computers do not run into driver issues with first-party hardware because Apple has control over every component. This means you won’t have to root around looking for drivers to make your sound, wireless or other components work properly. There are still preferences for devices though, starting with the CDs & DVDs menu.
Here you can set rules with regards to optical media, something many new Mac owners will not be making use of. Regardless, the option is still here and if you do happen to buy an Apple-branded external drive then you can set default behaviours for inserted discs here too.
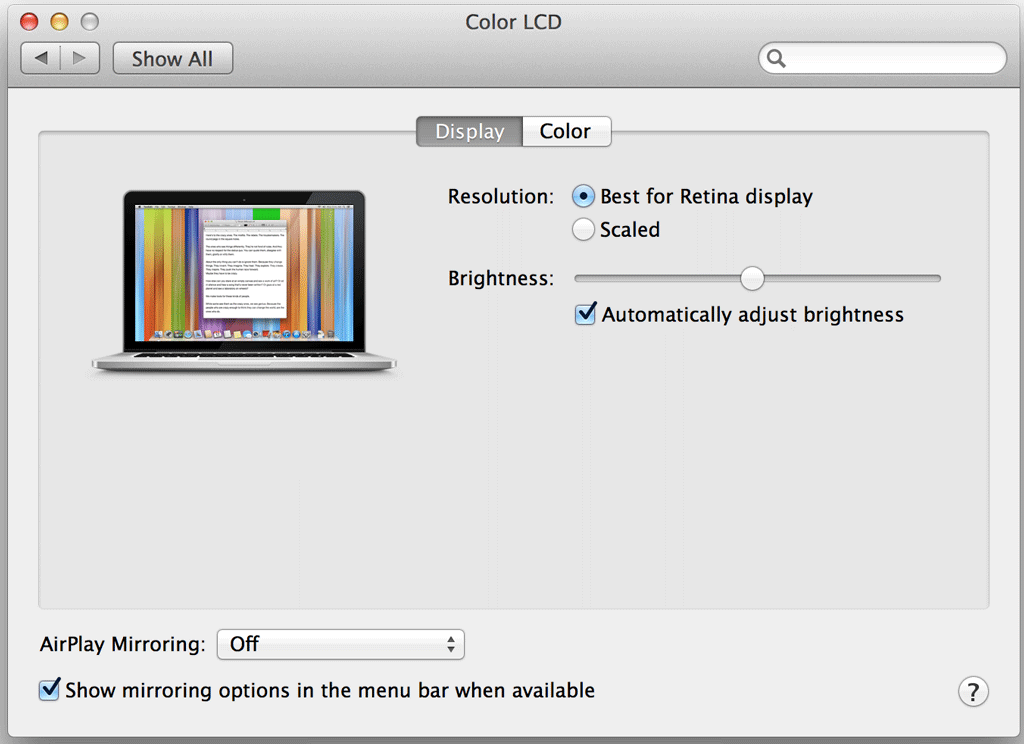
The Displays menu contains options for resolution, colour preferences and external monitor controls. You can arrange external monitors (i.e. decide where the monitor “appears” so that you can move your mouse to the appropriate side of the screen) and enable mirroring for externals and AirPlay devices (this mirrors your current display, rather than treating the new display like an extension of your existing desktop).
Remember: if you plug in a secondary display and launch the Displays preferences, a window will appear on each connected display for changes to be made - rather than all appearing from the “main” monitor.
The Energy Saver menu is for defining periods of time after which your Mac should sleep, hibernate and turn off the screen. Note the two tabs - Battery and Power Adapter - for setting separate rules depending on your source of power. Two other interesting settings are Wake for Wi-Fi network access which allows your Mac to wake up in order to complete file transfers, downloads and so on as well as options for Power Nap, a mode which periodically wakes your Mac in order to check for new email and iCloud updates.
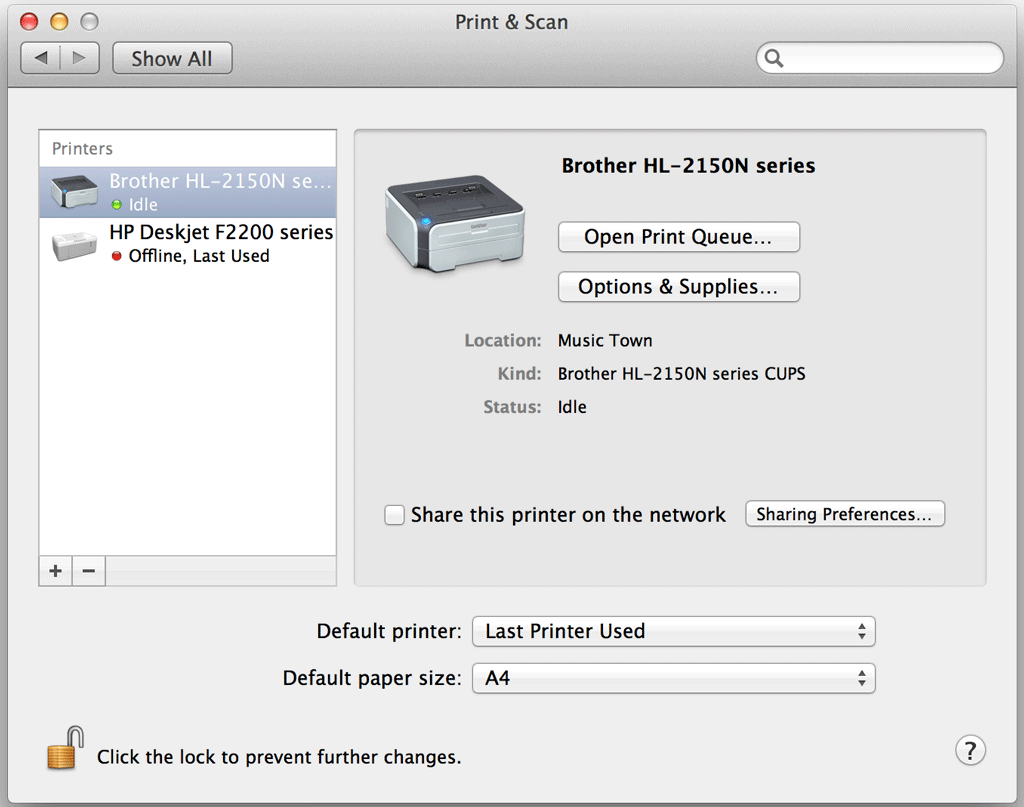
The Keyboard, Mouse and Trackpad preference menus are all very self-explanatory. The Print & Scan menu lists all known devices for printing and scanning, including network devices.
To install a printer within Mac OS X, simply turn on your laptop, turn on the printer and connect it via USB. Your Mac will detect new hardware and attempt to download the correct drivers without any intervention on your part. If it cannot find drivers this either means there are no Mac drivers for your chosen device (a good example of this is a Dell printer, which only has Windows drivers available) or optionally visit your peripheral vendor’s website for a dedicated download tool, installable using the .PKG software install methods outlined in Chapter 2 of this guide to the Mac.
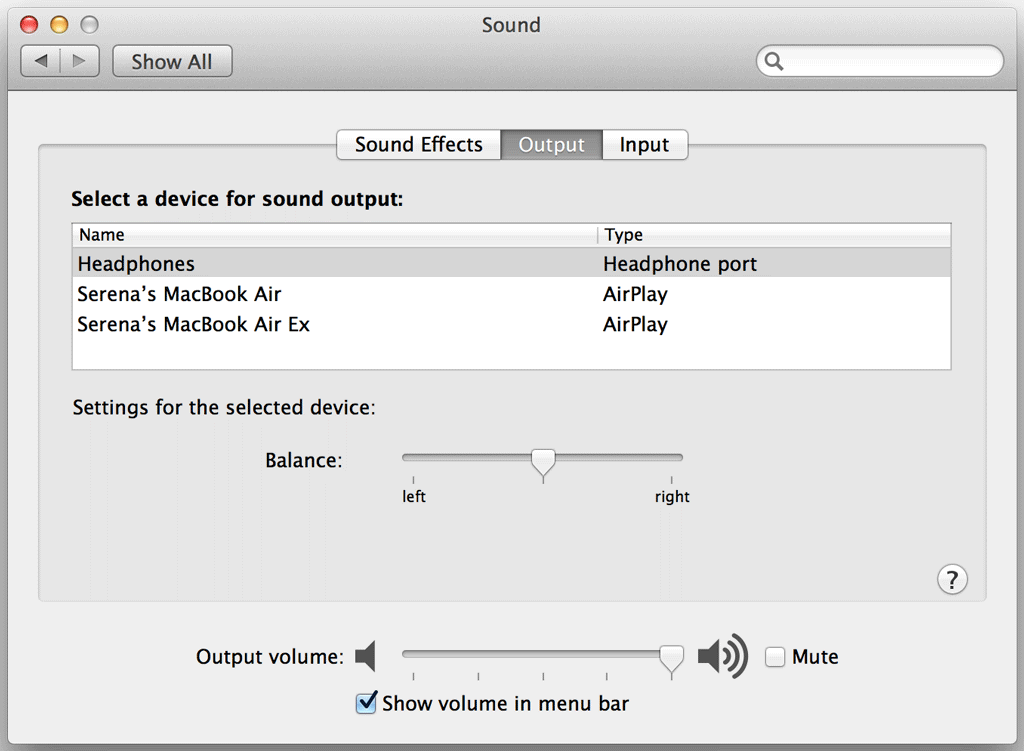
Finally in the Hardware section are options for Sound. Here you can define alert and other operating system sounds on the Sound Effects tab. More importantly, you can define input and output devices too on their respective tabs. By default the only input will be a microphone, built-in to your Mac. The output menu is very useful should you connect your Mac to an external TV or entertainment unit via HDMI, or to an AirPlay server for the wireless transmission of sound.
Note: You will need to define external sound output here, so to channel sound through a HDTV you would choose HDMI Output, or else the sound would play through your laptop while the picture is output to another monitor. You can also choose to channel all sound via AirPlay, should you have an Apple TV or other capable device.
4.3 Internet & Wireless
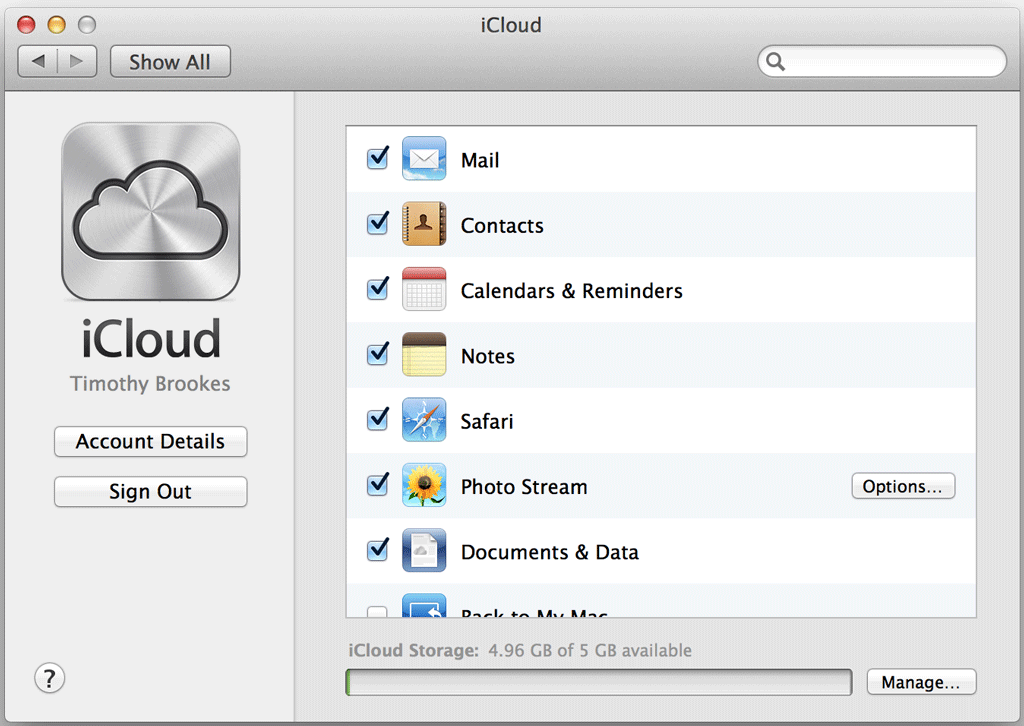
The Internet & Wireless preference area isn’t as packed at the rest, but still contains some important features, not least of which is iCloud. Here is where you can sign in to your iCloud account, choose what to sync, and get an idea of how much remaining storage you have. You can also upgrade to a higher storage plan from here, and delete items using the Manage Storage button.
Note: If you buy more iCloud storage you still get to keep the initial free 5GB, so a 10GB storage plan provides 15GB total usable storage.
Mail, Contacts & Calendars is another menu option that should be familiar to iOS users. This is where you can add email addresses for use in Mail, as well as Twitter & Facebook accounts for integrating with your Contacts, and also providing handy Tweet and Post to Facebook buttons in Notification Centre.
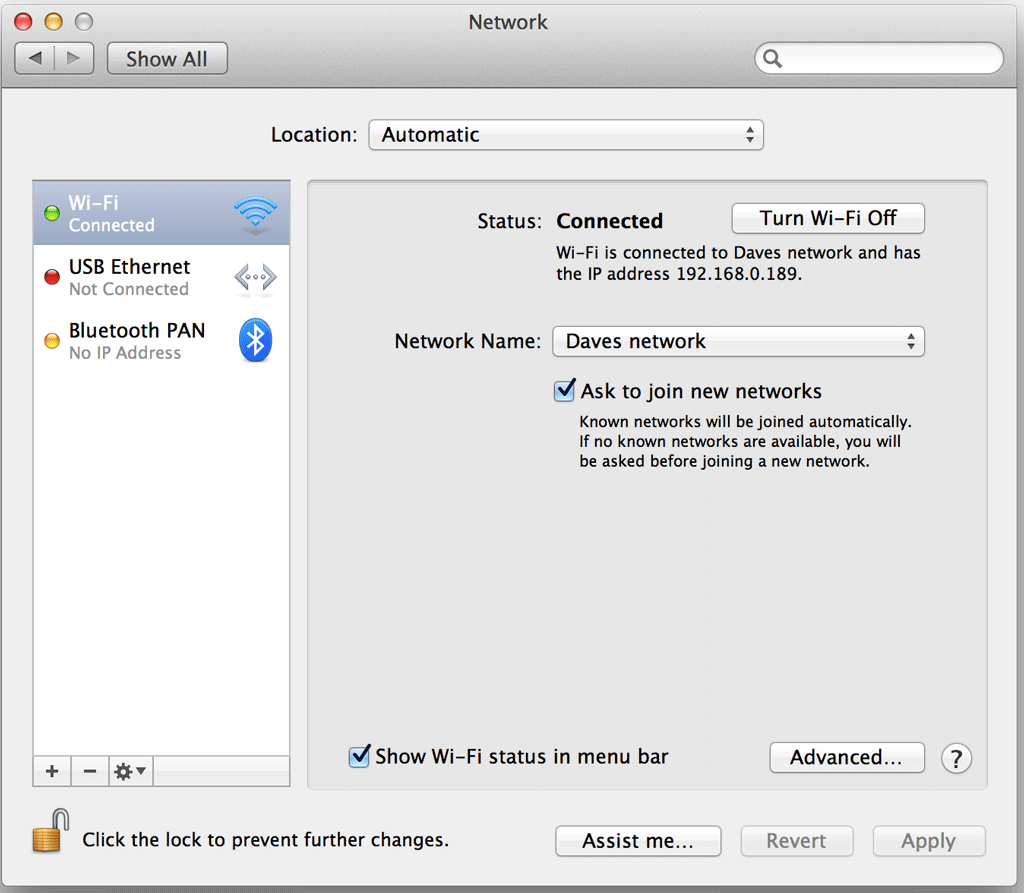
The Network preferences provide quick access to network adapters, known wireless networks and a few options for turning off automatic notification of new networks. Don’t forget you can always access Wi-Fi options from the top right corner of the screen, via the standard wireless symbol.
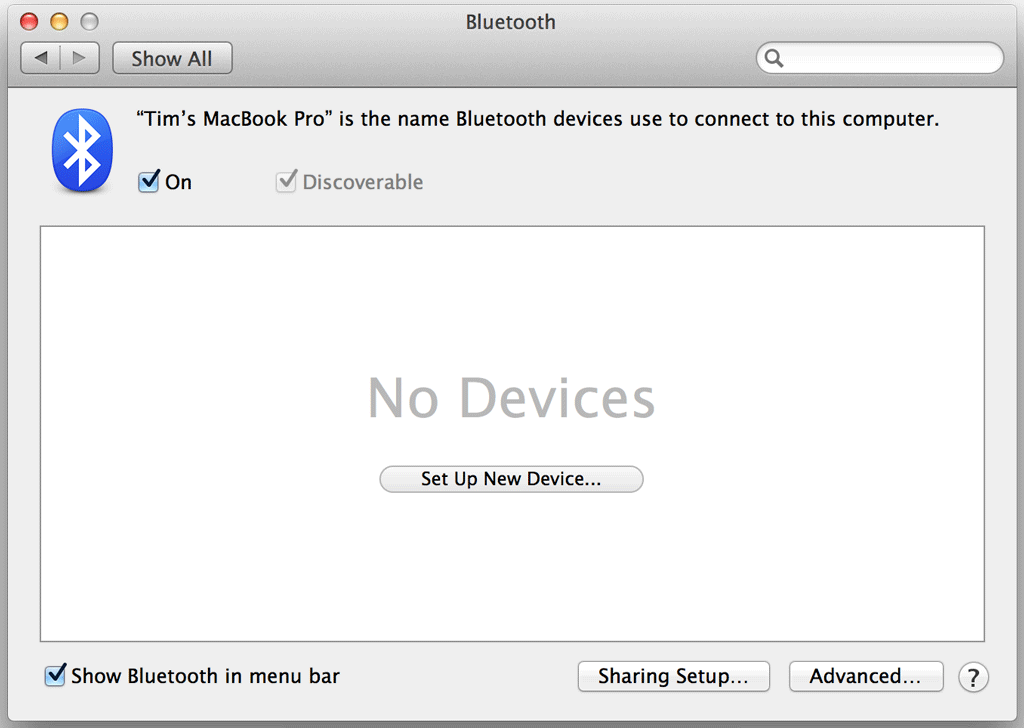
The Bluetooth menu is where you would go to set up a Bluetooth microphone, keyboard or other wireless device. You can also enable or disable Bluetooth from this menu, though this is also possible using the system tray area in the top right of the screen.
For setting up the sharing of files, printers and Internet connections head over to the Sharing menu. Simply check a service to enable it and many, like Remote Login, will give you the necessary information about connecting. Certain features require SSH connection and knowledge of Apple Remote Desktop from the Mac App Store. Sharing of Internet connections can be done via Wi-Fi, Bluetooth or Ethernet (though this depends entirely on what you’re connected to). You can also change your computer’s name here, so that it appears differently on the network.
Note: File sharing is done via Apple File Protocol, or AFP for short, rather than SMB which is what Windows uses.
Setting up SMB on a Mac isn’t impossible, but even after all these years Windows and OS X computers do not talk to each other particularly well. Mac to Mac works excellently, however.
Related Article: How To Easily Share Files Between Macs and Windows PCs
MakeUseOf Answers: How do I log into a Mac to share files from a Windows PC?
4.4 System
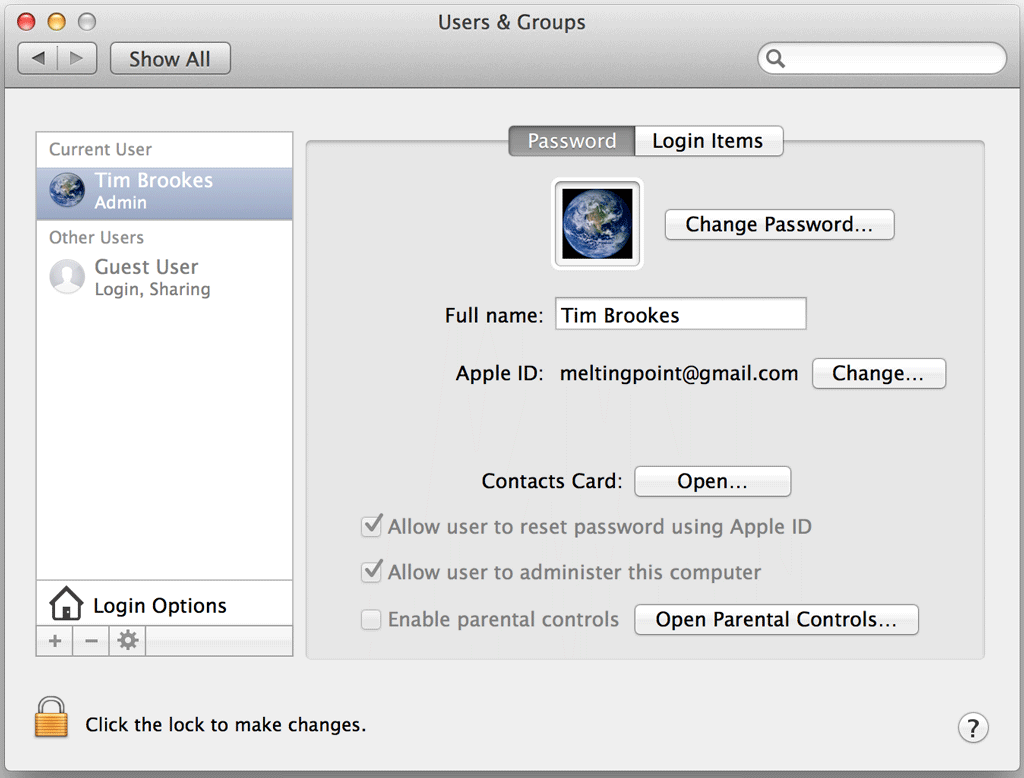
If you would like to add new users to your Mac you can do so from within the System preferences; simply choose Users & Accounts. Here you can also make changes to your own user account, including changing your name and your picture. You can also change the Apple ID that is associated with your user account and your password if need be.
To add a new user account first click the padlock and input your password. You can now add a new user account by clicking the plus (“+”) button in the bottom-left corner. Notice the Login Items menu which specifies which applications (if any) can run from a cold start, similar to the ‘msconfig’ boot menu on Windows.
The Parental Controls preferences require at least one more account other than your own which does not have administrator rights. Here you can restrict access to applications and other operating system functions you do not want others (such as children, naturally) to be able to access.
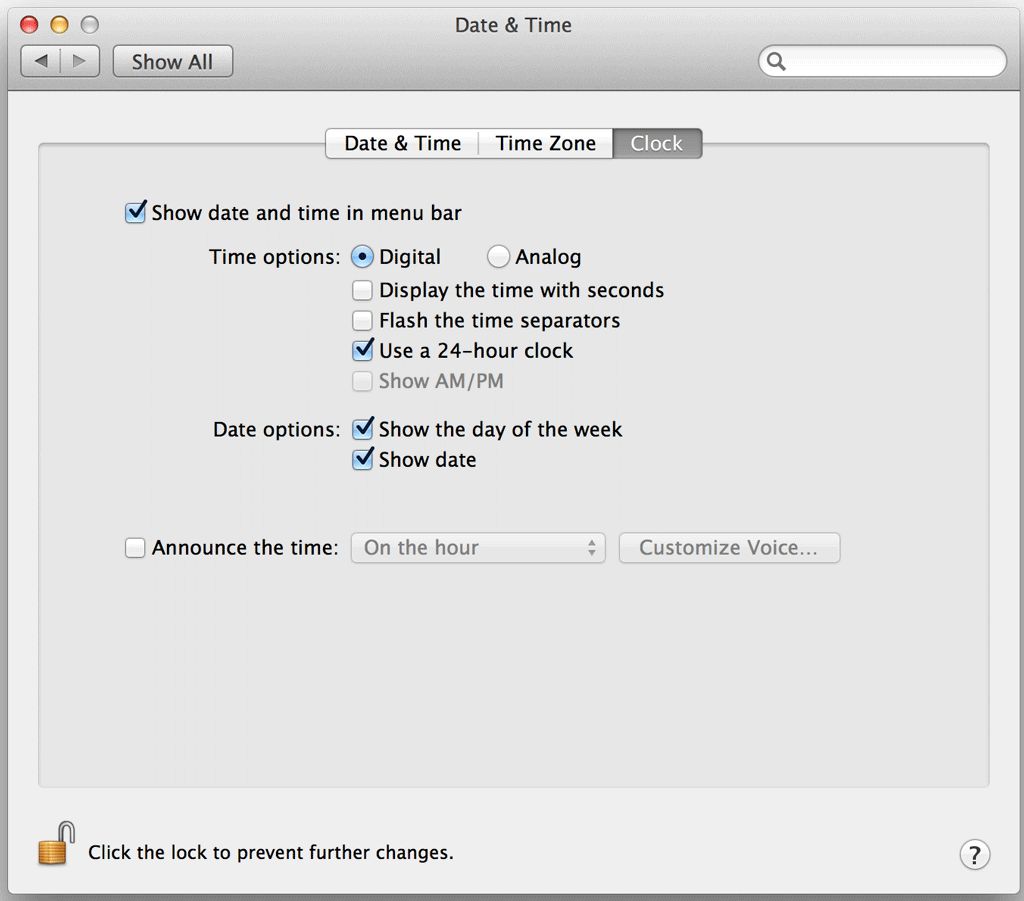
The Date & Time options are spread across three tabs, and this menu operates in much the same way as the Windows equivalent. Under the Time Zone tab is an option to set your date and time automatically, and if you are using a new Mac or recent MacBook this will detect your location using GPS so that you won’t have to change a thing if you are travelling.
Just about every preference for system clocks is catered for, with digital, analogue, and 24-hour, as well as display options to modify.
Dictation & Speech contains options for Mountain Lion’s in-built dictation function, which converts spoken words to text anywhere you can type. The feature is enabled by tapping the function (fn) key twice by default, but this menu allows you to change that shortcut or disable the function entirely. The Text-to-Speech tab contains options for VoiceOver, Apple’s in-built text-to-speech engine. When enabled, it will speak any elements of the desktop - particularly handy for partially sighted users. You can also highlight text in browsers and documents; two-finger click and choose Speech > Start Speaking to engage.
There are a number of options with regards to this feature, including the ability to change the voice and speed, and set automatic announcements. If you would like a different voice to that which came with your version of Mountain Lion, click the System Voice drop-down box and choose Customize. You can then choose from many non-English voices, which will need to be downloaded from Apple’s servers before they can be used.
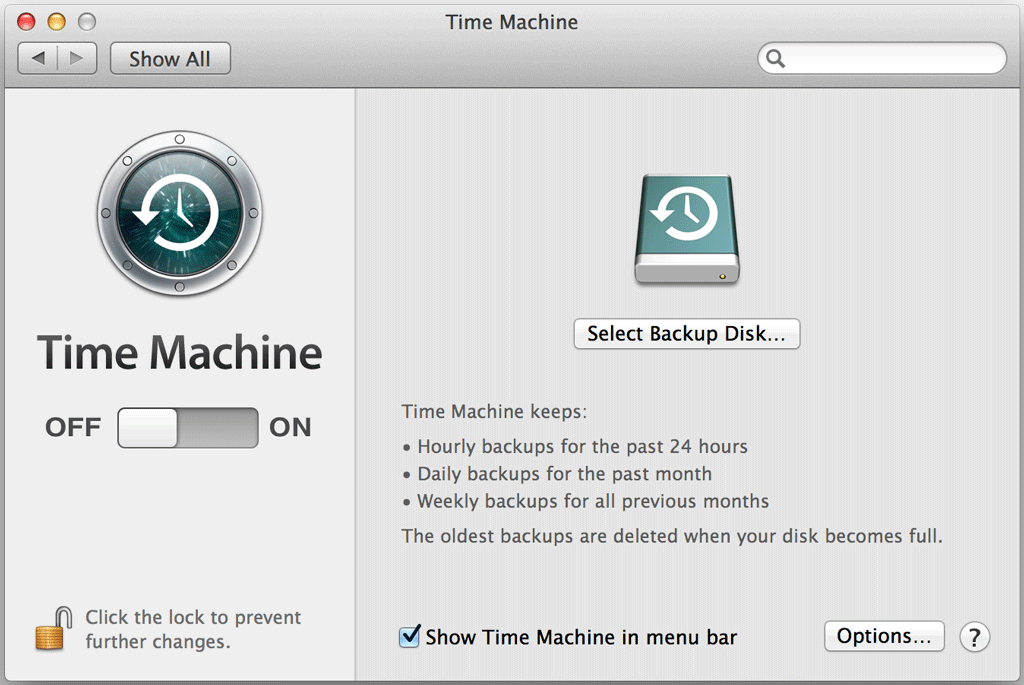
Time Machine is Apple’s automatic backup function, which turns an external hard drive into scheduled backup. Simply connect your external drive, go to Time Machine and flip the switch to the On position.
Use the Options menu to exclude items from the backup. By default, Time Machine will attempt to back-up your whole drive. You can then restore from this backup using Migration Assistant on a new Mac or fresh install of OS X.
For all of OS X’s Accessibility options, head to the Accessibility preferences and make your choices. Everything from zooming the screen to changing default colours, sticky keys and automatic announcements can be added simply by checking a few boxes.
4.5 Other
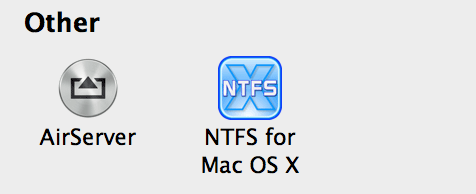
The Other area in System Preferences won’t show up on a new install of Mountain Lion. This area is reserved for other programs to install their own preference panels, in a bid to keep OS X’s modifiers all in the same place. What will appear here depends entirely on what you install, but virtualisation software, NTFS drivers and media streamers are often found here.
5. Hardware & Peripherals
5.1 Webcam & Microphone
All recent Mac computers in the MacBook and iMac range have built-in microphones and webcams. While the webcam is fairly obvious to spot at the top-centre of the screen, Apple hides the microphones remarkably well. All you really need to remember is that the microphones (yes, there are multiple microphones in the latest models) are designed to be used with you facing the computer – just as if you were normally using it.
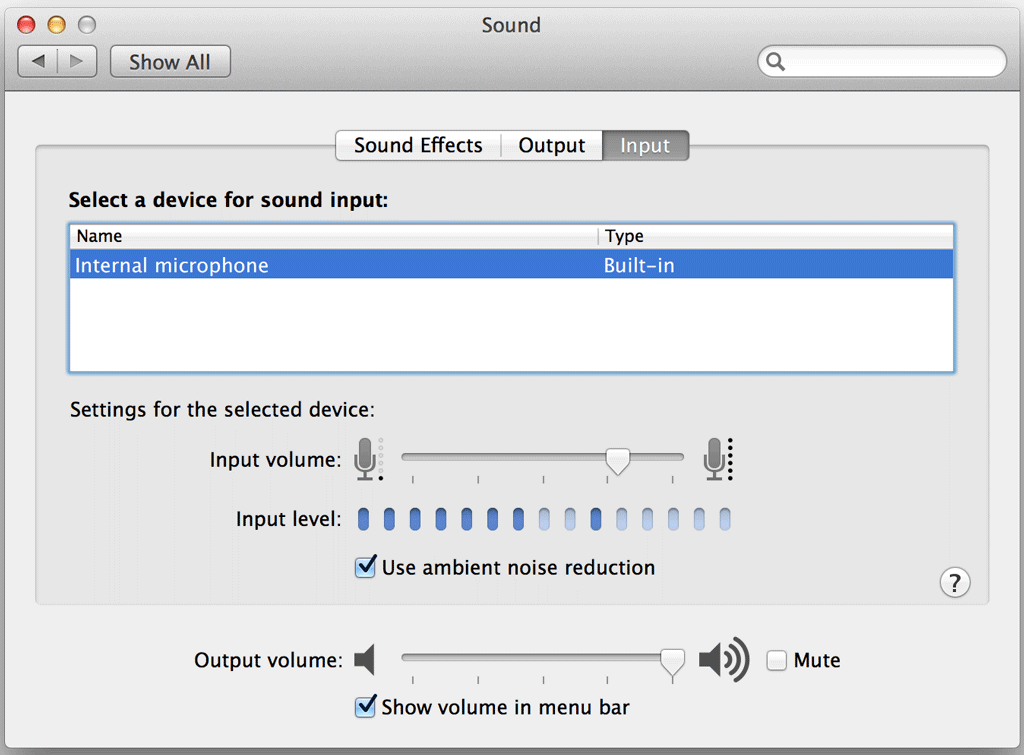
For most common usage the microphones are very sensitive, clear and require no set-up or manual adjustment. If you find you would like to adjust the microphone, or have connected an external microphone and would like to use that instead, head over to System Preferences > Sound followed by the Input tab.
Here you can see the microphone reacting to your voice, can choose to use ambient noise reduction and manually adjust the input volume if necessary.
Similarly your MacBook or iMac’s webcam will not require any setup, but if you would like to see it in action you can launch the Photobooth app, a simple image capture program included with iLife which allows you to take photos and apply some interesting effects.
If you have recently purchased your Mac, notice the green light alongside your webcam that is active whenever the camera is in use. If you see this light, a webpage or program is using your webcam, so be aware of the privacy implications this may have. Mac Mini and Mac Pro customers will have to connect an external microphone to the correct port, and a USB webcam (which your Mac should automatically install upon connection. Otherwise, as ever, check the vendor’s website).
5.2 Inside a Mac
Like any computer, a Mac is just an assembly of various components housed in a pretty metallic shell and shipped to consumers. Since Apple made the switch from PowerPC architecture to Windows-equivalent x86 and x64 architecture, the main differences between the two platforms exist superficially in the operating system alone.
Of course there are some differences, but there’s no reason you can’t take your brand new MacBook and install Windows, or any other X86/64 compatible operating system, on it – though you might have some issues with drivers. The terminology is slightly different for some components - Apple is stuck on the term “logic board” where most PC users would say “mainboard” or “motherboard” for example.
Upgradeability depends entirely on model, with the Mac Mini being one of the most upgradeable models thanks to an easily-accessible window on the bottom of the unit which provides easy access to RAM and storage. Conversely, the MacBook Pro with Retina Display and the new MacBook Air range are among the least upgradeable, with their RAM being soldered to the logic board and their batteries glued in place. This is a space-saving measure by Apple, required to get the internals to fit in the snug unibody enclosures. Laptops are traditionally difficult to upgrade beyond RAM, but these models make it impossible without voiding warranty or breaking out the soldering iron. Similarly, the brand new slim form-factor iMac models introduced in 2012 are upgradeable, with no soldering or gluing, but the drives and memory are very difficult to access. These models require much of the machine to be dismantled in order to reach these components.
Apple’s preference toward slim and light machines has clearly somewhat affected their upgradeability, and so a Mac isn’t necessarily the best choice for someone who likes to tweak inside the case. Then again, these machines are very well-equipped straight out of the box, with the MacBook Pro range coming with highly capable dedicated graphics chips, while retaining battery-friendliness with an additional low-power onboard chip.
With regards to longevity, most Mac owners should buy what they think they will realistically need over the time they intend to own the laptop - 5 years is a good estimate, though many machines go on for longer. More storage is always better, and it might be worth waiting a month to afford the better-equipped model rather than taking a base model and regretting it a few years later. Apple’s support for older hardware is notoriously good, as many iOS users have found out with the company routinely providing software updates for outdated devices.
The same is often true for the Mac range of computers, though be aware cut-off points do exist when your machine will no longer be able to upgrade to the latest version of OS X or beyond. This doesn’t mean your Mac will no longer function, it just means you won’t necessarily get the latest and greatest features bundled with each OS upgrade.
5.3 Ports
Thunderbolt
For expanding your Mac’s potential there are the same array of ports you’d expect to see from a Windows PC, with a few extras on top. Each Mac differs, so your MacBook Air is bound to have less ports than, say, an iMac, due to space constraints. One thing you are very likely to get on a new Mac purchased in 2011 or later is a Thunderbolt port.
Thunderbolt technology is where Apple has hedged its bets, and more and more devices are being made that bear the Thunderbolt connector.
Thunderbolt has an effective speed of 10Gbit/second, which makes it twice as fast as USB 3.0 at 5Gbit/second. Thunderbolt devices can be “daisychained” together, so if your MacBook Air only has one Thunderbolt port it can still use multiple Thunderbolt devices at once, except you’ll have to connect your second device to the first.
A good example of this is the latest range of Apple Thunderbolt monitors. These have a Thunderbolt port on the back and according to Apple allow you to daisychain up to six devices through your MacBook’s one port, with each new peripheral connected to the last.
USB & FireWire
Apple embraced USB alongside FireWire, its own proprietary high-speed connection. New Macs no longer come with dedicated FireWire ports but instead separate FireWire adapters that fit into a Thunderbolt port are available for purchase so you can use older hard drives and devices.
All new Macs purchased post-2012 now come with USB 3.0 connectivity. This provides fast transfer speeds of up to 5Gbit/second (trouncing the USB 2.0 speed of 480Mbit/second) while retaining backwards-compatibility with older USB devices.
MagSafe & Other Ports
MagSafe is Apple’s name for their power port, which is loosely held in place by a magnet. The power supply cable is designed to come away easily, should an impact cause tension on the wire to stop your laptop flying off the desk or the power cable taking damage.
Ethernet is supported on iMac, Mac Pro and Mac Mini models, though MacBook owners will need to purchase an adapter for post-2012 models. HDMI and Mini DisplayPort are also included on some models, along with a SDXC slot which can be found on all recent Mac models for the reading of SD-sized memory cards.
Audio output is delivered via the standard 3.5mm stereo connector which outputs an analogue or digital signal.
5.3 External Devices
A lot of devices designed for use with Windows PCs will function just fine on a Mac, albeit with a few exceptions and things to bear in mind. Most, if not all, USB keyboards will work, as will USB mice; both can then be configured from their respective entries under System Preferences.
Similarly many external drives and USB sticks can be used on both Windows and Mac machines, though the choice of filesystem is important. FAT devices, FAT16 and FAT32 included, can be read and written on both Microsoft and Apple operating systems, whereas NTFS (Windows’ common file system that allows files of greater-than-4GB to be stored) can only be read on a Mac by default. There is compatibility software, known as an NTFS driver, which enables Mac computers to write to NTFS volumes; one free solution is NTFS 3G, while a paid solution is Paragon NTFS.
It’s also worth remembering that if you format a USB stick to the native HFS or HFS+ format that OS X uses then it will not be compatible with Windows PCs. If you need to use a USB disk with both systems, format the drive to ExFAT.
MakeUseOf Answers: What is ExFAT and how is it different from FAT32?
You should always check whether a peripheral is designed to work with a Mac before you buy, as despite the likelihood that it will there is still a chance you will be unable to return it should you discover it does not work.
6. Conclusion
6.1 Switching Back
So you’ve purchased, set up and got your Mac running the way you want it to but you need Windows all of a sudden? Thankfully there are a few ways of accessing Windows on a Mac, with the main options being:
• Bootcamp: Apple’s Windows-friendly partition manager, found in Applications > Utilities > Boot Camp Assistant. This wizard guides you through the steps required to set up a separate Windows partition on your Mac which you can choose to boot instead of OS X when turning on the machine. Requires a copy of Windows, patience and enough hard drive space to justify it.
• Virtual Machines and Compatibility Software: Running Windows in a virtual machine is a good way to have access to the entire operating system alongside your primary OS X install. It also takes up less hard drive space and time in order to get a VM working than it does to repartition your hard drive and install afresh. Look for software like VirtualBox which is free, or VMWare Fusion which allows you to run Windows software as if it were native OS X code.
• Replacing OS X with Windows: Formatting and installing Windows as if you’d just purchased a Windows PC. Seems a bit drastic, don’t you think?
For more information about running Windows and OS X together in harmony check out our guide:
Download: Computing Harmony - Seamlessly Blend Windows and OS X
Download: Computer in your Computer - How To Use VirtualBox
6.2 Final Thoughts
Congratulations - you have reached the end of this guide to the Mac. There is of course more to being a Mac owner than we could ever fit into one guide, and that’s why we’ve created a few of them to help you out. It’s unlikely that we could ever cover everything so instead we’ve got MakeUseOf Answers for tech help, as well as regular articles on the subject.
Download: What’s New In Mountain Lion
Help: Ask A Question on MakeUseOf Answers
Solve: Mac Questions on MakeUseOf Answers

