Learning Git is an essential skill in software development. The increasing popularity of open-source software has led to Git's success. You can use it to keep track of contributions, manage collaboration, and host codebases in remote repositories.
Git plays a vital role in most open-source projects. Find out what relation Git has with open-source and how you can use this productive tool to boost your contributions.
The Relationship Between Git and Open-Source
Git is a version control software widely used in development. Git lets you track software changes in real time, save copies of your code in remote repositories, and collaborate online. Take an in-depth look at Git in our advanced Git tutorial.
Git is also an open-source project that contributors have worked on to improve over time. Open-source software is generally free for anyone to use. Software becomes open-source when the owner grants rights to anyone to use, change, and distribute the source code.
Open-source contributions happen in a public and collaborative manner, also known as “Building in Public.” Learn more about the difference between open-source and closed-source software.
Git has collaborative features that are essential in open source. Git enables teams to collaboratively maintain projects. It lets you fetch code, add contributions on your local machine, and submit your changes for review.
Git Features Used in Open-Source
Git has several commands used to perform operations on its interface. There are many such commands, but you don't need to learn them all to contribute to open source. Here are some basic terms and commands that you will come across:
- Fork: A copy of a GitHub repository (repo). When you make a fork, you get a copy of it on your GitHub account, allowing you to edit the contents without affecting the project's parent repository.
- Issue: An idea, bug, or task that contributors may work on. An issue with a label like good first issue is a simple task meant to motivate contributors to participate in open-source projects.
- Label: Used to categorize issues and discussions.
- Maintainers: Contributors with permission to modify the files in a project’s repository. They are also known as code owners.
- Contributors: Anyone who contributes code, documentation, or other technical resources to a Project.
The following are some common commands you will use in open-source development:
- Branch: A copy of the contents of the repo. One repo can have several branches: the main branch and several others, if necessary. The default branch is main/master, and you can name additional branches according to their purpose.
- Merge: Merge means joining different branches together such that they have the same code.
- Pull Request (PR): Notifies maintenance that you have pushed code that needs to review. Make a pull request when ready to merge with the parent branch and need reviews from others.
- Remote: Online version of your local repository.
- Fetch: Downloads content of a remote repository into your local repo.
- Commit: Tracks changes to a file on a local or online repo. All commits have a unique ID that records details about the author, time, and nature of changes made.
Getting Started With Open Source
In this tutorial, we will look at the basic steps you will take to make your first contribution to open-source. We will use Git as the local repository and GitHub as the remote repository. Here is how you get started.
1. Pick a Project
Identify a suitable project to contribute to. Your skills and passion for making a difference will determine which project you pick. You can contribute a feature, documentation, or skills such as product management.
The right project will have an active community on social channels such as Slack or Twitter. Its repository should have regular contributions and proper licensing for open-source software.
2. Get the Contributors Guide
Every reputable open-source project should have a contributors guide. The guide has instructions and directions to show new developers how to contribute to the project.
You will learn how to fork, work on an issue, and make a pull request to the upstream repo to allow the maintainers to review your contribution. You will most likely find the contributors guide in the root folder of the project.
The contributors guide will help you understand the project's workflow and reduce merge conflicts. If you don't adhere to these contributors guidelines, a maintainer may reject your pull request.
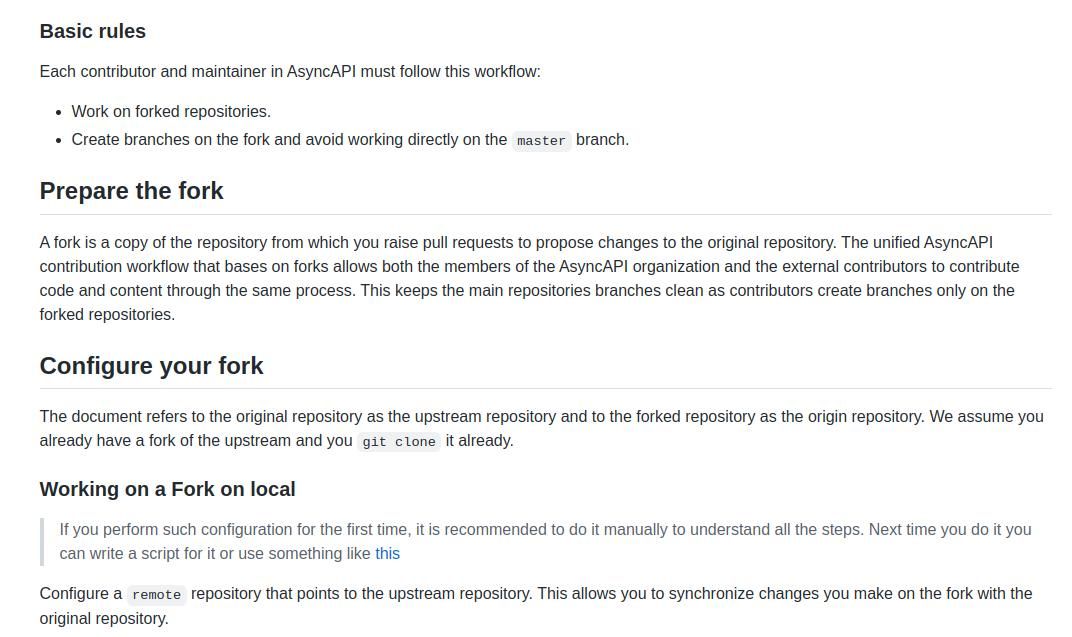
Here's an example of a contributors guide from the AsyncAPI project.
3. Pick an Issue
An issue can be anything you would like to contribute to. It can be a request you identified in the issues section on the project repository, a typo, or documentation you wish to add to the project.
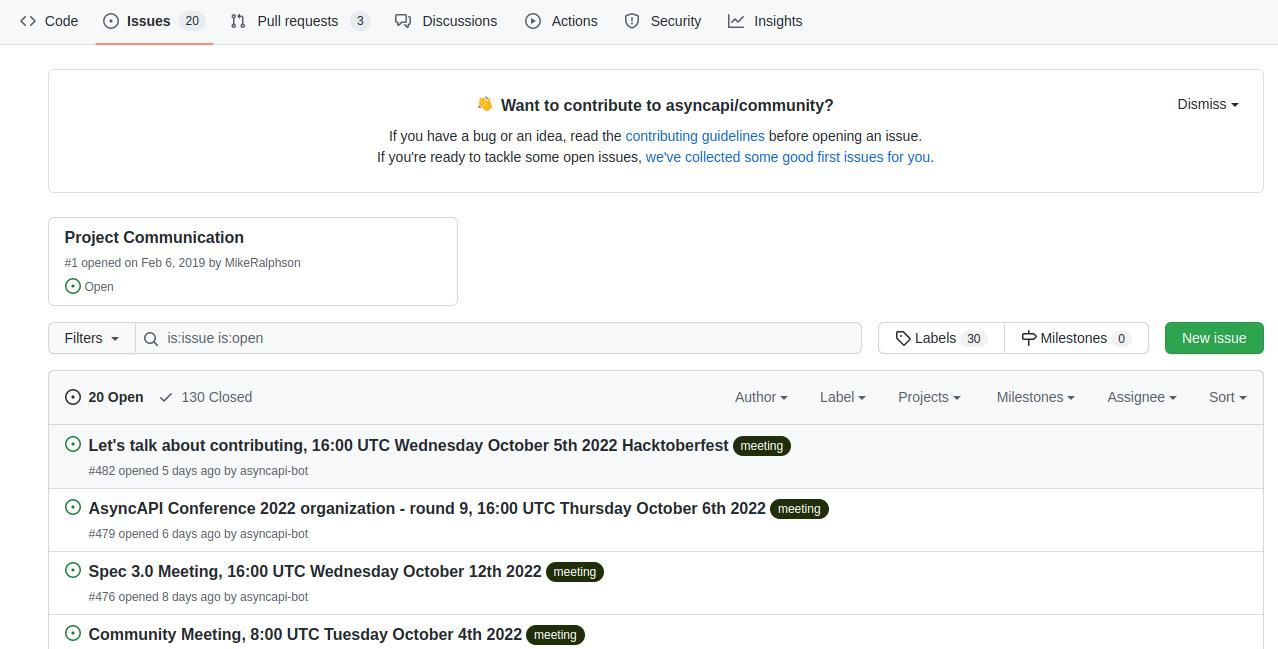
Before you start working on an issue, first inquire about or discuss the issue with the maintainers. Sometimes it could be a stale issue or one that another contributor is already working on. This is what the issues section on GitHub looks like:
4. Work on the Issue
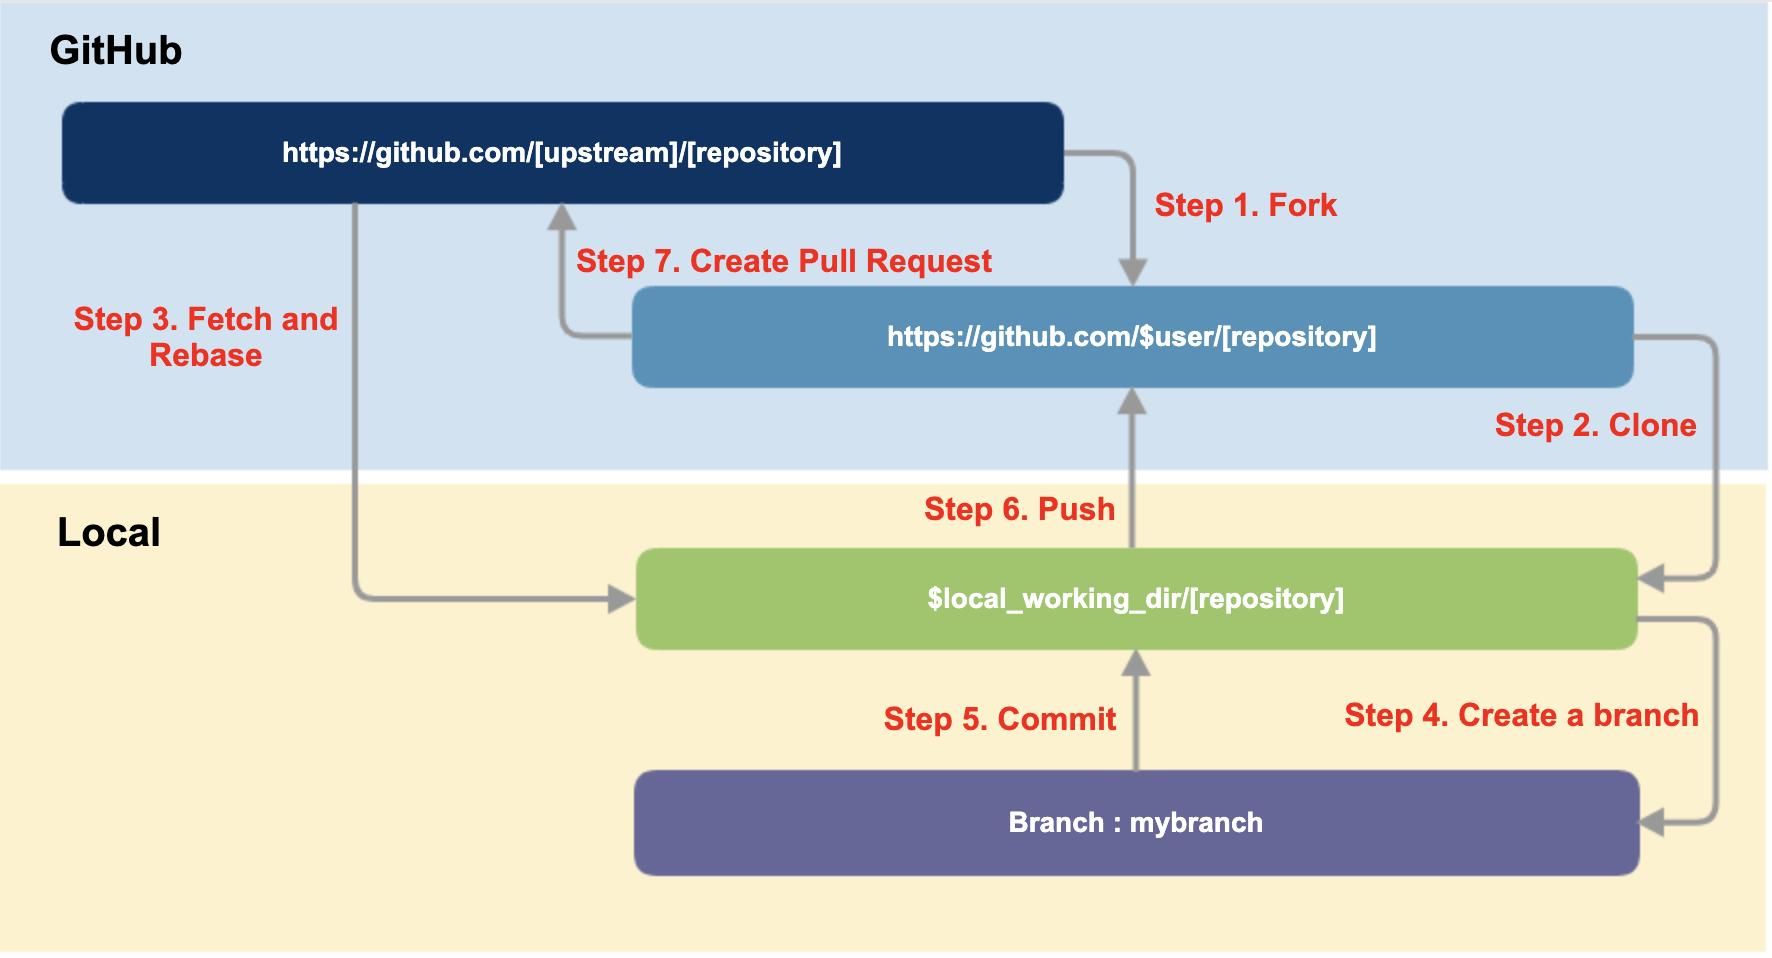
Once the maintainers approve the issue, you can set up a forked repository. Forking will get you a copy of the parent repository to your repository. You will clone the repository into your local machine with the git clone <repository address> command.
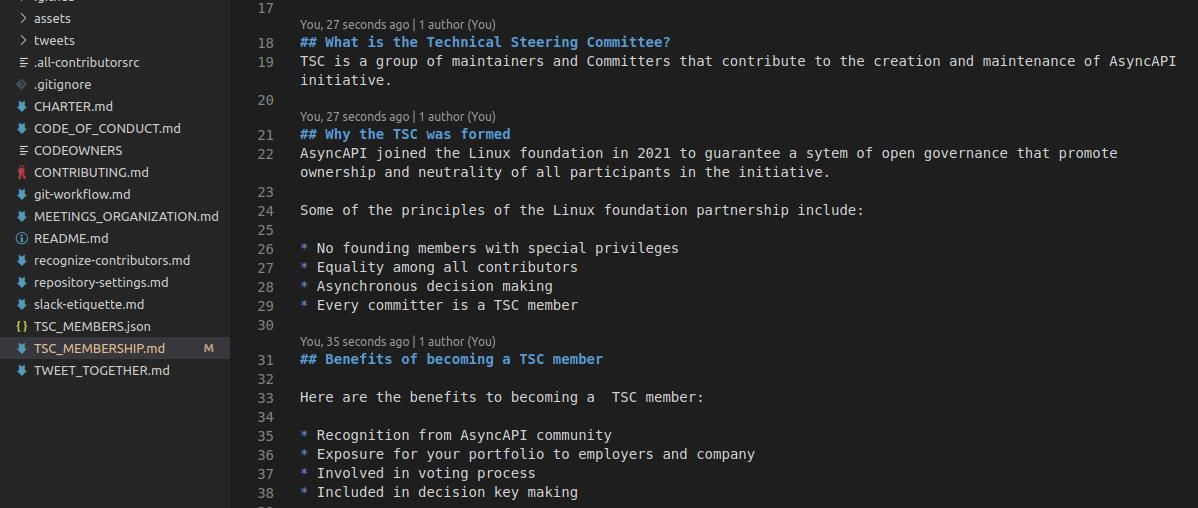
You can open the folder on your preferred code editor and start working. Here, it is essential to know the syntax of popular markup languages like Markdown, which is popular in most open-source projects. If you are working on a documentation issue, you will likely use Markdown as illustrated below:
5. Submit Your Work for Review
When you have finished working on the issue, follow the contributors guide workflow to push your work to GitHub for review. Use the following steps to configure the fork and submit it for review.
-
Connect your local repository to the project's upstream repository using this command:
git remote add upstream https://github.com/{original-owner}/{original-repository}.git -
Use git fetch to download the contents of the upstream branch to your local branch:
git branch -u upstream/master master - Create a new branch with git branch <name of new branch>. You can check whether the new branch is created with git branch command.
- Stage your branch with git add <name of file> and commit it with git commit -m<commit message>.
- Push your code to the GitHub branch with git push origin <name of branch>.
- Make a pull request(PR). A PR alerts the maintainers to review your branch and suggest changes before merging. This diagram summarizes the whole process.
6. Reviews and Merging
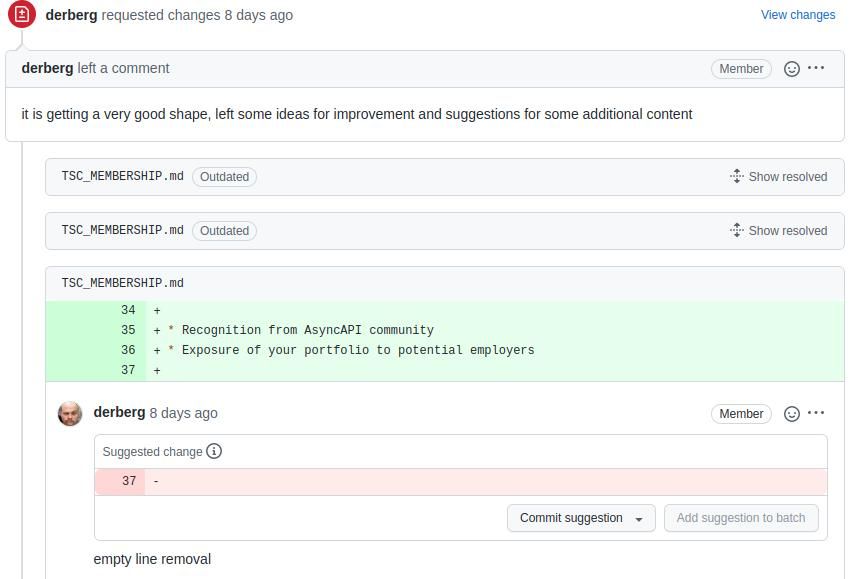
After submitting the PR, the maintainers will likely review and suggest changes. You can make local changes or commit the proposed changes on the remote repository. GitHub has a provision to commit changes remotely.
During the review, you will receive feedback on your contribution and can seek clarification on some matters. Below is an illustration of how you can commit changes on GitHub:
When you're done making changes, make new commits. Commits will notify the maintainers to review your work again. If all checks pass, your PR will be quickly merged. Congratulations! You have just made your first contribution to an open-source project.
Git Enhances Open-Source Collaboration
Git plays an essential role in open-source contributions. Git enables big and small projects to track contributions manage teams, and host various versions of source codes. As an open-source project itself, Git has enhanced the quality and quantity of contributions to open-source software.
Your first open-source contribution will likely be intimidating, but it is easy and fun once you learn the workflow. Using Git will help you sharpen your coding skills, learn collaboration, and network with the best people in the tech industry. Go ahead and get started!

