You might think you don't have a need for a transcribing tool if you aren't a journalist, lawyer, or medical professional, but you'd be surprised.
You could be in a meeting with a recording app turned on. Or in a classroom lecture as your professor drones away. You can also be a writer, like me, who makes audio notes on the go. Basically, we can all benefit from ways to convert audio to text, transcription is the best way to do that.
How to Transcribe Audio Using oTranscribe
In the good old days, turning audio into text was sheer grunt work, but not anymore. oTranscribe is a free and open-source app that runs in your browser. Got your audio file ready? Here's how to start the transcribing session:
- Click the blue Start Transcribing button on the homepage.
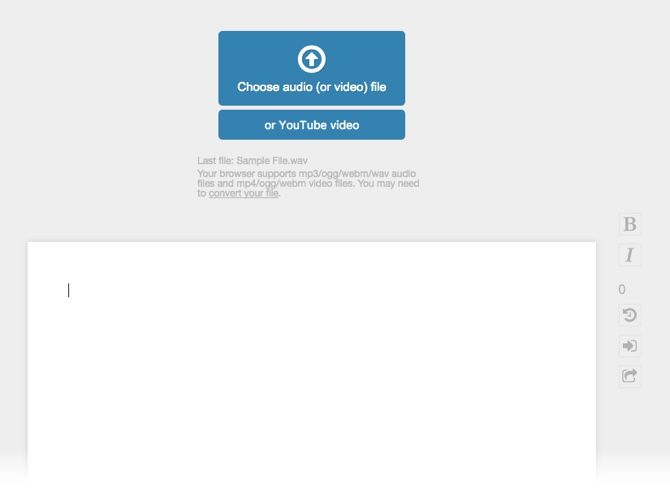
- Upload the audio recording into the browser with a click on the Choose audio (or video) file button. The web app also supports the transcription of YouTube videos.
- The file is displayed as a play head on top of the browser window with controls for rewind, pause or fast-forward. There are keyboard shortcuts for the productivity ninjas too.
- The word processor is where you type the transcribed text. Bold and Italic are the two formatting options available.
- Start typing and control the speed of playback with the slider on top or the F3 and F4 keys.
oTranscibe also has interactive timestamps. Press Ctrl + J (Cmd + J on Mac) to insert the audio file's current time into the document. This timestamp is hyperlinked and when you click on it it will take you to the specific time in the audio file.
Once you've finished transcribing, you can download the transcript as a markdown file, a plain text file, or retain it in the oTranscribe document format. The .OTR format can be imported back into the app. You also have the choice to export it to Google Drive and keep a backup or make it part of another document.
Do you use a transcription tool? Does oTranscribe meet your expectations or are their better free alternatives out there?


